January 12, 2023

While I’ve always found sunrises and sunsets picturesque, what truly fascinates me is when all of that radiant light is gone, and I’m left with a gigantic sky full of stars or the moon. It just fills me with awe, especially when I’m lucky enough to be in an area with little to no light pollution from cities or even a densely populated suburban town. And I can think of no better way of appreciating such a spectacular view than by using my camera to photograph it. Fortunately, today’s digital cameras make astral photography easier than ever thanks to major improvements in sensor technology. What used to require a serious amount of experimentation and ex- pensive gear is now attainable with just about any capable digital camera. Beyond that, however, there are some best practices to keep in mind when setting up your night shots. Like any other type of photography, it helps to have a workflow or methodology in mind to ensure consistent and high-quality results. Here are some of my favorite tips to practice on your next night shoot, presented in no particular order of priority.
It’s understandable to directly associate night photography with stars. Next to the moon, stars are elements most anyone expects to see in the night sky. However, depending on the time of year, the phase of the moon, the weather conditions, and your specific location seeing and photographing stars may not be possible. But that doesn’t mean you should pack up your camera and get a head start on sleep.The hallmark of any great photographer is knowing how to turn lemons into lemonade. If you’ve already made the effort to haul yourself, and your gear, to a location at some ridiculously late hour, you at least owe it to yourself to find one composition.

One of my favorite things to do when stars are out of the question is to play around with light. Because night photography requires elongated shutter speeds, there are all sorts of ways to leverage a wide variety of light sources in creative ways, like shooting the light trails of a car’s headlights on a highway late at night. You simply need to be open to experimenting.
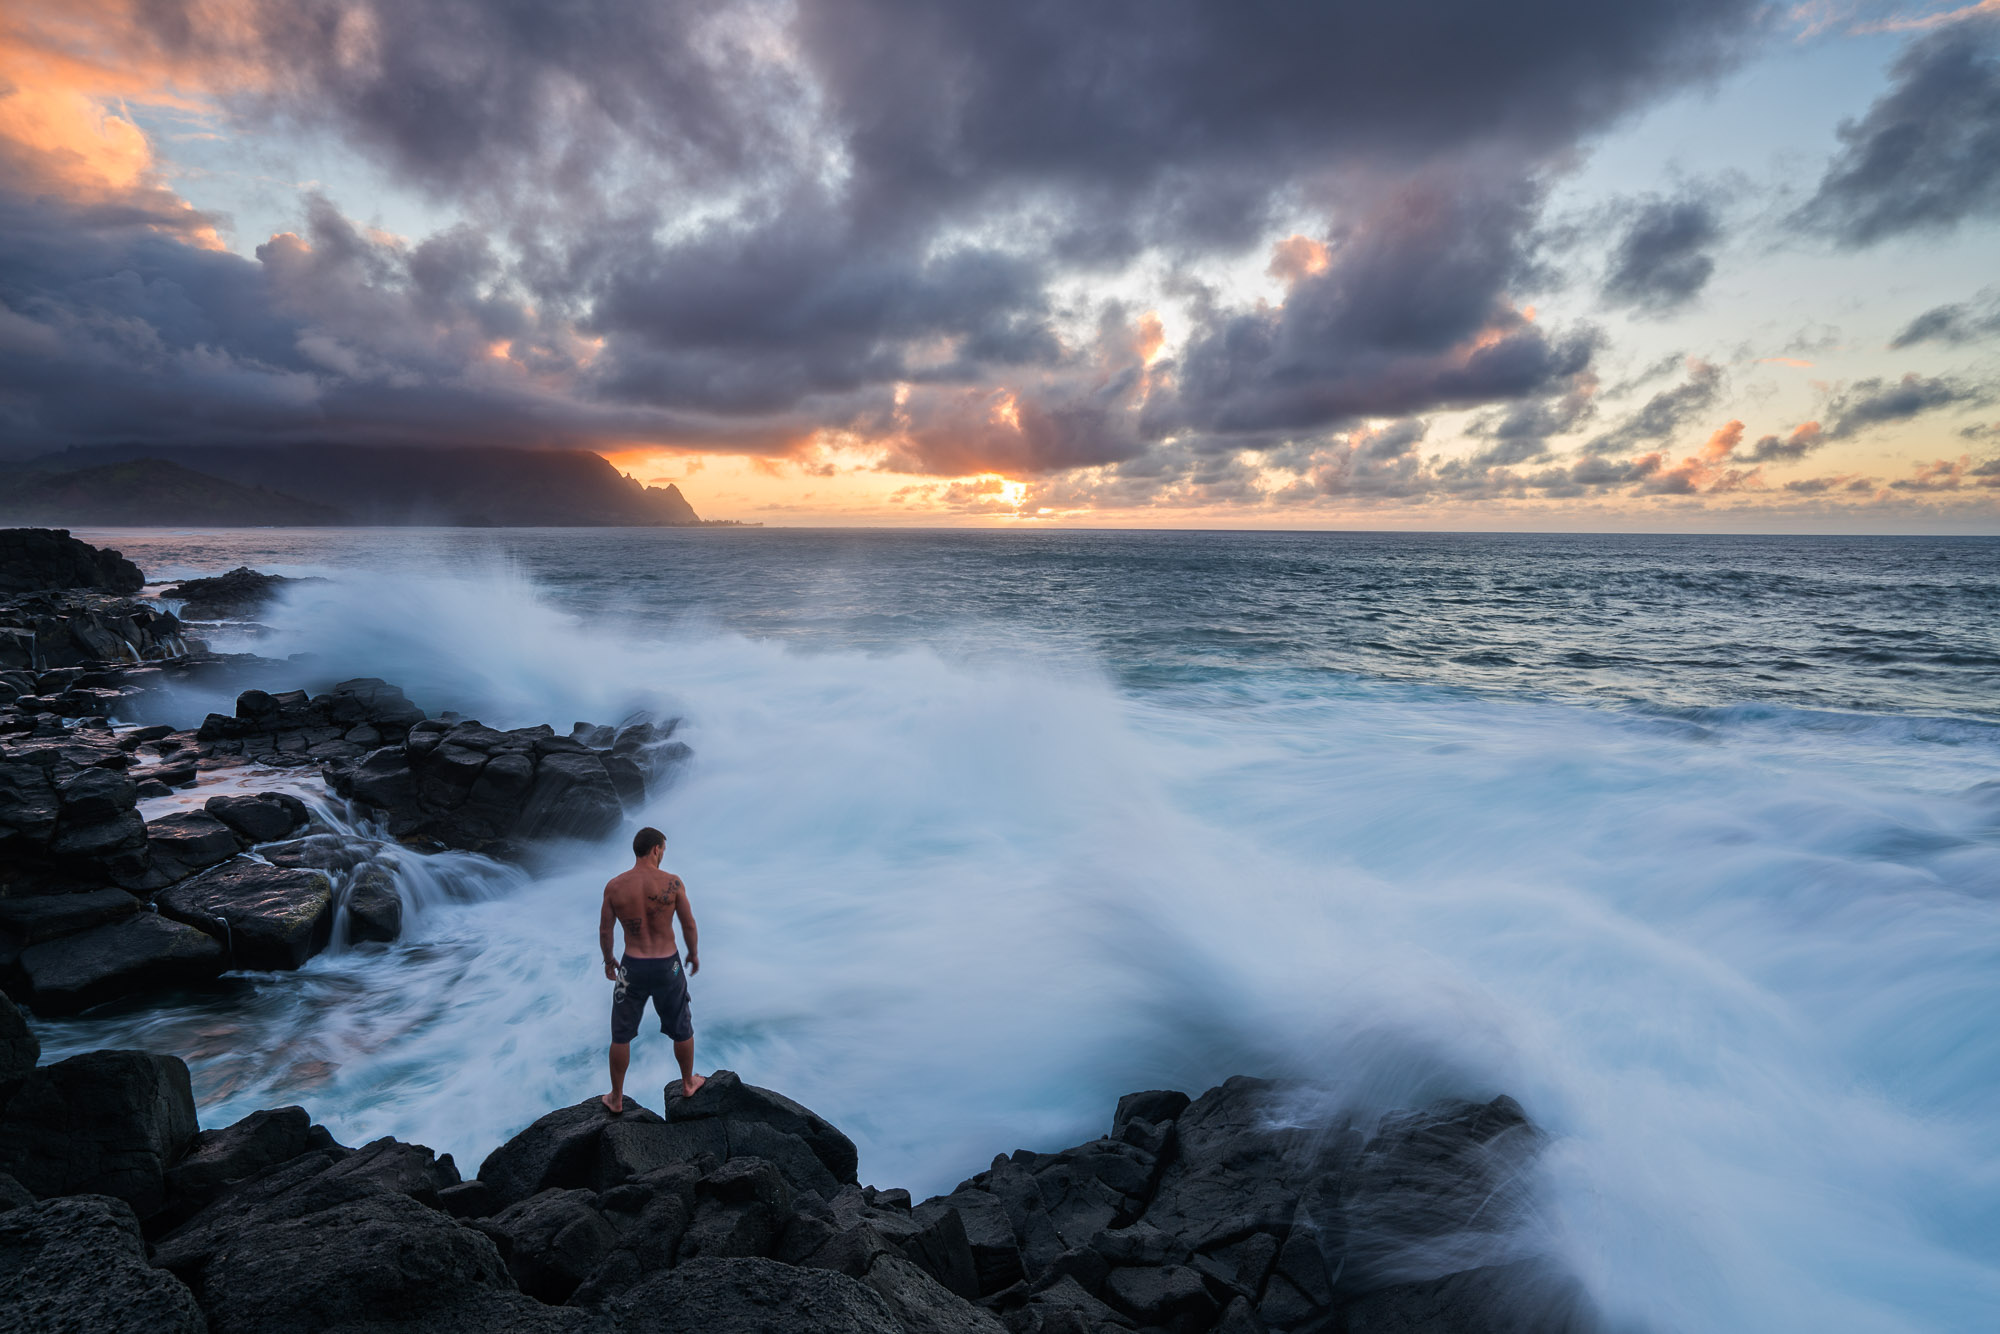
Life would be so much easier for photographers if all we had to do was aim our cameras up at a starry sky, focus and shoot. Of course, there’s nothing stopping you from doing exactly that. But I suspect you’ll be somewhat disappointed with the results. That’s usually because the viewer doesn’t have a foreground element to help give the sky context. Additionally, when your starry night photos lack a dominant foreground element, there is no way for the viewer to establish a relationship between the stars and the foreground, which is a concept applicable to any photo, regardless of the time of day.

Before I even head out on a night shoot, I spend some time performing my due diligence. I’ll scour Google Earth and other photo-sharing sites to see whether there are any visually striking foreground elements. At this point, I’m not looking for night shots from the location. I just want to see if there are potential opportunities. Once that’s established, I can head out with a clear plan in mind of how I intend to wrap the stars around the foreground element.
If there is one way to ruin a starry night photo instantly, it’s by having the shot be out of focus. Viewers know what stars look like, or what they should look like. When you look at a starry sky, you should see millions of tiny pinpoints of light. They’re not soft or mushy...unless you suffer from cataracts. If the stars in your photos look soft, it is more than likely due to not achieving critical focus for infinity. Depending on the focus method of your lens, you may be able to precisely focus on infinity, which is commonly represented by the horizontal “figure 8.”

Many lenses don’t have this capability of focusing exactly to infinity, which will require some trial and error. In these cases, my preferred method of focusing is to crank my camera’s ISO very high and use the electronic viewfinder (or rear LCD) to find my focus. This usually involves me slightly nudging the focus ring back and forth in tiny increments until the stars look like little pinpoints. I’ll then reset my exposure settings, take a shot and review it for focus. If it looks good, then I won’t touch the focus ring again for the evening. If it looks slightly soft, then I’ll readjust the focus ring and repeat the process.
Determining the right shutter speed for your starry night photo is just as critical as getting a proper focus lock. Depending on who you ask, you may be given a variety of answers as to how you should approach this, and, much like getting proper focus, you will need to experiment. However, before you do anything, figure out what your intent is. What I mean by intent is whether you want to present the stars in your photo as sharp, tiny pinpoints or as a wispy star trail. Your answer will determine how to approach your exposure workflow.

In the case of achieving sharp, tiny pinpoints, there is a well-known formula that I’ve used to figure out an initial starting point for my shutter speed. Remember, there are several factors to consider when identifying what the maximum shutter speed can be before you introduce movement in the stars. Those factors are your lens’ focal length, the maximum aperture of your lens and the size of your camera’s sensor. Once you have that information, you can easily plug it into this basic formula:
500 / Focal Length = Maximum Shutter Speed in Seconds
What’s important to understand is that this formula assumes that you’re using a 35mm full-frame sensor. If you’re using a cropped sensor, then you will need to divide the final result by whatever the crop factor is. In my experience, this formula does a good job of getting me to a solid starting point to begin experimenting with shutter speeds. Like with the focus experimentation, it’s important to take, and review, a few test shots before locking things in.

For those instances where you want to create a star trail, you’ll want to use the same process of identifying an ideal shutter speed. The key difference is that afterward, you’ll want to use an intervalometer, either via a remote or within specific cameras that include this feature, to take a sequential series of photos. Once you have a sufficient amount, you can use an image-editing program, like Adobe Photoshop, to blend them together. This technique can be especially striking, especially when you include an interesting foreground element.
The simple fact is that, despite having an amazing camera and lens, your night photos still need some love applied during post-processing. If you’re shooting at high ISO values, your image will likely be riddled with noise. Also, if you shot with your lens wide open, it’s likely that the photo won’t be as sharp as you’d like. Fortunately, when you combine the base editing capabilities of Adobe Lightroom Classic with the remarkable noise reduction of DeNoise AI and the intelligent sharpening of Sharpen AI, you can achieve some truly beautiful results. Here’s a workflow video that I created walking you through how I edit a starry night photo using these three aforementioned apps.
Visit our product pages for DeNoise AI, Sharpen AI, and Gigapixel AI and click on the "Try for Free" button to download free trials that never expire.

© 2005 - 2024 Topaz Labs. All rights reserved.