September 10, 2022

I’ve long held the idea that one of the most important skills a photographer can gain is learning how to approach a shoot based on intent. In other words, before heading out to a shoot, do you ever ask yourself, “What do I want to get from this outing?” And the answer very well may be, “I really don’t know, but I’m open to finding out!” or it can be something more specific. That answer is also equally applicable for those wondering how to do street photography or for those who are simply wondering what is street photography.
The latter was the case when I asked myself this question before flying out to my hometown of New York City in late October several years ago. While my primary reason for returning to my home city was to attend the PDN PhotoPlus Expo, I also had a particular goal in mind regarding photography. I was so in tune with this goal that it influenced everything, all the way down to which camera and lenses I would take and which camera bag I would pack them in.
Everything I took was based on the intent of further improving my street photography. Even more to the point was that I intended on practicing different types of street photography in Chinatown at dusk. Now, don’t get me wrong. I’m not saying that every shoot you go on should have the same laser-like focus on intent. Not every outing needs that, but it’s important to tease out the difference. That's why I'm excited to share this street photography guide. Many people are interested in how to take street photography and while I'm always growing in this genre, I've done it enough to where I think I can help.
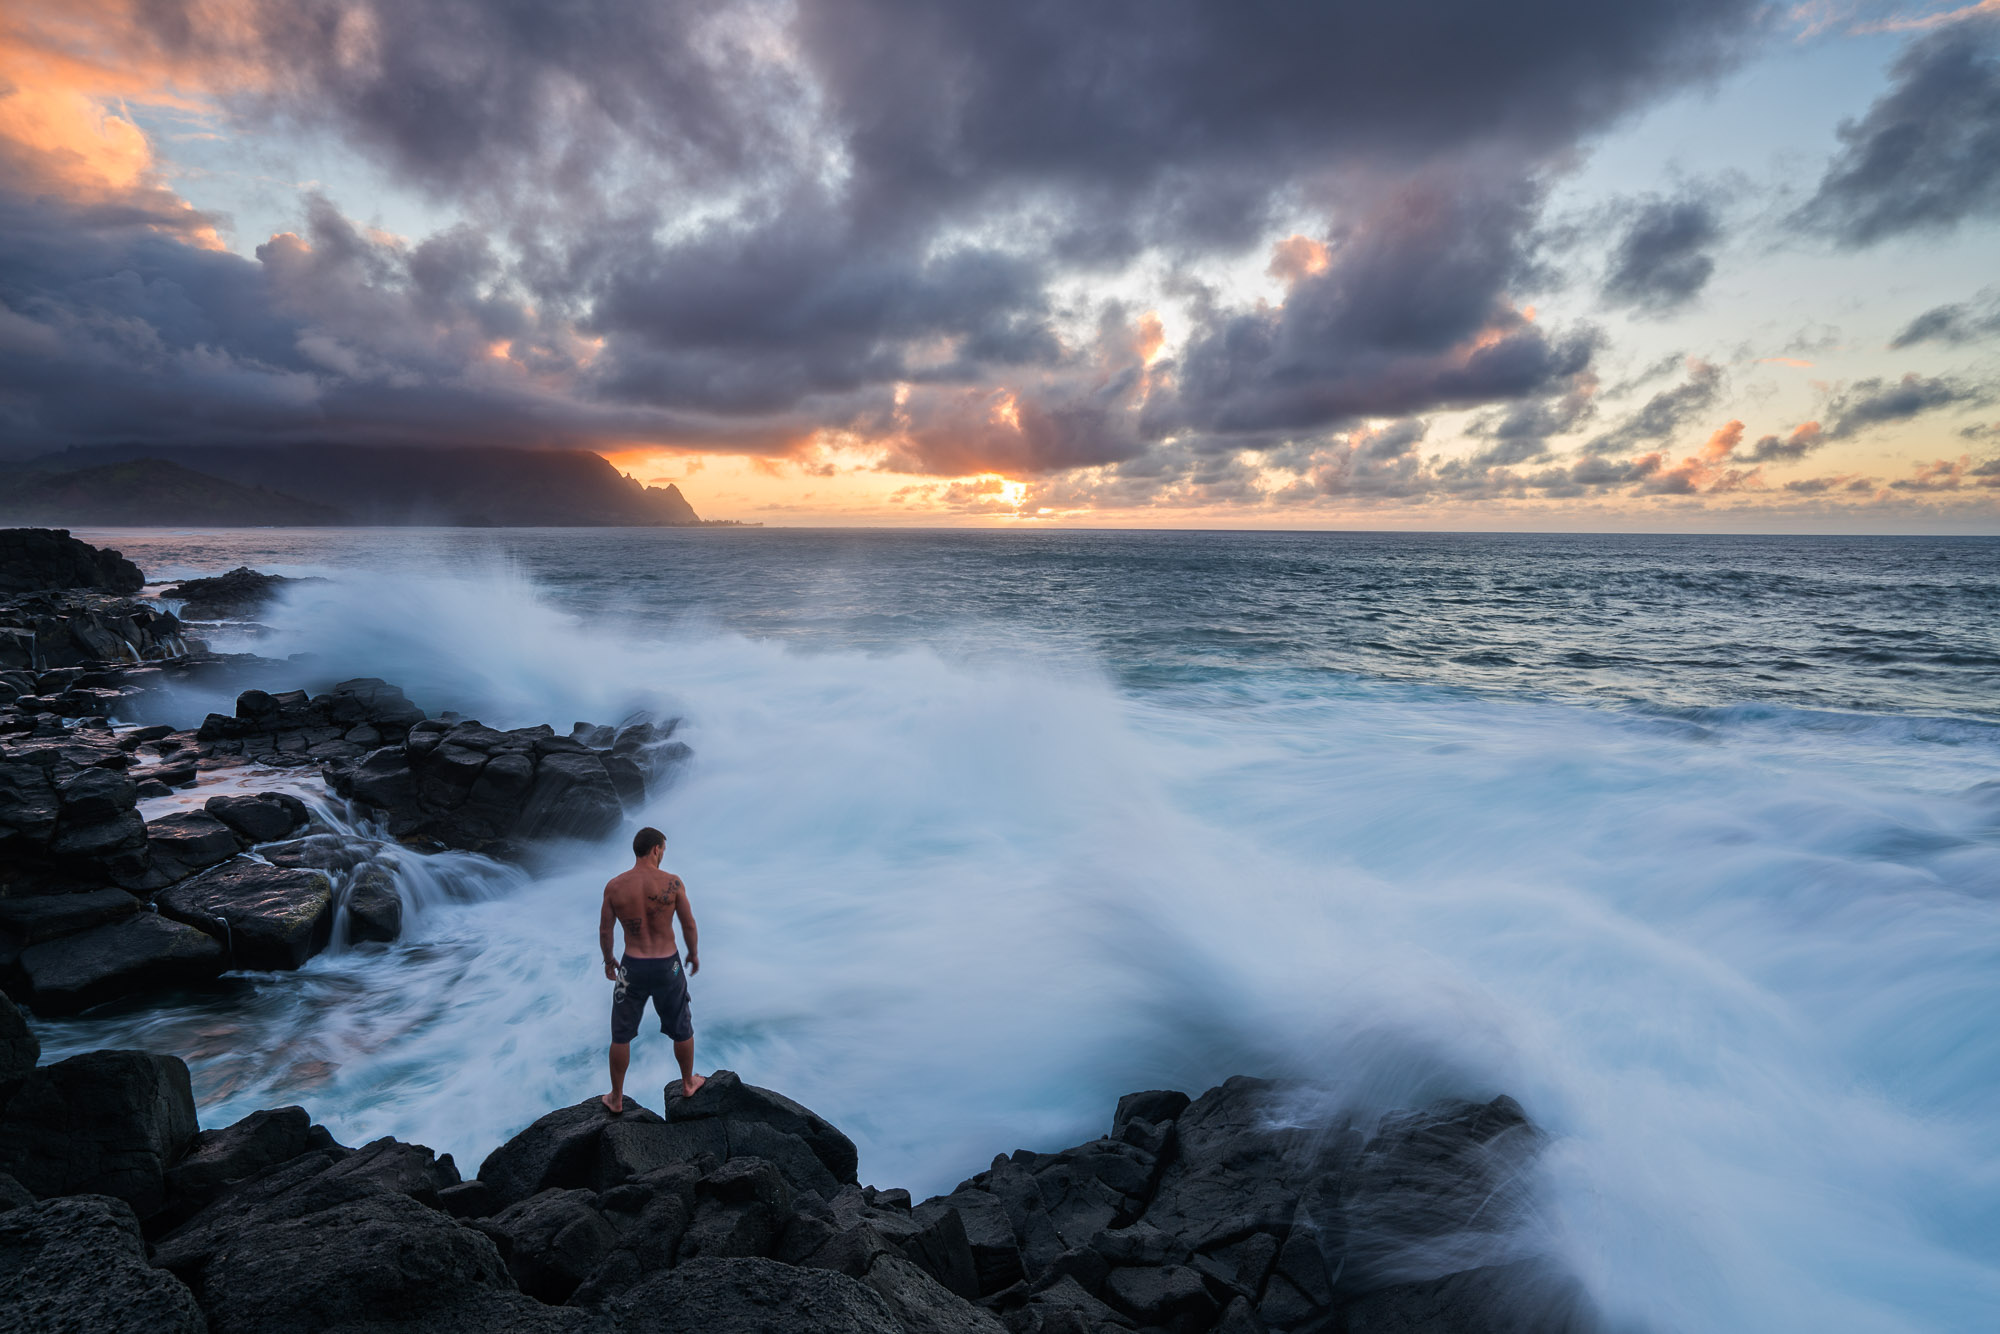
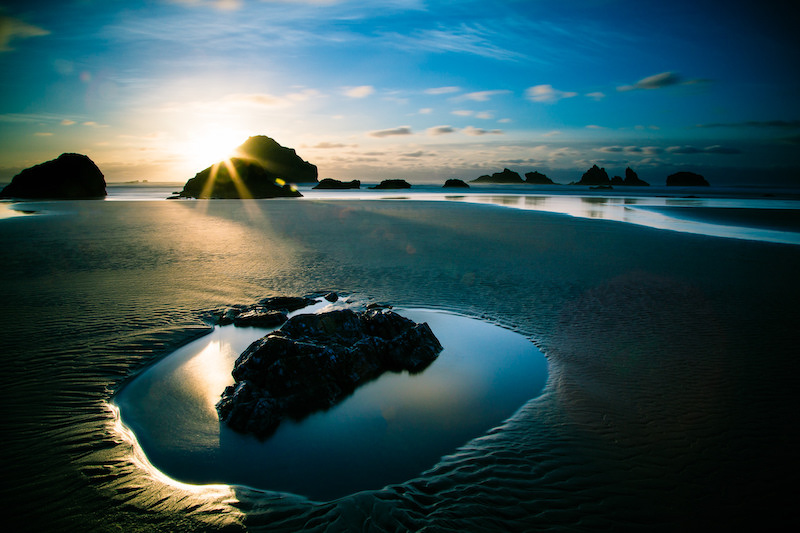
My approach to a shoot is pretty simple: If the place I’m going to is new to me, I’ll be more likely to keep an open mind in terms of the type of gear that I bring and the sort of photography that I’ll practice. For example, when I traveled to Iceland for the first time several years ago, I wasn’t exactly sure what my intent was aside from the photographer’s universal purpose of documenting whatever was in front of me. As such, I maximized my opportunities by packing several larger and heavier zoom lenses ranging from 16mm all the way to 400mm. Doing so ensured that I would be able to frame up just about any composition that presented itself to me.

However, another way of looking at it is that I didn’t have much focus on photographing anything specific. I’d take things as they came to me. This trip to New York City was quite different because, aside from being born there, I’ve spent many years photographing it. As such, I find there to be a direct correlation between how many times I’ve photographed a particular location and how narrow I want to set my objective(s).
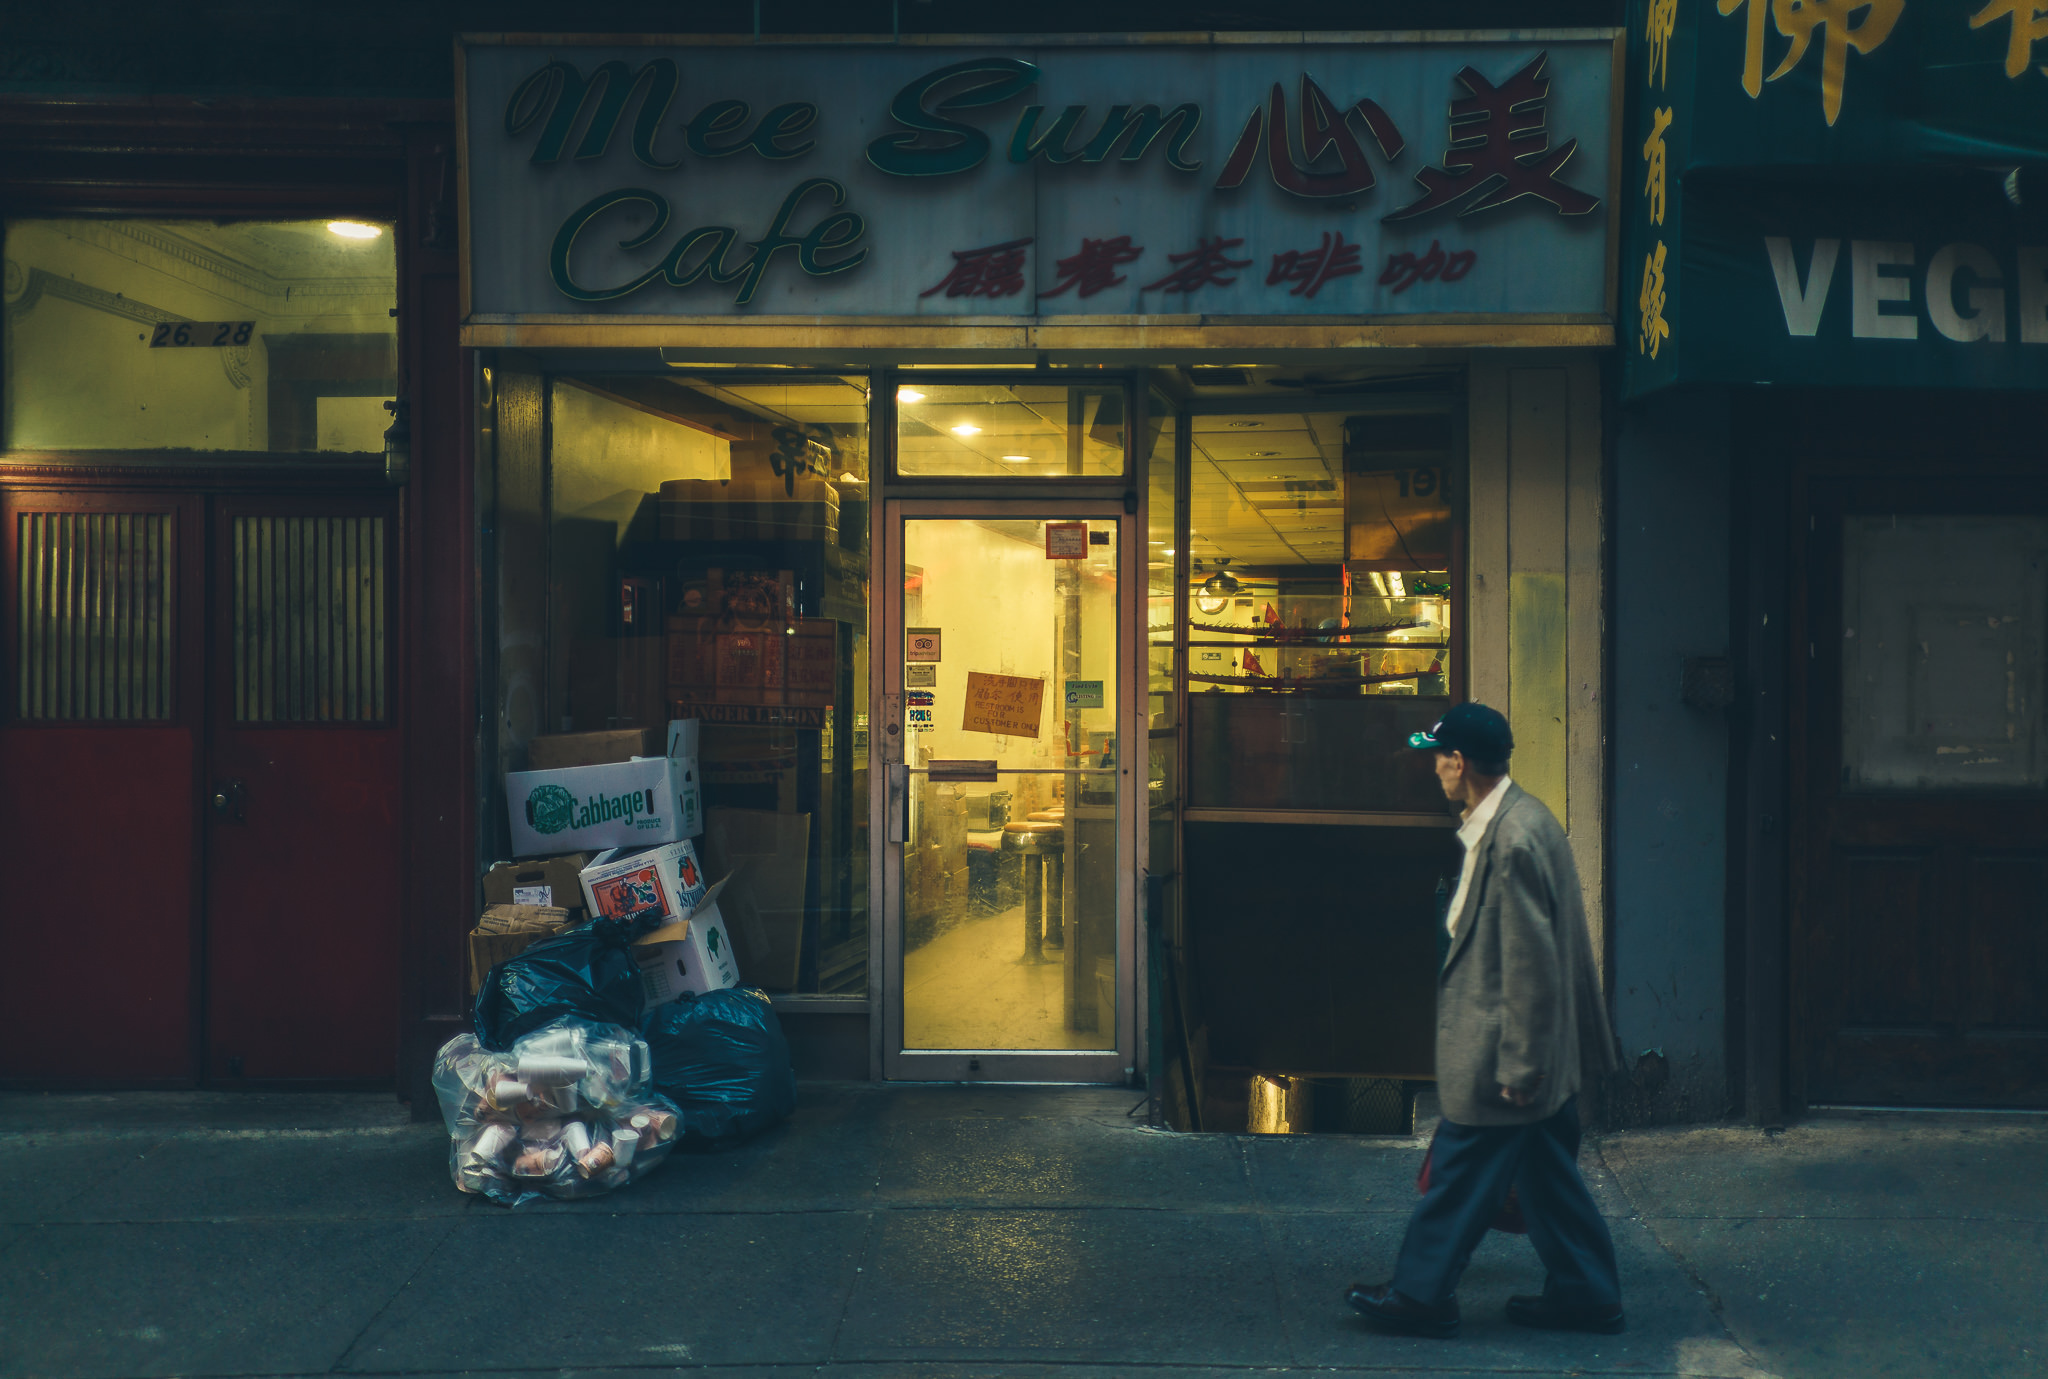
I visit home pretty often each year, which gives me the luxury to cast away the broad strokes of photographing as much of as many things as possible and set my sights on specific things. This same rationale can be applied to your own hometown. Since you generally have ready access to where you live, you have the luxury of challenging yourself with specific photography goals. My goal with this recent trip home was to photograph Chinatown at dusk. Next time, it could be limiting myself to only using an infrared-converted camera or only photographing bicyclists or only focusing through storefront windows. You get the idea. I issued myself a specific challenge and, as such, packed the specific gear to help me complete it.
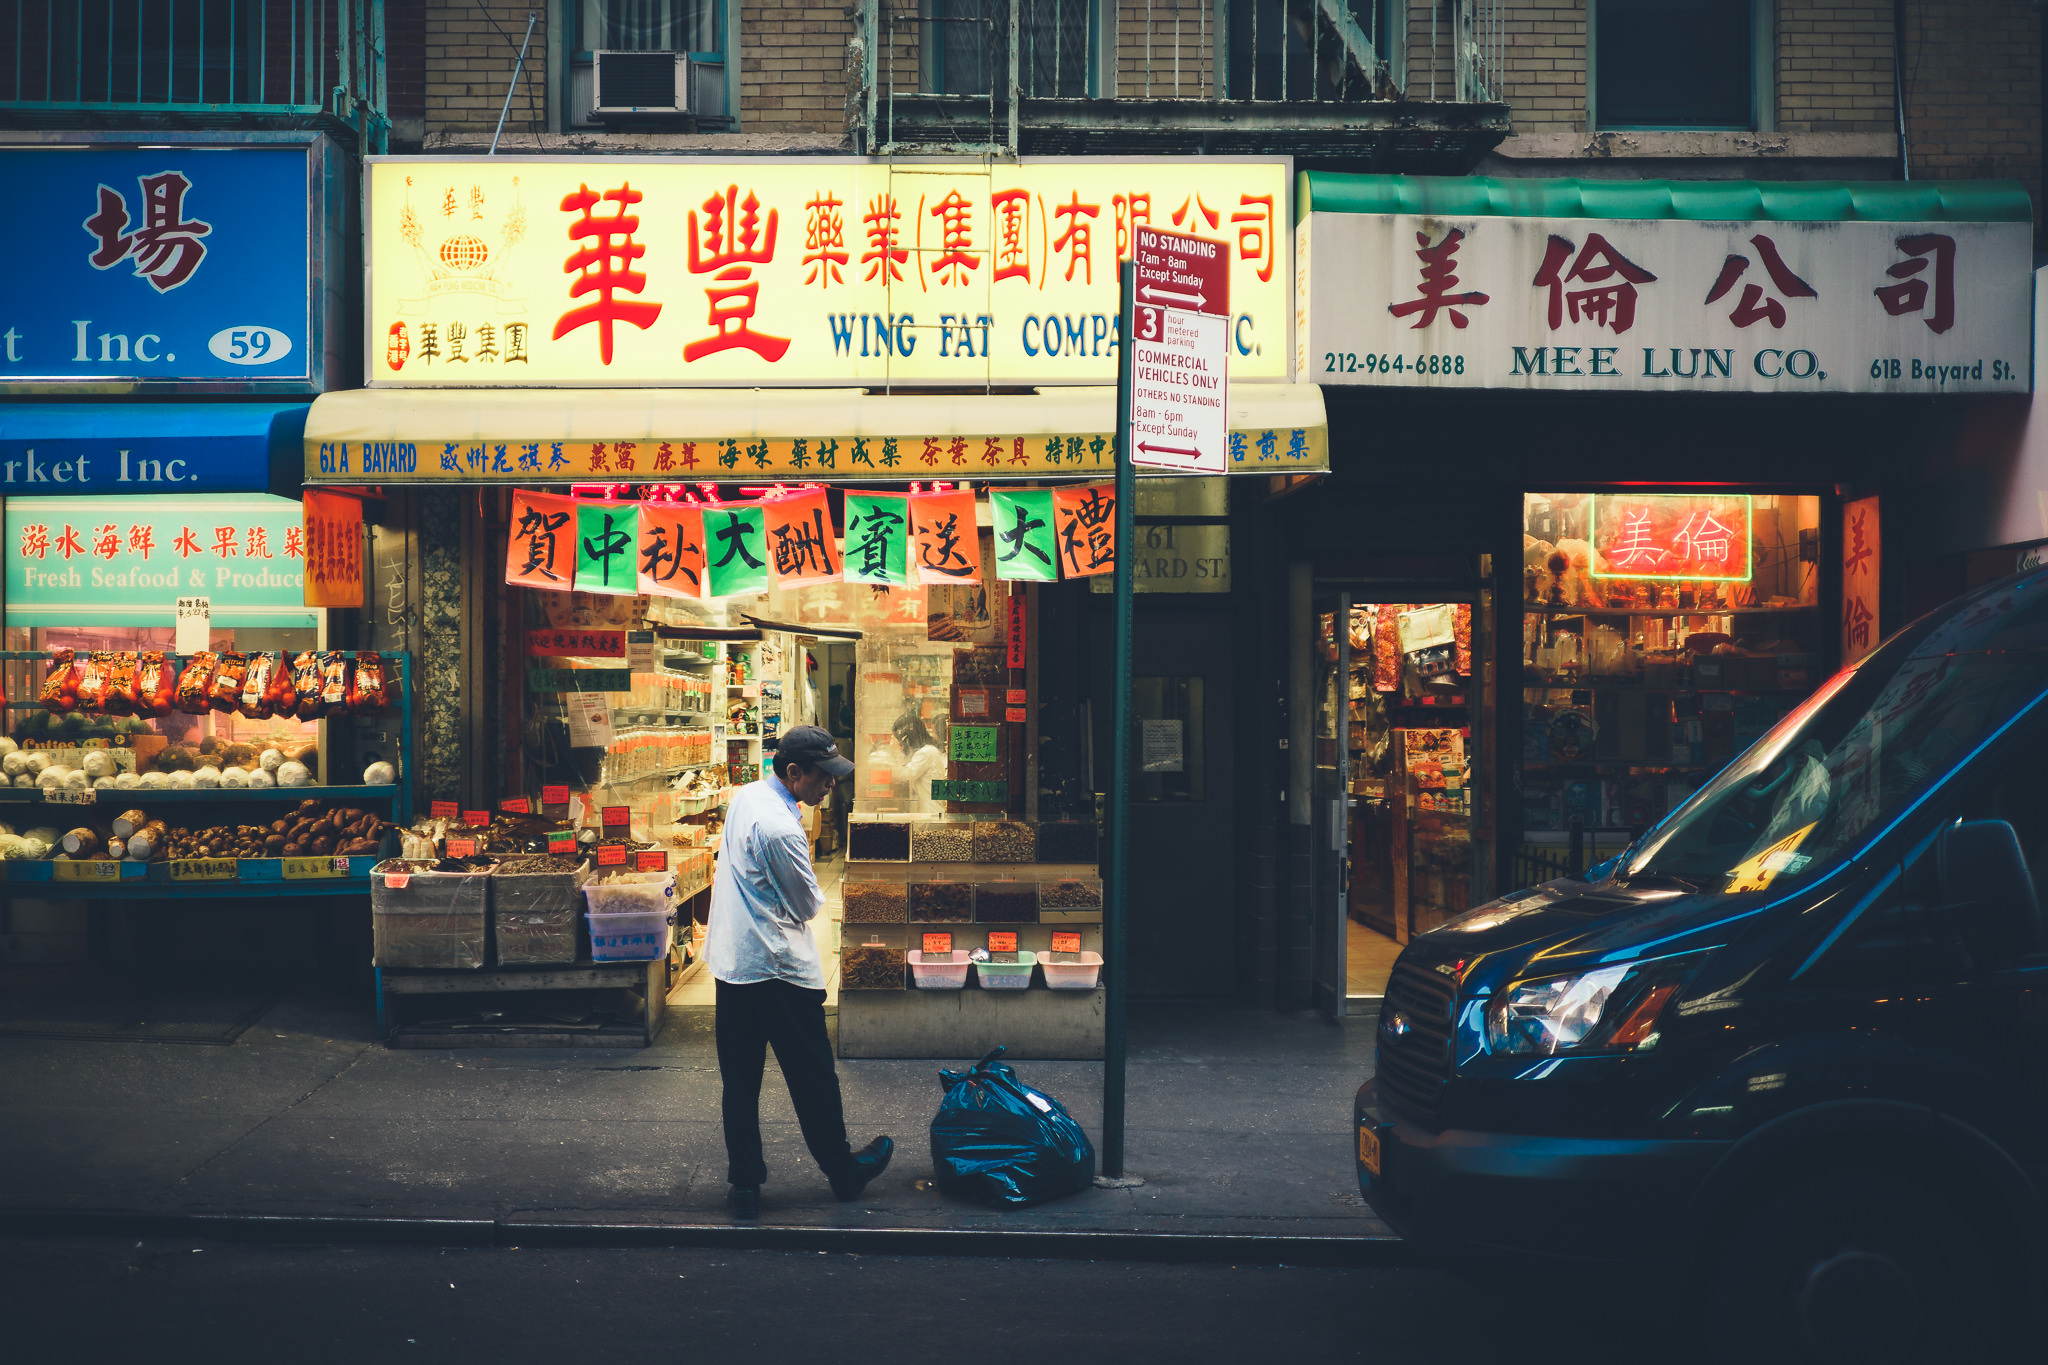
I didn’t choose this challenge accidentally. It wasn’t like I pulled a card from a hat or threw a dart at a poster with a bunch of random challenges. Between my own experiences and seeing photos of other accomplished photographers whom I admire, I made a mental note to spend more time in Chinatown at dusk. That neighborhood is such a wonderful medley of varying elements and factors, and when it all comes together, it’s magical. Everything from Chinatown’s denizens to the colors of all those glowing signs to the variety of storefront merchandise—you can find a never-ending source of visual inspiration.
Because my challenge was based on a specific window of time, I made sure to get to the location about 90 minutes before dusk began to settle in. This allowed me to leisurely scout the neighborhood, all while making mental notes of specific places I wanted to return to. I also kept a running list of composition ideas that I tested while scouting.
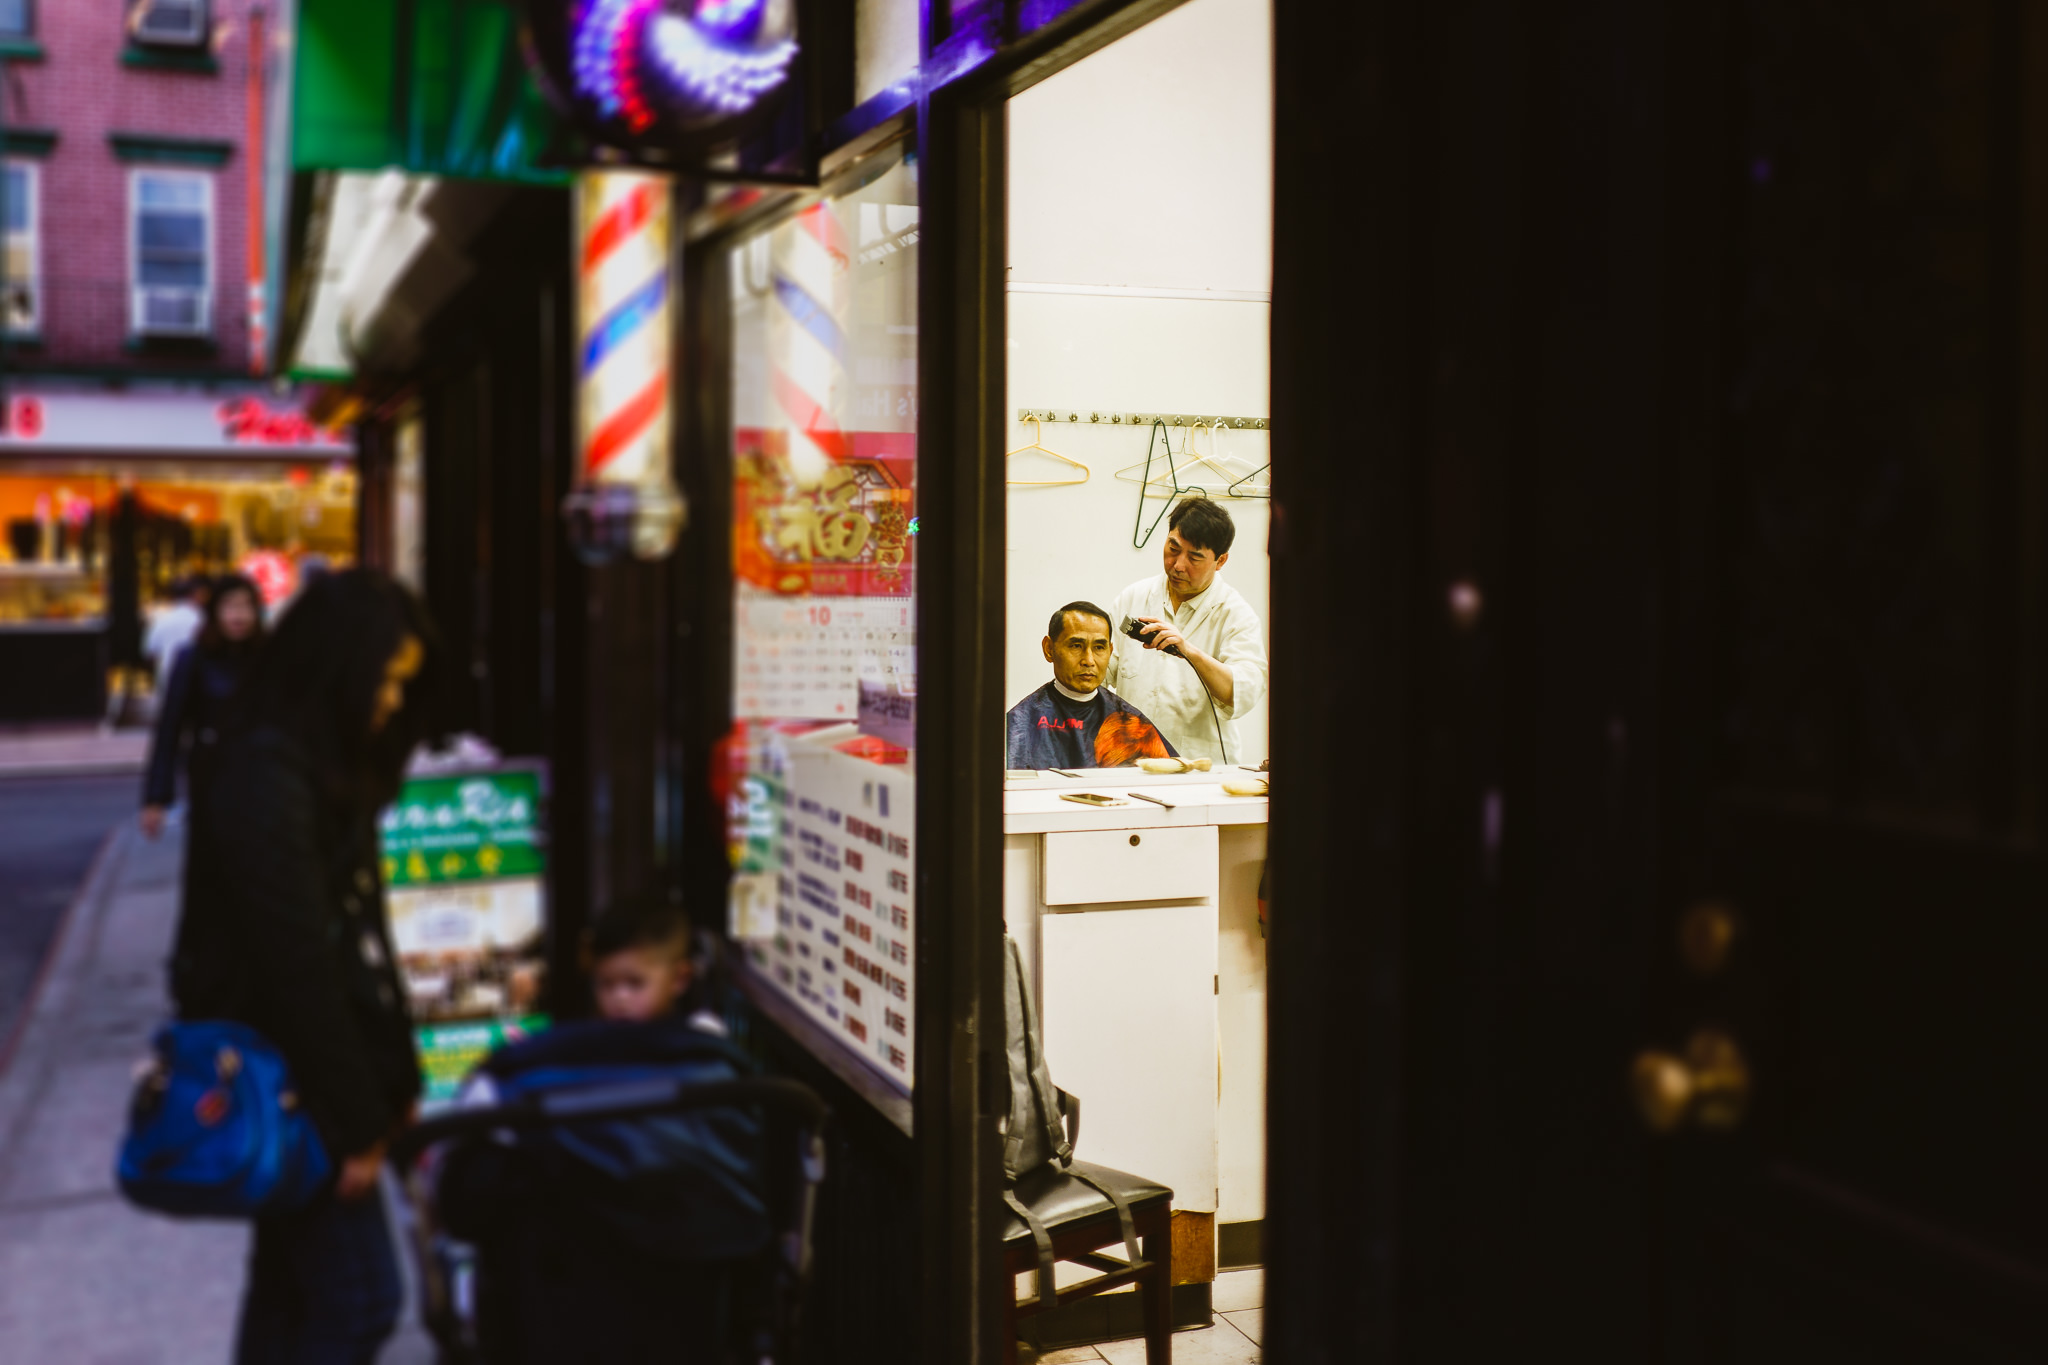
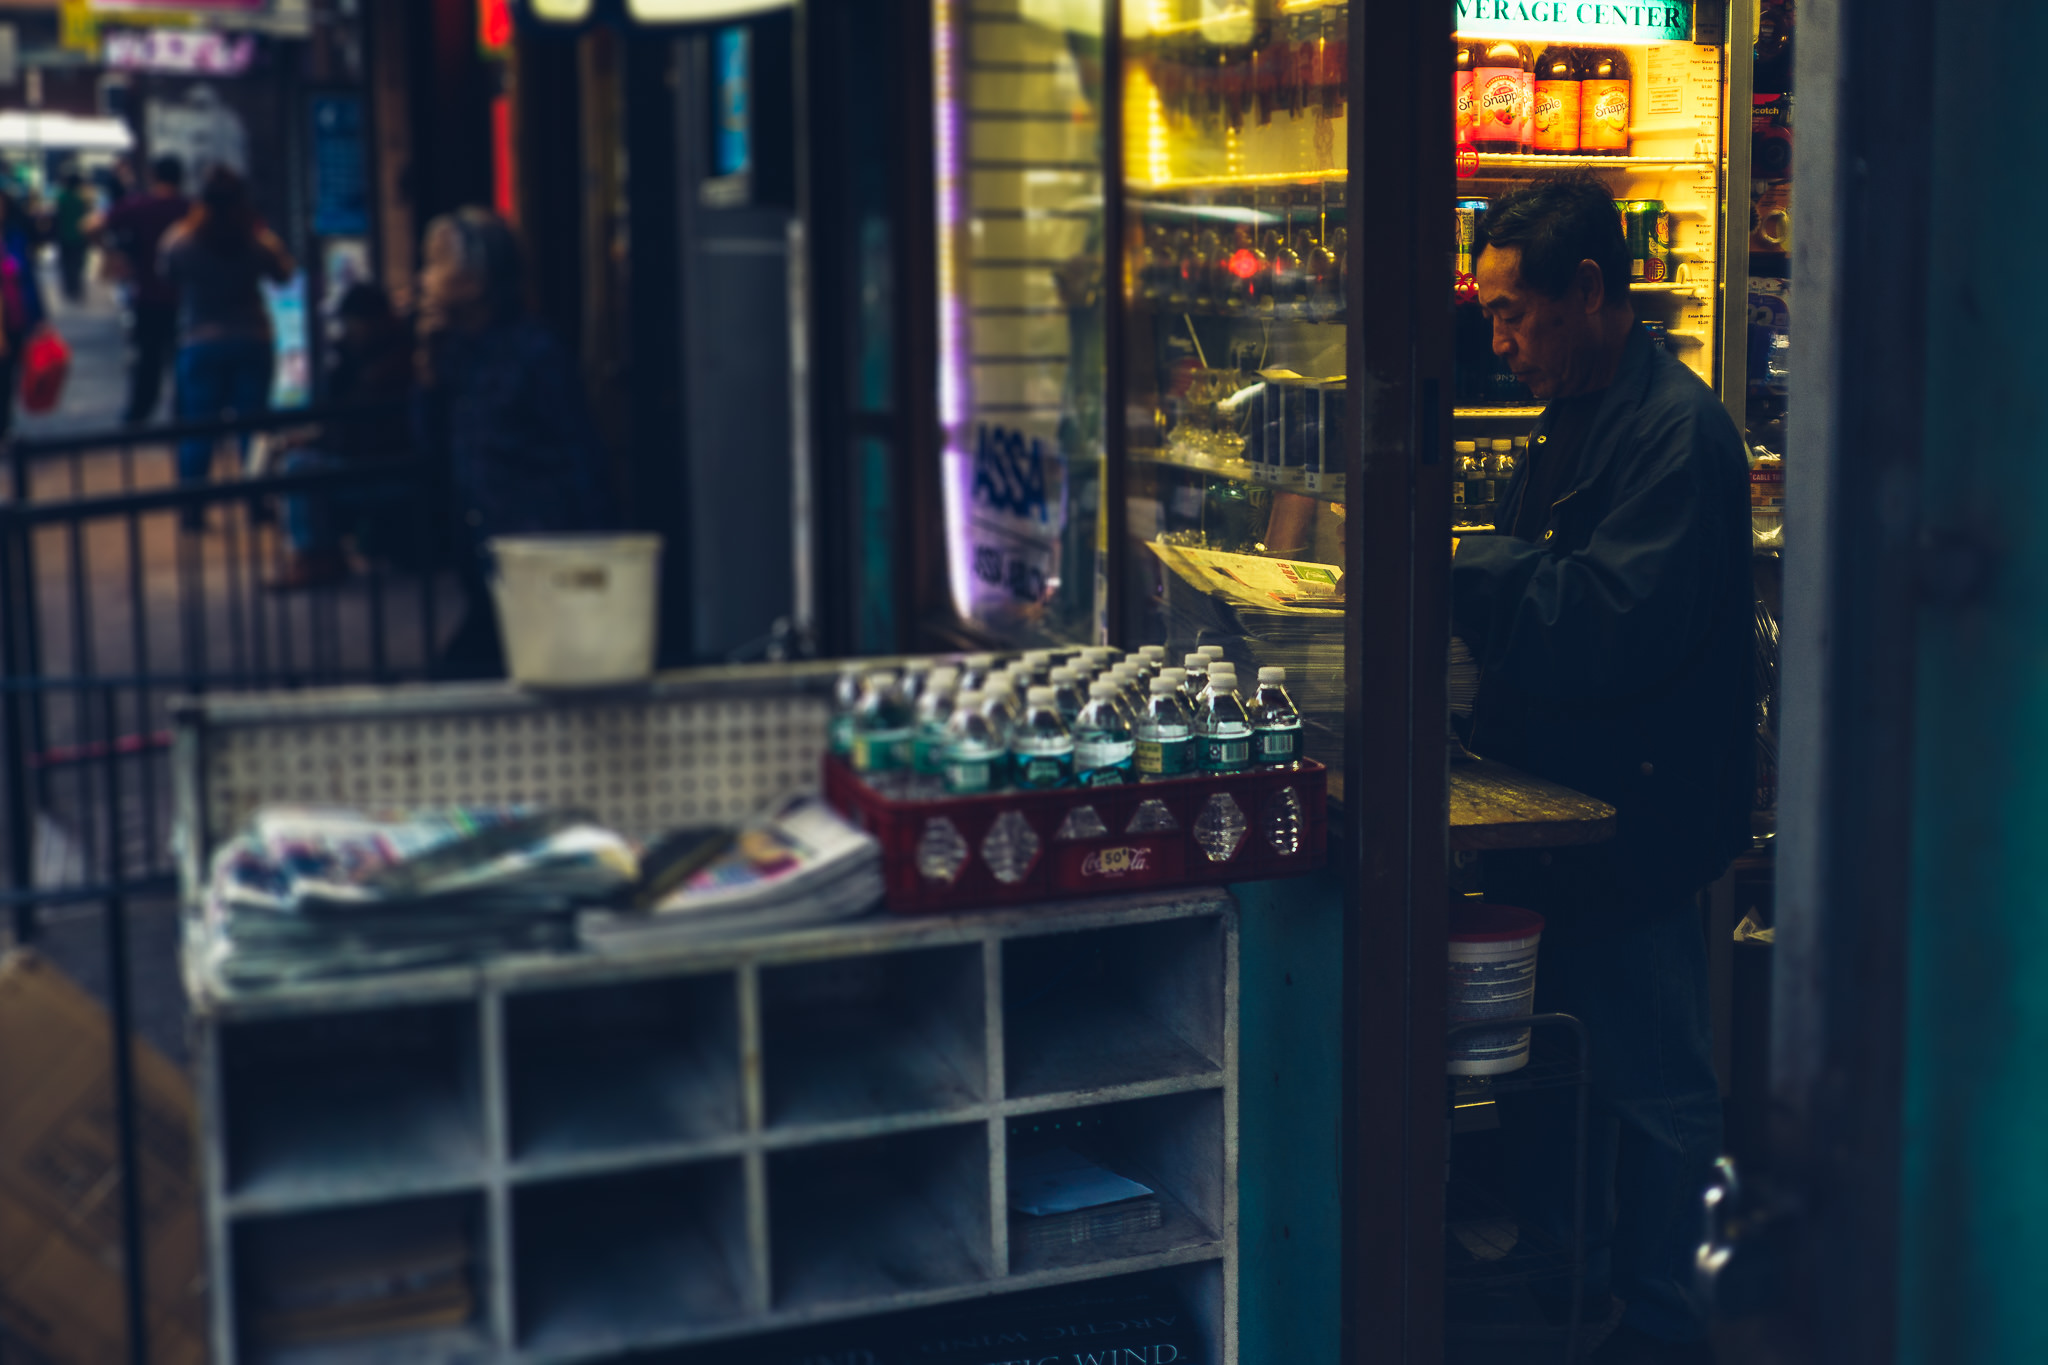
After a while, I realized that there were two primary compositions that I found myself leaning toward: The first was head-on while standing across the street from a storefront, and the second was at an angle while peering into a doorway or window.
Having all of this relatively figured out in advance allows me to spend less time looking for places to put myself and more time on waiting for the right opportunity to present itself.
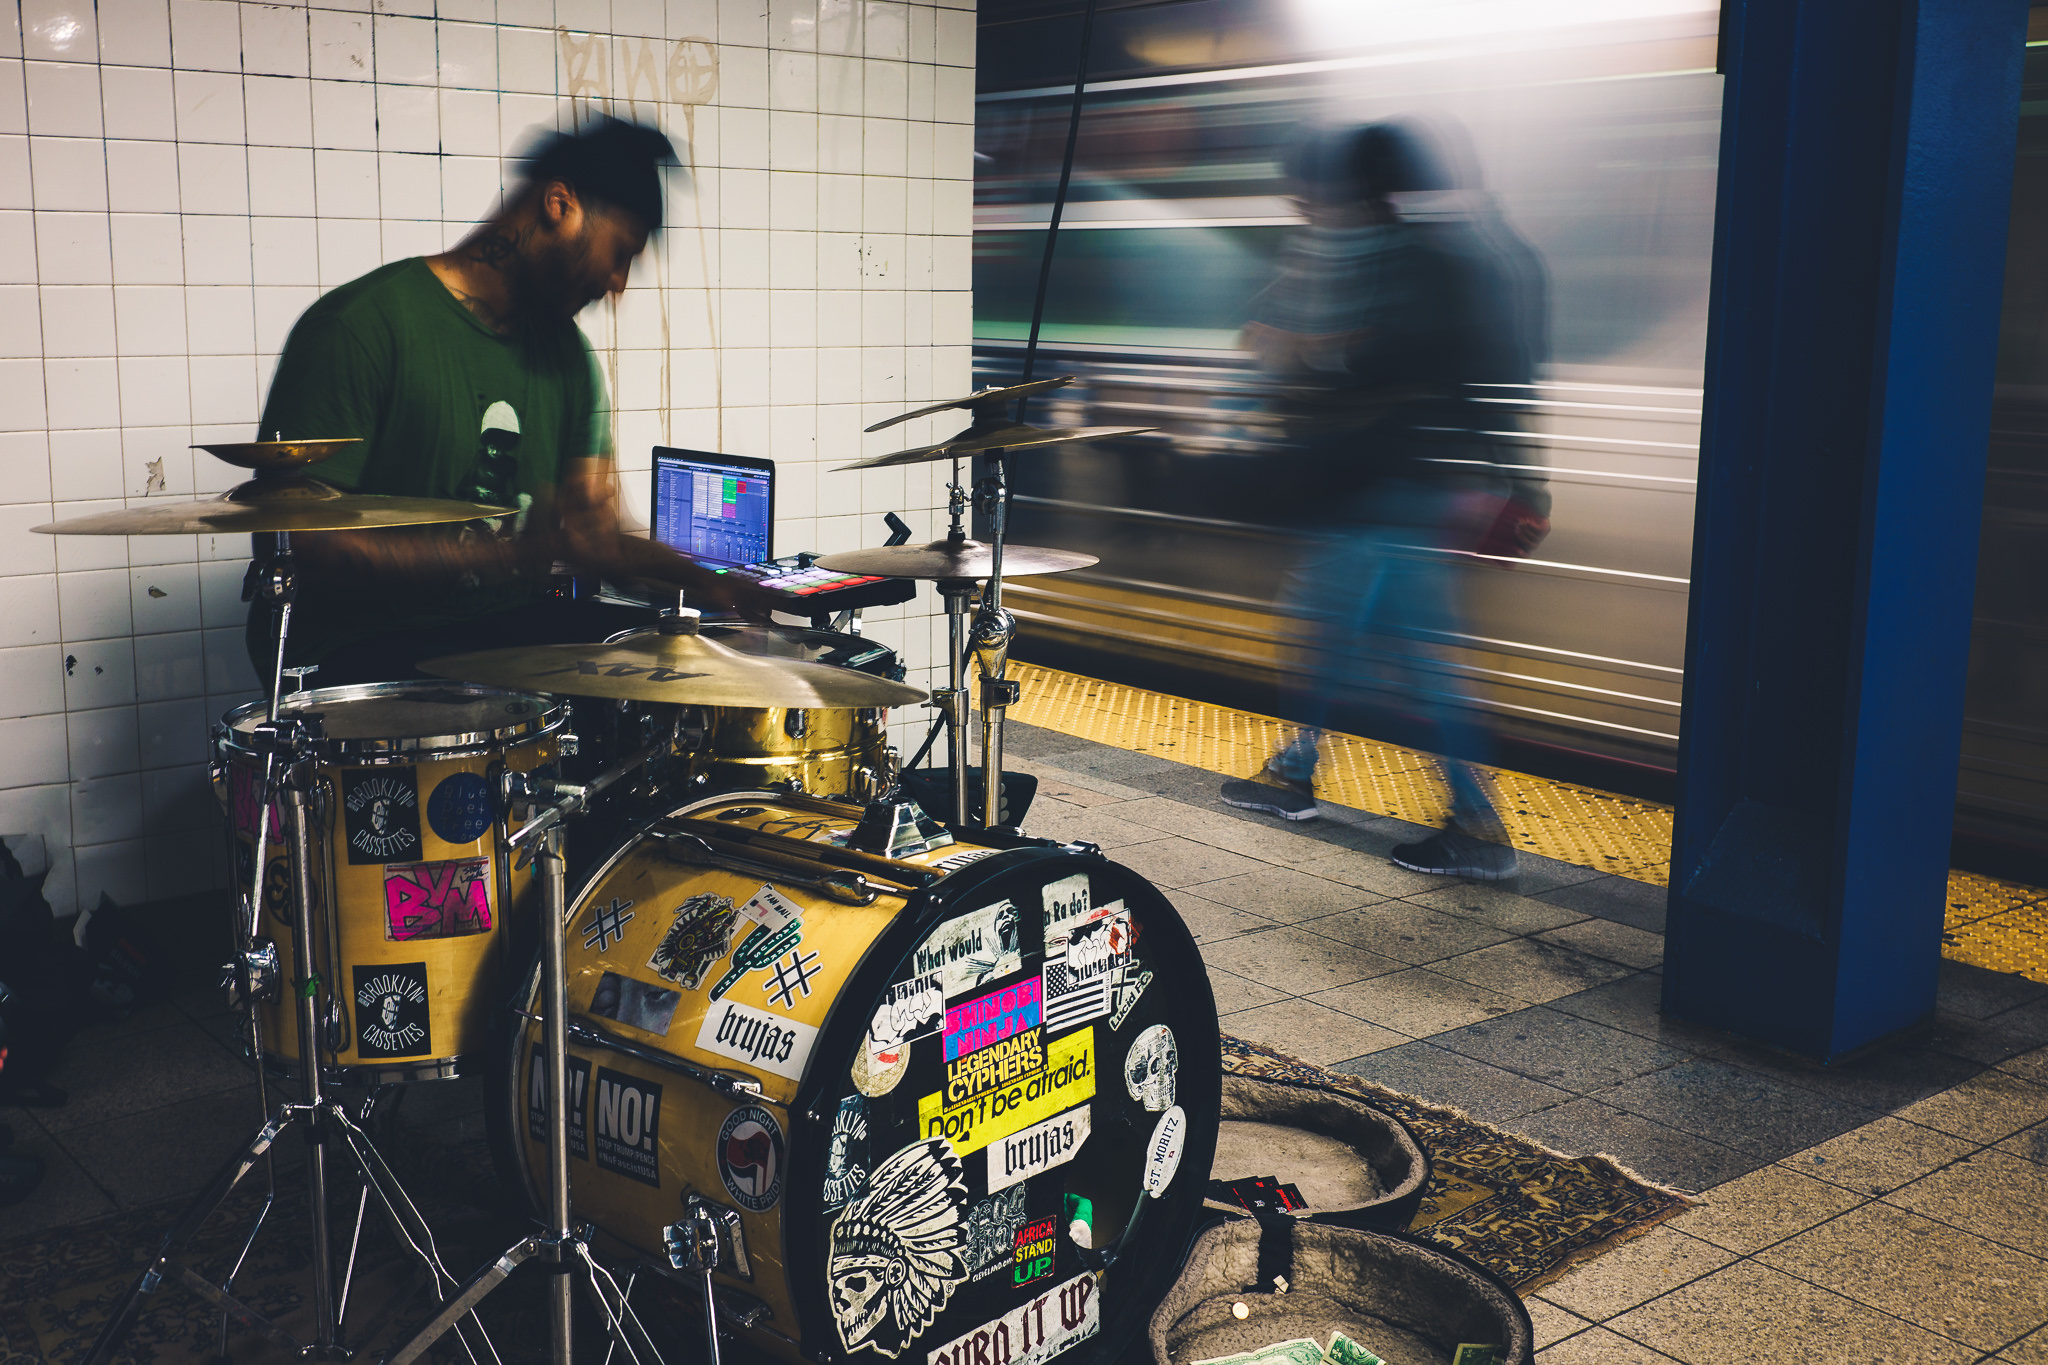
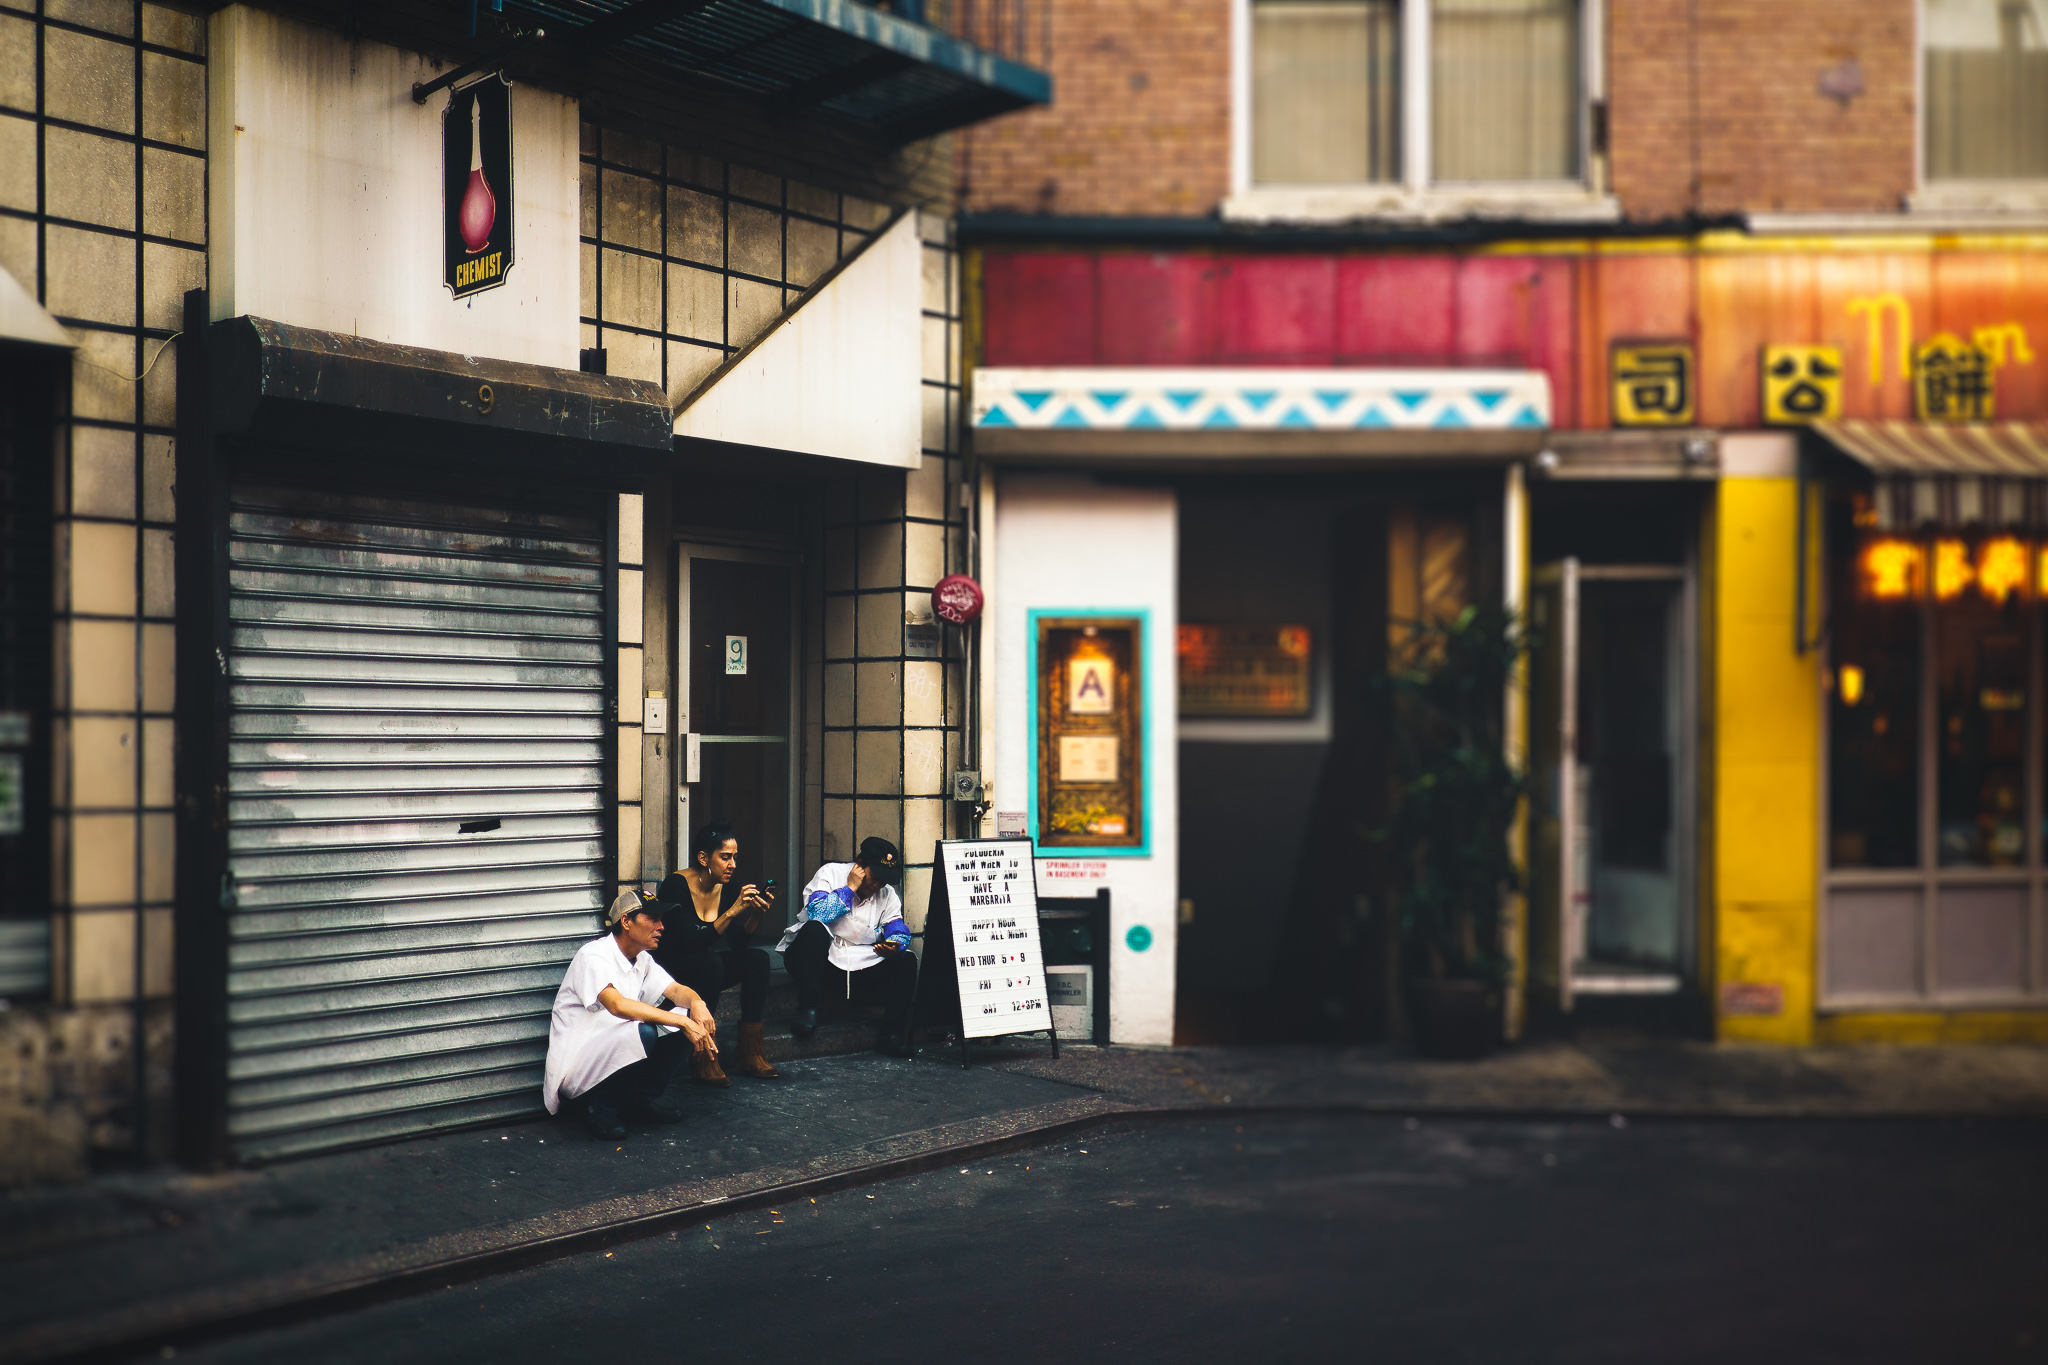
Investing time at a particular scene is a critical component of street photography composition and one that often pays back with dividends. The more time I spent standing in a single location, the more I began to notice nuances like how a cook held his cigarette while on break or the way a barber was shaving his customer’s hair. Giving myself the time to simply observe afforded me the luxury of photographing the right moments as they happened instead of haphazardly spraying a series of shots, hoping for one of them to be a keeper.
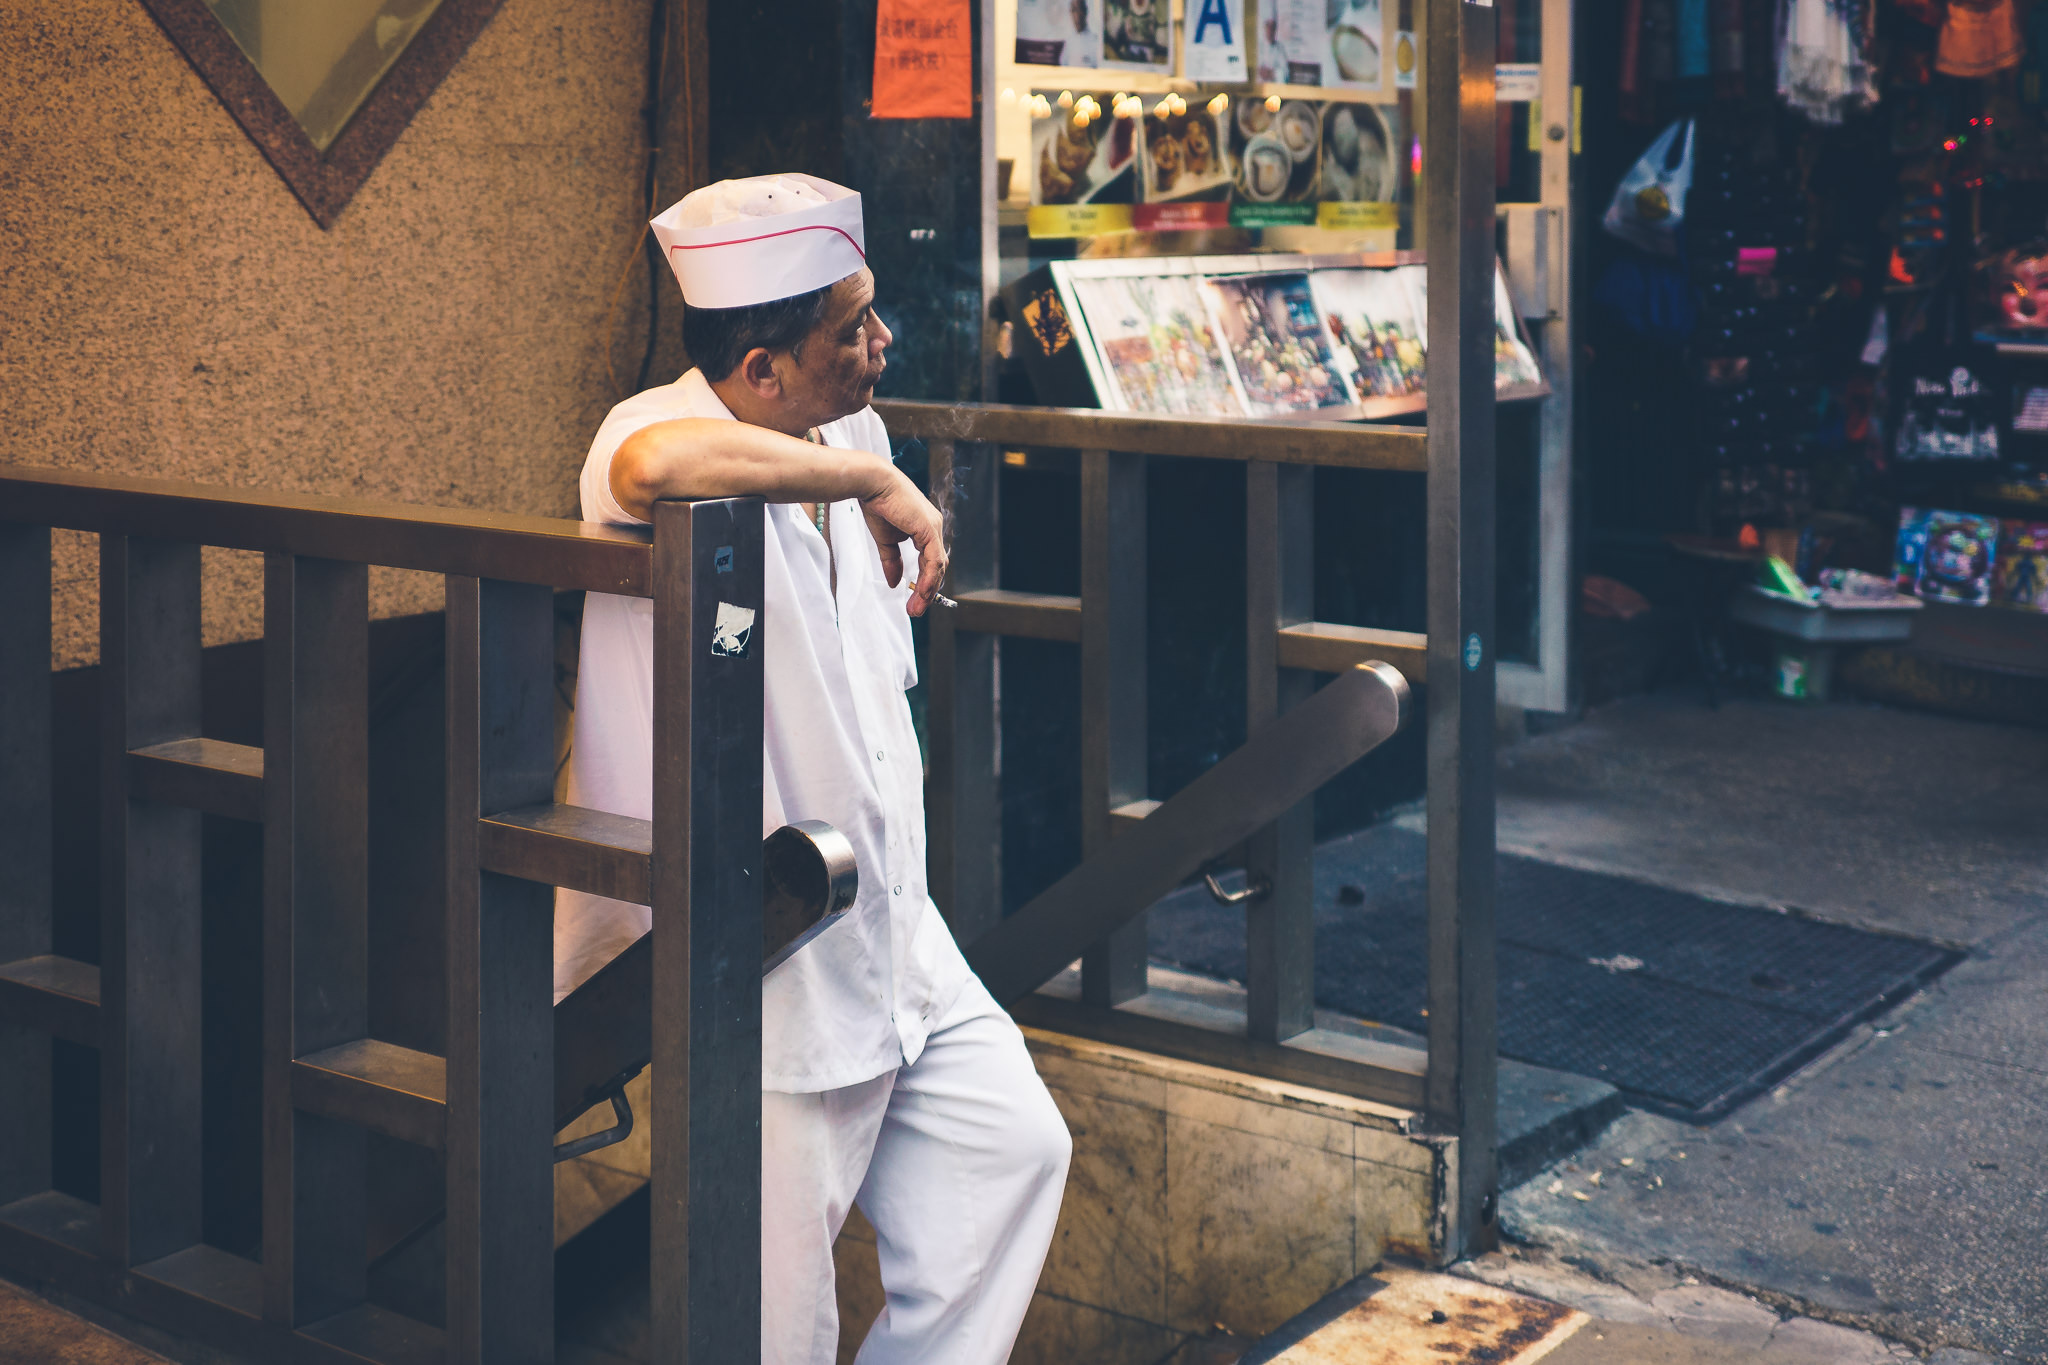
And, speaking to the benefits of staying put, one of the most important is that it aids in you blending into your surroundings. Rather than frantically walking, then stopping to shoot, then walking again, I just leaned back against a light post or building façade and faded into my surroundings. People who may have noticed me initially eventually forgot I was there. I was just another guy, and that was enough to allow them to return to doing whatever they were doing. The less they were paying attention to me, the more I was able to get natural photos of them.
Whether you want to admit it or not, gear plays an important role in photography. This is even truer when you have a specific agenda in mind about what you want to photograph. When choosing which gear I was going to pack, I considered several factors. The first was the size and weight of everything I had to carry on the shoot. Because I’d be doing a lot of walking and handholding my camera the entire time, I didn’t want my gear to fatigue me. I also knew that using a tripod was out of the option because I didn’t want to stand out, as referenced in Tip #2.
Also, I didn’t want to have a gigantic lens strapped onto my camera, creating an instant spectacle of myself. I knew that I’d be photographing at dusk, with relatively low light, so I’d need a fast lens with a wide aperture. The combination of these factors made my choice of gear easy. I chose the Sony a9 full-frame mirrorless camera for one specific reason: It can shoot continuously at 20 fps with no shutter blackout. The advantage this provides is that I can squeeze the shutter button for short bursts and capture multiple frames at near-full motion rates, ensuring that I capture a precise moment.

As for lenses, I chose three: the Zeiss Loxia 2/35, the Zeiss Loxia 2/50 and the Zeiss Batis 1.8/85. All are prime lenses, and are small, lightweight and fast. My experiences with street city photography reminded me that I rarely got photos that I loved with anything wider than 35mm or longer than 85mm, so these lenses covered my bases and never caused discomfort due to weight or size. Fortunately, many other manufacturers also offer exceptionally capable camera bodies and lenses for street photography. If you want to learn more about why I chose this specific gear for how to do street photography, I recommend watching this video where I explain my rationale.
There’s also nothing that says you need to use an interchangeable-lens system to get great photos. You can find a wide variety of all-in-one cameras that not only are svelte, but also produce stunning results. I’d also like to remind you that smartphone cameras have gotten especially impressive over the last several years, so don’t discount the camera you keep in your pocket.
This entire time, we’ve discussed the importance and benefits of intent-based photography. First, there was the specific challenge issued based on the intent of photographing Chinatown at dusk. Then there was the gear selection made to facilitate the intent. Finally, there was the consistency in the way the photos were composed. But, it doesn’t stop there.
After completing my shoot and returning to the hotel room, I had a chance to import and review the collection of photos I took. After culling the rejects and starring the strongest photos, I began experimenting with a stylization process that would tie the photos together. Ultimately, I want someone to look at the group of photos from this shoot and instantly identify the cohesive elements in the composition and the stylization. If there’s one thing that I’d love to see photographers take away from this article, it’s to spend as much time developing a consistent stylization theme as you would on the compositions themselves.

Before even considering a style or look, I first had to contend with any issues such as dust spot removal and noise reduction. Had I been using a tripod, I’d likely have used lower ISO settings. But, because I was handholding my camera at dusk, when the available light was quickly waning, I had to bump up my ISO. Despite using a capable full-frame camera, noise is still a reality that photographers have to contend with. Fortunately, I can send my RAW files to DeNoise AI to get optimal noise reduction applied. With that done, I was then free to begin stylizing these photos.
The first step was to see whether I could identify any common attributes between my final selection of photos. For the most part, the tone in each photo was similar, and that led me to experiment with adjusting the tone curve. Before even thinking about color, I made tone my primary objective. I ended up settling on applying what’s commonly referred to as an “S curve,” which adds contrast by boosting the highlights and enriching the shadows. However, I also infused gray in the shadows by adjusting the black point of the curve. This results in a familiar vintage look that’s popular on social media these days.
With the overall tone adjustments locked in, it was time to dial in colors. I’m a huge fan of split-toning and cross-processing, so it’s no surprise that I turned to those stylization techniques. The key was to identify a set of hues for the highlights and shadows that were applicable to all the photos while also being visually appealing. I ended up settling on three different color combinations that worked well across the board, and all I had to do was choose which blended in best for each photo.
Since I spent a solid portion of this article discussing the importance of creating a cohesive style, I thought it’d be helpful to share a new workflow video illustrating exactly what I did to get the look for my Chinatown at Dusk series. I hope you enjoy it!
Now, when I look at the collection of photos from this particular dusk shoot in Chinatown, I’ll see the benefits of intent-based photography and why it’s so important to challenge yourself in the way you compose and stylize your images. And don’t forget that you can download free trials of DeNoise AI, Sharpen AI, and Gigapixel AI to try them out for yourself!

© 2005 - 2024 Topaz Labs. All rights reserved.