
Trained on thousands of videos and combining information from multiple input video frames, Topaz Video Enhance AI enlarges your video up to 8K resolution with true details and motion consistency. Here’s how to get the best results for your footage.
Getting Started With Video Enhance AI
Download Video Enhance AI. Available for Mac or PC, you can launch a totally free 30-day trial to test Video Enhance AI with your own video projects.
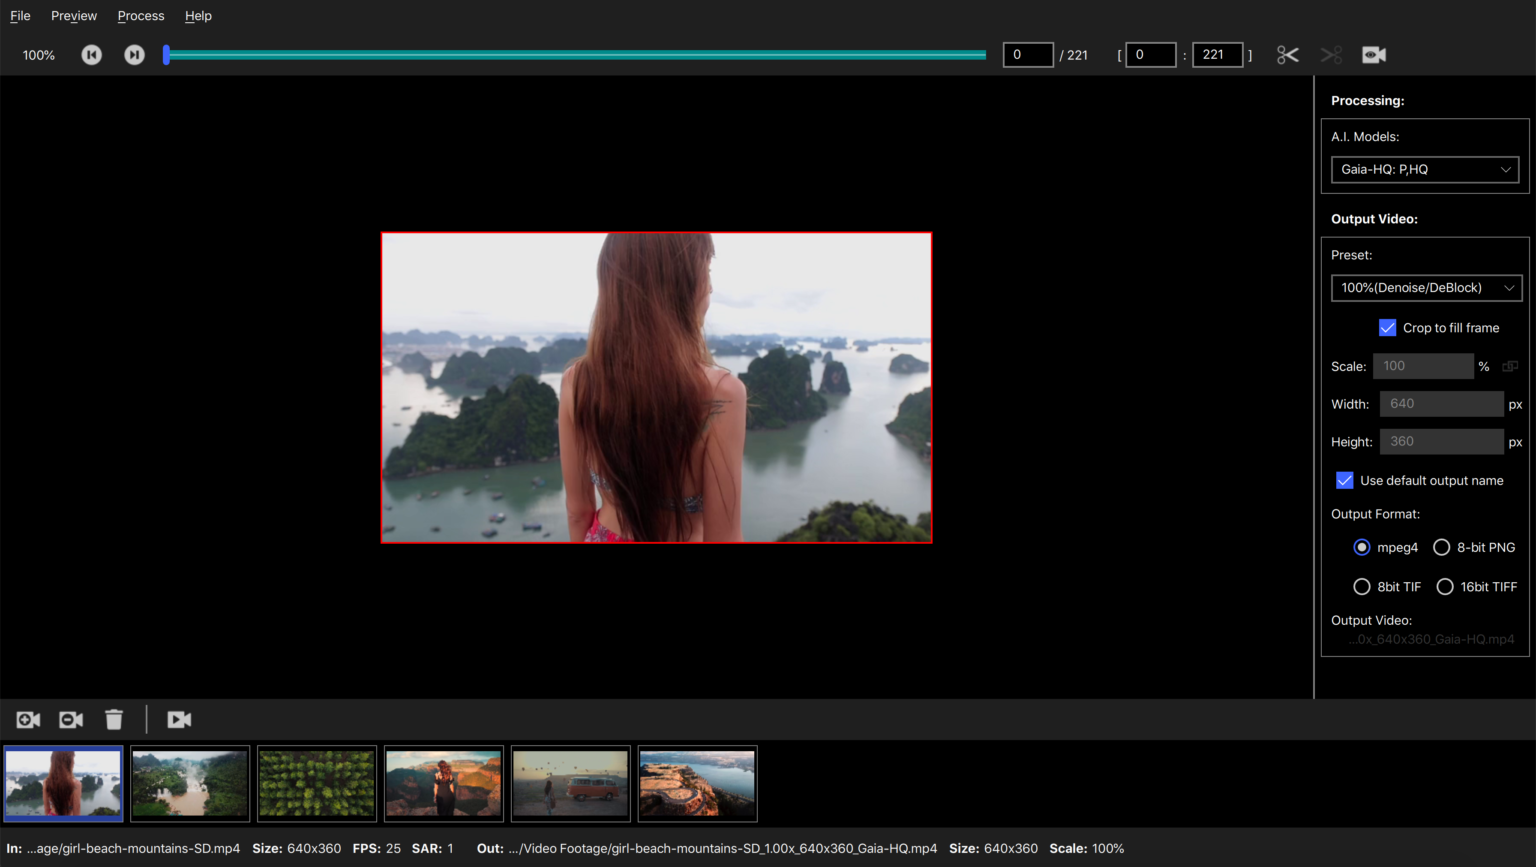
How To Import Footage For Upscaling
Importing footage to be upscaled is as easy as drag and drop. You’ll find your clips at the bottom of the Video Enhance interface. Simply click on each video thumbnail to change individual processing and output settings.
Sync Settings to Save Time
Are you planning to use identical settings for an entire batch of video clips? Easily apply synchronized settings to your whole batch:
- Import your first video and apply your settings.
- Click on Process > Setting as Default.
- Import the rest of your clips and identical settings will be applied.
Choosing Your AI Processing Mode
Video Enhance AI offers several different AI Models tailored to suit different types of footage.
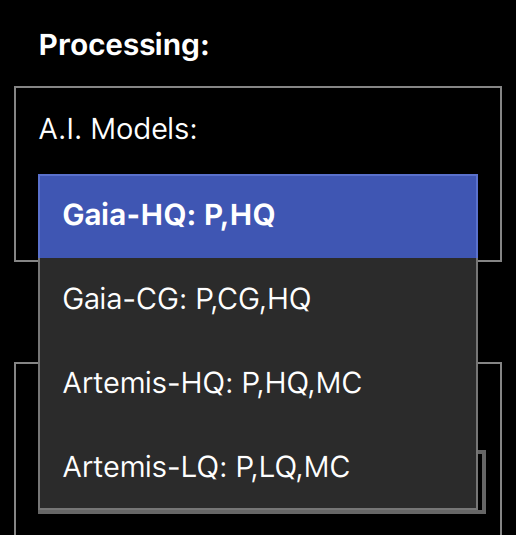
Gaia-HQ
Standard upscaling for high-quality progressive footage.
Gaia-CG
Upscaling for progressive computer-generated content. Use this for digital animations, cartoons, etc.
Artemis-HQ
Enhancement and upscaling for high-quality progressive footage with better motion consistency. Use this to upscale higher-quality footage, like stock video clips, films, and drone footage.
Artemis-LQ
Enhancement and upscaling for low-quality progressive footage with better motion consistency. Use this for old family recordings, historical footage, etc.
Selecting Video Output Using Presets
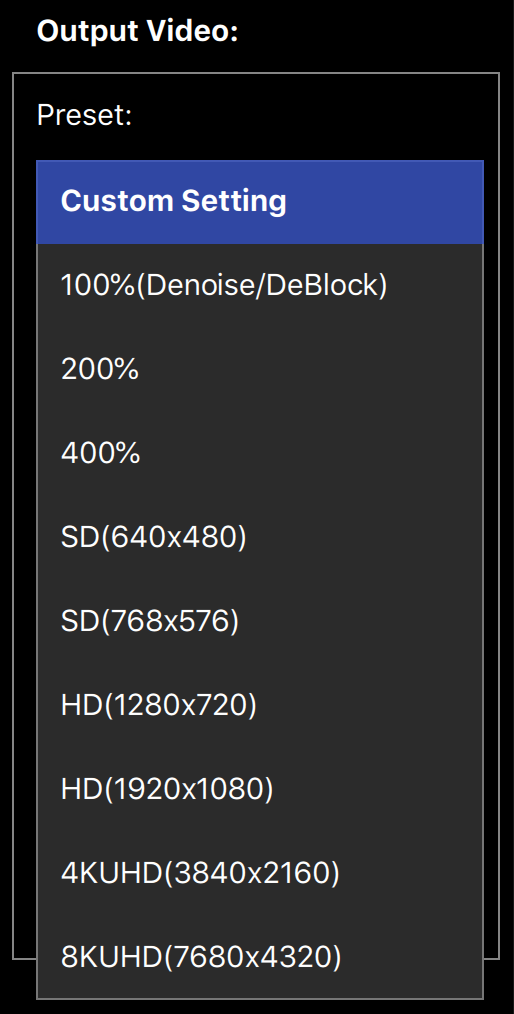
Video Enhance AI offers a selection of video output presets, or you can choose your own custom settings.
Preset video upscaling options include:
100% (DeNoise/DeBlock)
200%
400%
SD (640×480)
SD (768×576)
HD (1280×720)
HD (1920×1080)
4K UHD (3840×2160)
8K UHD (7680×4320)
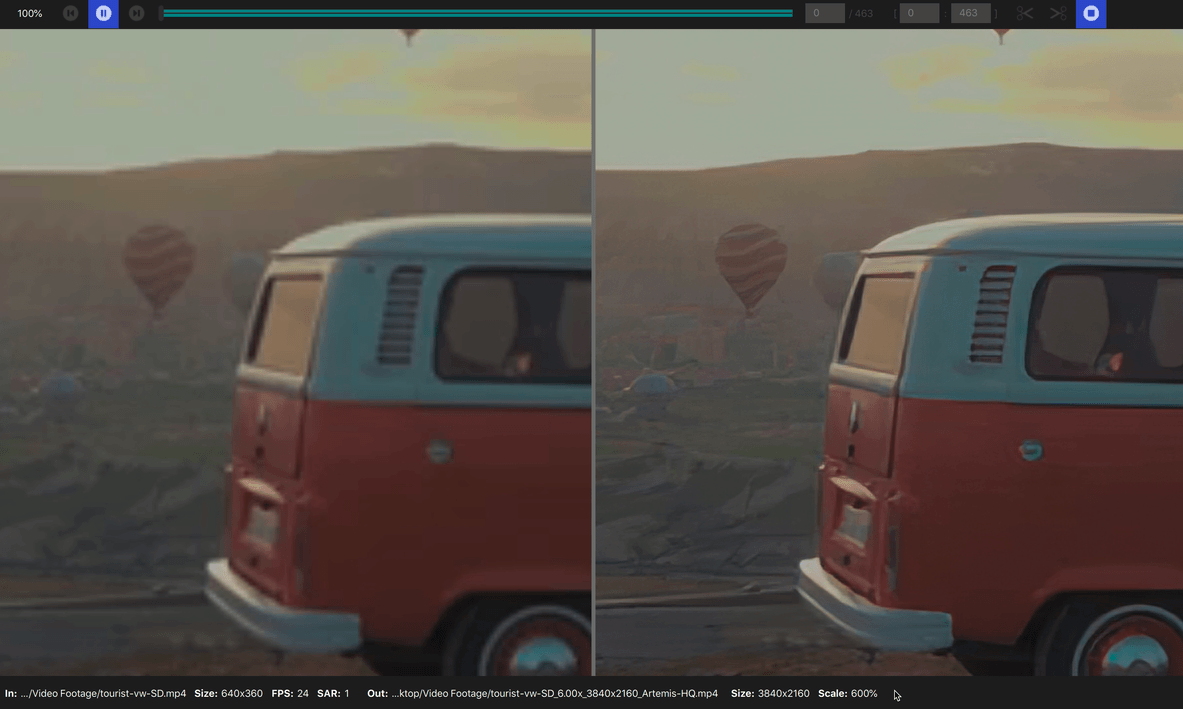
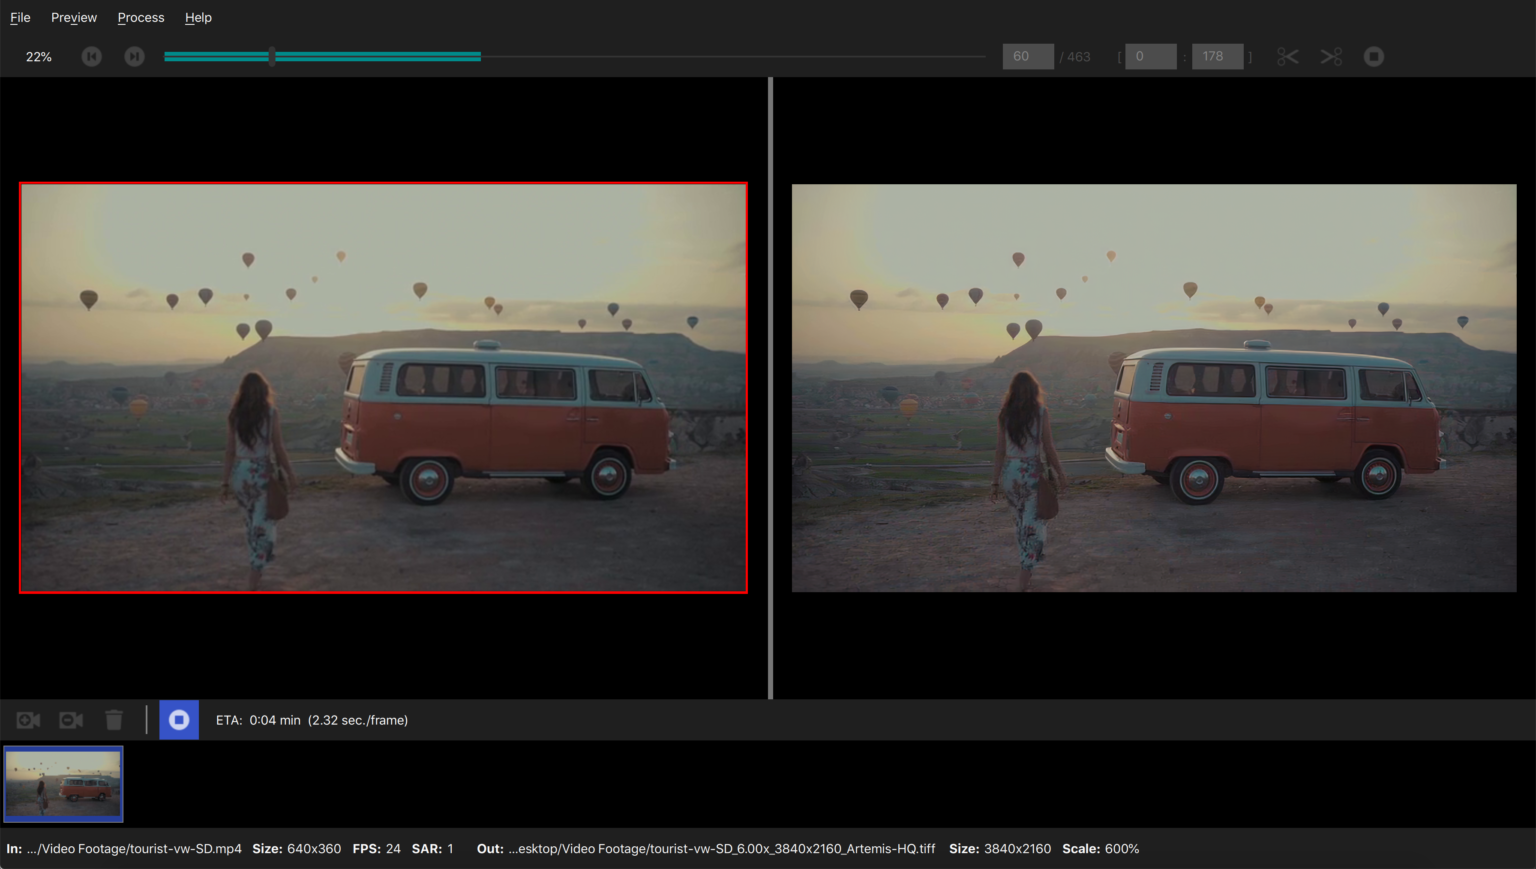
Preview Your Video Enhance Output
Select a starting point on the timeline and click the Preview button to see a 30-frame sample of your rendered video output. Happy with your results? It’s time to process your video.
Choosing Your Output Format
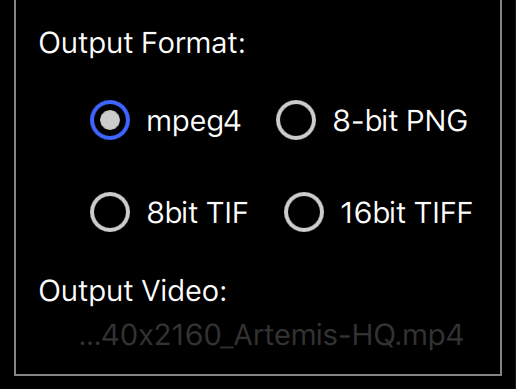
The default mpeg4 output will be suitable for most projects, and will result in a ready-to-use video upon completion.
For the highest-quality output, along with a reduction in processing time for videos greater than 1,000 frames, select 16bit TIFF output.
Achieving Highest-Quality Output
For the highest-quality video productions, you need the highest-quality output. If you’re working on a larger project with more than 1,000 frames, or if you need the absolute best results, it’s recommended to select 16bit TIFF as your output format.
The final output will result in a folder of sequentially-numbered TIFF files ready to be assembled in the video editor of your choice.
Assembling TIFFs Into Video Footage

To complete your output, you can assemble your TIFF images within the video editor of your choice.
In Quicktime, select File > Open Image Sequence and select your TIFF images. Your video will be created automatically and ready for further post-production.


1 thought on “How To Get The Best Upscaling Results from Video Enhance AI”
Using names like Gaia and Artemis sounds great but it has no explanatory functional meaning whatsoever. I suggest you replace it with names that clearly explain what they do (functional names)
For example:
Change Gaia-HQ to Standard -HQ input
Standard upscaling for high-quality progressive footage.
Change Gaia-CG to Standard-HQ for Computer Graphics Input (or Standard HQ for CG)
Upscaling for progressive computer-generated content. Use this for digital animations, cartoons, etc.
Change Artemis-HQ to Higher Quality footage Input
Enhancement and upscaling for high-quality progressive footage with better motion consistency. Use this to upscale higher-quality footage, like stock video clips, films, and drone footage.
Change Artemis-LQ to Lower Quality footage Input (old recordings)
Enhancement and upscaling for low-quality progressive footage with better motion consistency. Use this for old family recordings, historical footage, etc.
There is no question that Video Enhanced AI (VEAi) is INCREDIBLY Good. The output quality is just amazing, although you will be frustrated unless you have a very powerful GPU, because the processing time using CPU will be very, very long. Great Job !
Your
Comments are closed.