Comparing noise reduction software

Managing image noise is an essential part of a photographer’s workflow and there are a lot of applications on the market to assist with reducing image noise in post-processing. Sacrifices typically have to be made when it comes to noise reduction – usually in the form of reduced details. But is it possible to have it all? A program (or programs) that reduces noise, retains details, is easy to use, and does it quickly? Let’s take a closer look at noise and some of the noise reduction applications available to photographers.
Identifying the types of noise in your photo
Before you begin reducing noise in your image, you must identify the location and type of noise in your image first. These two factors will determine your approach to noise reduction.
The easiest way to locate noise in your image is by setting your zoom to 100%, then scanning your photos for areas with visible noise. If you can see the noise present in your image at this magnification, you will need to do some level of noise reduction.
Image noise comes in two forms – luminance and chroma noise. In a perfect world, image noise wouldn’t exist. But, unfortunately, it is an inevitable side effect of shooting with today’s digital cameras.
Luminance noise
Luminance noise is a random variation of brightness that your camera processes in relation to the original and correct brightness of the image and is the most common type of noise found in digital photography. Luminance noise is directly related to image exposure and often appears as grain or specks. It is most common in underexposed images, as well as in photos with high ISOs.
Because of this, luminance noise is associated with a lack of light. A prime example is a night photo where you drastically increase the ISO in order to capture the shadows in more detail.
Chroma noise
Chroma noise, also known as color noise, is uneven color transitions in an image. It often appears as colors in areas that do not match the adjacent pixels. Chroma noise is emphasized and is more noticeable in regions that are very bright or very dark.
Similar to luminance noise, underexposure and high ISO causes color noise. This type of noise is much more dangerous than luminance noise because it can render images completely unusable.
Using image noise reduction software
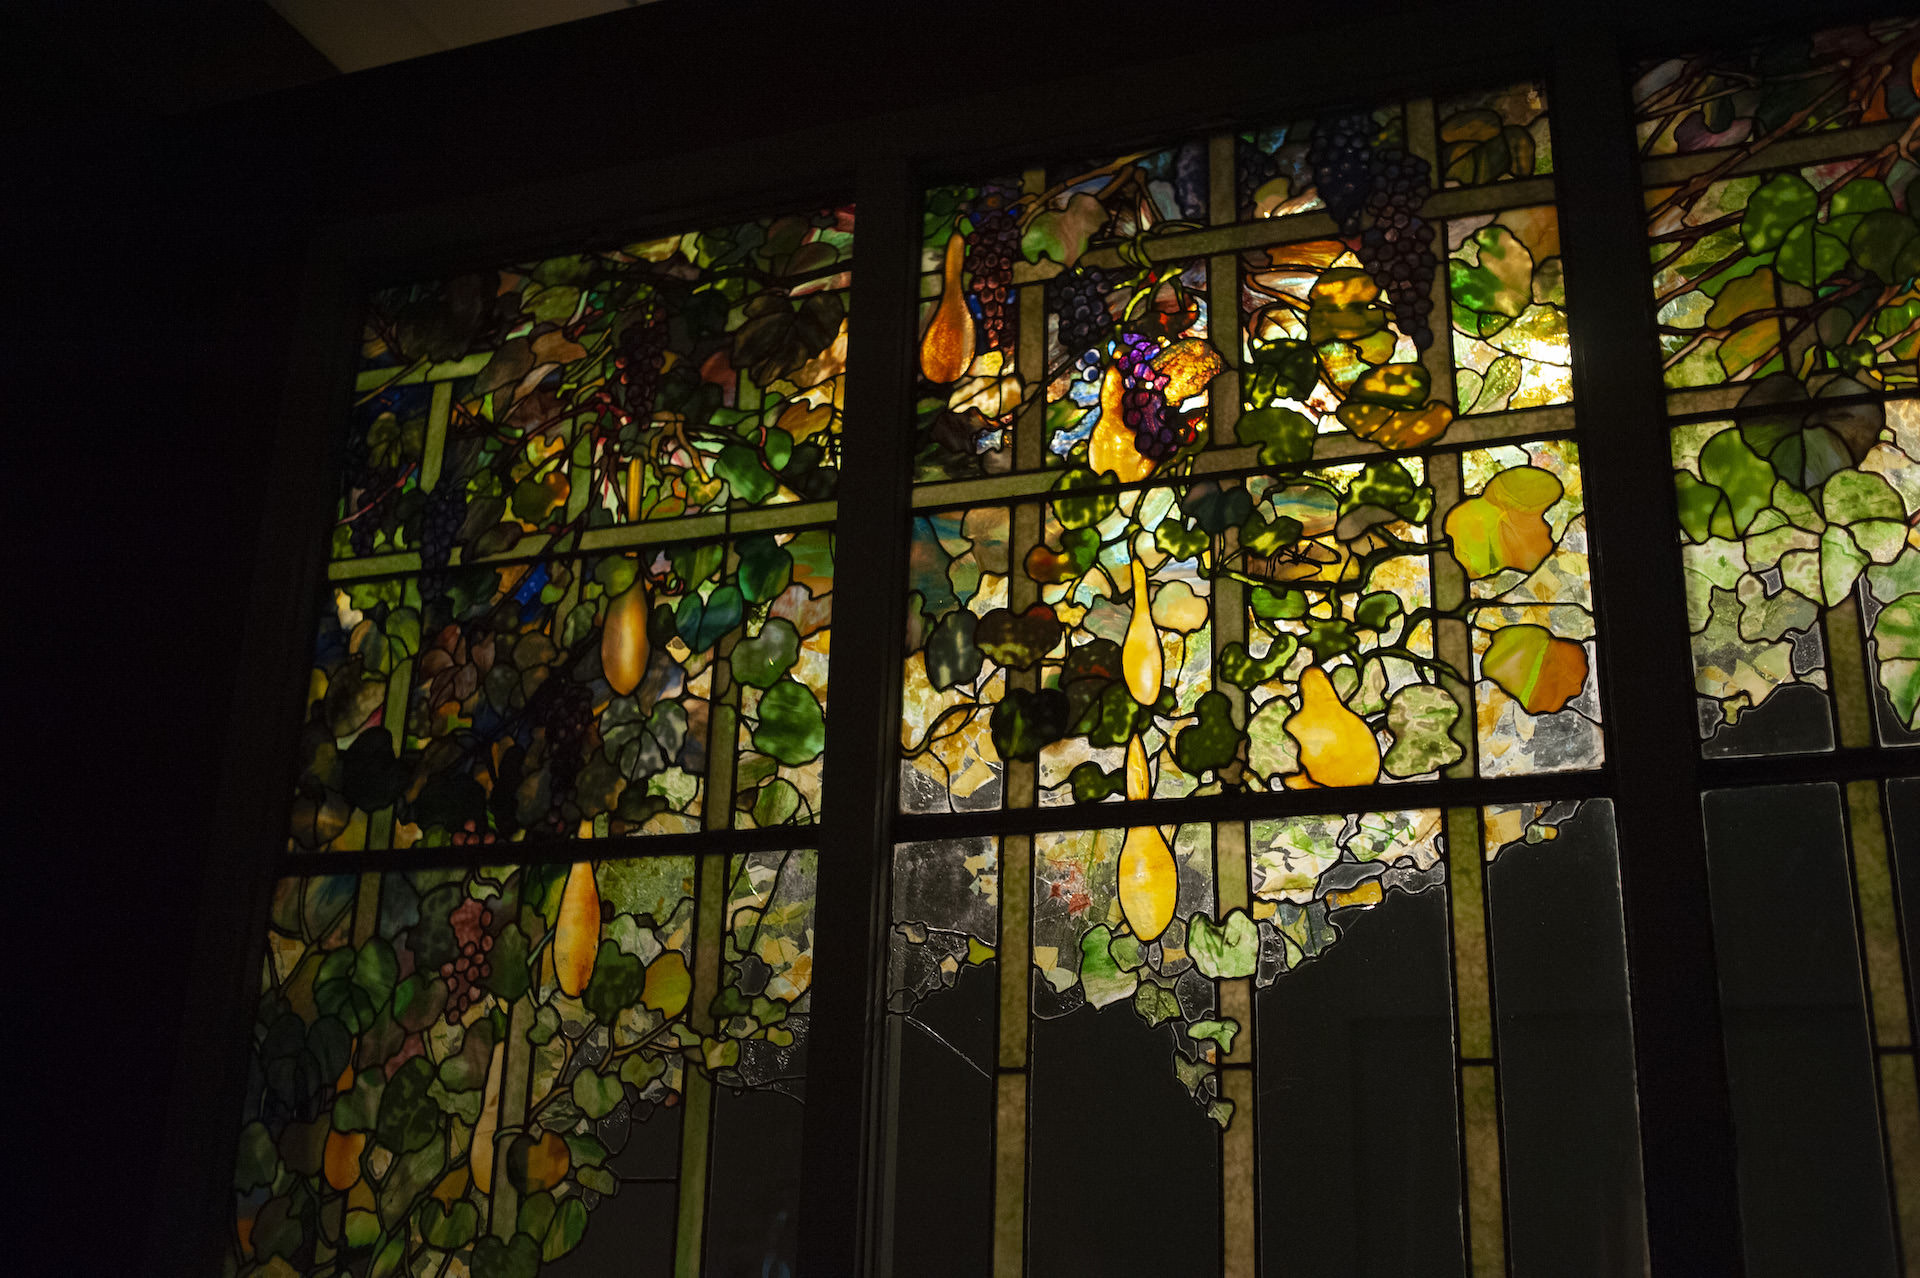
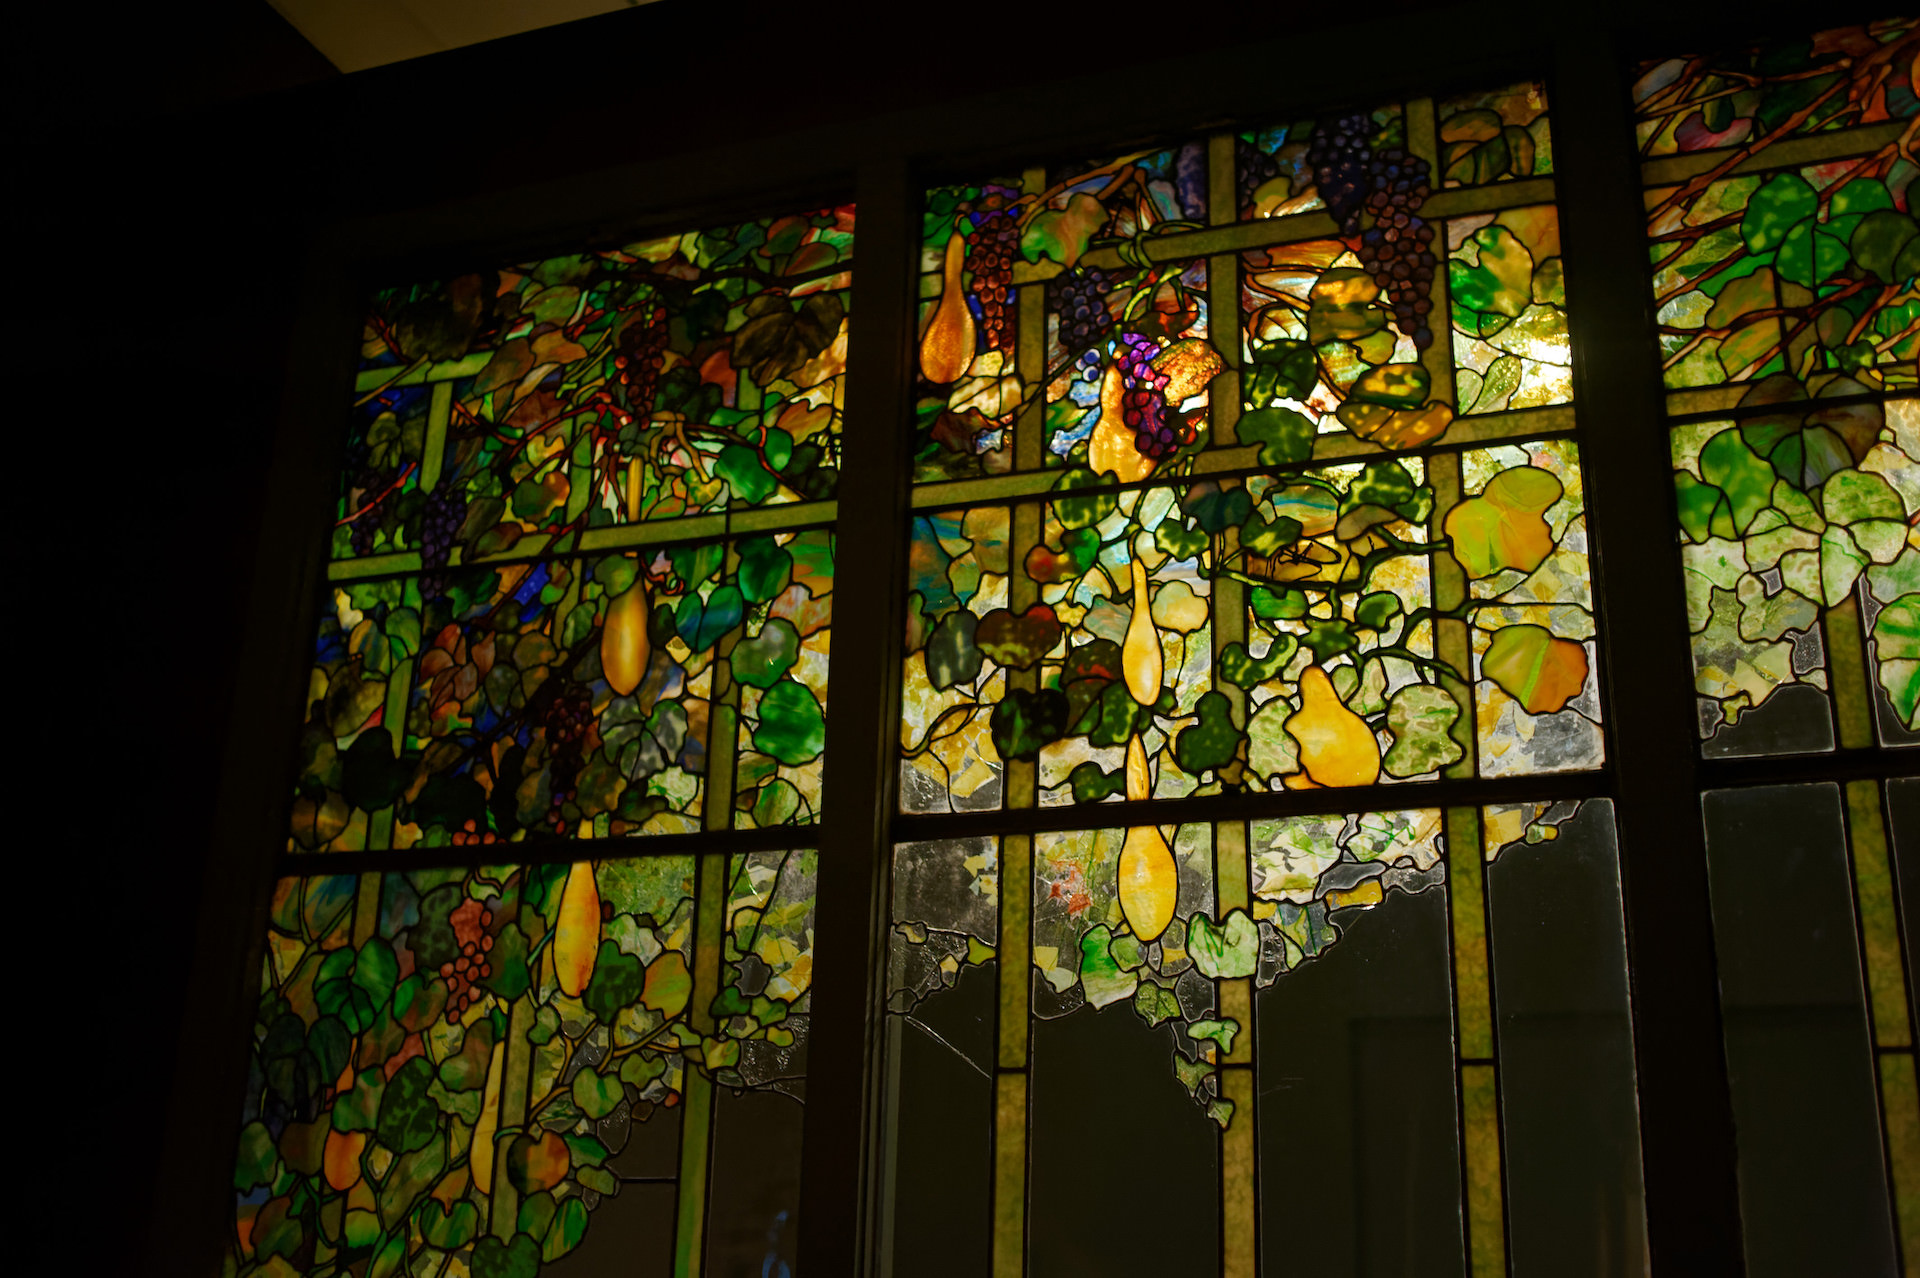
To compare the pros and cons of various types of noise reduction software, we’re going to take the image below, which has both luminance and chroma noise, and attempt to reduce the noise in a few different noise reduction software.
But before we get started, here's a quick tip: To view these images in detail, simply zoom in your browser window!
Let's start with a commonly used photo editor: Adobe Photoshop. There are two tools you can use in Photoshop to reduce luminance and color noise independently: Camera Raw’s detail panel and the Reduce Noise Filter.
Photoshop noise reduction
First, let's attempt to reduce the noise in this image in Photoshop. This can be tried two ways - first, by using the Camera Raw feature in Photoshop. Camera Raw can also be accessed by other applications, such as Adobe Bridge.
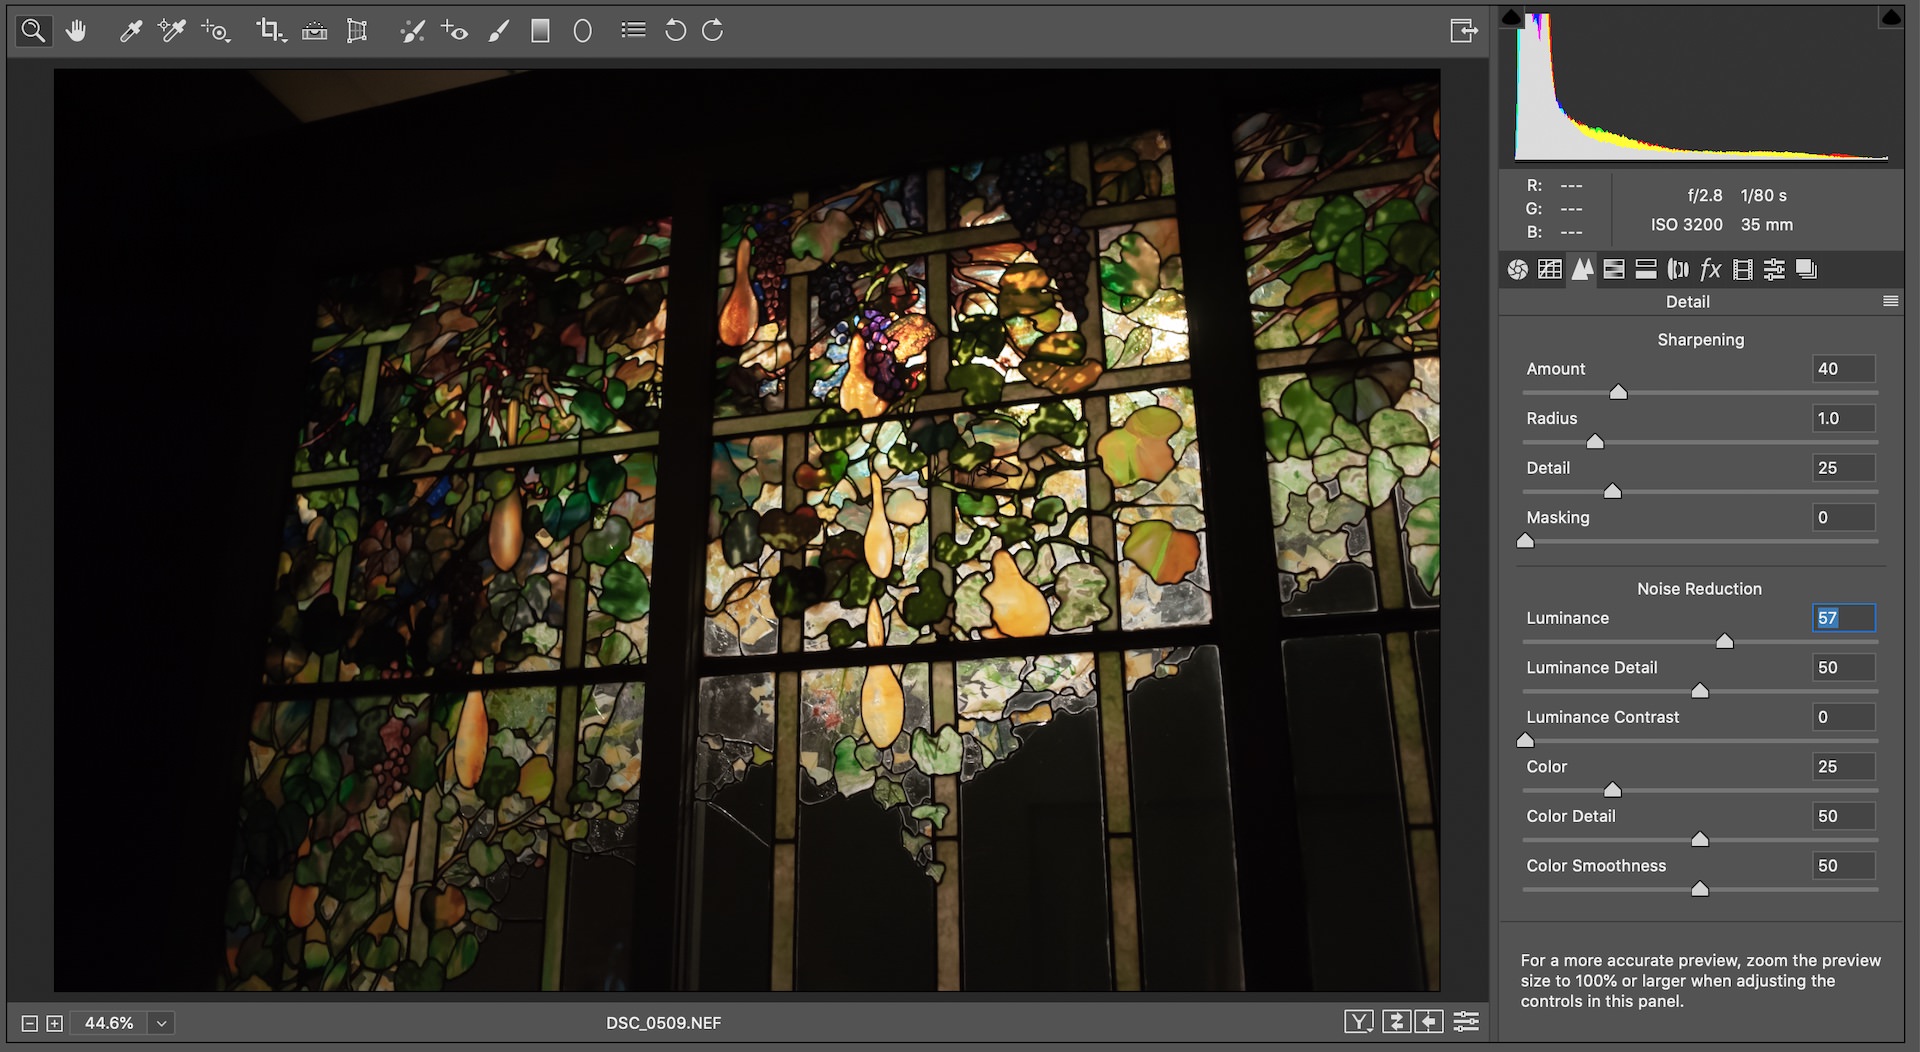
In Camera Raw, you can reduce noise by going to the Detail section and adjusting the Luminance slider. This will take care of one of the two types of noise, luminance noise. To adjust color noise, you can adjust the Color sliders in the Noise Reduction area of the Detail section.
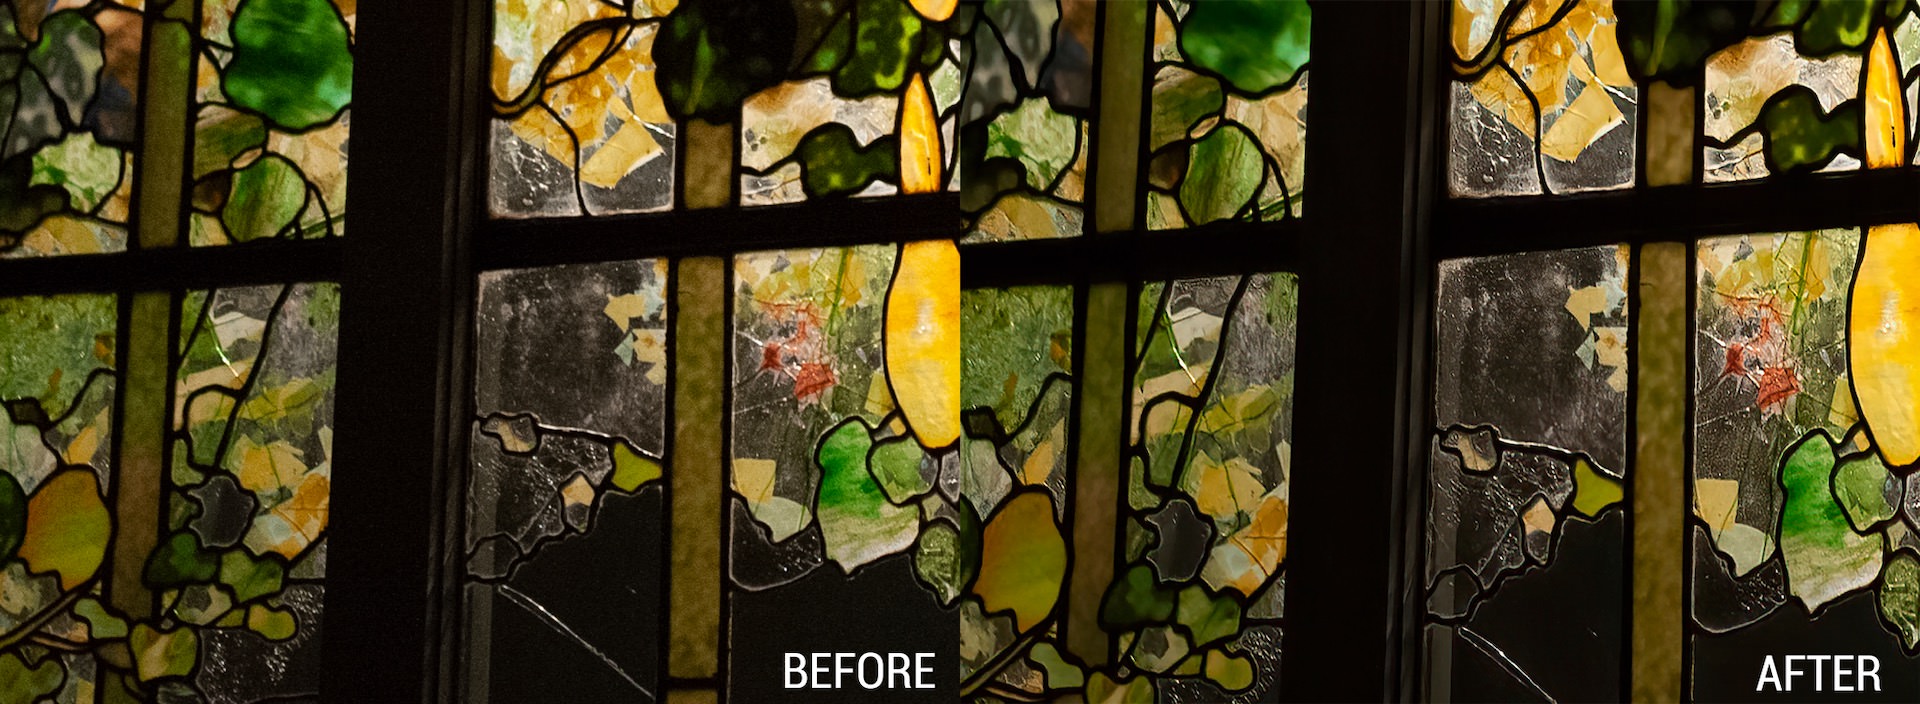
Let's zoom in on a particular area of the image where we see a lot of noise. The beams in the stained glass are particularly dark and have both chroma and luminance noise. Here’s what the image looks like when we open it before applying any noise reduction:
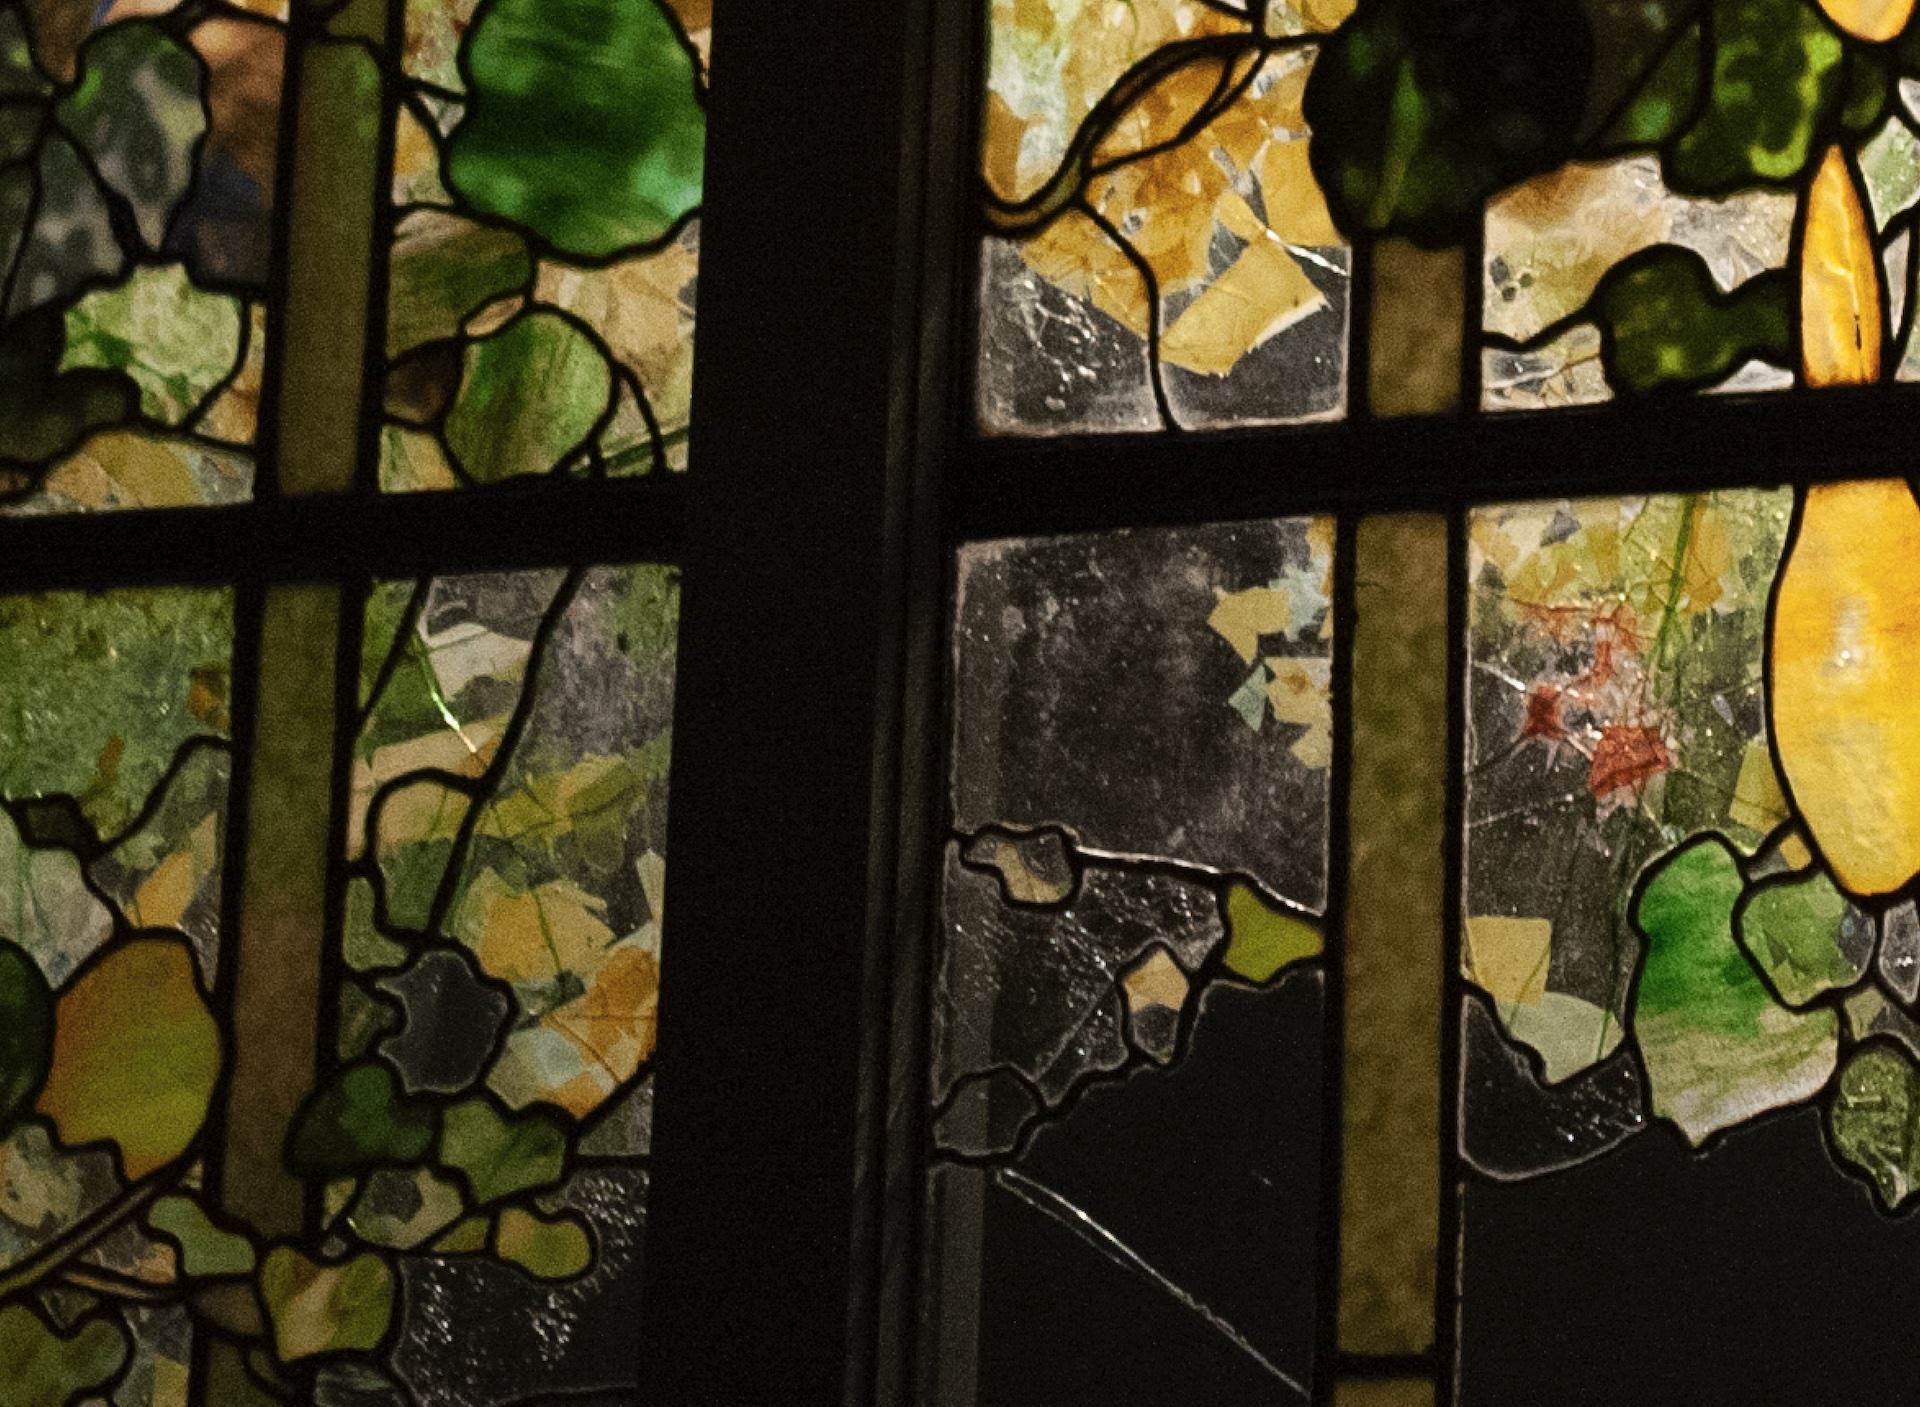
You can see that there’s a fair amount of noise in the green portions of the stained glass, as well as the light in the crossbeam.
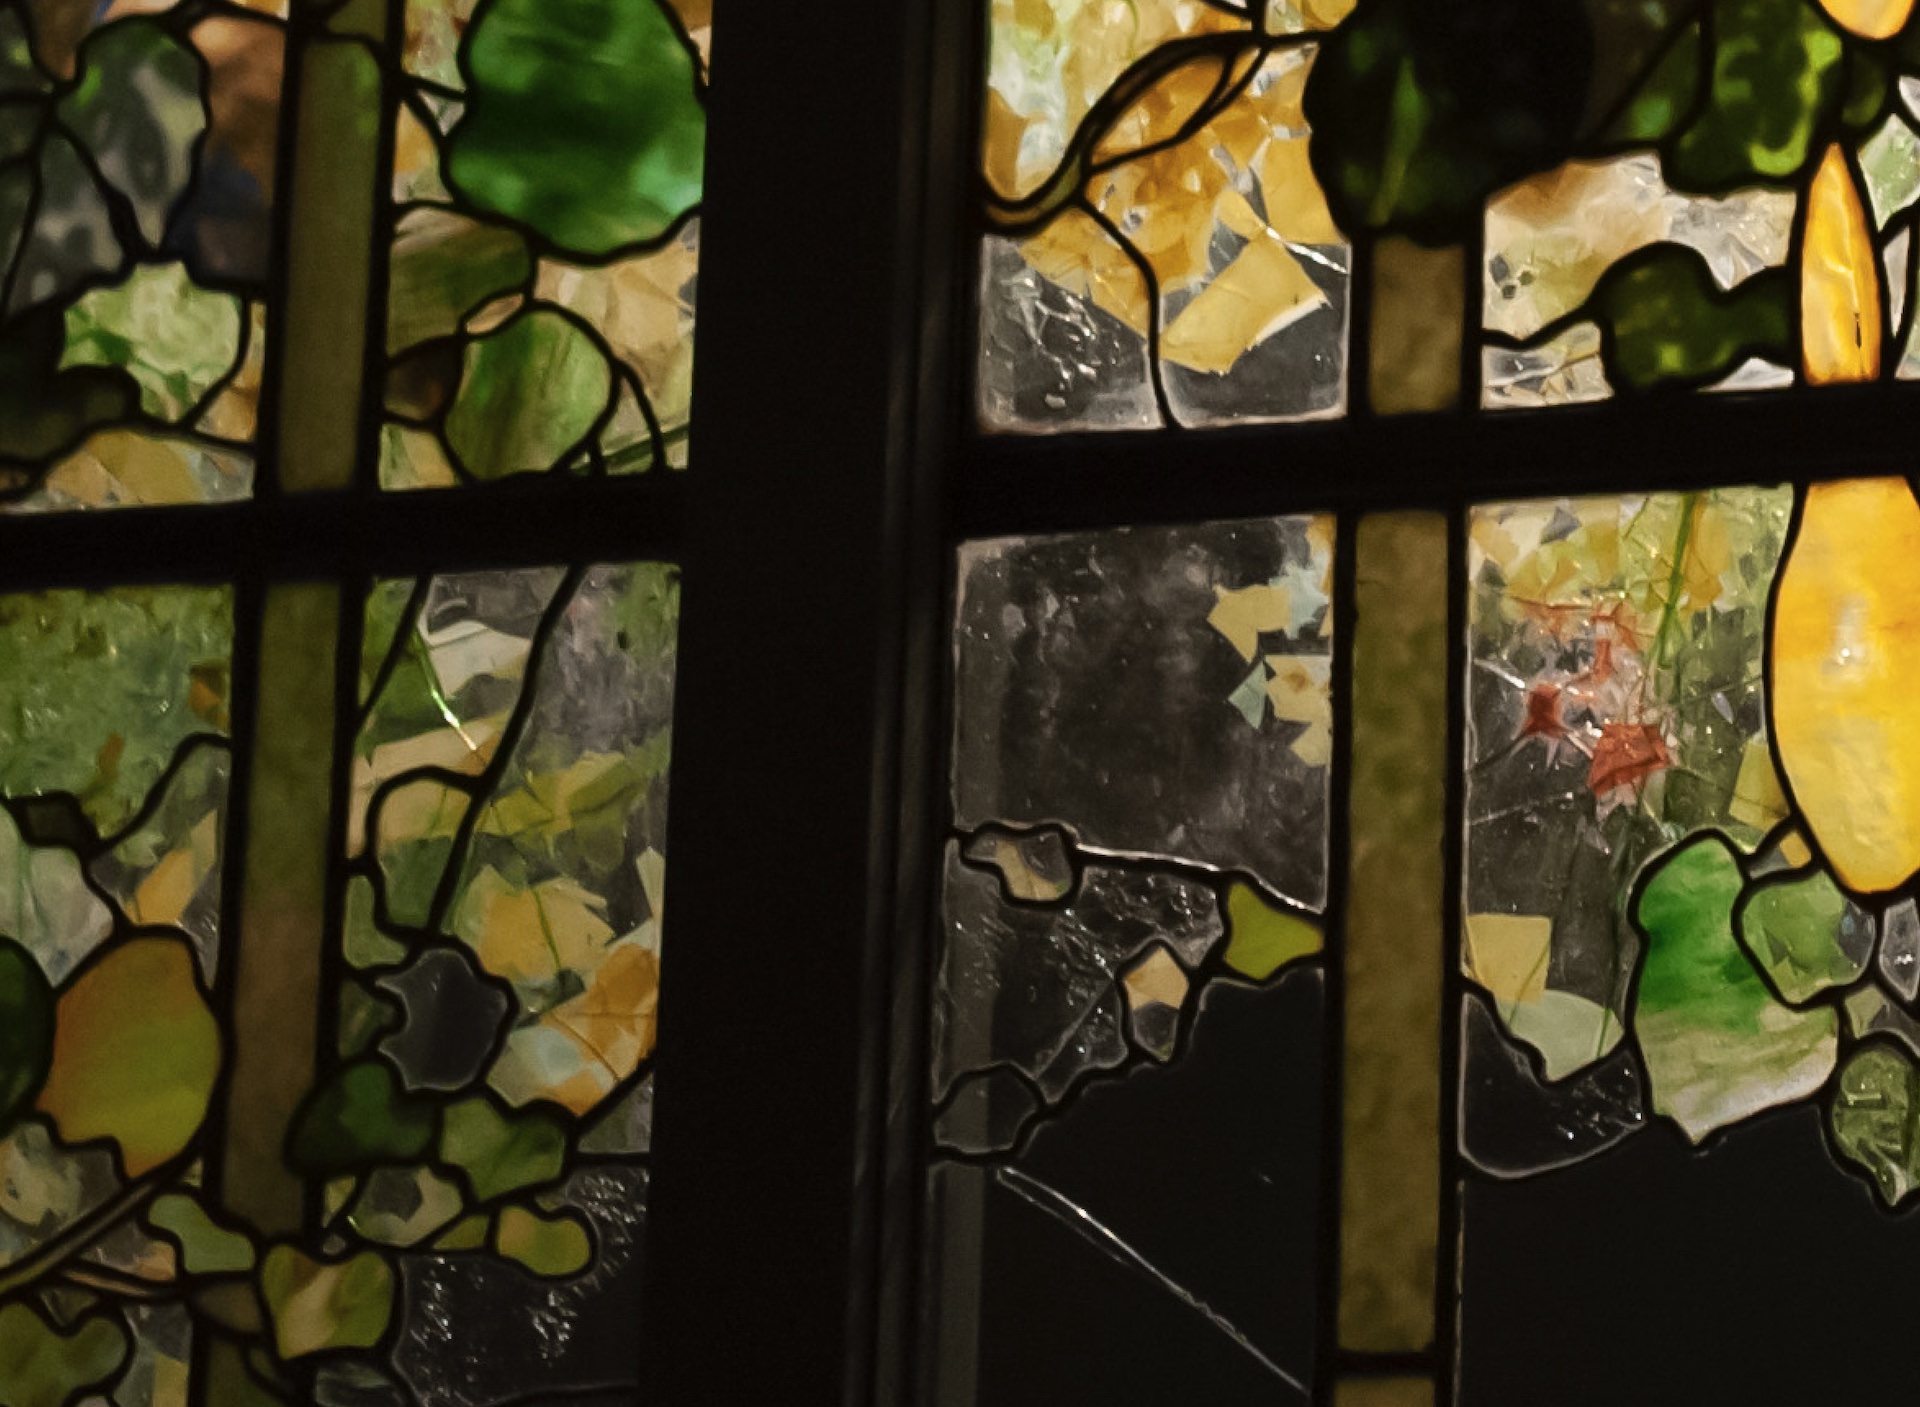
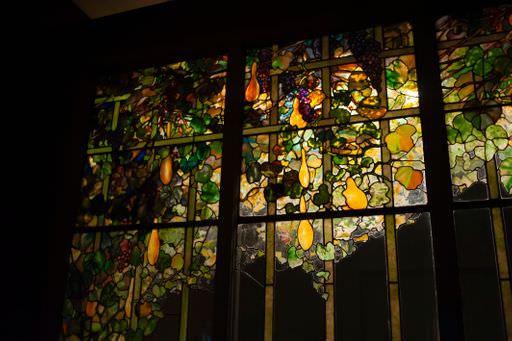
This is also apparent in the full-size image. You can see below that the contrast in the image seems more apparent and drastic as well.
Camera Raw has a few strengths, including batch processing capabilities, and one could call the Noise Reduction section easy to use, though it’s location is not immediately clear.
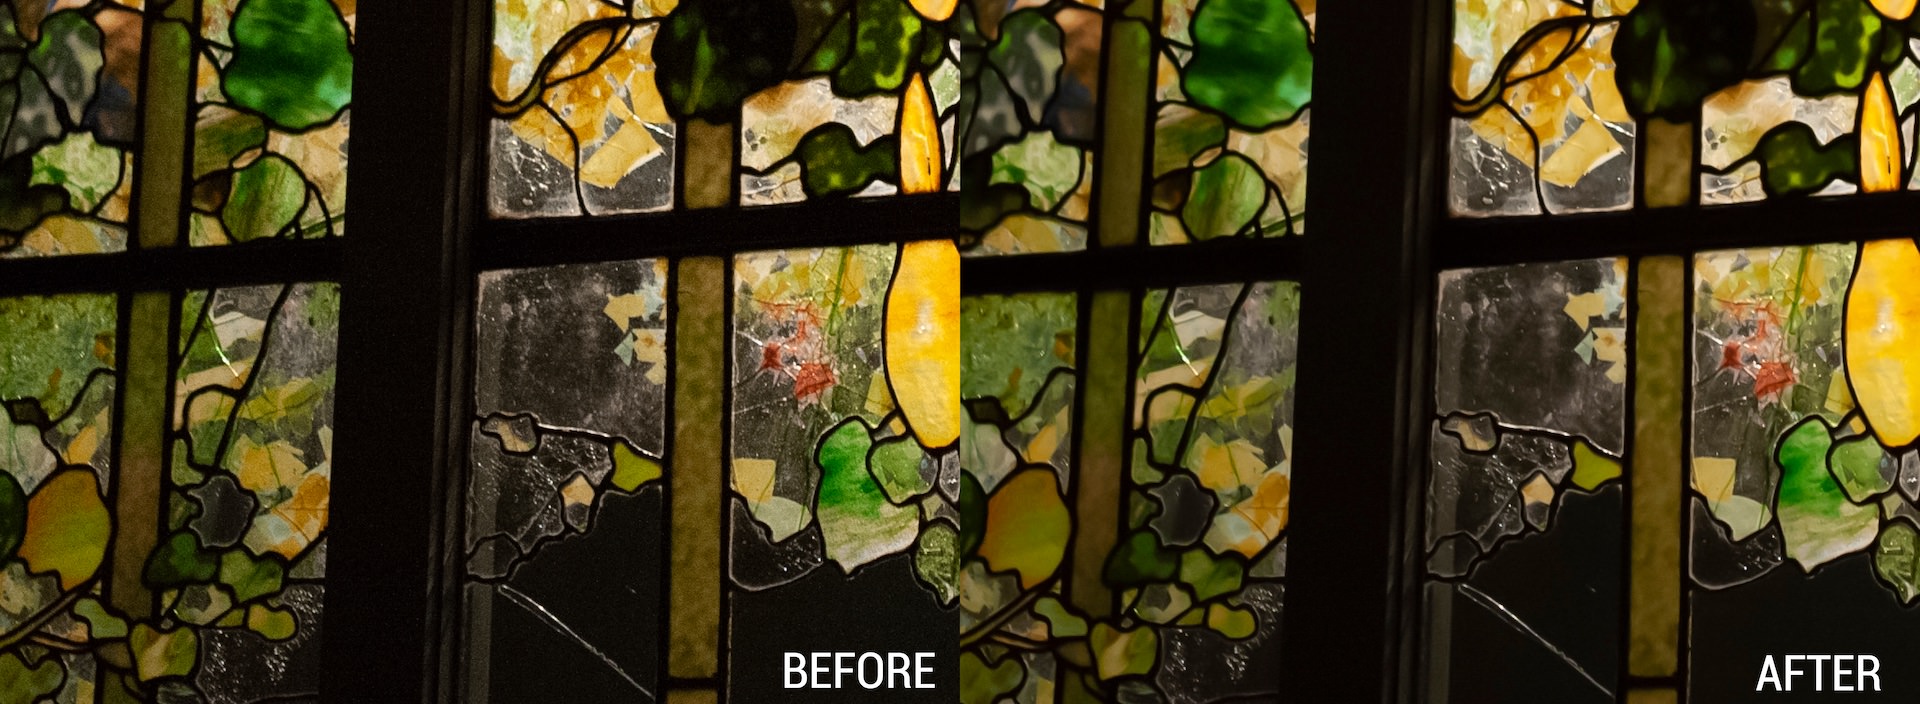
The other way of reducing noise in Photoshop is with the Reduce Noise Filter, which is accessed in Photoshop in the filters menu.
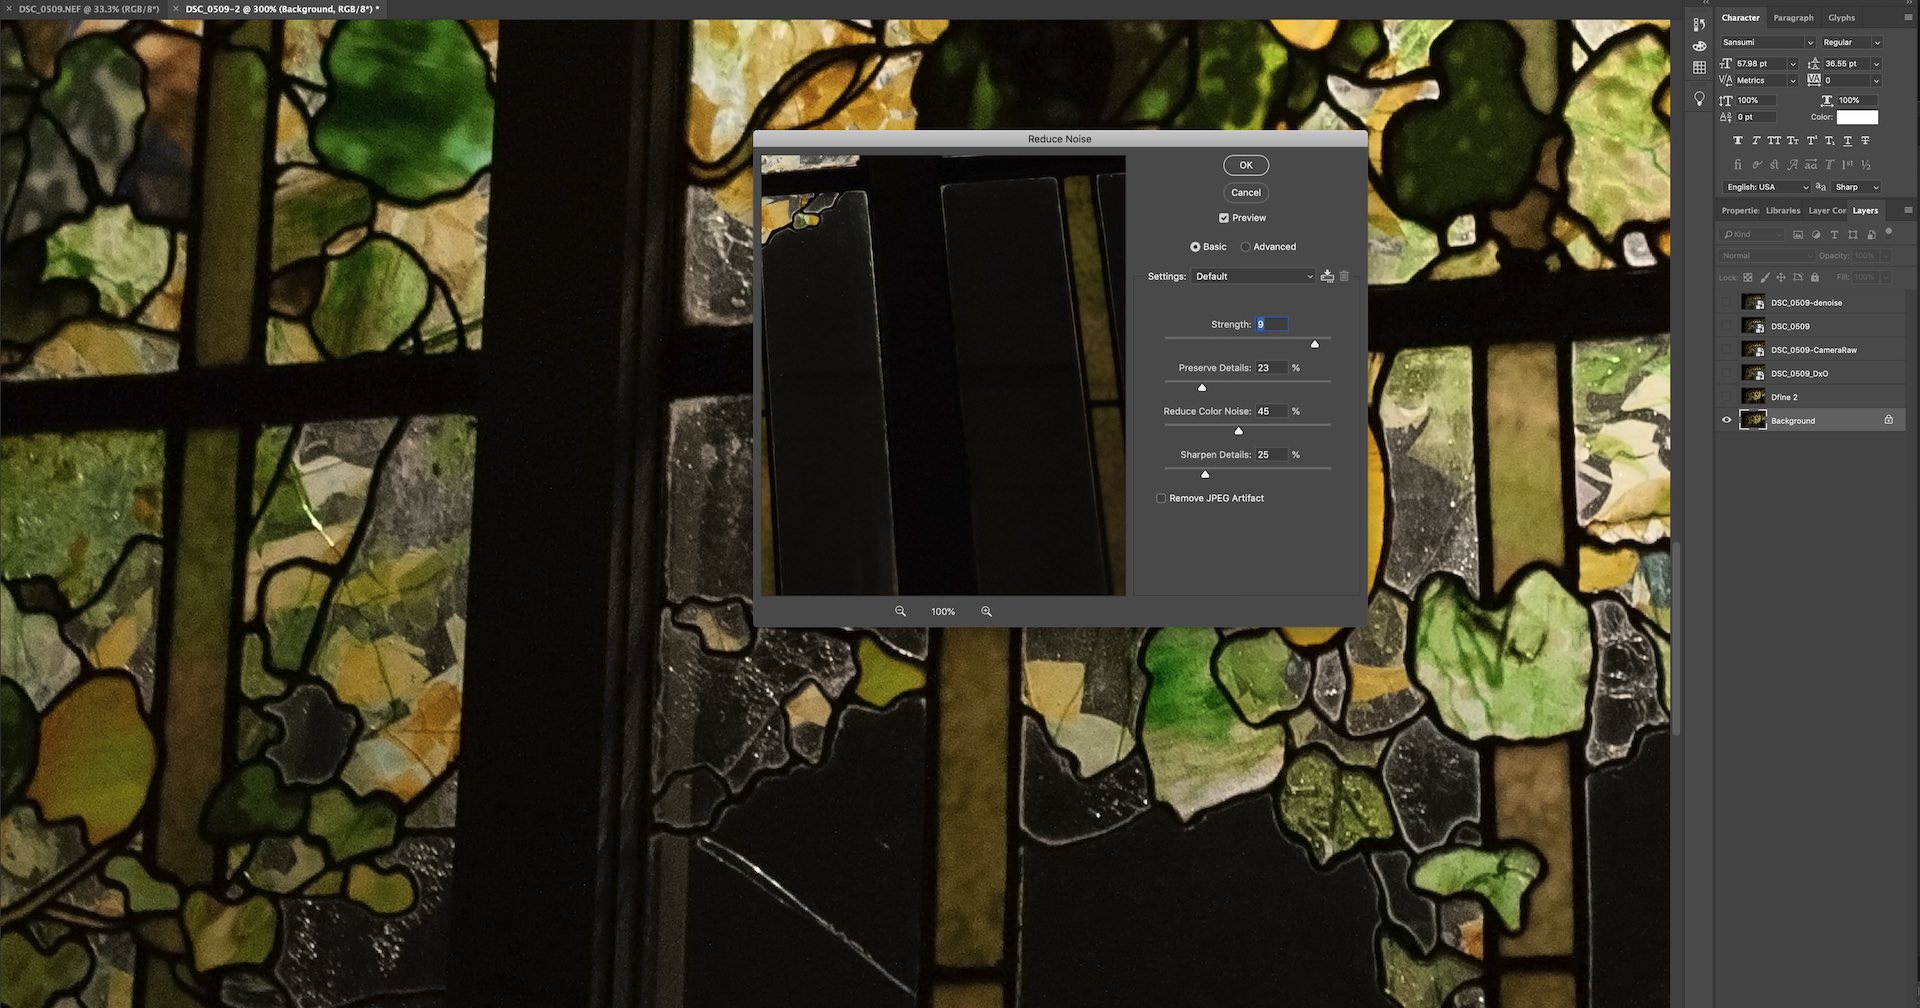
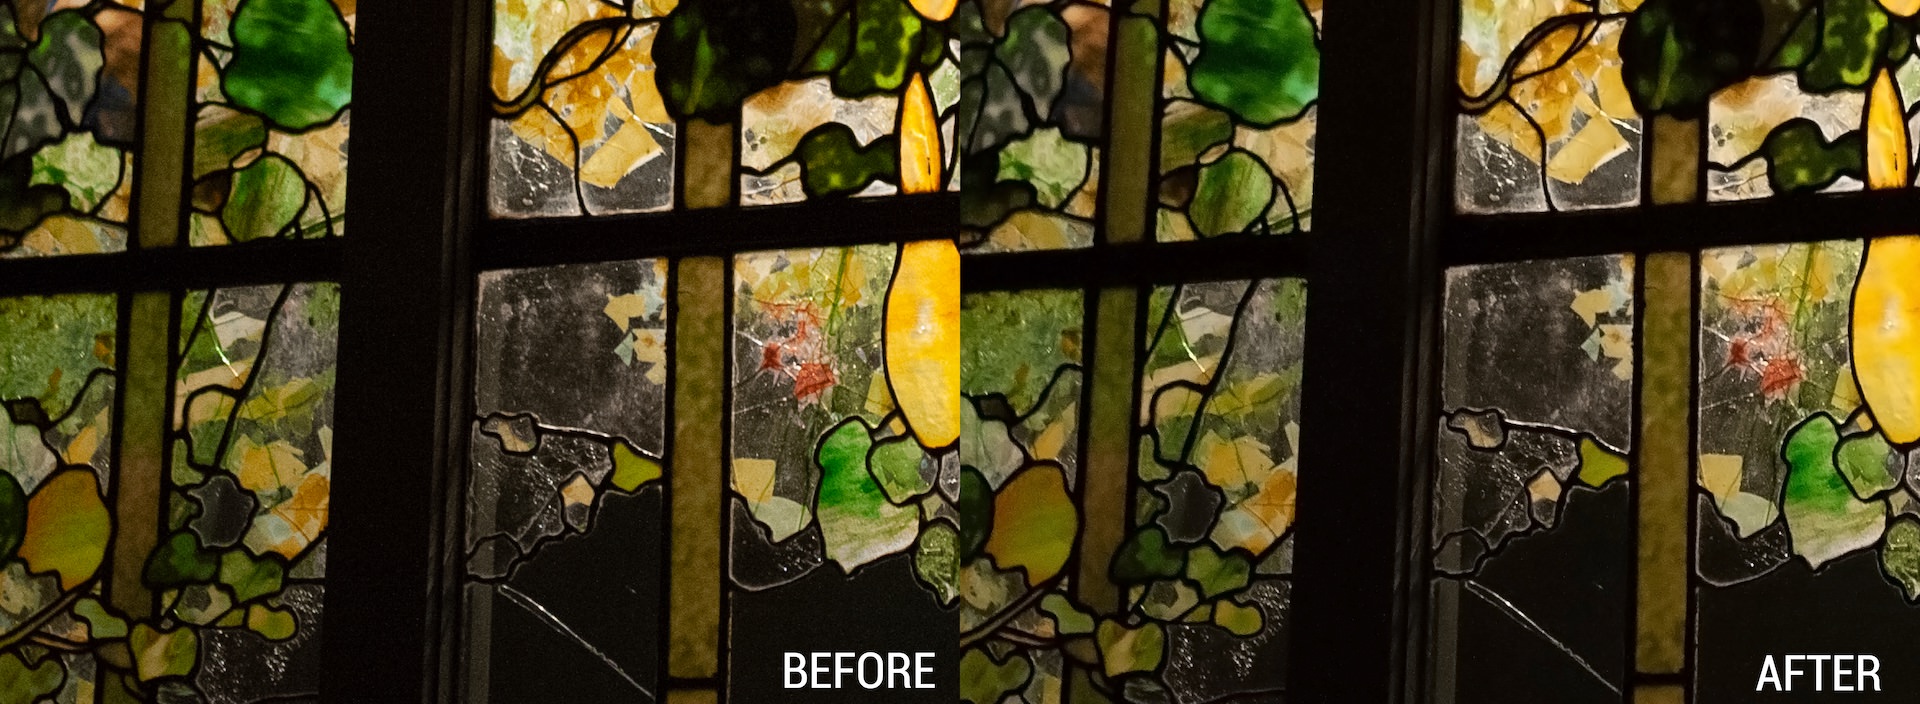
To get the level of noise reduction we were hoping for, we had to almost max out the Strength slider in the Reduce Noise menu. While we reduced the noise in the crossbeam, doing so did not completely eliminate the noise in the colorful sections of the stained glass. It also caused some over-smoothing in the golden parts of the image, taking away some of the fine detail that made the stained glass interesting.
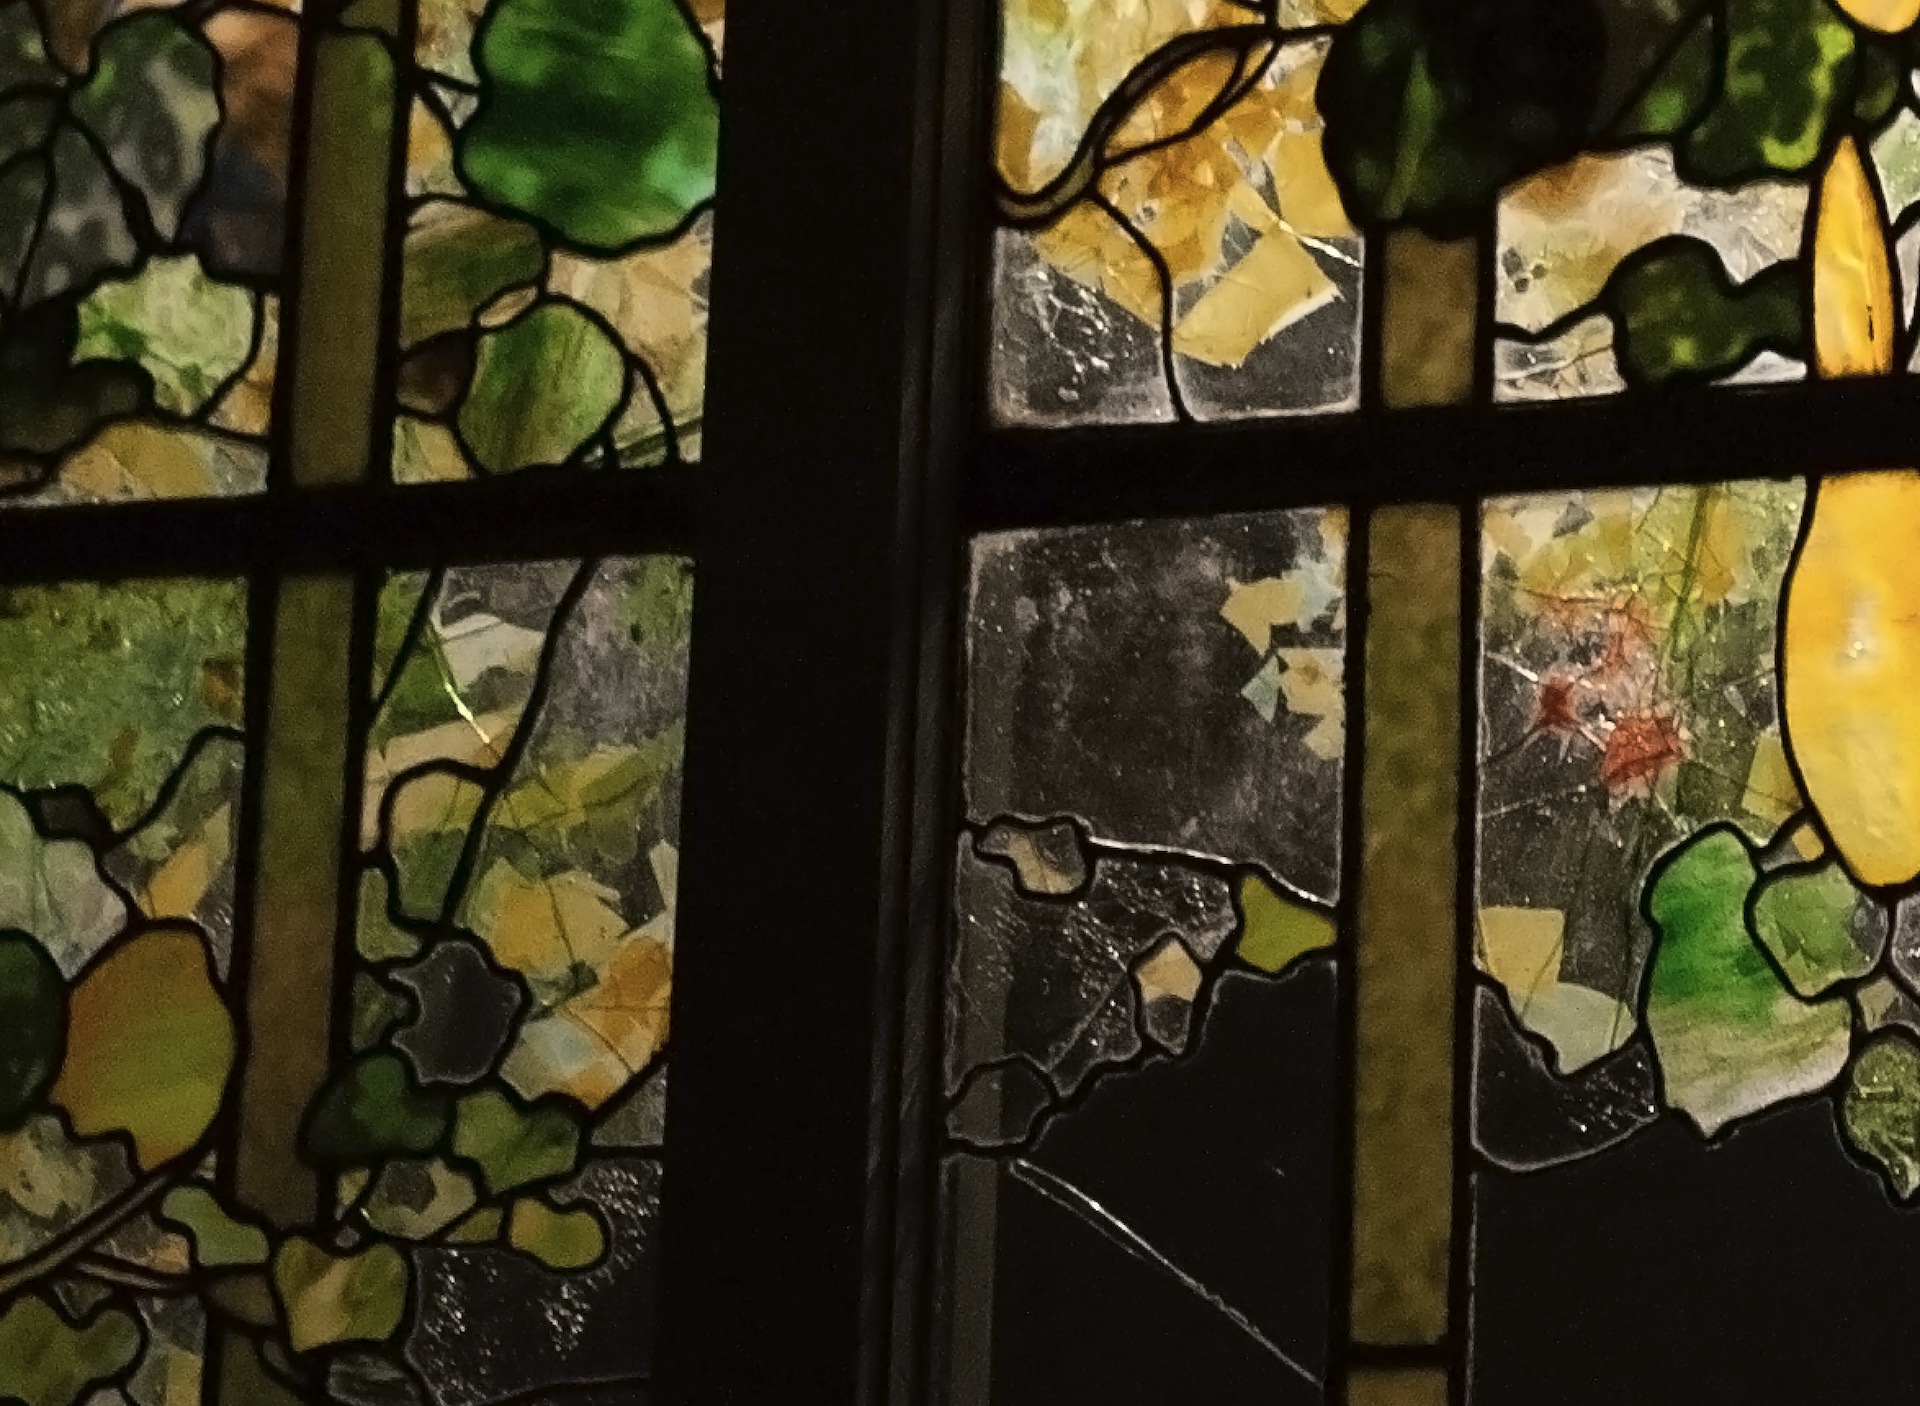
The Reduce Noise filter is easy to use and might work on areas where the noise was concentrated exclusively in darker areas, but it seemed to struggle in luminance noise in the colored areas of our image.
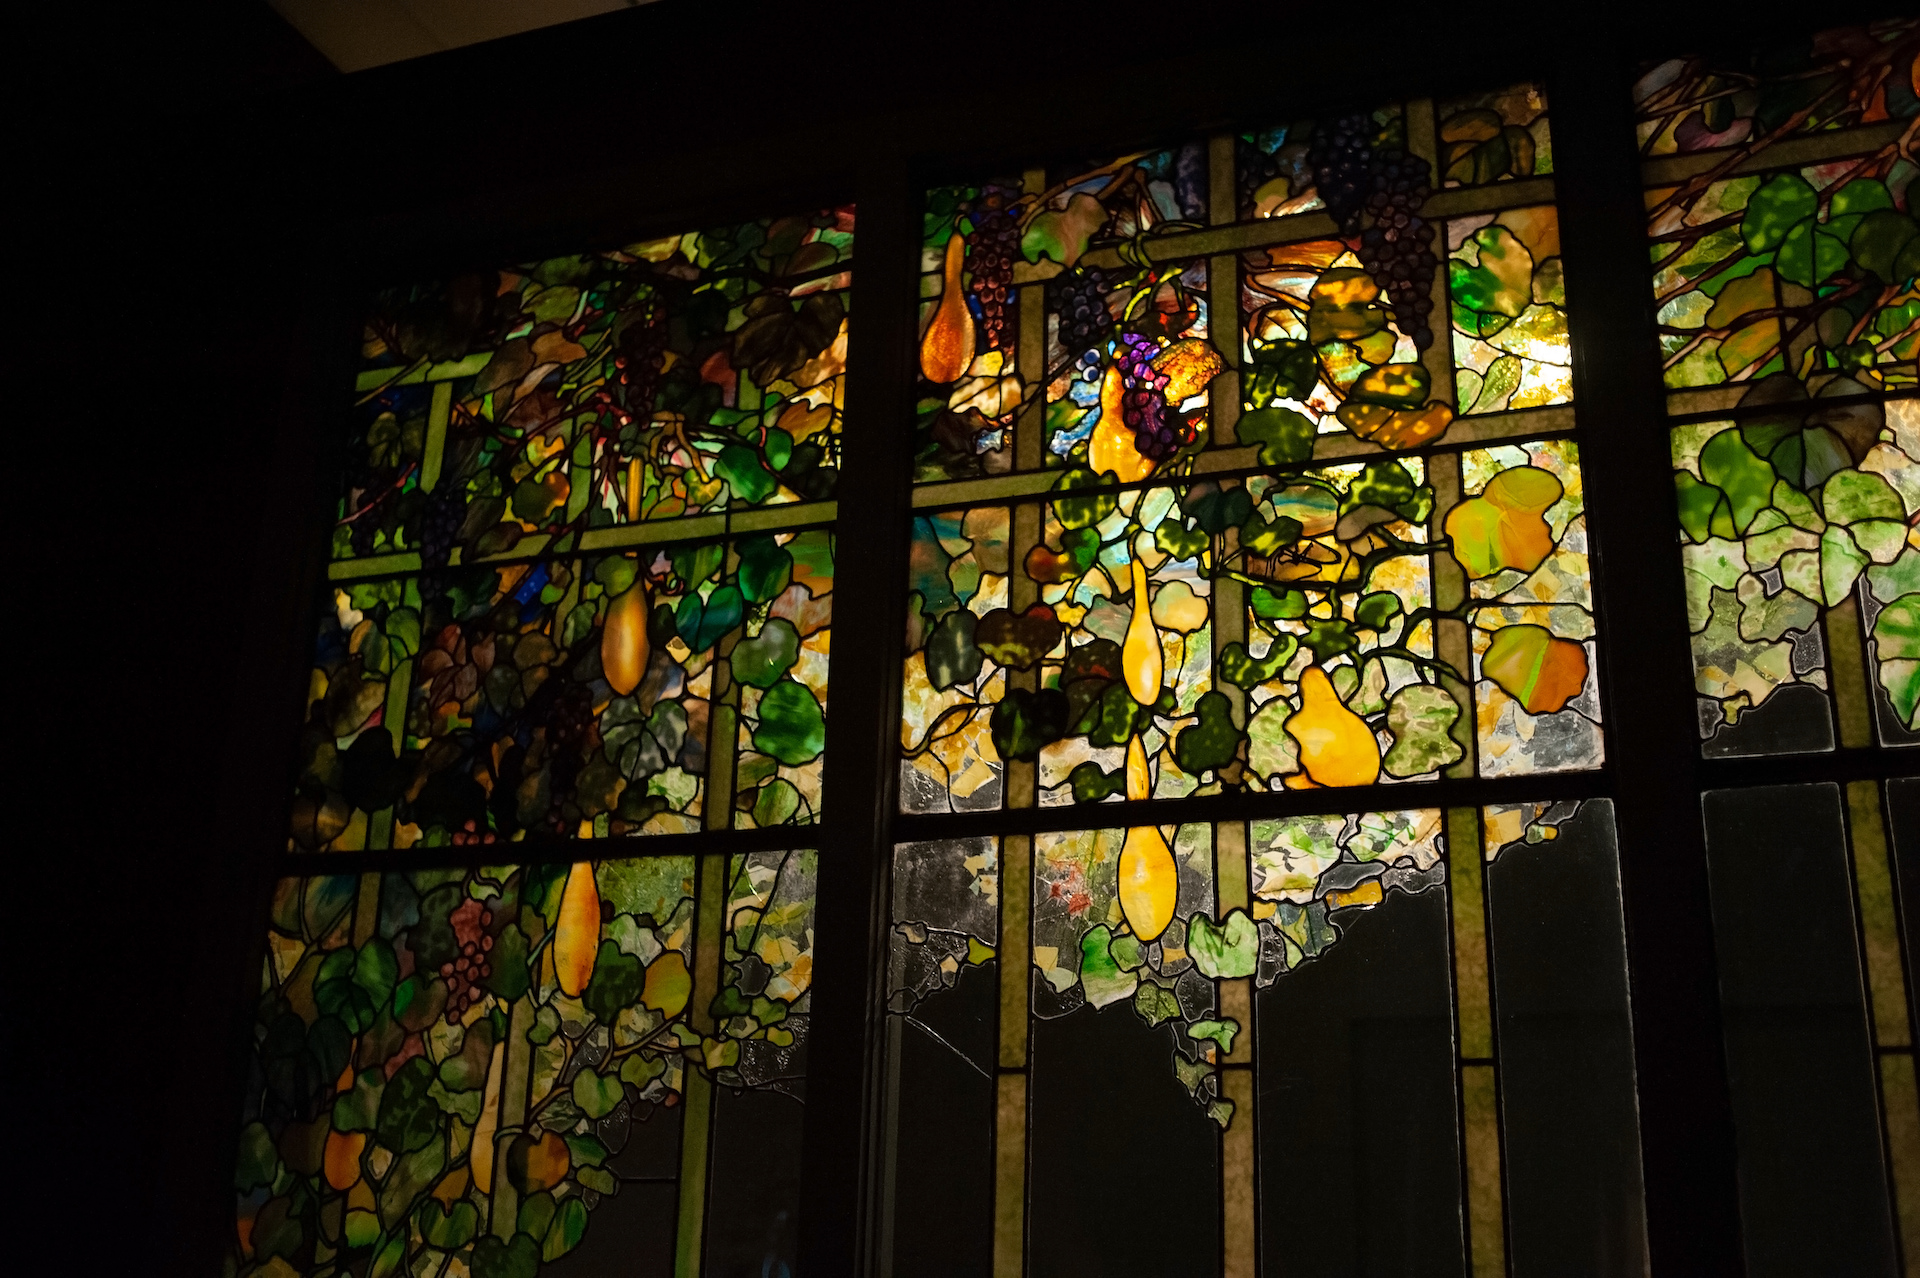
There is also a slight color shift in the full-size image, and the clearer parts of the stained glass look muddled.
Lightroom noise reduction
Next, we attempted to reduce the noise in this image with Adobe Lightroom. Lightroom is an easy-to-understand program with a lot of versatility. However, we noticed some limitations when attempting to use its noise reduction capabilities.

After opening this image in Lightroom, you will use the Noise reduction slider under the detail menu. We had to max out the Noise Reduction slider to achieve any noticeable effect on our image and then had to sharpen a little to attempt to recover detail.
After applying noise reduction via Lightroom, we get this result.

While noise has been reduced across the image, the image has lost most, if not all discernible sharp detail. The details in the sections of the stained glass are basically non-existent. It has increased the contrast in areas that were not necessary and the dark areas of the image have also gained a matte-quality appearance in certain areas, which is more prevalent in the full-size image.

While Lightroom has a lot of strengths as an all-in-one editing platform (along with its batch processing capabilities), the product does not shine in the area of noise reduction.
DxO Prime noise reduction
Next, we attempted to reduce the noise in this image with DxO Prime. When you first open an image in DxO Prime, the program automatically gets to work detecting noise. By default, DxO PhotoLab applies HQ(Fast) noise reduction mode as soon as you open an image in the application. Depending on the type of editing you do, this could be a helpful or a frustrating process.
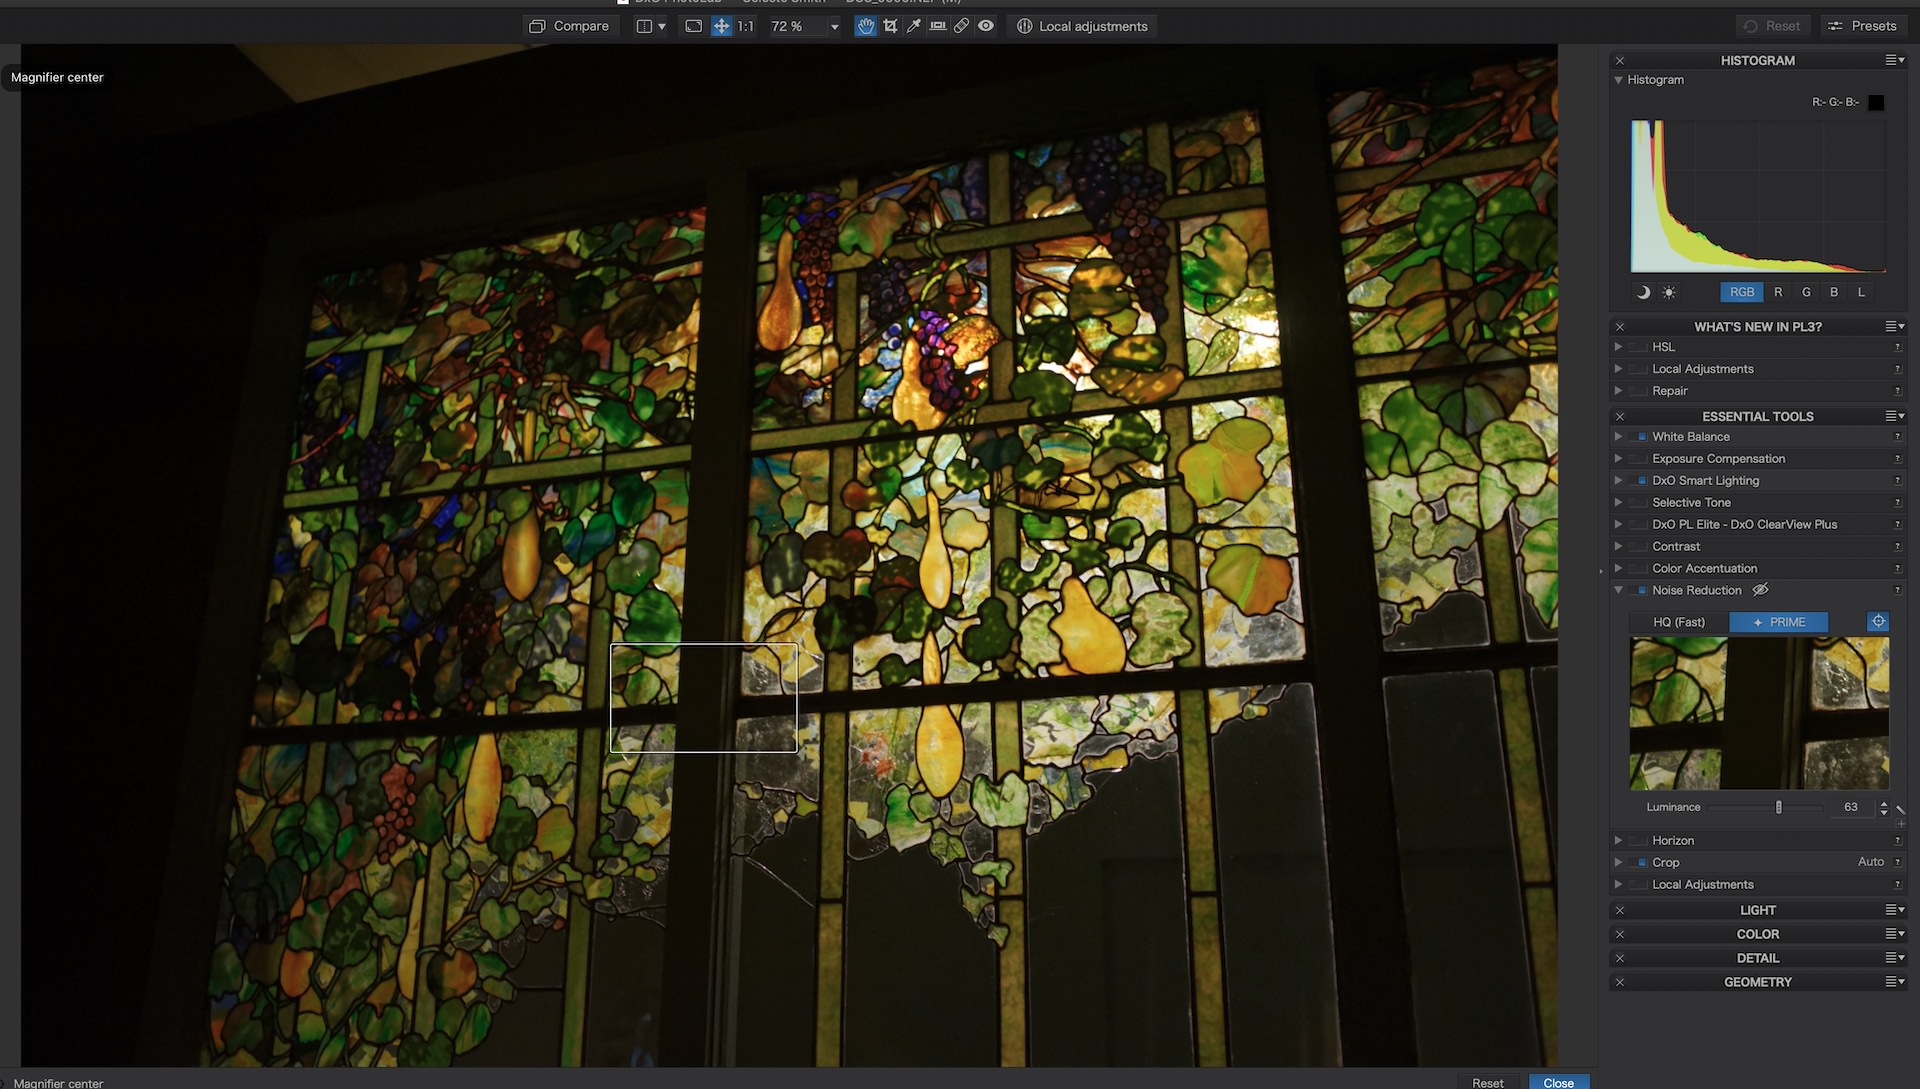
After opening your image in DxO PhotoLab, you will use the noise reduction sub-palette under the Essential Tools menu. To apply, you have to export the image before previewing it. We will cover more on this in a minute.After applying noise reduction via DxO Prime, we get this result.
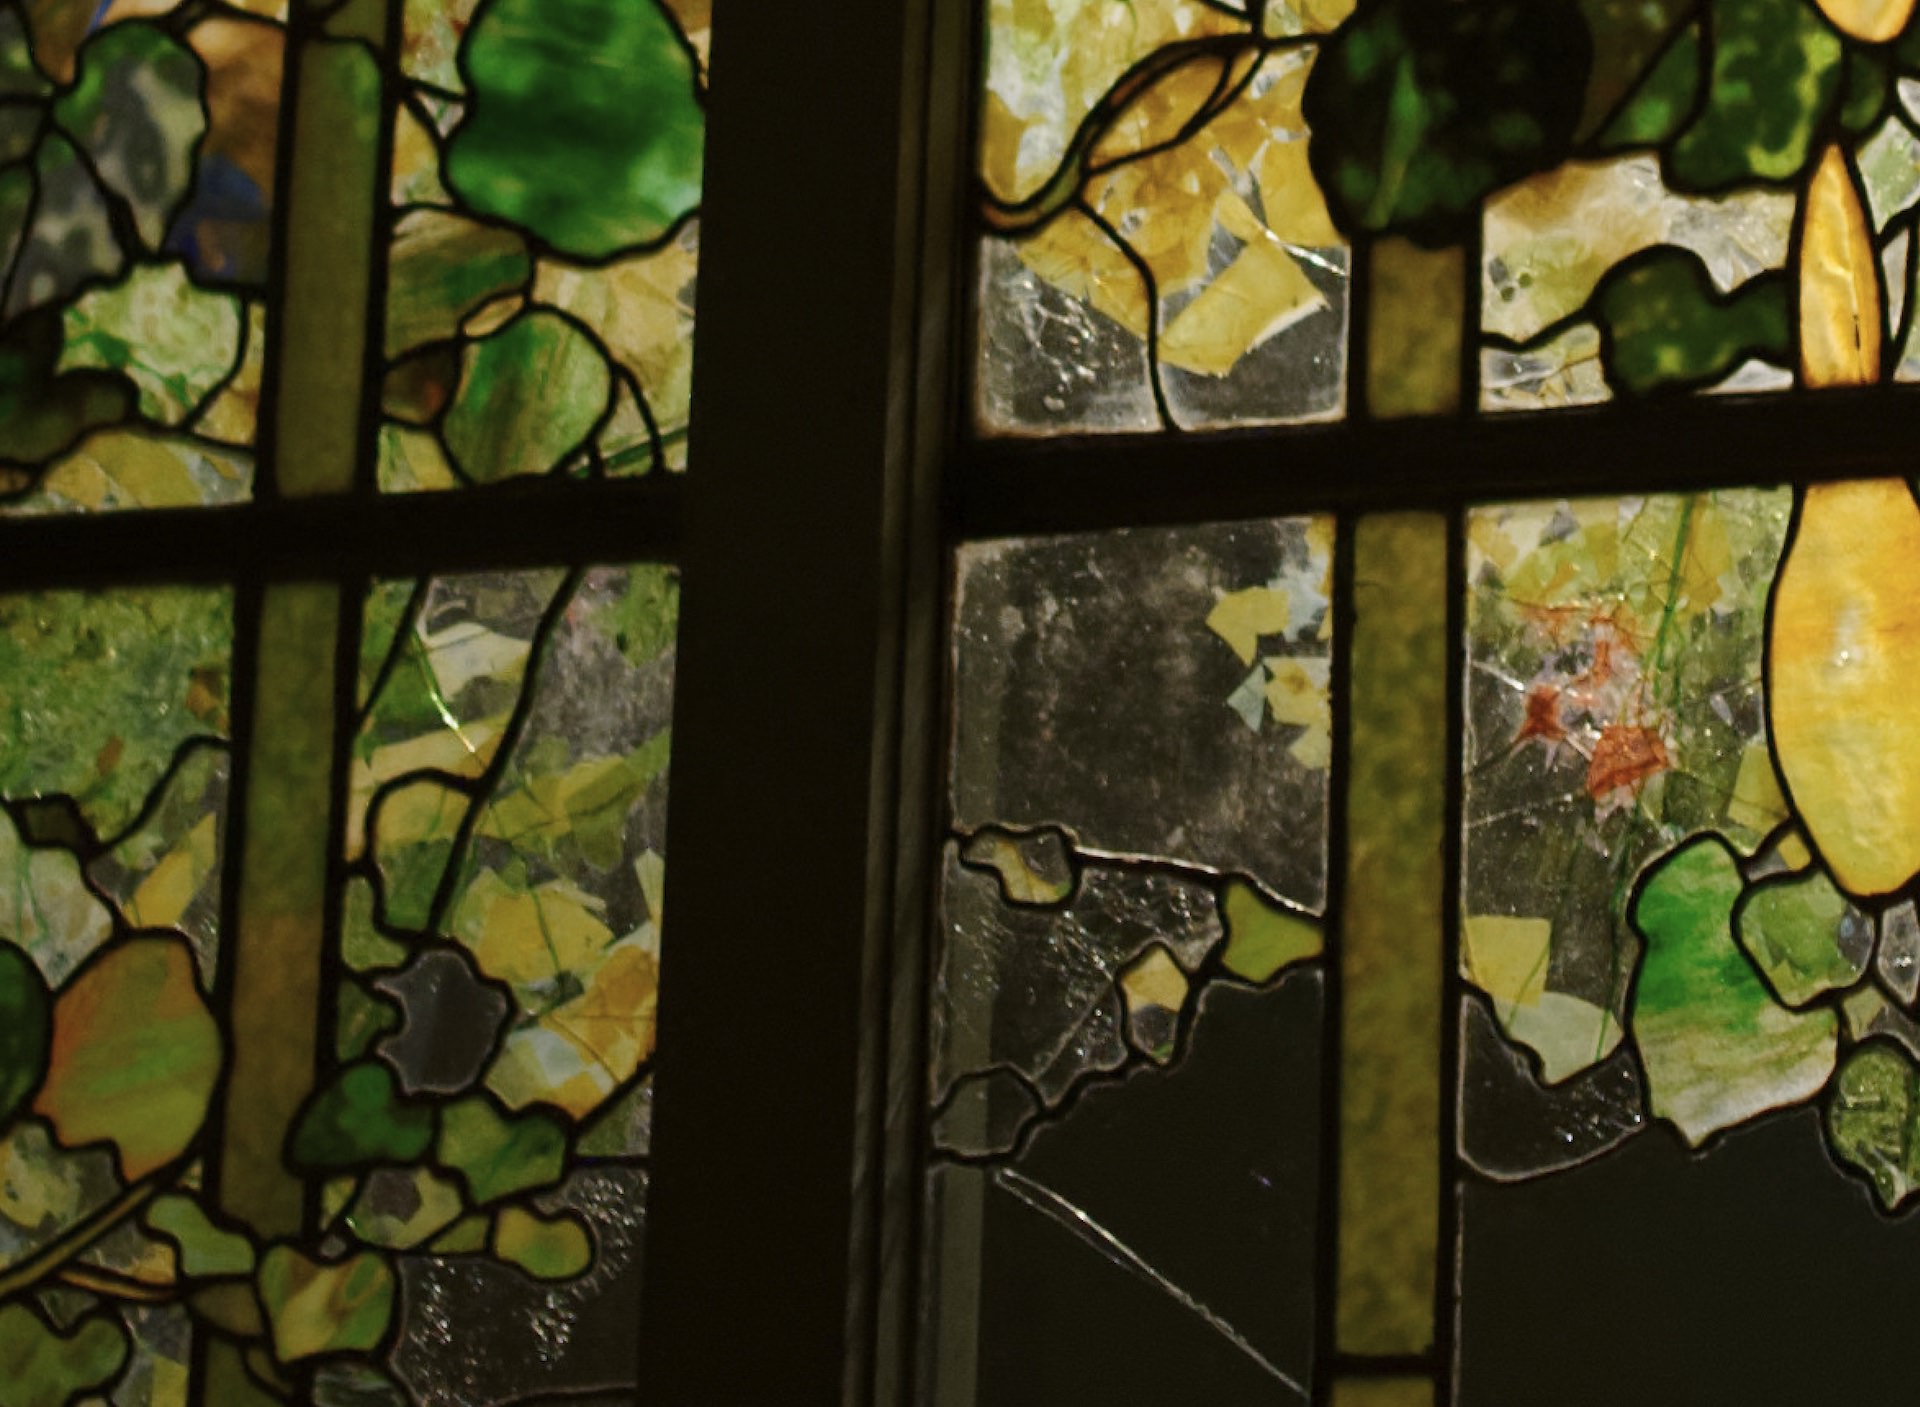
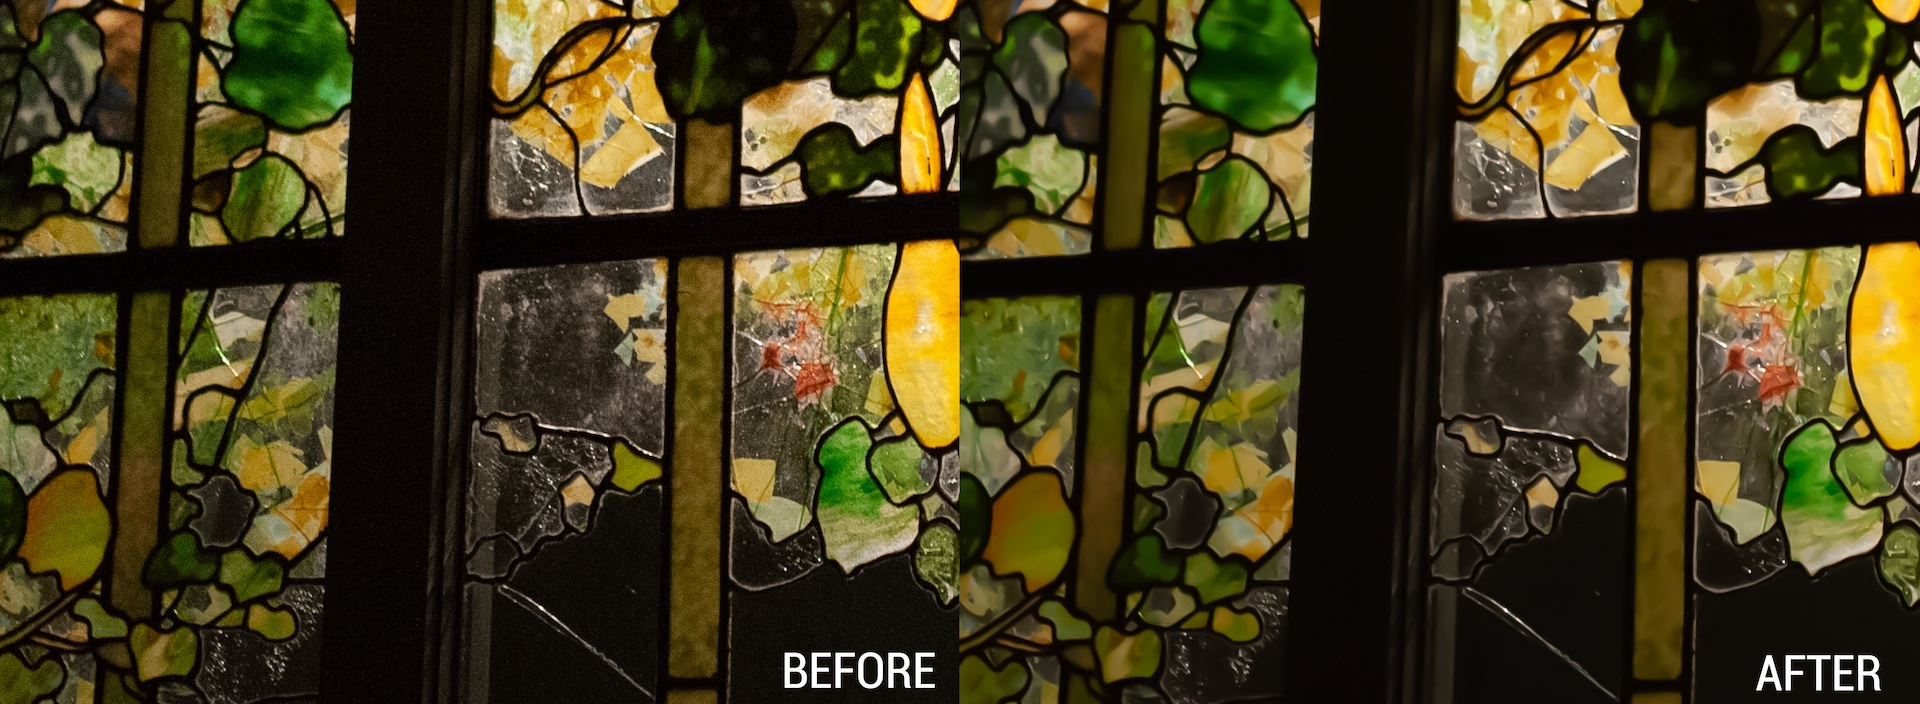
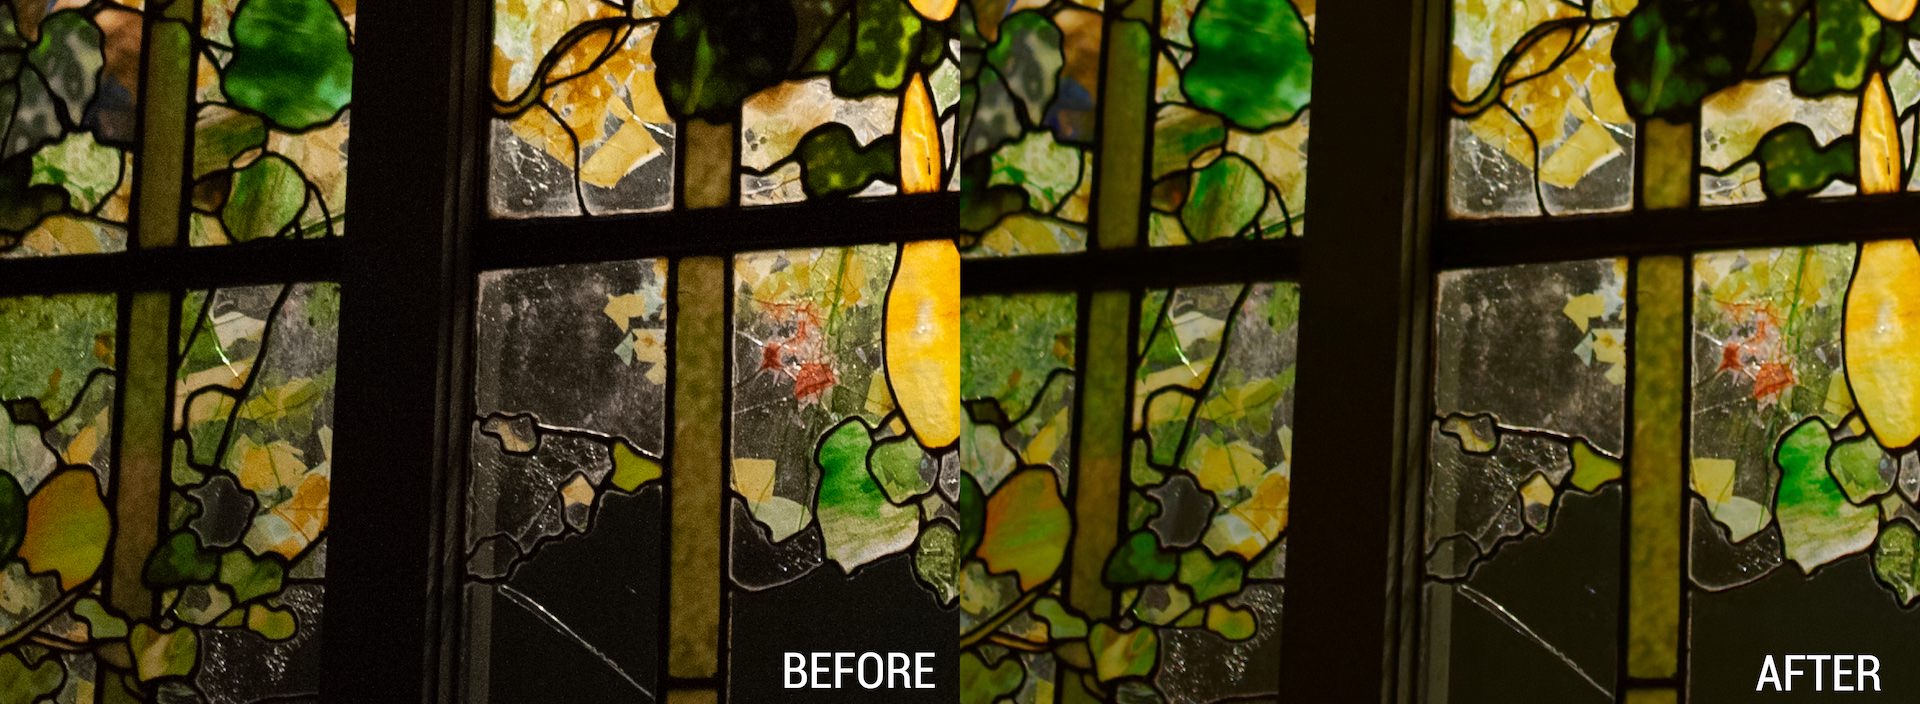
While noise has been reduced across the image, it has also caused the image to lose its sharpness, making portions of the image appear blurry or out of focus. Additionally, it has changed the way greens and reds appear in the photo, overall giving the image a yellowish tinge. In order to restore the original color in the photograph, we would need to adjust color hue and luminance in post. This is especially apparent in the full-size image below.
While there are only a few clicks to get to Noise Reduction in DxO PhotoLab, there are several limitations. DxO Prime within DxO PhotoLab can only be used with RAW files. Moreover, because of its powerful calculations, DxO Prime denoising can only be previewed in the noise reduction sub-palette window, a small screen roughly 260x150 pixels wide. The final noise reduction only takes place for the entire image upon export, which doesn’t allow you to preview the overall effect on your whole image until you are finished editing.
Nik Dfine2 noise reduction
The Nik Collection, also owned by DxO, was our next stop in noise reduction. Once you’ve installed the Nik Collection, a box is visible when you open an image in Photoshop. You will then click on the plugin you want to use, in this case Dfine 2. You can also find this under the Filter menu in Photoshop as well.
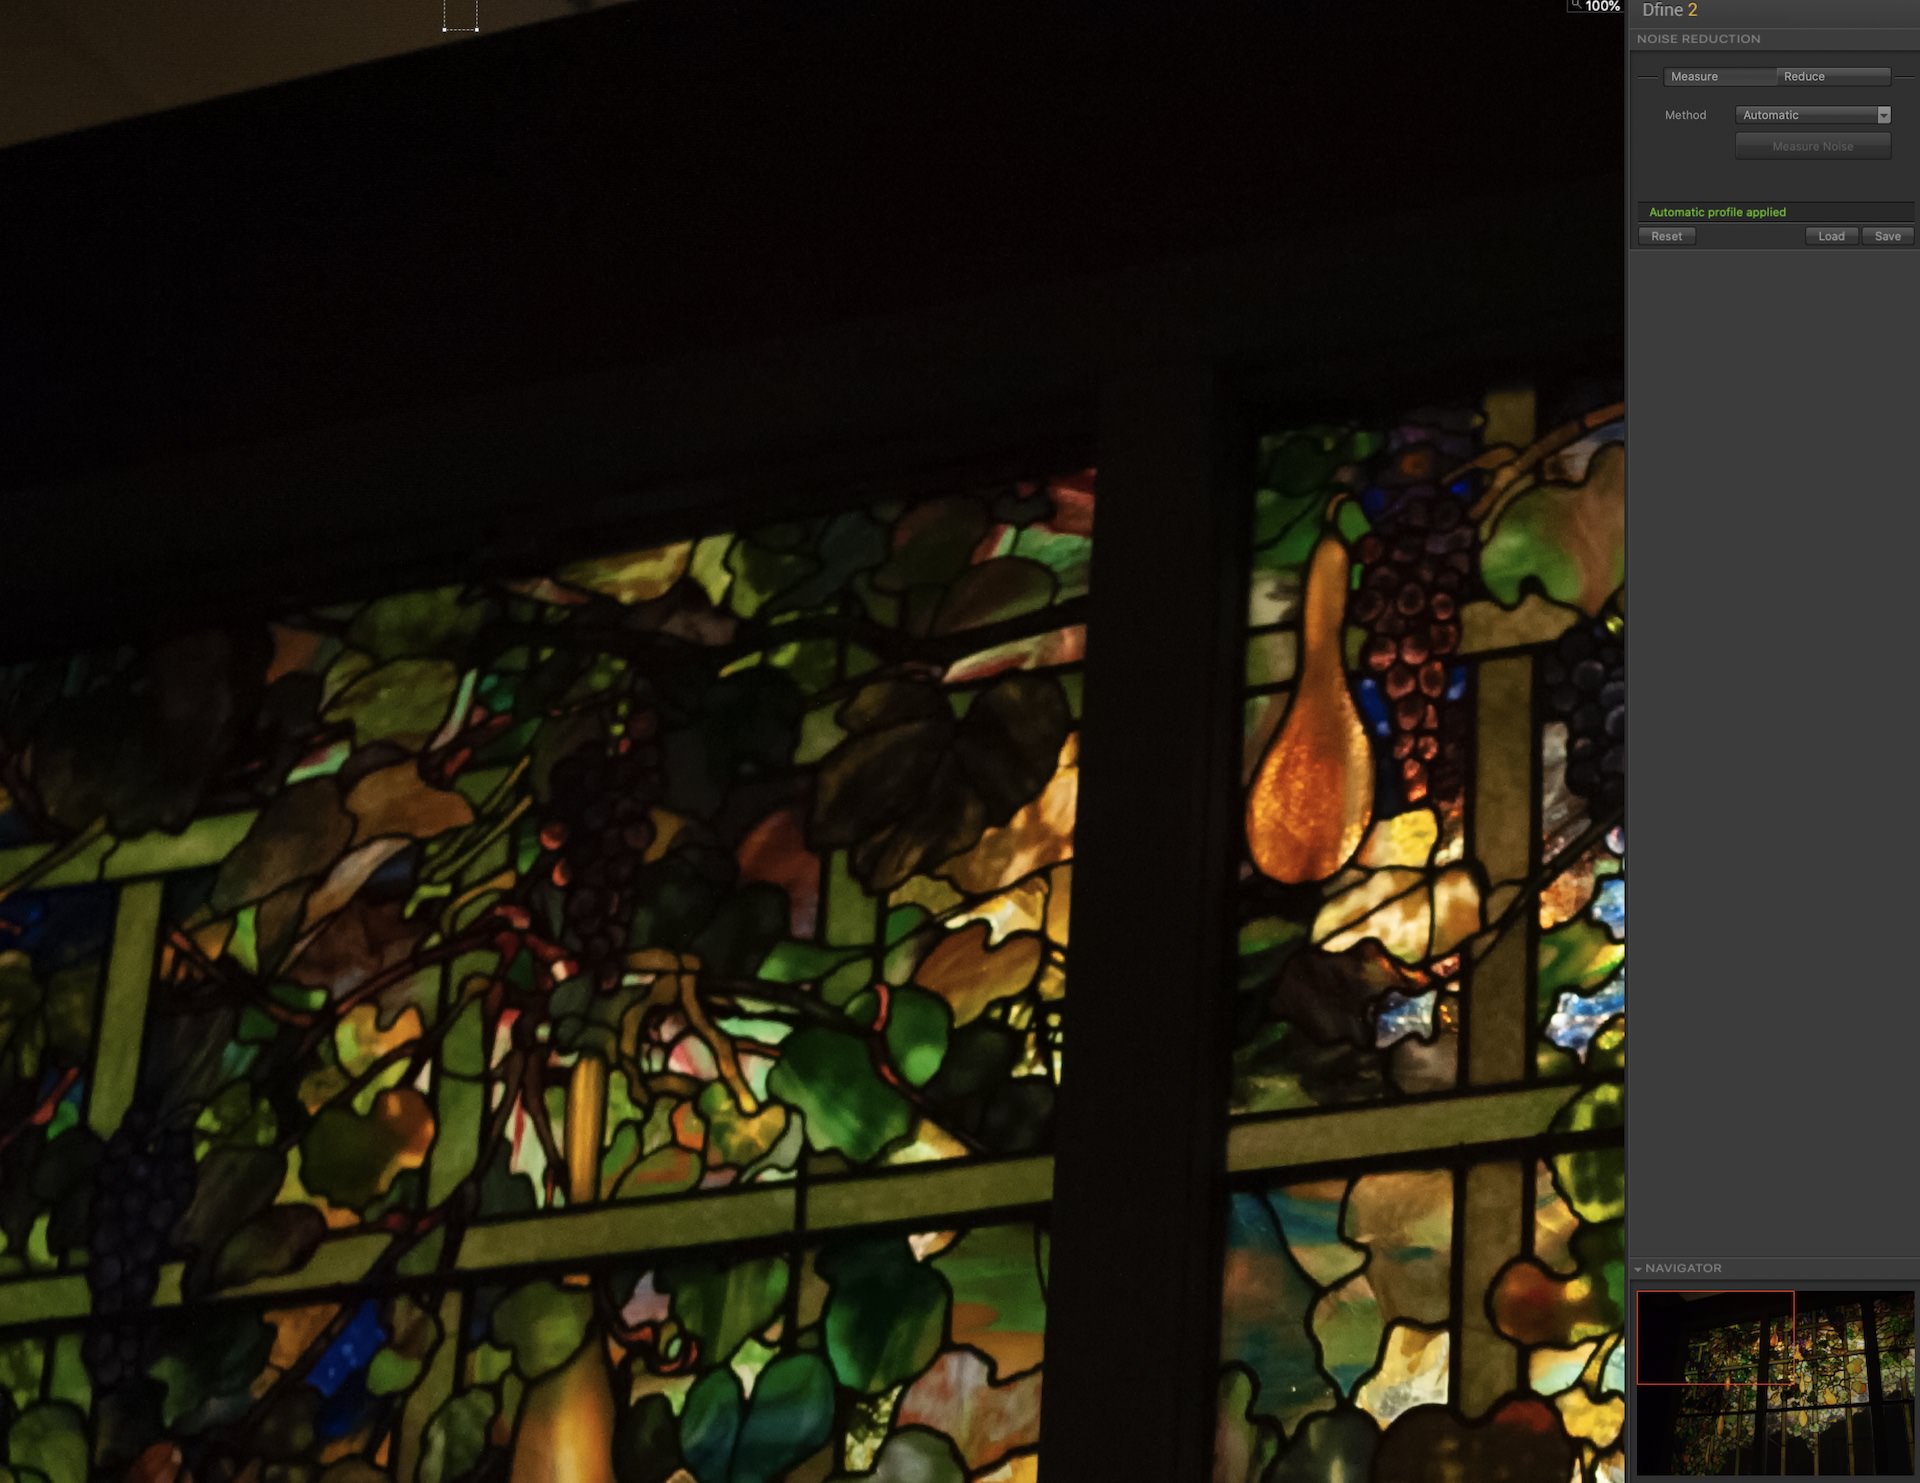
The strength of Dfine 2 is in its ease with which you can vary the level of noise reduction that’s applied across an image. That’s helpful because areas with lots of detail only need a light treatment. However, using the program can be a lot slower than other programs on high-resolution images.
After applying noise reduction via Dfine 2, we get this result.
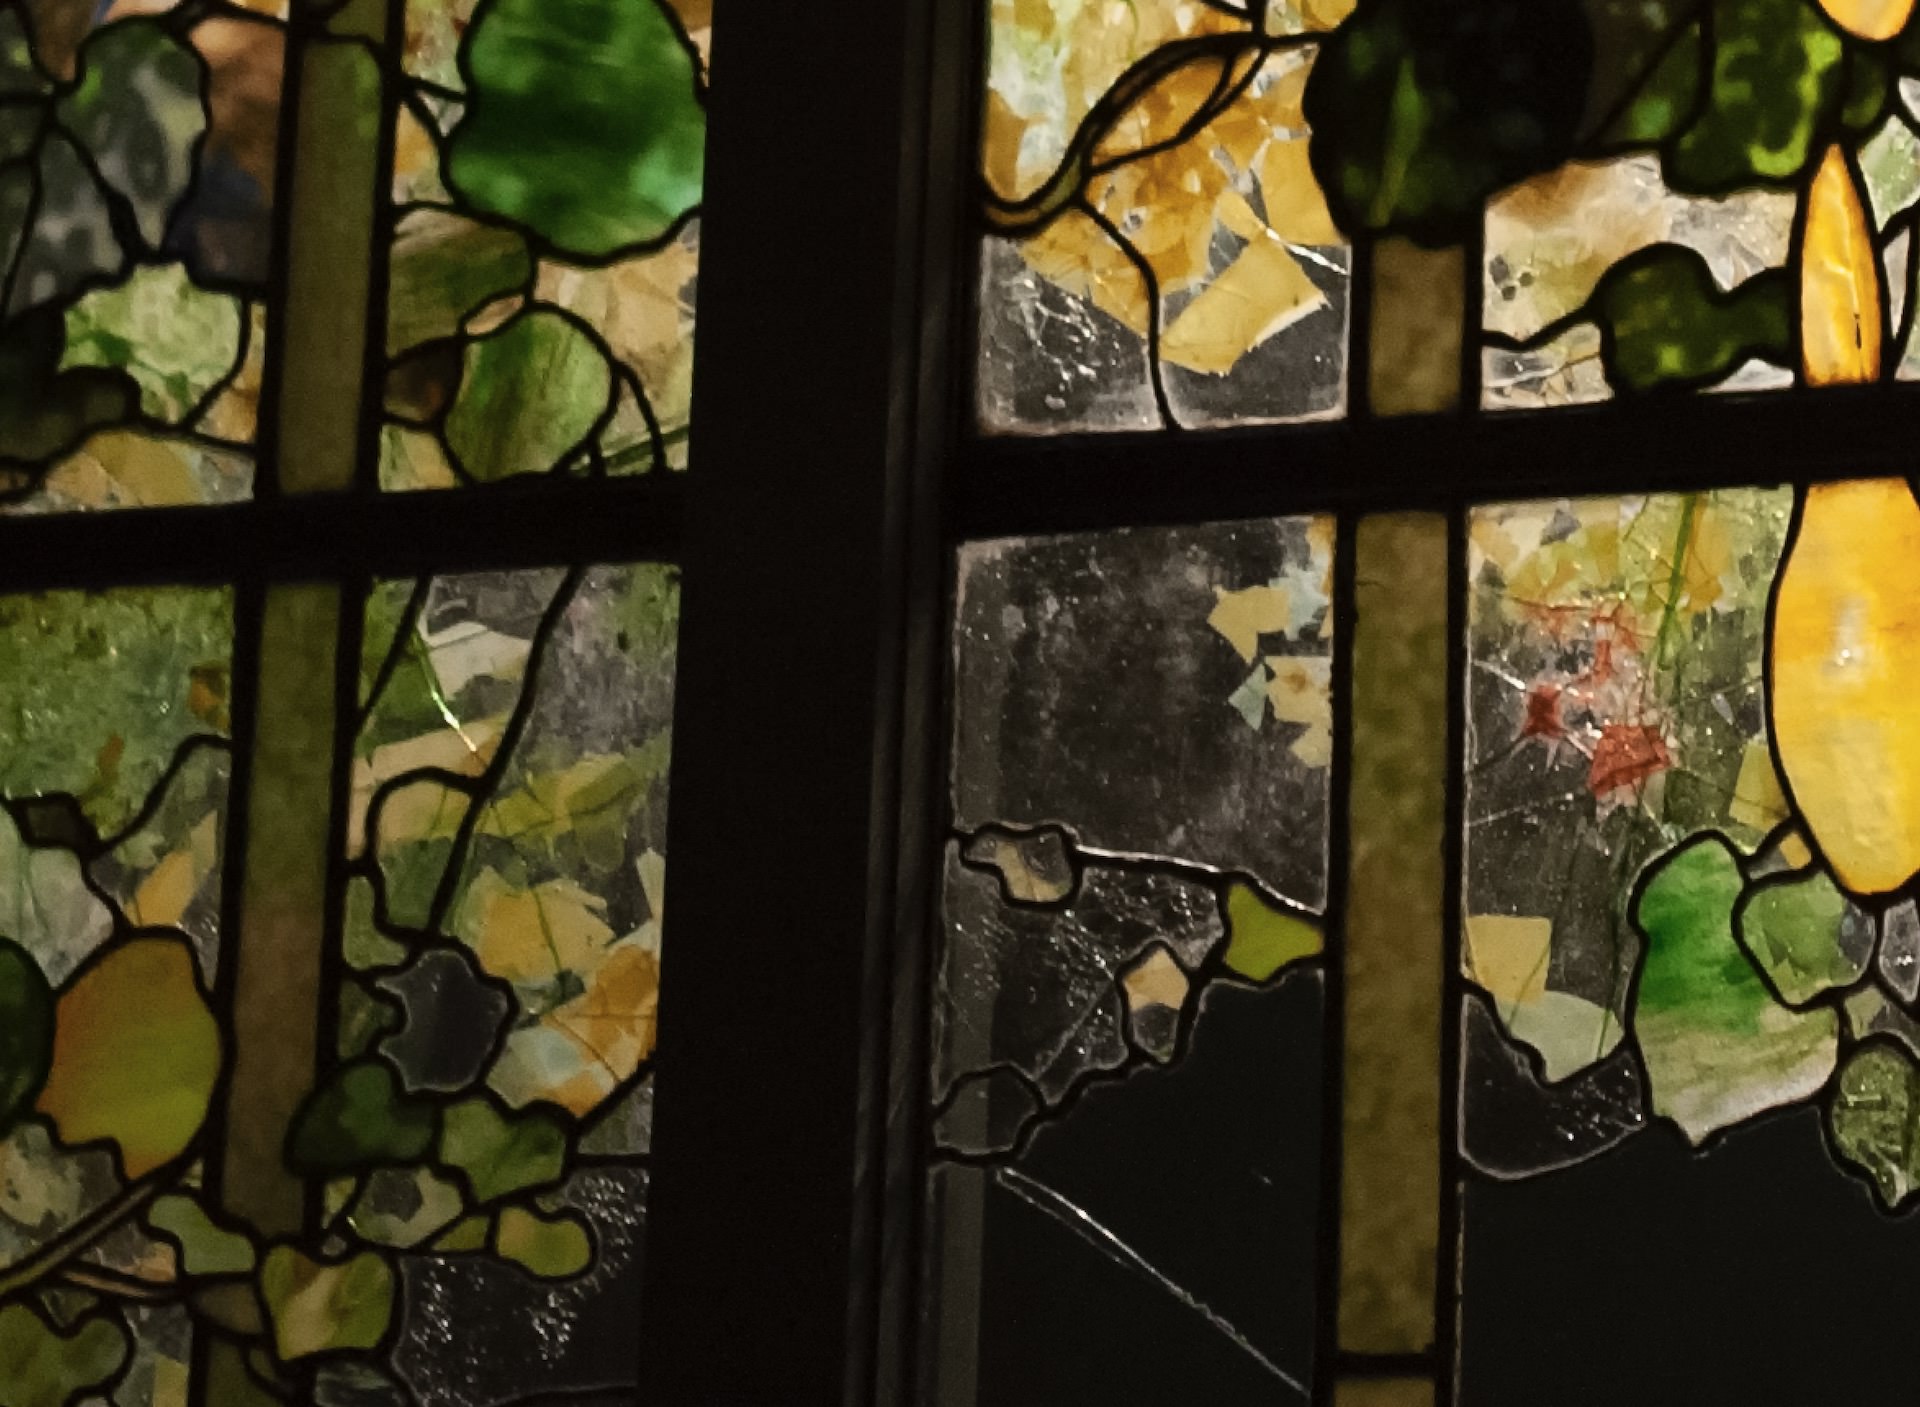
Though the noise has certainly been reduced, certain portions of the lines have now taken on a pixelated quality. Simply put, the quality of the image has gone down. The colors have also been pixelated and smoothed out in areas diminishing the overall sharpness of the photo.
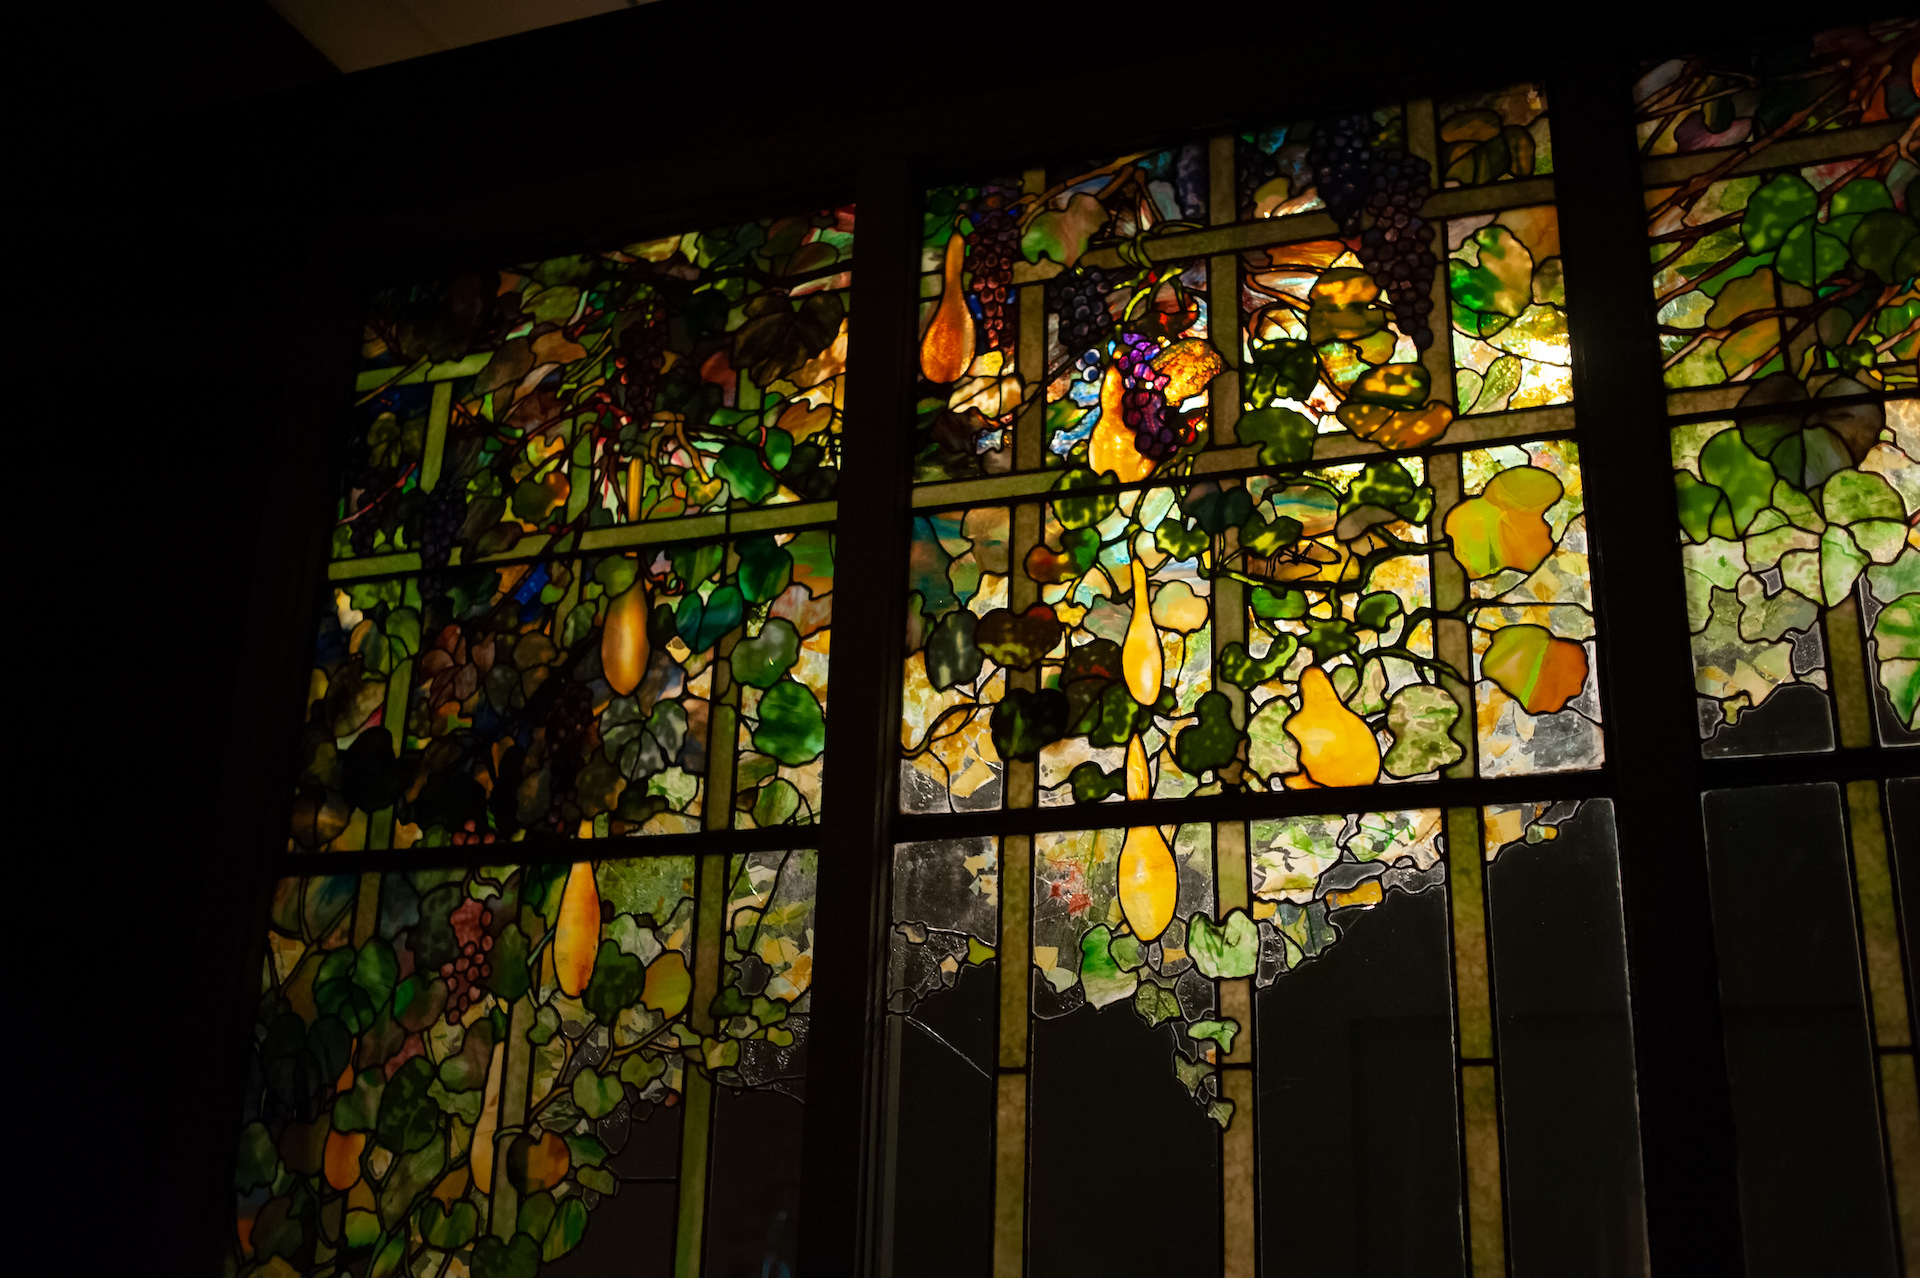
Dfine 2 is easy to understand but hard to use because of its speed in creating its calculations. Overall, this makes the program tough to use even though you are able to refine more with Dfine 2 than with the other programs tested thus far.
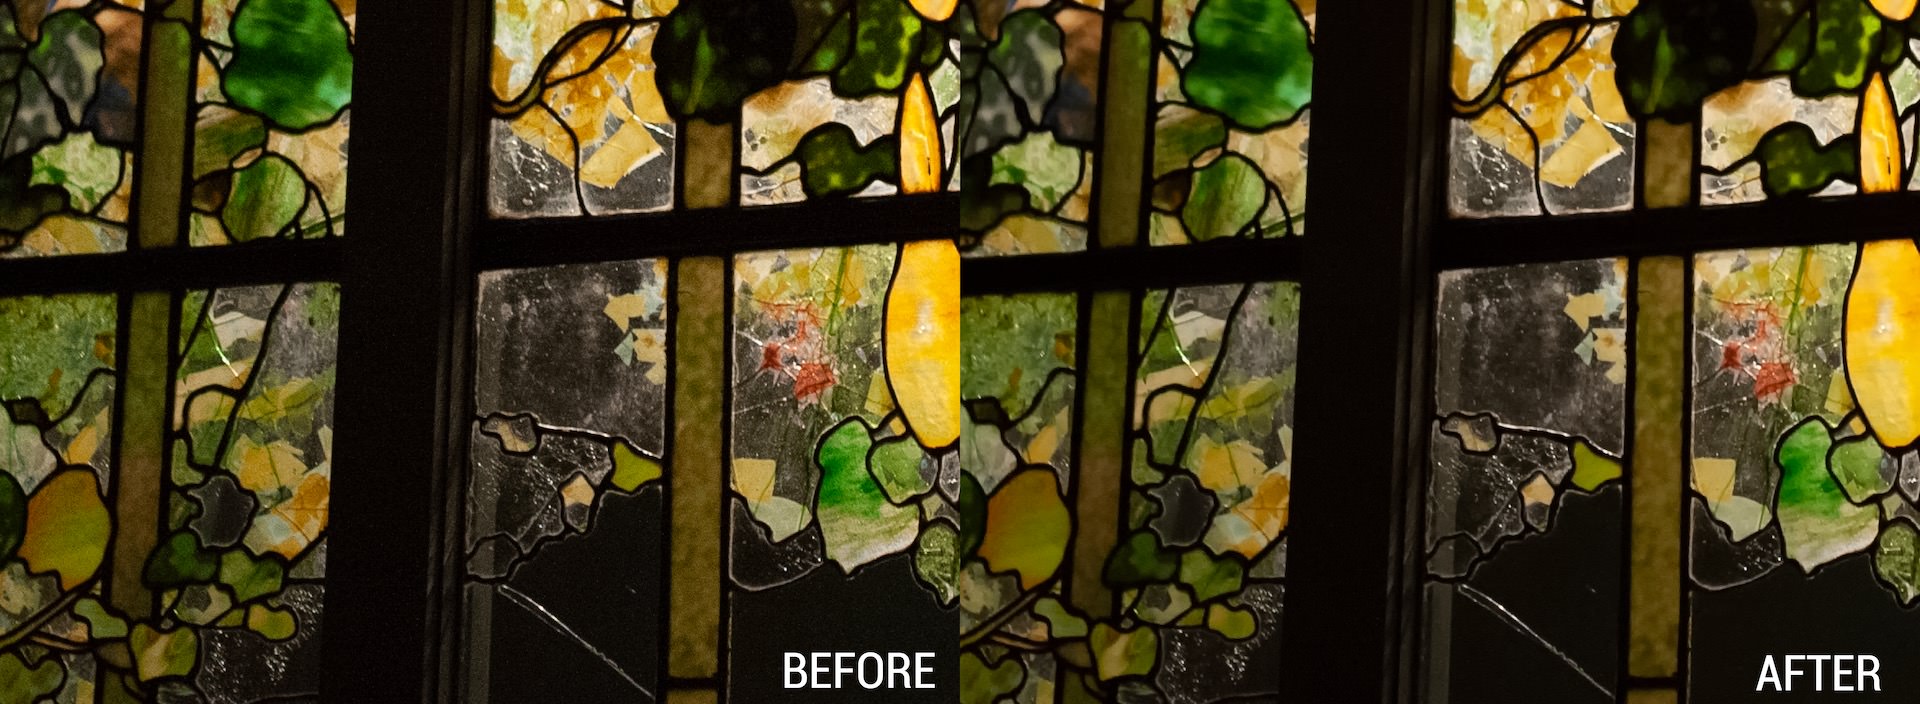
DeNoise AI noise reduction
Unlike the other applications tested here, DeNoise AI works by using data gathered during its machine-learning process: We fed an algorithm millions of noisy/clear images until it actually learned what noise is and how best to remove it. We go into more detail about how machine learning works in DeNoise here.
DeNoise AI is simple to use. Upon opening the application, you are given the option to open an image (or multiple images). After opening your image, you are able to select between two models - DeNoise AI and AI Clear. The DeNoise AI model allows for more tweaking while the AI Clear model has fewer settings, but faster rendering. In this instance, AI Clear worked best to clear the chroma noise in our image. You can also choose the manual or the auto options for ease of use (manual will give you more control while auto is a good starting point if you intend to batch process).
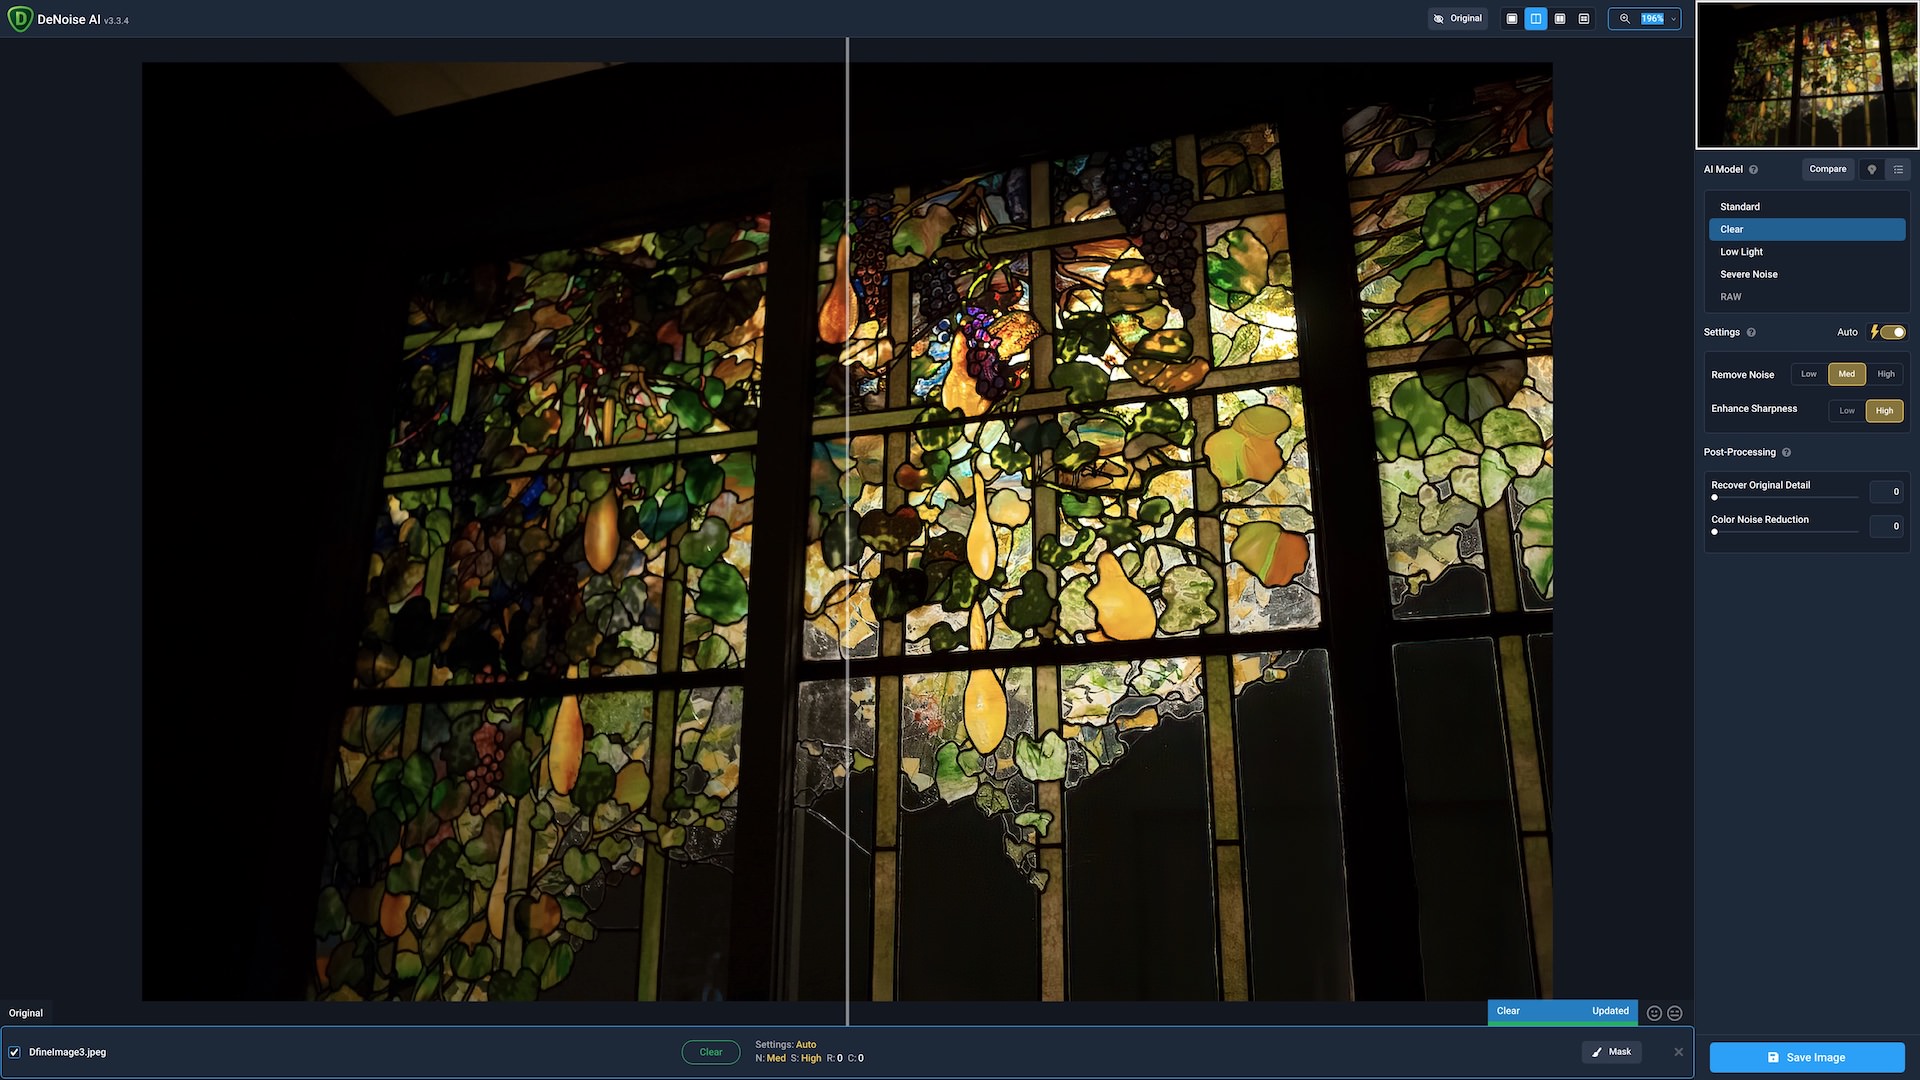
Because our image had some chromatic noise (which you can see if you zoom in on the image), we applied some Chroma Noise Reduction to the image. AI Clear actually incorporates chroma noise into its calculation, but here we decided to add an additional amount to fine-tune it.After applying noise reduction in DeNoise AI, we get this result.
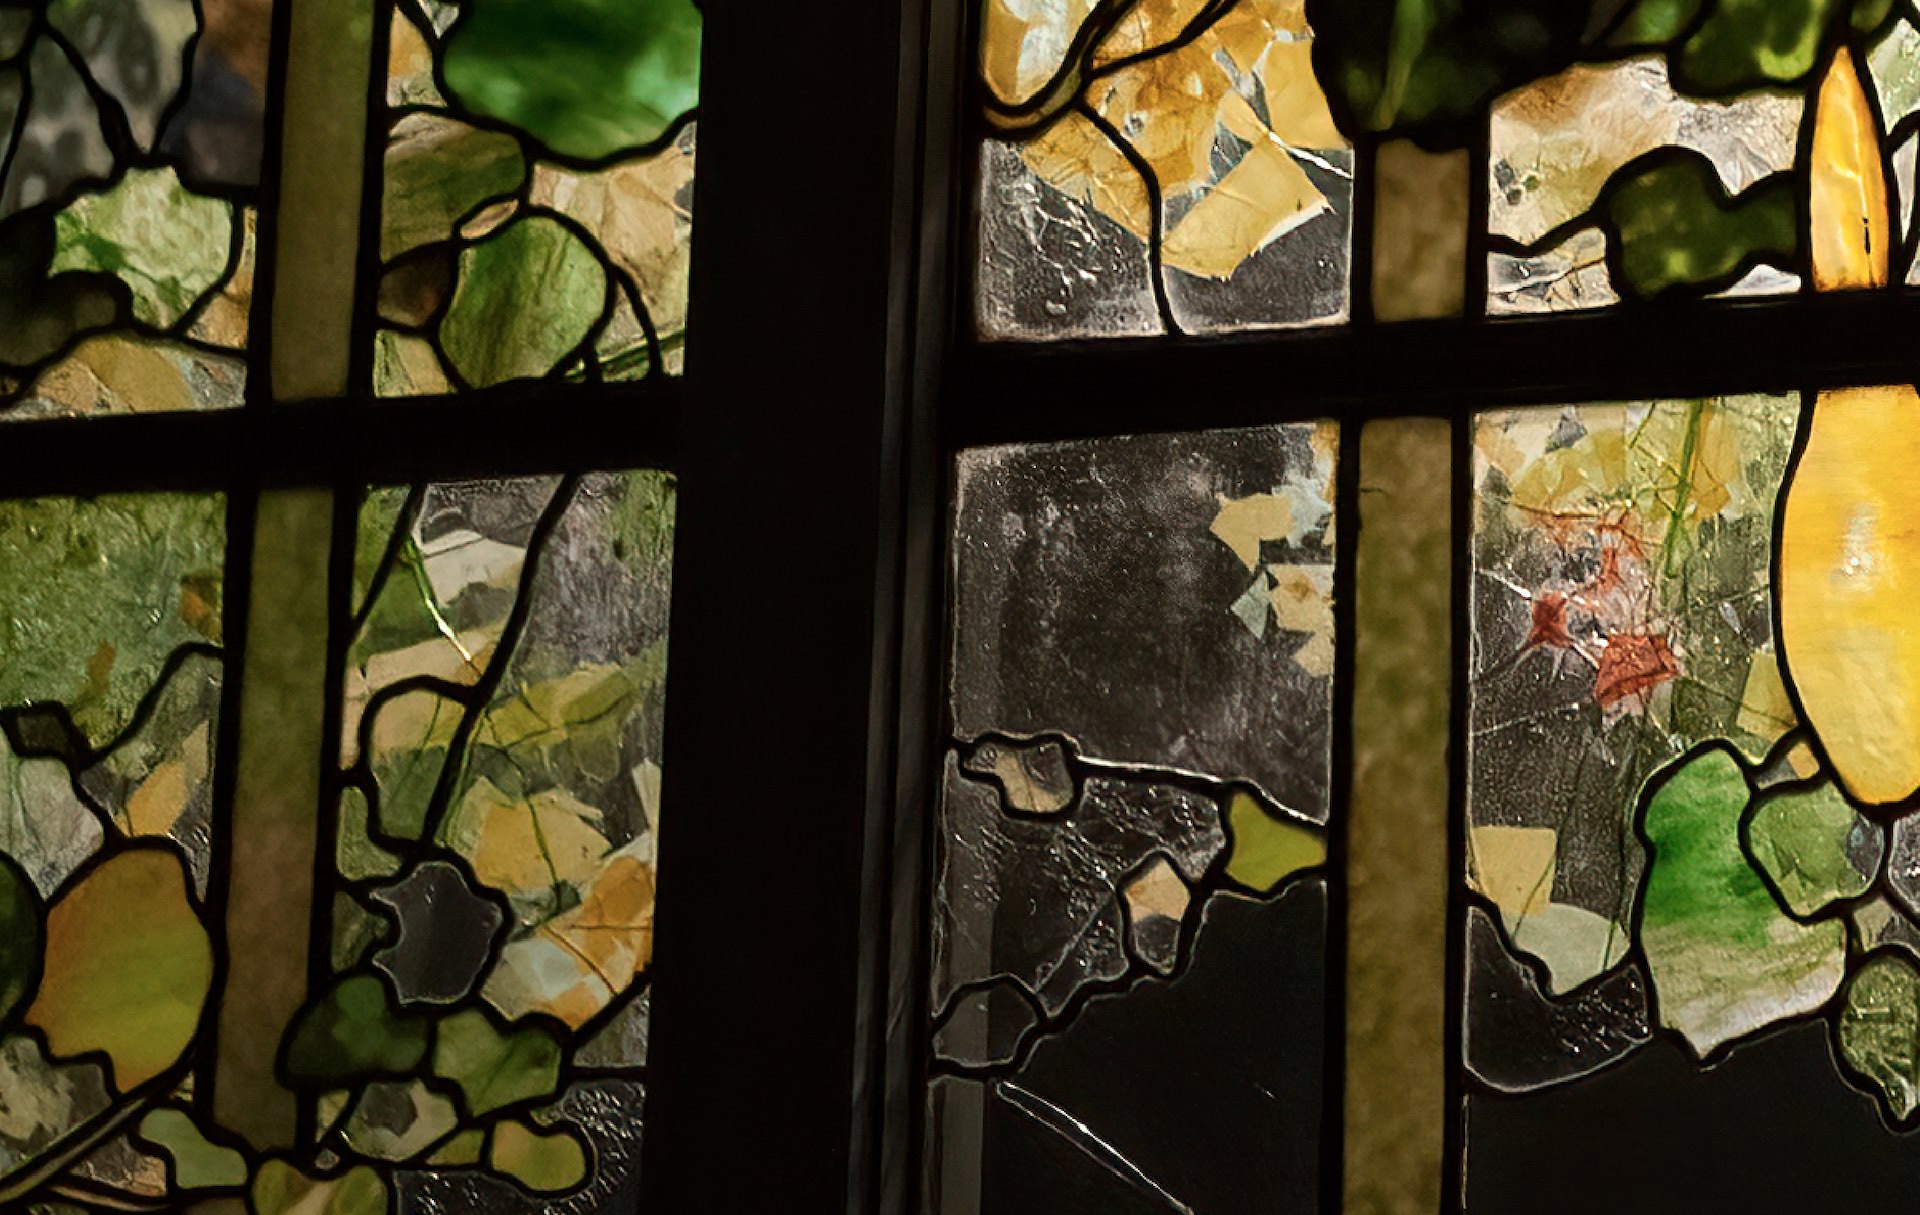
The noise is effectively absent but the details all across the glass remain sharp and clear. The chromatic noise has disappeared and the lines along the panes of glass allow the image to look sharp and clean without a loss of quality. The image does not appear overly smoothed or blurry.
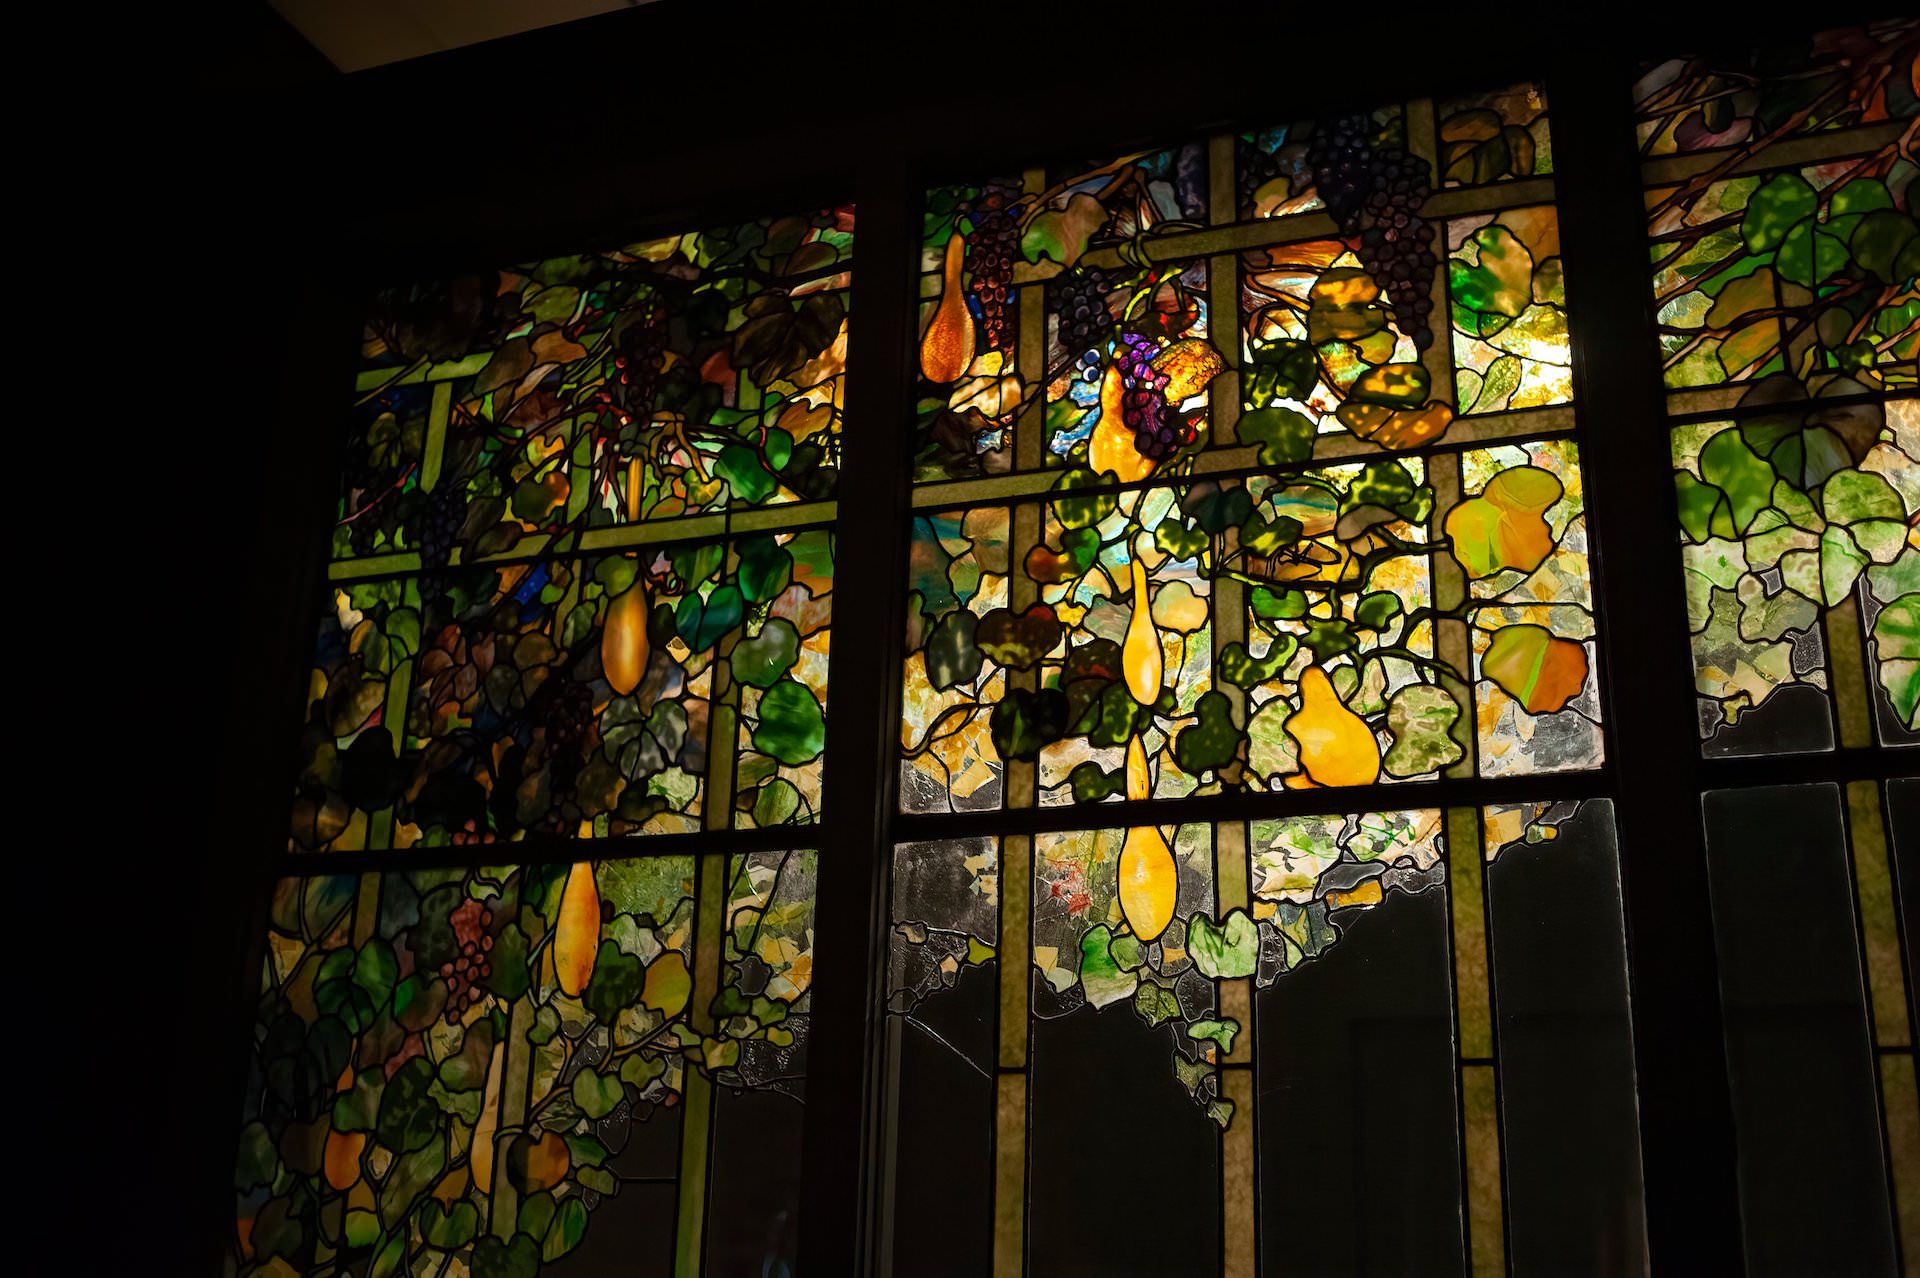
In addition to the noise reduction capabilities, DeNoise AI also features batch processing so you can apply the same level of noise reduction across an entire set of images from the same lighting scenario.
Extreme luminance noise reduction in a JPEG image
Editing a JPEG image is a lot different than editing a raw image. Sometimes, unedited JPEG images can have more noise than unedited raw images. Noise especially becomes a problem when you have a processed image that has lost some quality. Let’s look at an extreme example below.

We took this image and ran it three different programs - Photoshop’s reduce noise filter, Camera Raw, and DeNoise AI. After processing the image and attempting to correct for noise, these were the results.
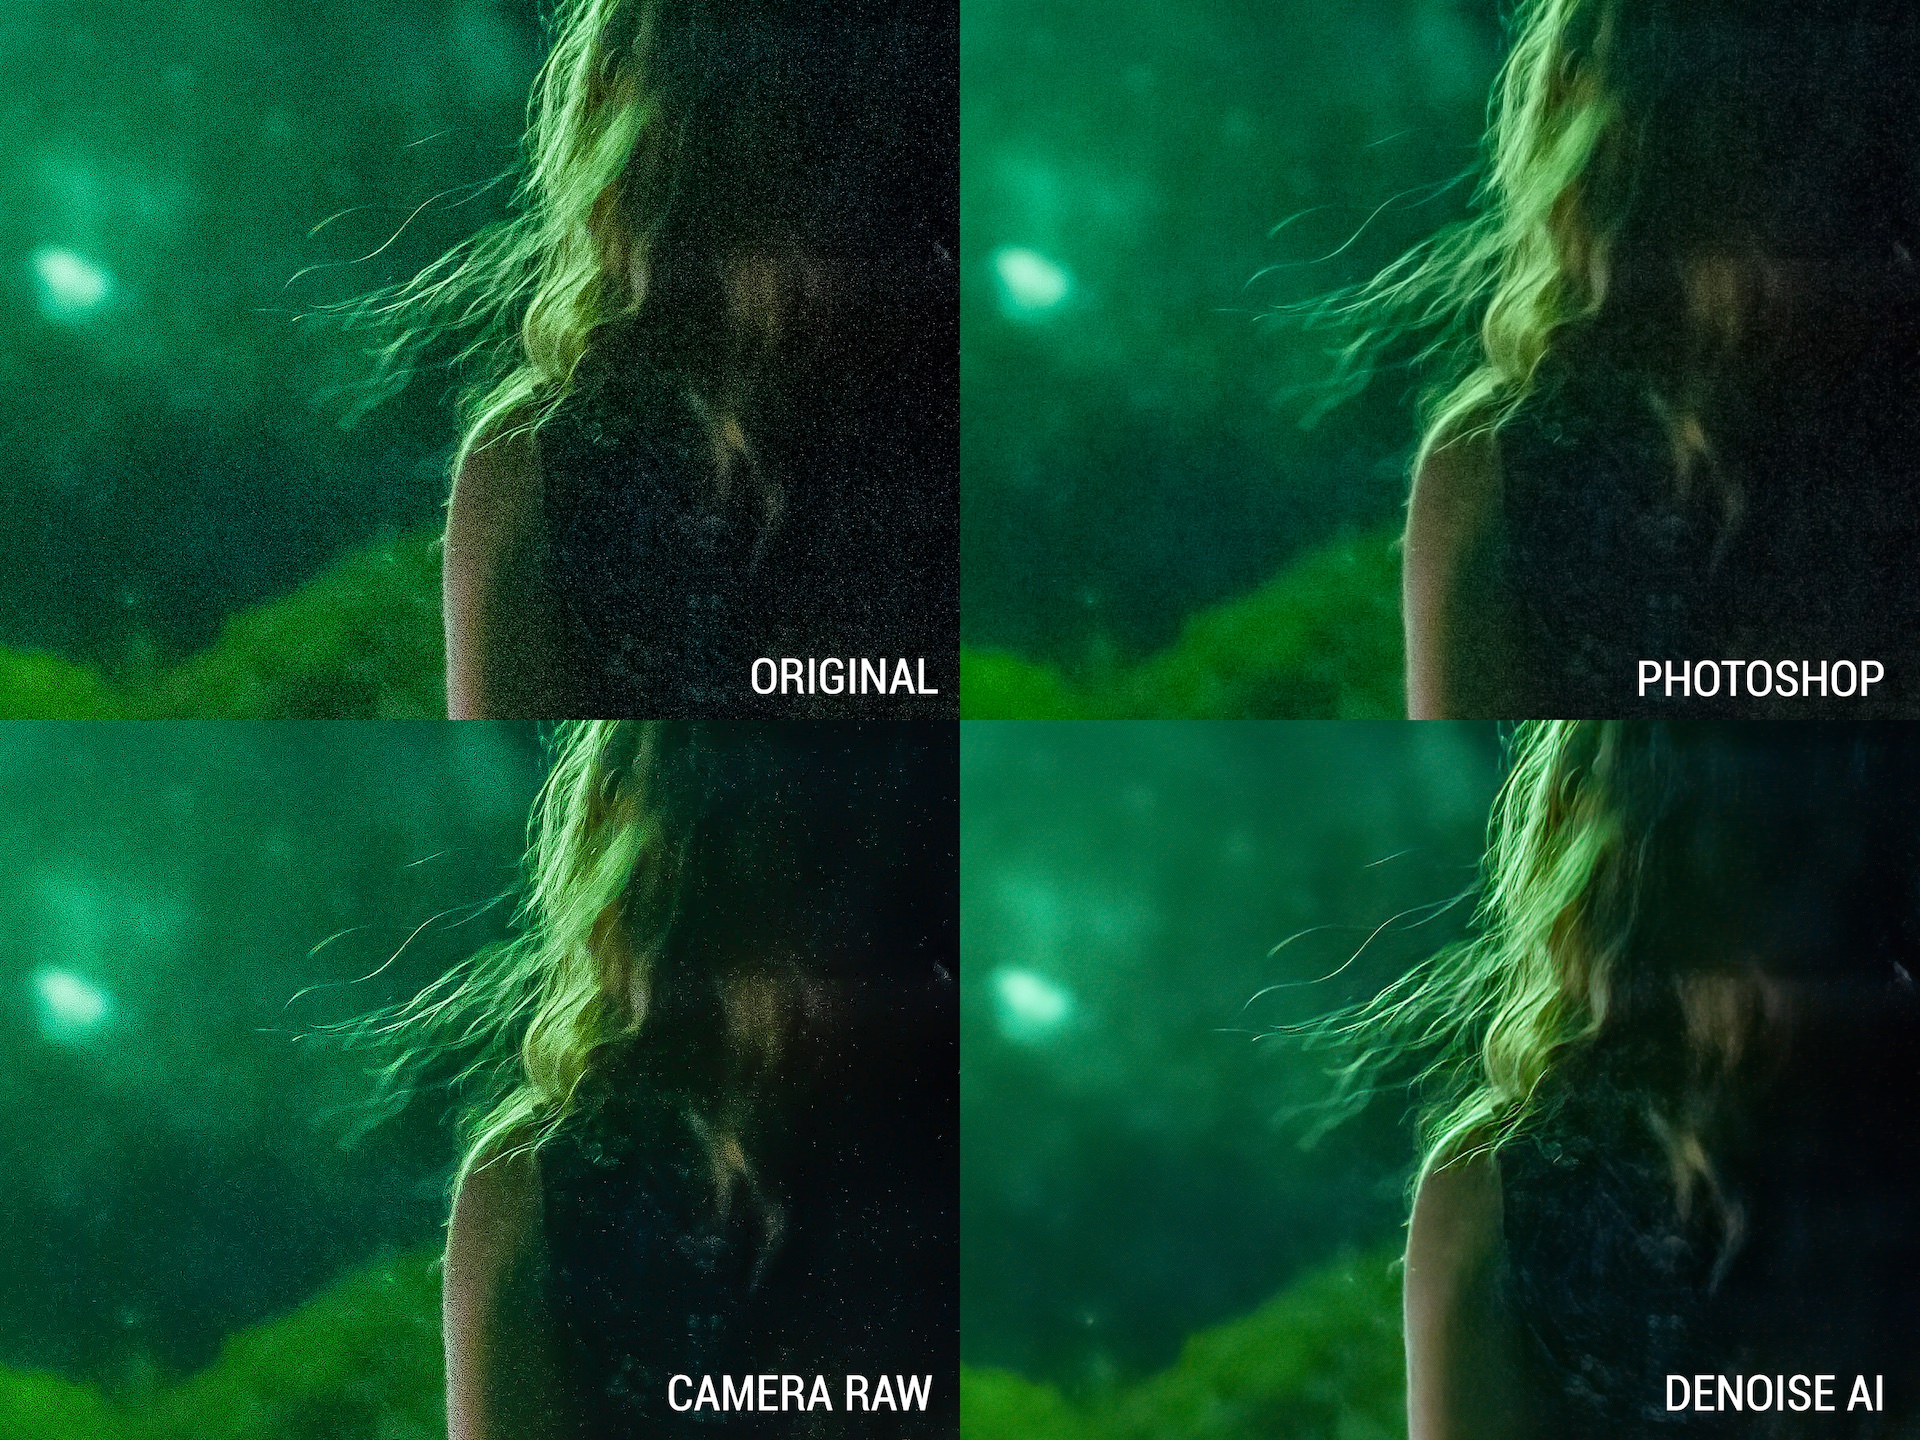
While Photoshop removed a lot of the noise, it also stripped the photo of sharp details like the strands of hair in the image. It has also taken on a muddled quality that makes the entire image look blurry. In Camera Raw, even pushing the luminance slider as far as it could go, it still couldn’t entirely remove noise from almost any area of the image. Though it retains some of the finer details, they are hidden behind noise.
After processing the image through DeNoise AI, the sharpness of the hair is more defined and noticeable. The noise is almost entirely gone from the image in a way that allows you to easily separate the background from the foreground. It even enhanced certain details in the shirt that wasn’t visible in the initial image.
Here was the final result after using DeNoise AI.
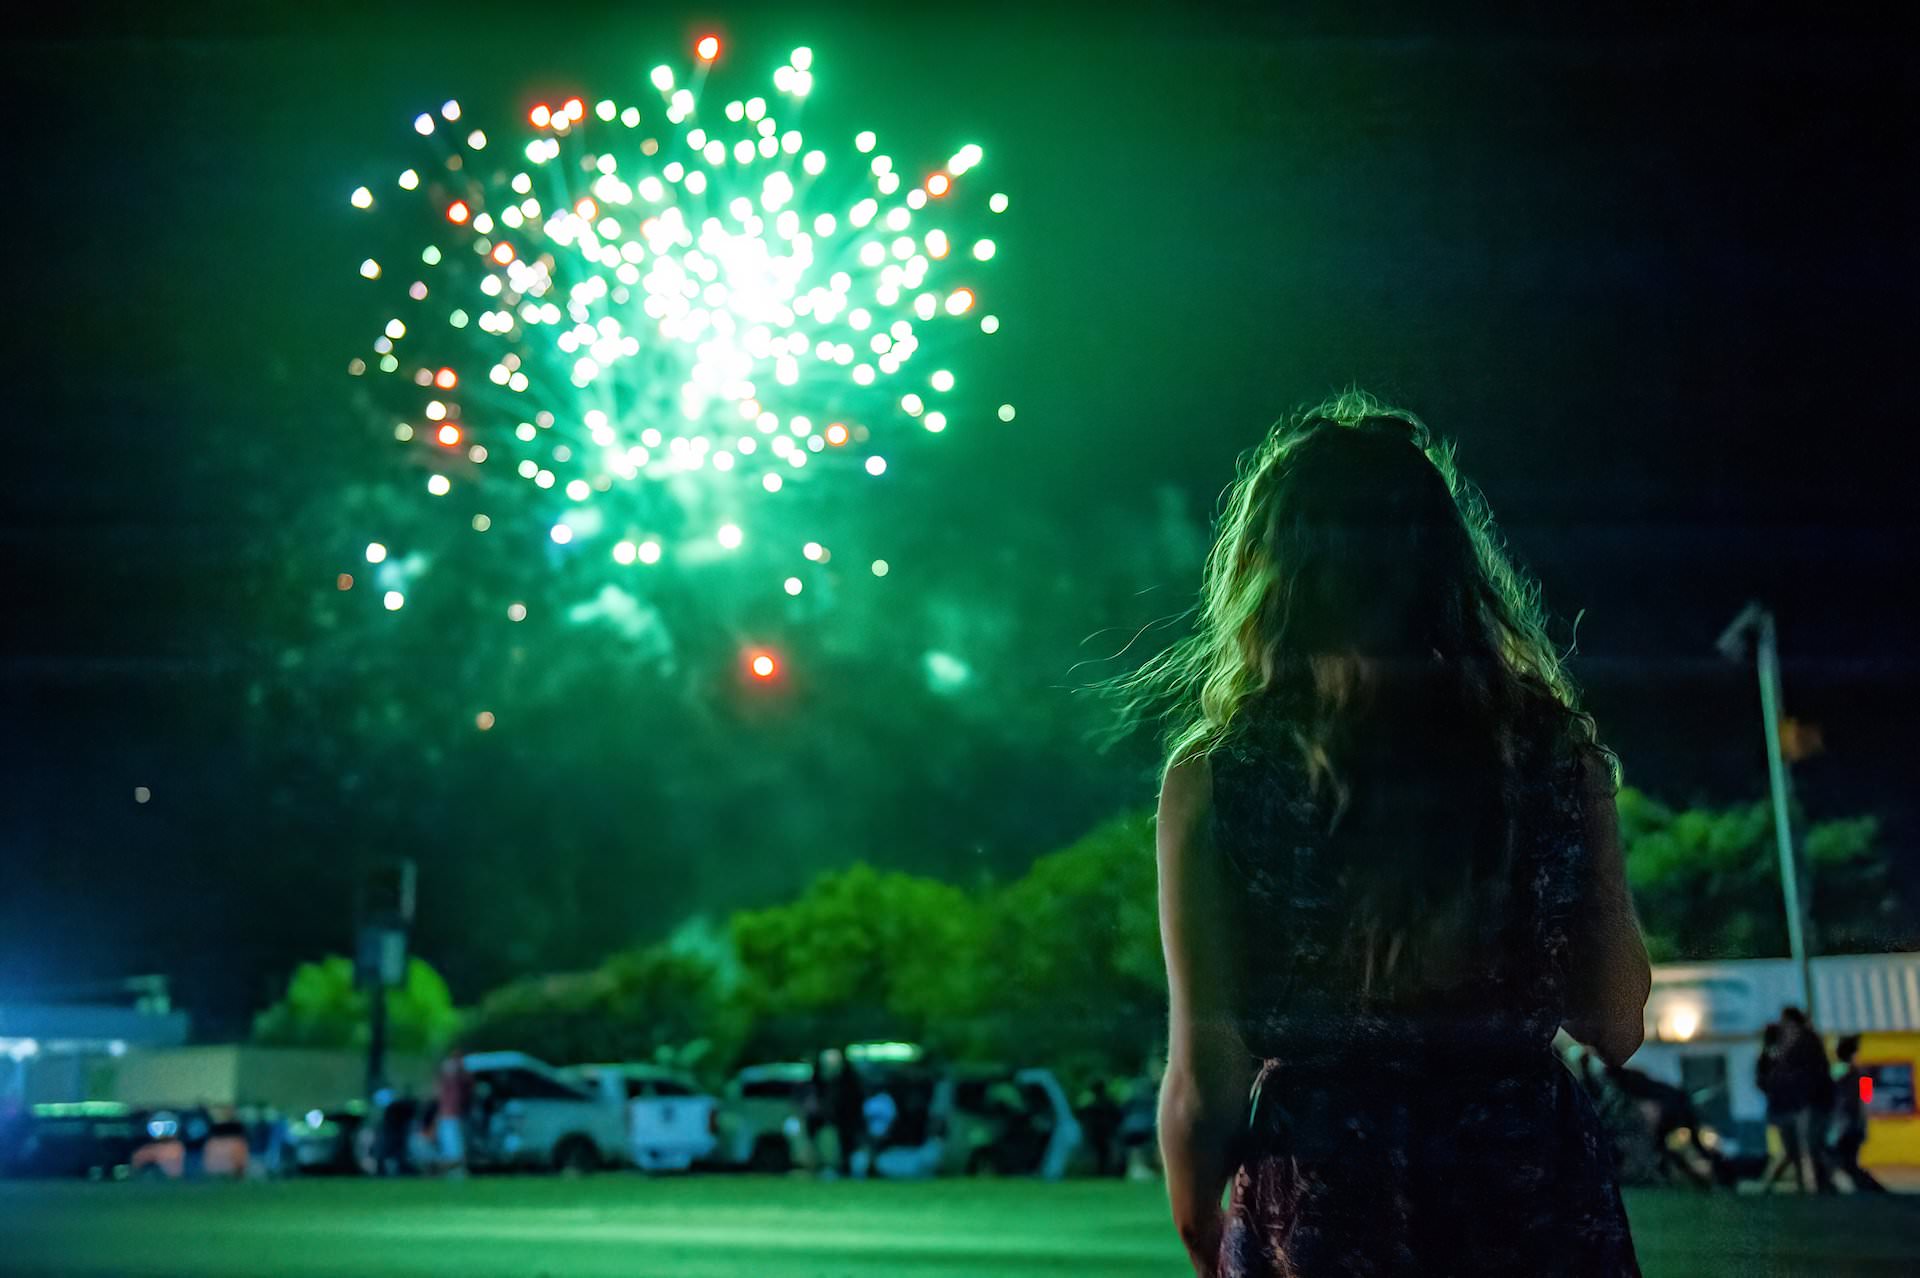
The photo is now showcasing a depth of field that was difficult to discern in the original image, and though the extreme noise has left some lines in the sky, they blend in with the background and you are now able to see the details of the figure in the image.
Let’s look at another example.

This image of a cat is a raw JPEG file straight out of a camera. Though the detail is apparent in certain areas of the cat's face, it is muddled by the existent noise in the photo. Like before, we ran the photo through three different programs.
These were the results.

Here, in both Camera Raw and Photoshop, the detail gets lost from the face and whiskers after applying the noise reduction tools. Her fur becomes mottled and her whiskers blend in with the rest of her fur. In contrast, after applying DeNoise AI, the noise from the background and face is come and the whiskers have become even more defined. You can also see more detail in her eyes and fur below her ears.
Extreme chroma noise reduction
Chromatic noise is inherent to the digital camera world. Chromatic noise, usually called chroma noise or simply color noise, is the splotchy fluctuations of color tone between pixels. This type of noise is very unsightly and can arguably be more of a nuisance than luminance noise. This type of noise becomes more apparent in the very dark or very light areas of digital images.
Let’s take a look at an example.
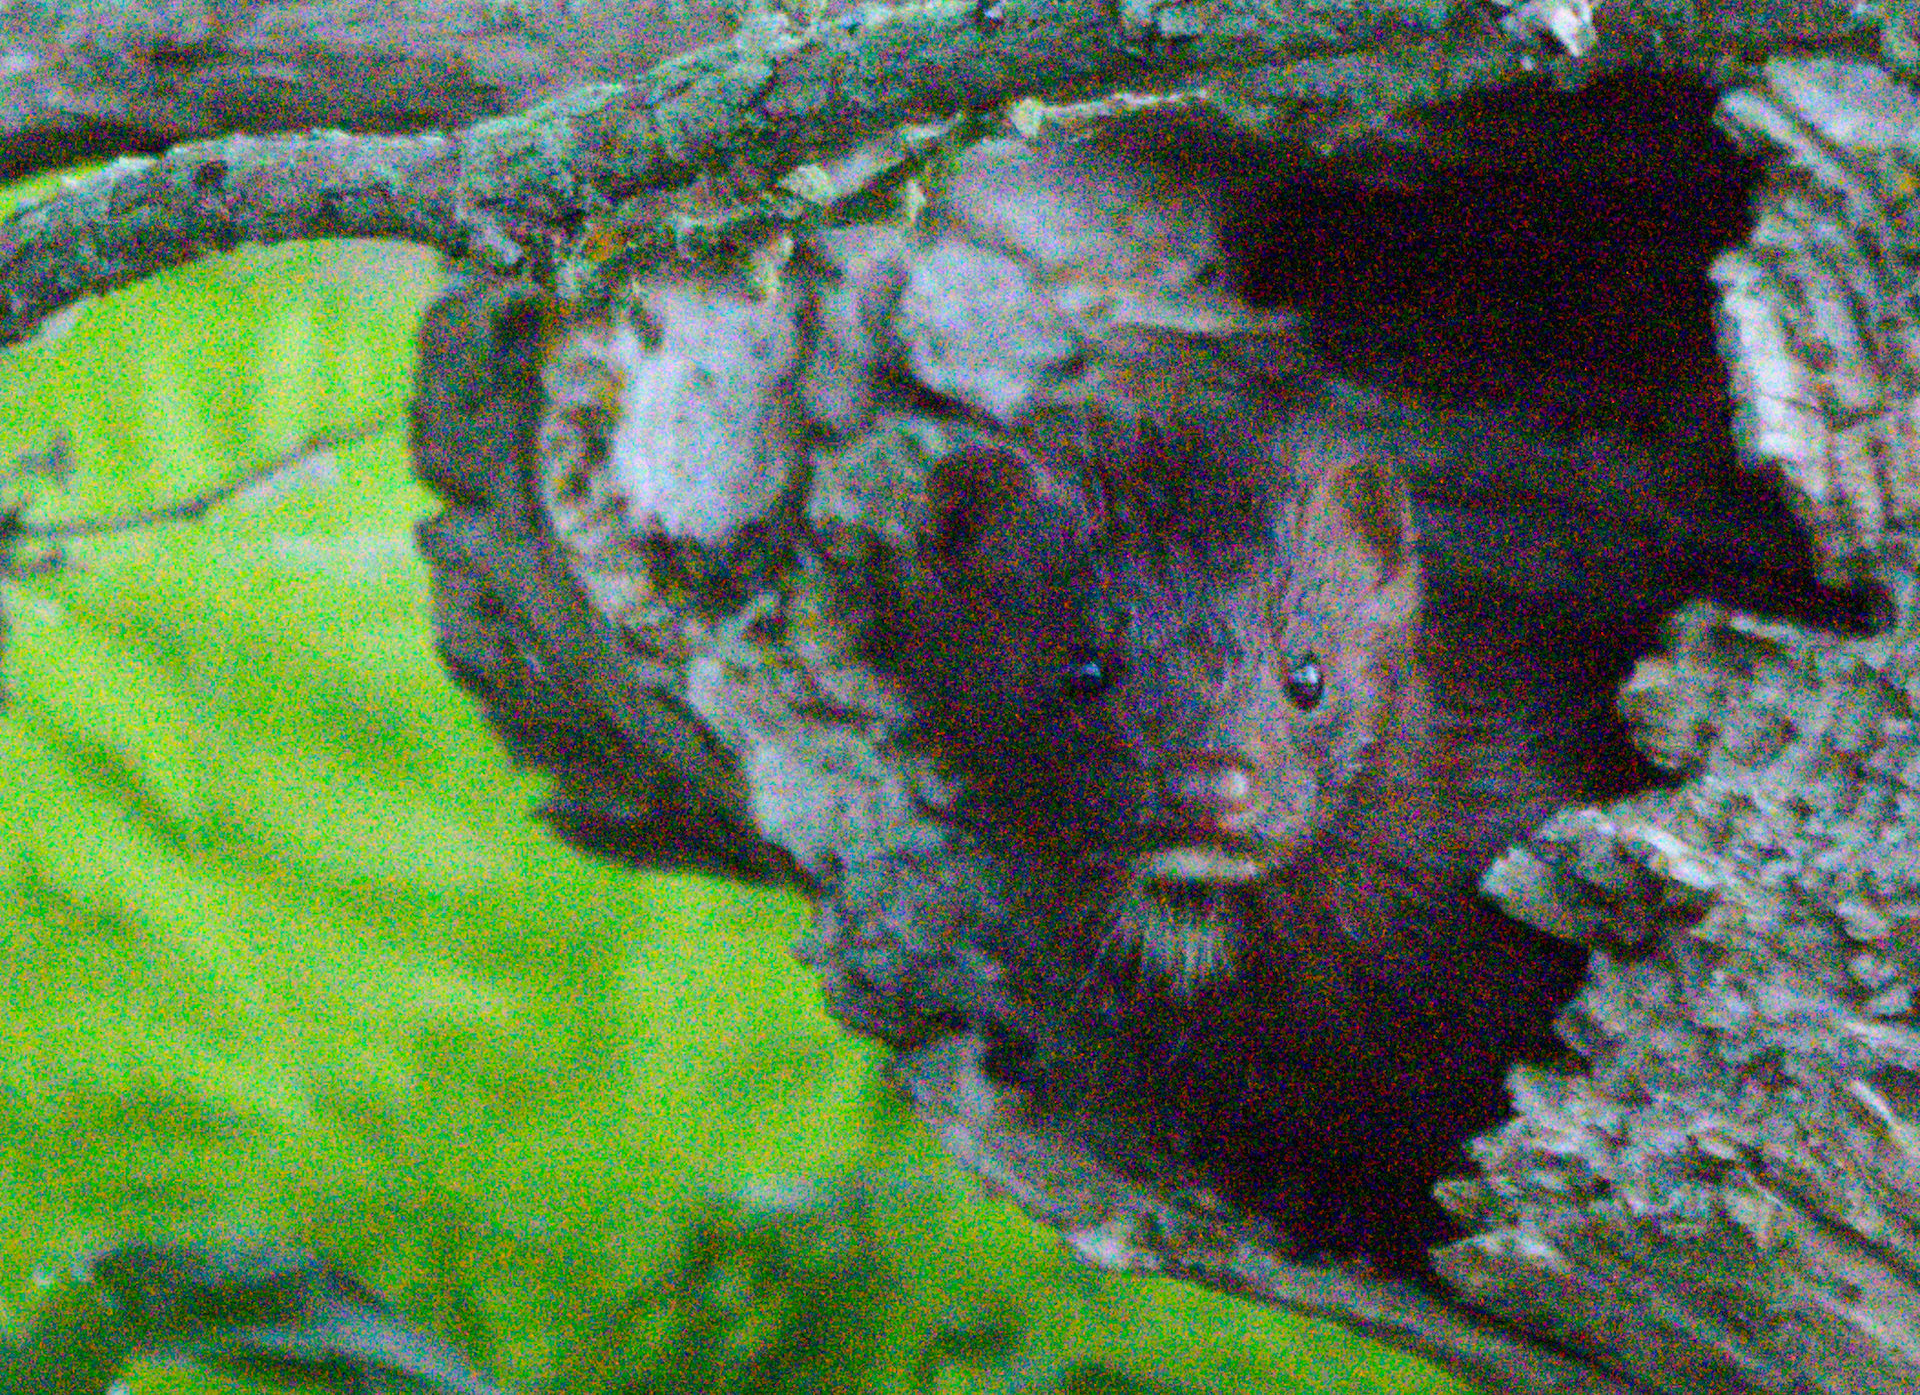
To start, we zoomed in on this picture of this creature. From far away, the noise is not as discernible but you can tell that the image is muddled. Once we zoom in, the chroma noise becomes immediately apparent.
We took this image and ran it three different programs - Photoshop’s reduce noise filter, Camera Raw, and DeNoise AI. After processing the image and attempting to correct for noise, these were the results.
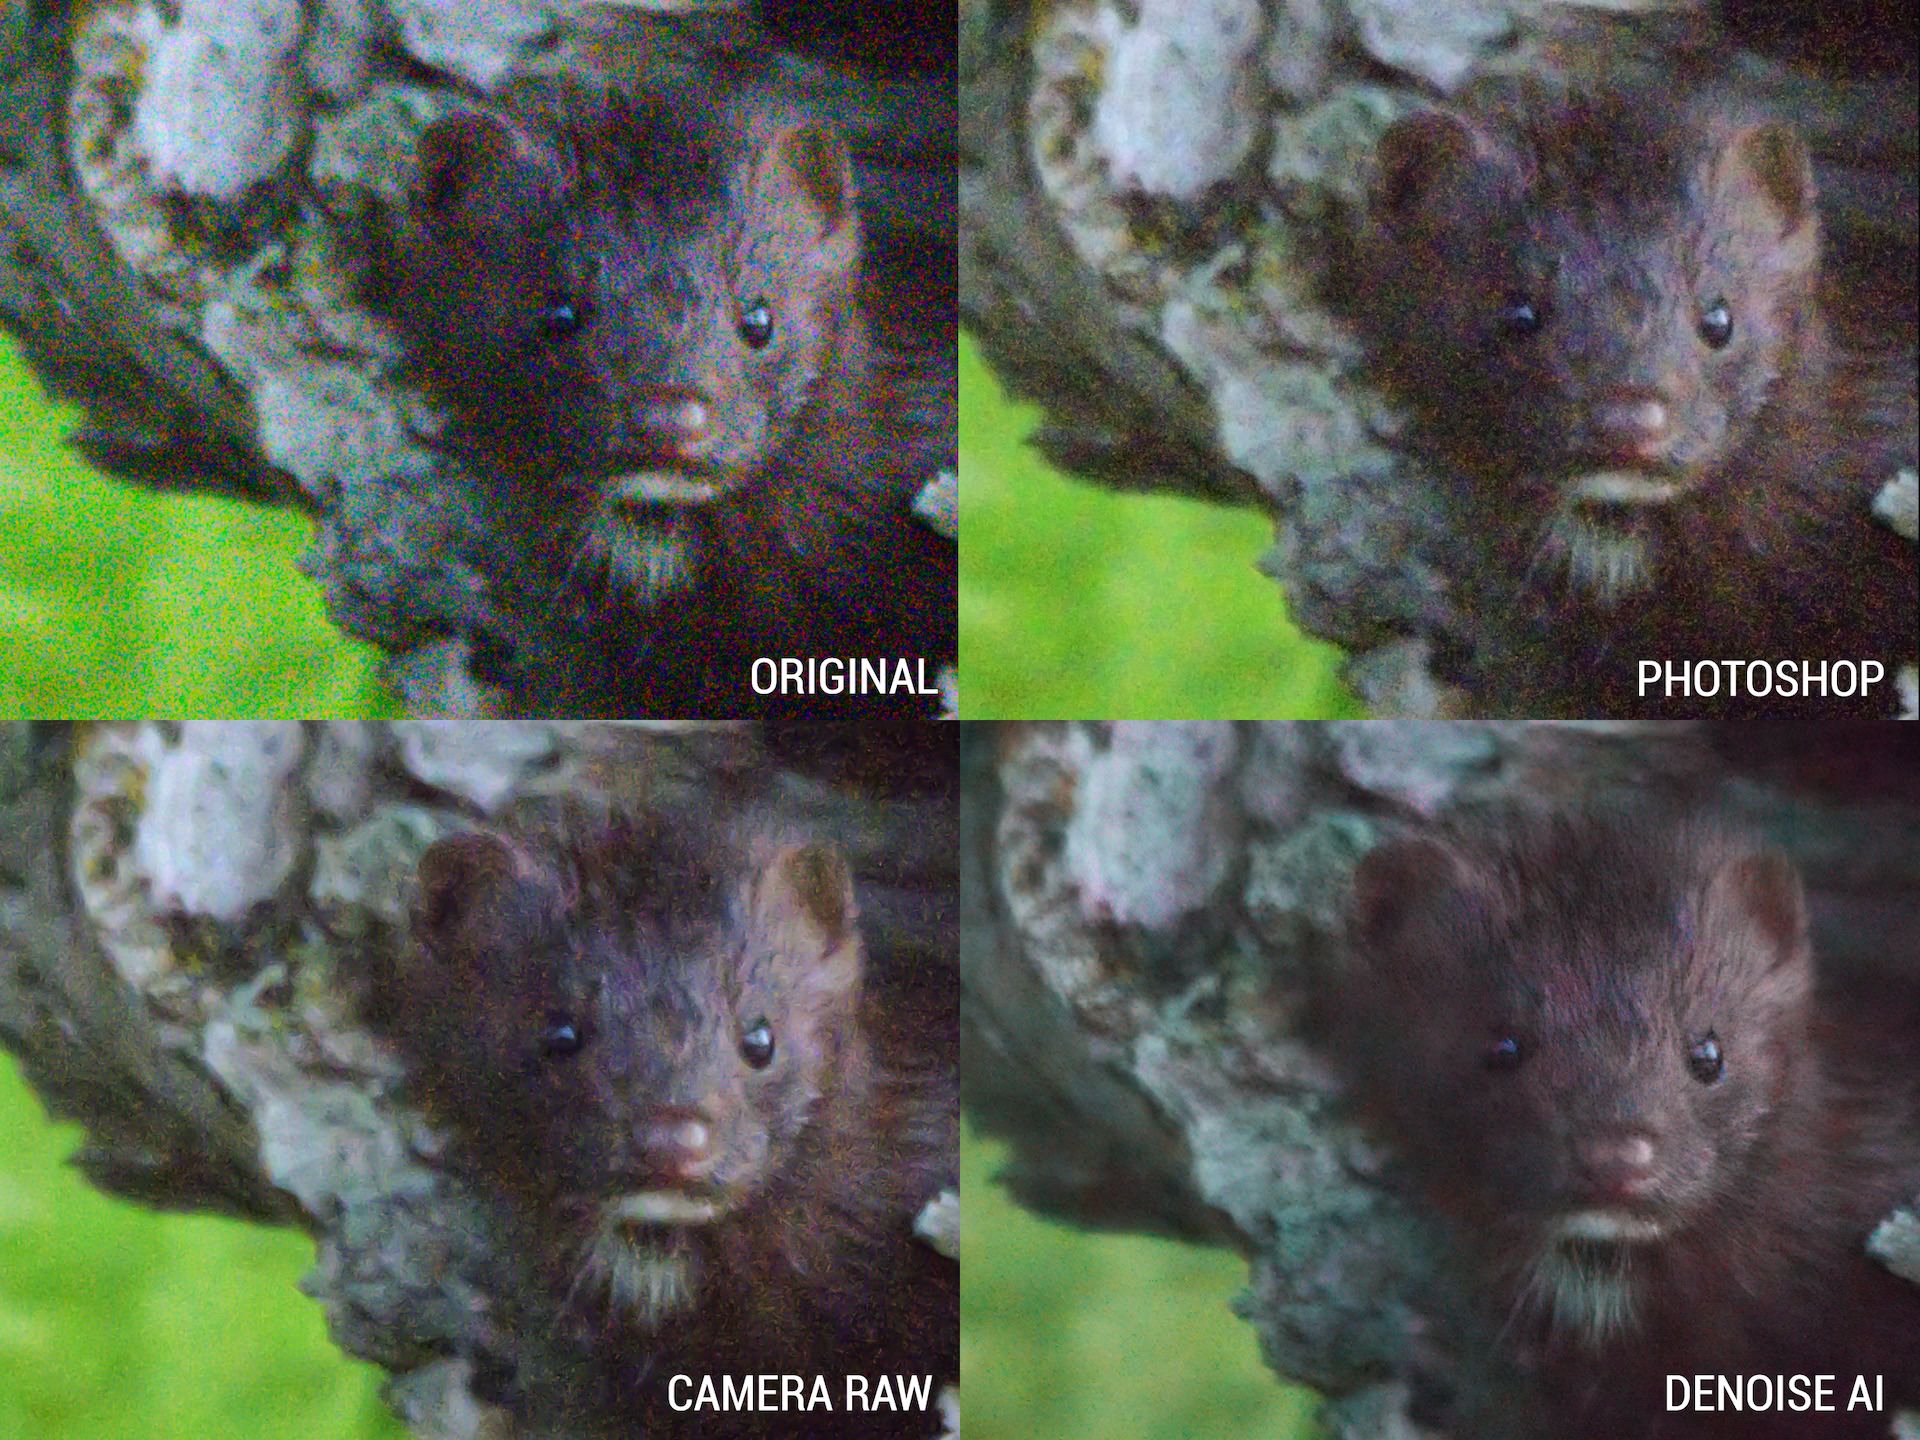
Photoshop did its best to reduce the chroma noise but wasn’t entirely able to clear the noise in the areas around the fur and across the bark. It is also blurred the details around the eyes and face. Camera Raw blended the details together in an almost painting-like effect when attempting to remove the chroma noise so that the detail everywhere in the image was lost.
After processing the image in DeNoise AI, the chroma noise has been eliminated and the strands of fur have started to separate, lending detail to the area around the creature’s face.
Conclusion
There are many different ways to reduce noise. Noise is such a common issue for photographers that almost all photo editing programs have a built-in process for reducing the noise in your images. The benefit to DeNoise AI is that, unlike other programs, its strength is in its singular task: reducing noise and maintaining detail better than any other program. Fill out the form below to try DeNoise AI for free today and start saving more of your shots!
DeNoise AI can effortlessly handle even the most extreme cases such as de-banding, color casts, and shadow tone restoration. It provides better control and enhanced results compared to other noise reduction tools. When you are shooting in low light and using fast speeds or whenever you are encountering noisy conditions, the program will provide you the peace of mind to know that you’ll eventually end up with a clear, crisp, and noise-free result.
Try DeNoise AI for free
Visit our product page for DeNoise AI and click on the "Try for Free" button to download free trials that never expire.
Keep Learning

Pricing & Plans


