January 12, 2023


Can you imagine all of the jaw-dropping photos of this planet that you’ve seen in print magazines, photography books and online websites? Think about it for a minute. The diversity in ecology, seasonality, and terrain that our planet offers is so magnificent and varied, it’s genuinely stupefying. And how lucky are we as photographers to have opportunities afforded to us with [relatively] affordable travel and technology—unlike any time in history—to access even the most remote locations and photograph them using devices that can literally fit in your pocket?
Fortunately, there are plenty of readily accessible natural areas for landscape photographers to visit and, in many cases, capture stunning photos of if you’re prepared and have a little bit of luck on your side. In other words, if you’re not prepared, you’re increasing your chances of missing a great shot. The good news is that there are plenty of things you can do to maximize your chances of nailing that beautiful sunset, surging waterfall, or powerful seascape photo. My goal with these landscape photography tips is to give you some additional ideals, some of which may be outside of the box, to get the most out of your outdoor adventures.
Dr. Louis Pasteur, inventor of pasteurization, has a very meaningful quote attributed to him: “Fortune favors the prepared mind.” Now, while Dr. Pasteur may have been referring to the field of scientific observation, you can easily apply it to a landscape shot. Before setting out on a nature shoot—especially if it’s at an unfamiliar location—I always take time for some “online reconnaissance.” In the intro of this story, I referred to our luck for having access to amazing technologies that can make our jobs as landscape photographers easier.
One such piece of technology is the mobile phone and its use of GPS. Let’s say I’m planning to take a landscape photograph of the sunset at a specific location, like Death Valley National Park’s Racetrack Playa, for example. To help me prepare for the shoot, I’ll research some of the more obvious things, like weather forecasts and driving routes, along with any potential hazard warnings in the region. But then I can take it a step further by using apps like PhotoPills and The Photographer’s Ephemeris to predict and visualize the path of the sun and moon, and plot their intended locations at anytime of day or night.

With this information available, I can reliably position myself in an ideal location in anticipation of that sunset landscape shot.

Another favorite online reconnaissance tool is Google Maps. The sheer amount of geographic and topological information available on Google Maps is staggering and has played a huge role with my scenic photography. On a recent trip to Iceland, I wanted a stronger grasp of the area I intended to photograph at sunset. It was important to know whether there would be any mountains or other obstacles that could impede how much time I’d have before the sun would become obstructed. By putting in a bit of time exploring with Google Maps, I had a much better understanding of the area and had a much more precise idea of where I would want to go.
If there’s one variable that will change things up on you no matter how much due diligence you put in, it’s the weather. While weather forecasts are worth spending time researching, they’re not an excuse for being caught off-guard. If the forecasts call for mild temps with scattered clouds, you should still be prepared for the chance of heavy showers if the season warrants it. And no worthwhile list of tips for landscape photography should omit something related to protecting your gear from inclement weather.
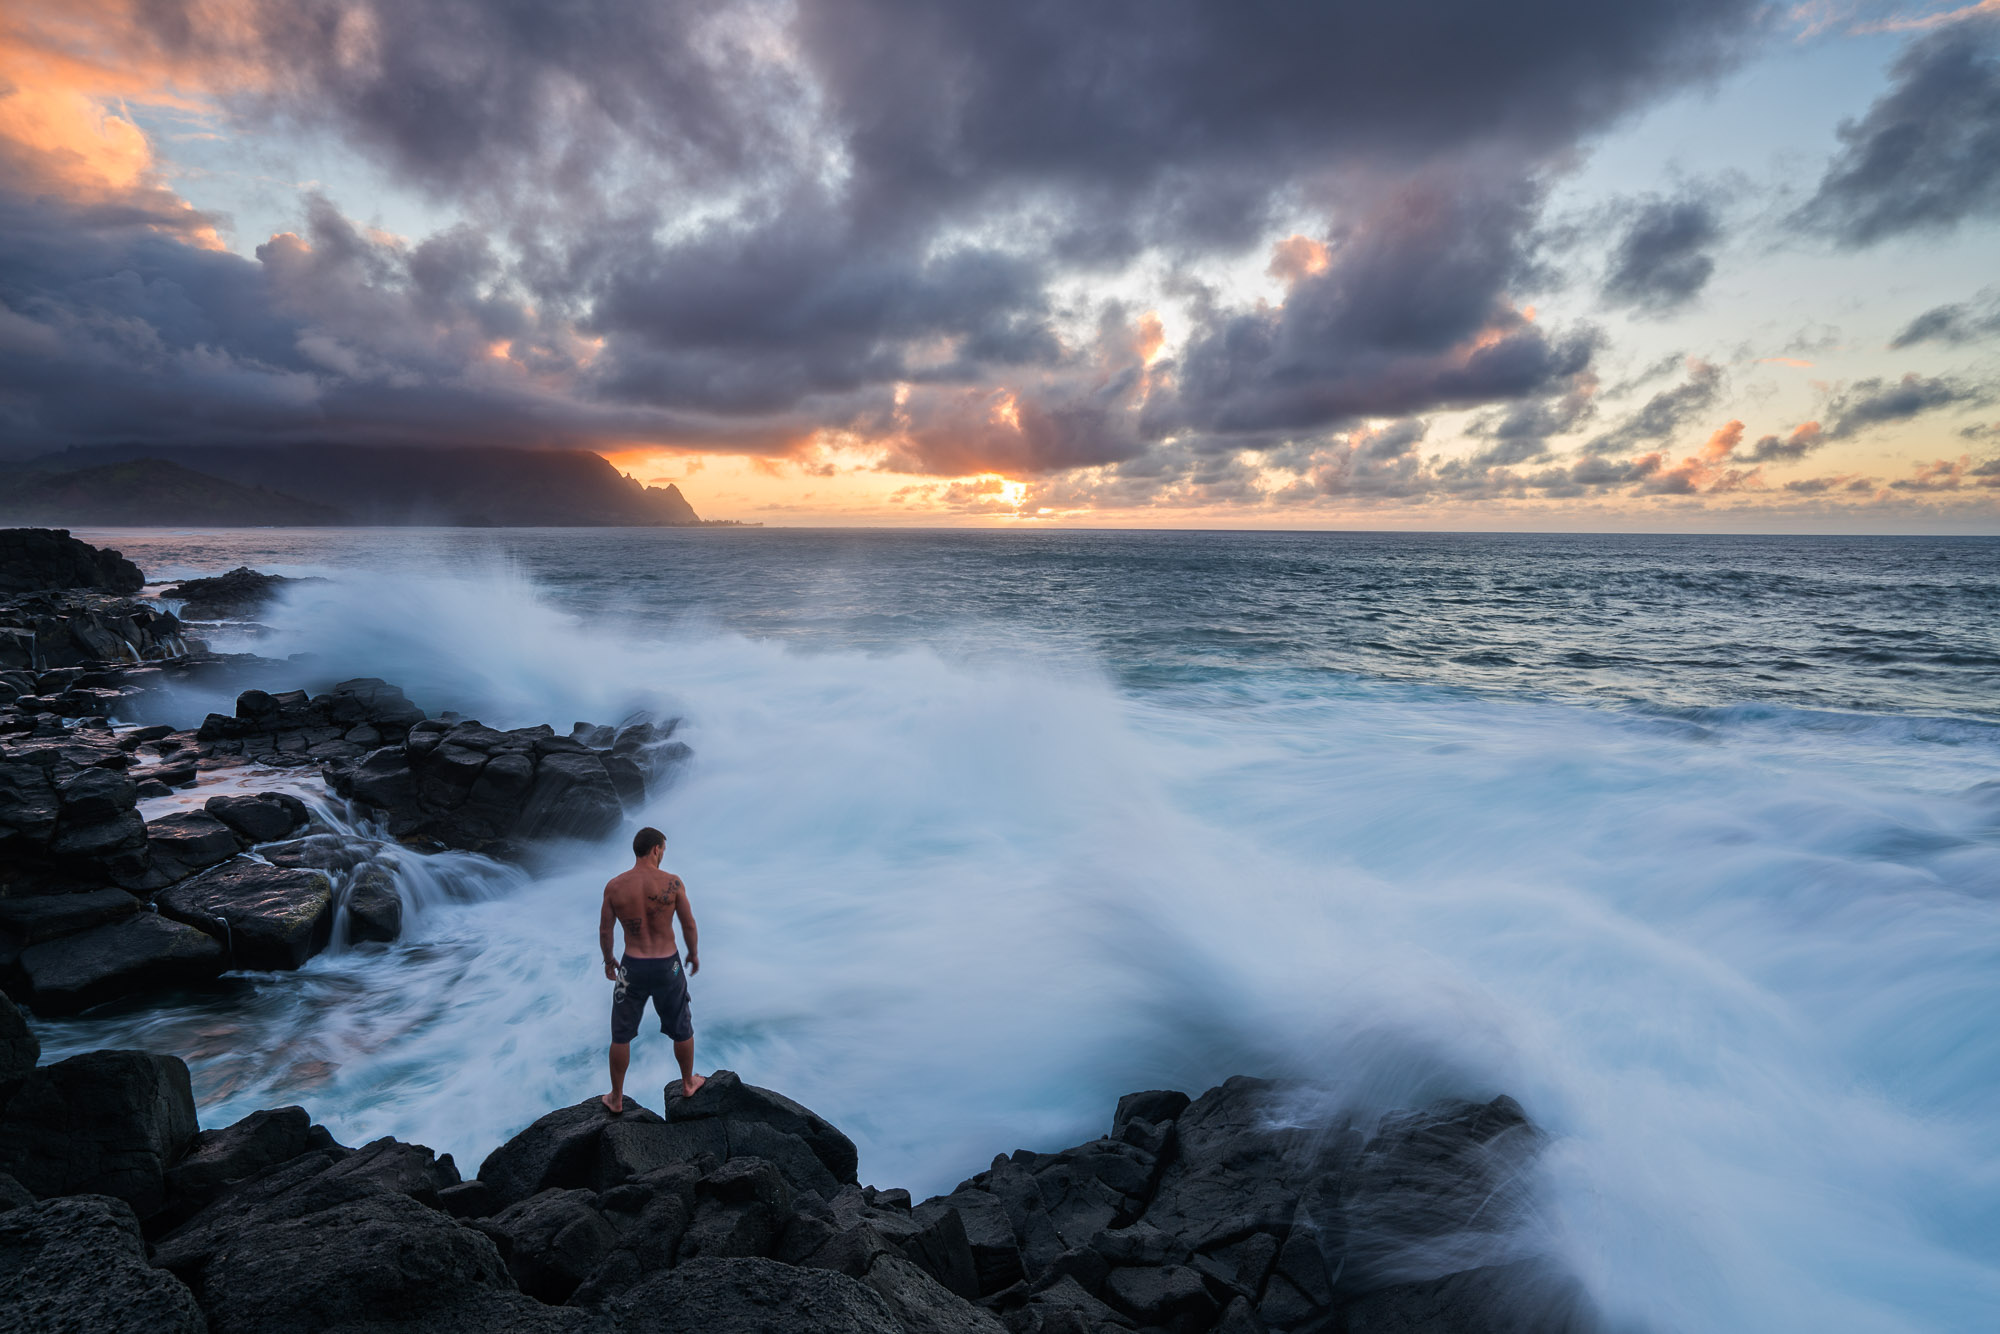
Fortunately, as someone who has spent years photographing in the Pacific Northwest, I’ve found that dealing with condensation has become second nature. It was almost a given that rain would be an element I’d have to factor in when on a shoot. If you find yourself in a situation where you’re combating water—be it from rain or from the spray of a waterfall—your focus should be on manually locking in your composition and focus. When I’m in this type of situation, I’m not really concerned about the spray collecting on my lens. I’m using the time to get everything dialed in.

Once I have everything set, I use a clean microfiber cloth to dry the surface of the lens (or ND filter) and fire away. I can’t stress enough the importance of using clean microfiber cloths, as dirty ones will only end up blending oily residue and smudges in with the water. One tip that I recommend is to set your camera on a tripod and use a 2-second delay. After you’ve composed and obtained focus, clean the front of your lens with a microfiber cloth and keep it covering the lens until you’re ready to shoot. Once you’re ready, press the shutter button and remove the cloth after a second. This helps reduce the amount of time that the lens is exposed to spray or rain.
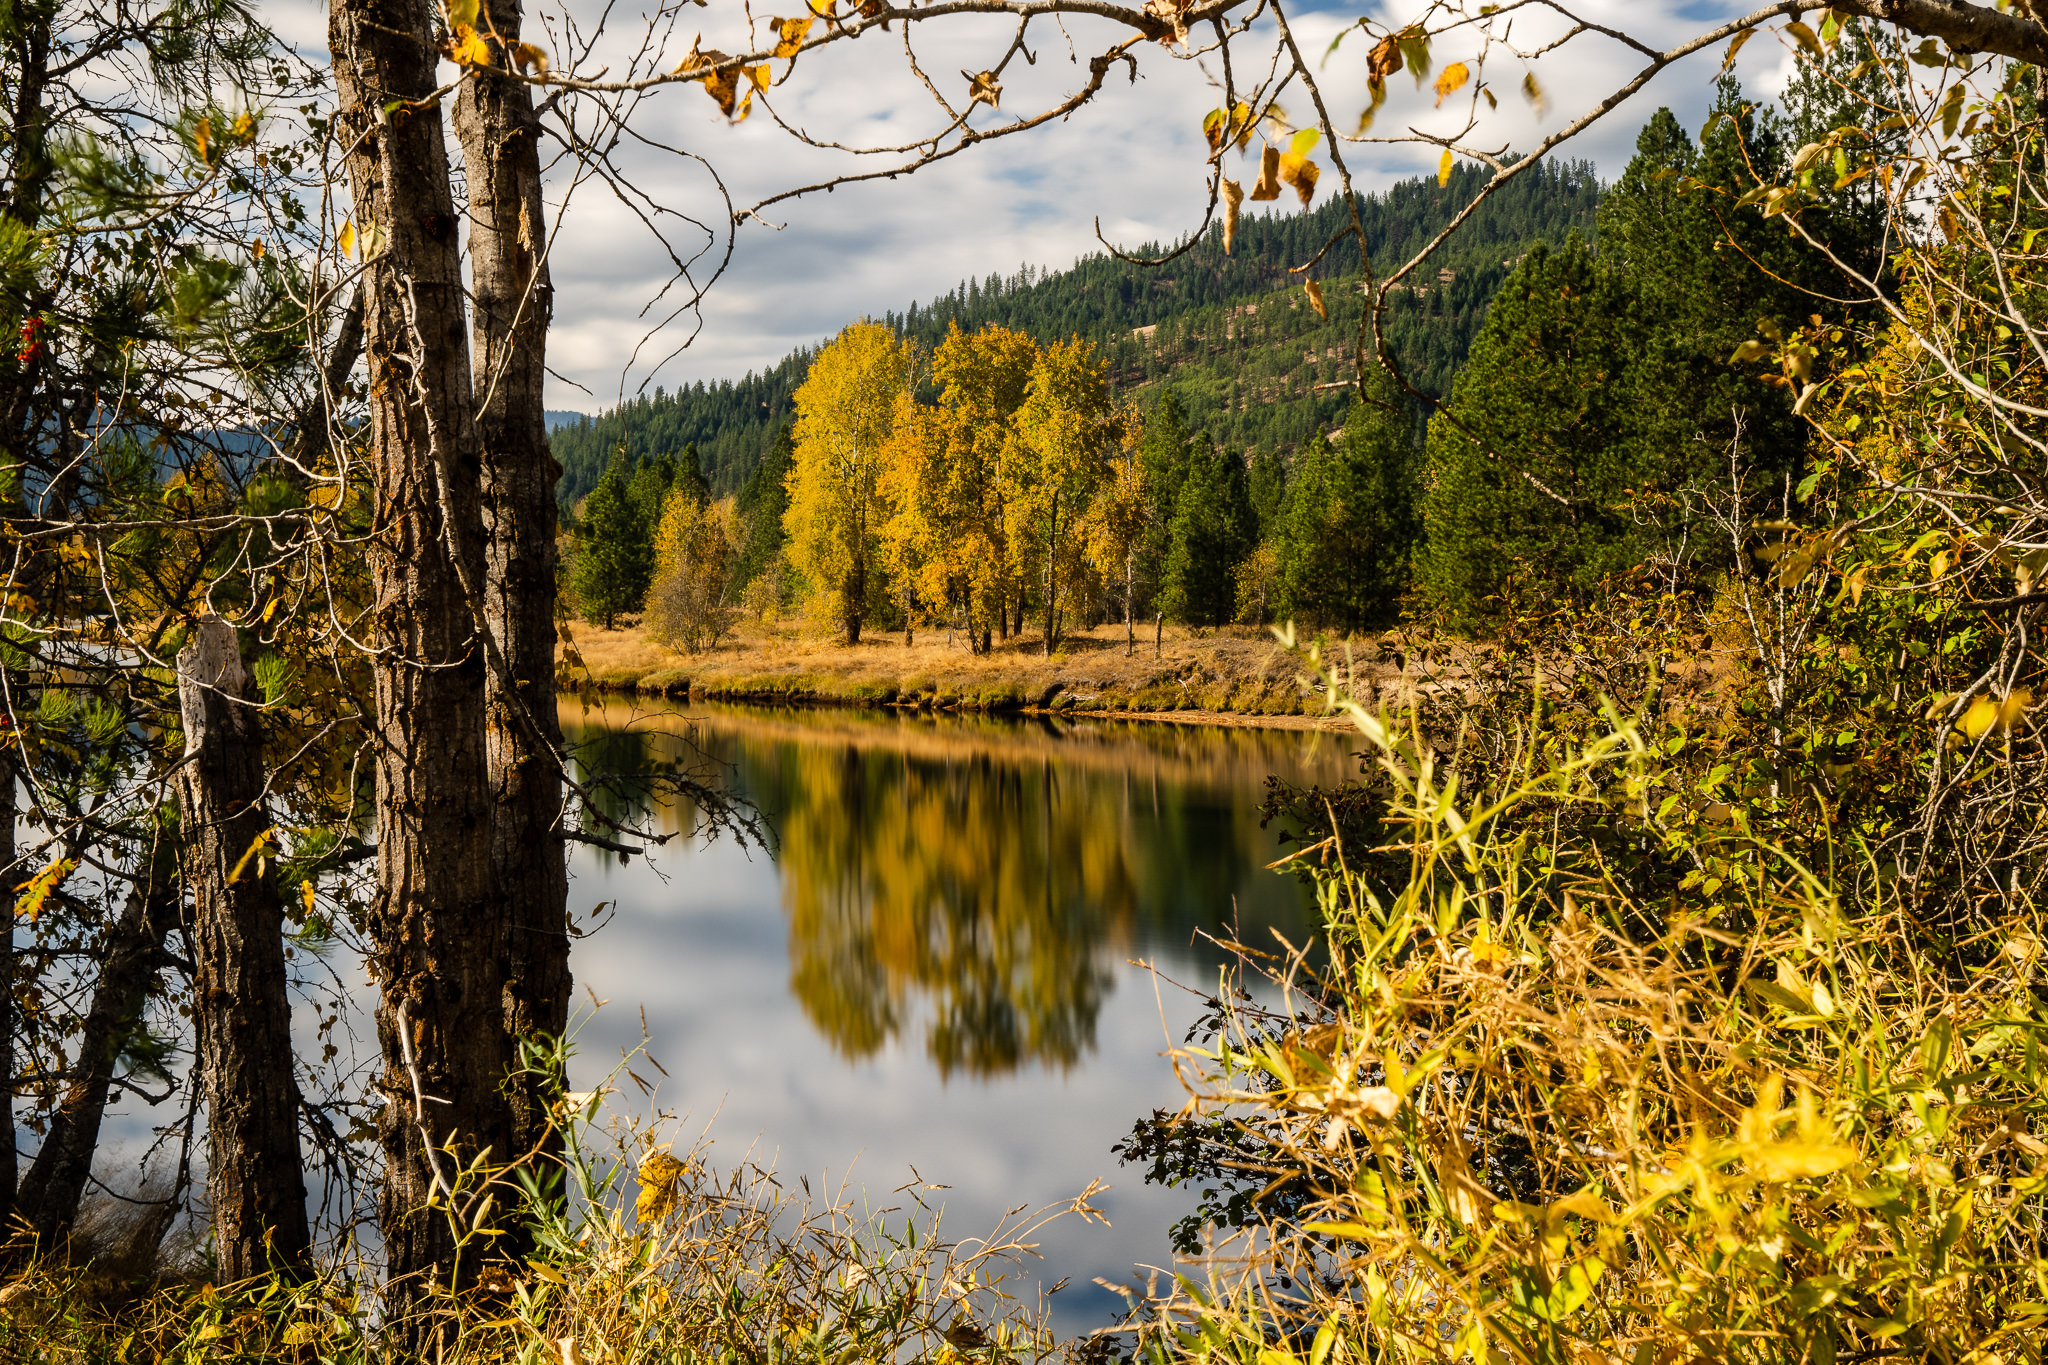
This may be my favorite of all the landscape photography tips that I’ve learned or taught. I’m sure it goes without saying that most photographers strive for a clean photo, right? If you’re photographing a mountainous vista, you’d likely prefer not to have a gigantic tree trunk cutting through a portion of the frame. Whether we’re contorting in some undiscovered yoga position or have our tripods defying gravity with the way they’re balanced, we go to great lengths to remove obstacles. In some cases, it’s completely warranted, but I’d also argue that there’s something to keeping obstacles in your frame. If we use my experiences photographing in the Pacific Northwest again, dealing with obstacles becomes as second nature as dealing with the rain.

I can’t begin to count the number of instances where my landscape shots were impacted because of some fallen trees or a group of gigantic boulders. The way I saw it, I could either abandon the shot altogether or get creative with incorporating those elements into the overall composition. In almost every case, I went with the latter option. In some cases, I’ve gone from doing whatever I could to avoid an obstacle to using it as my primary focal point. In those situations, I find that filling the frame with that obstacle and getting lower to the ground helps create a more unique composition. That’s why I tend to gravitate towards ultra-wide angle lenses for landscape shots.
Let’s say you’re on a landscape shoot and your intent is to photograph the sunset. You know where you’re going, you have the right gear with you, and the weather is all but guaranteed to be great for the setting sun. So how are you going to capture it? Sure, you could just fll the frame with the sun and call it a day, but you’re here to convey the beauty of the landscape in front of you, right? You also want to give your viewer a sense of place and depth.
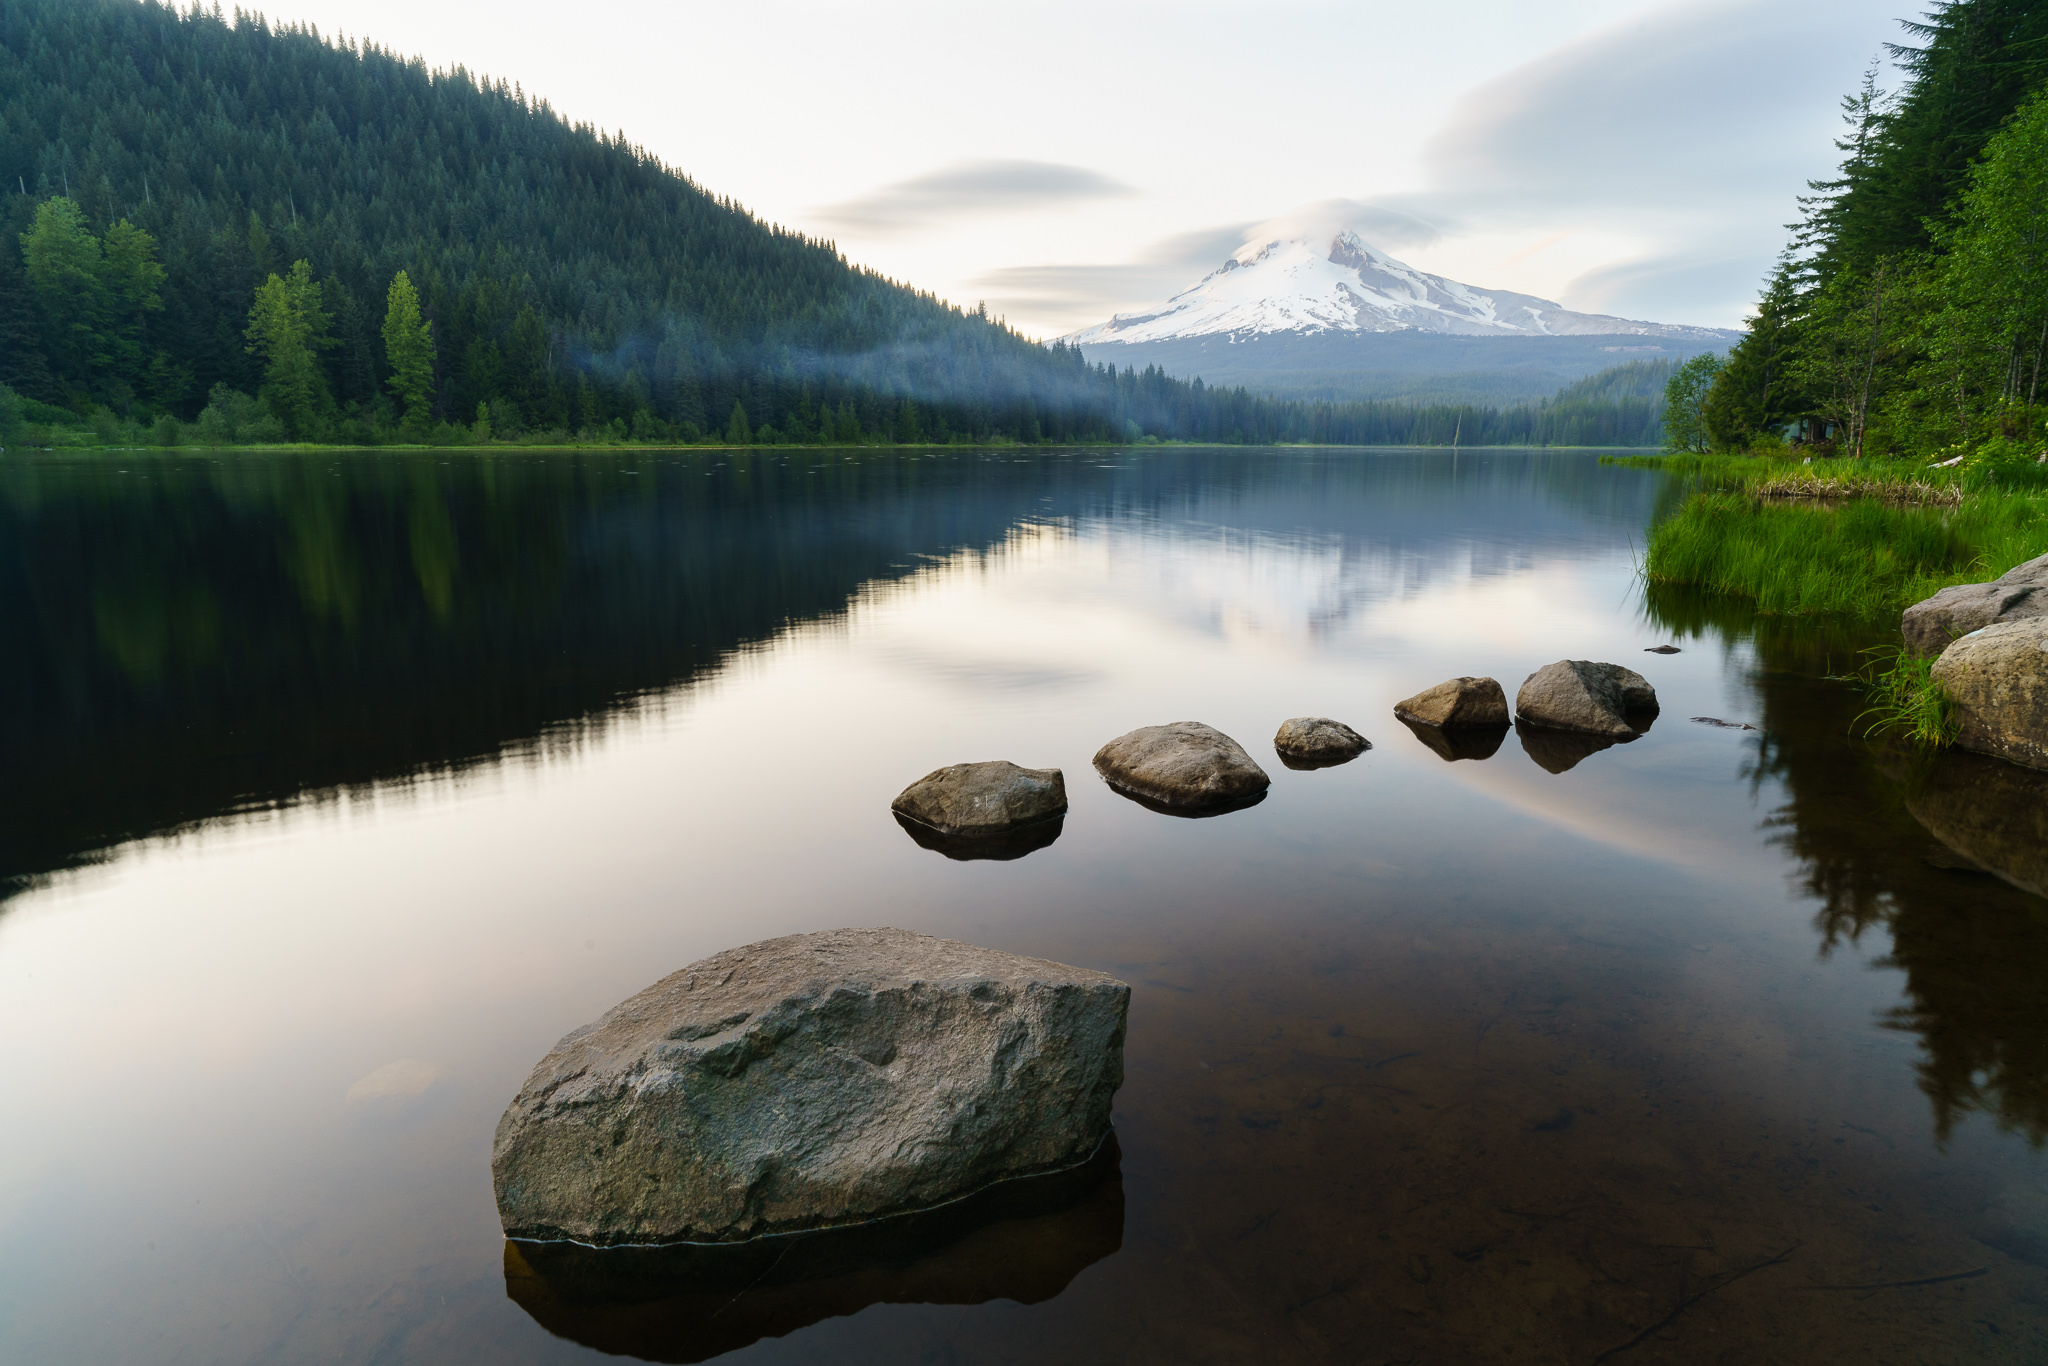
One of the best ways to do so is to find some strong foreground elements. That’s not to say that you need to be right next to whatever is in your foreground. Rather, it’s important to pay attention to what you’ll use to accompany the actual sunrise or sunset. In some cases, I like to use the natural surroundings to frame the sun, as I’ve done when photographing Mesa Arch in Canyonlands National Park.
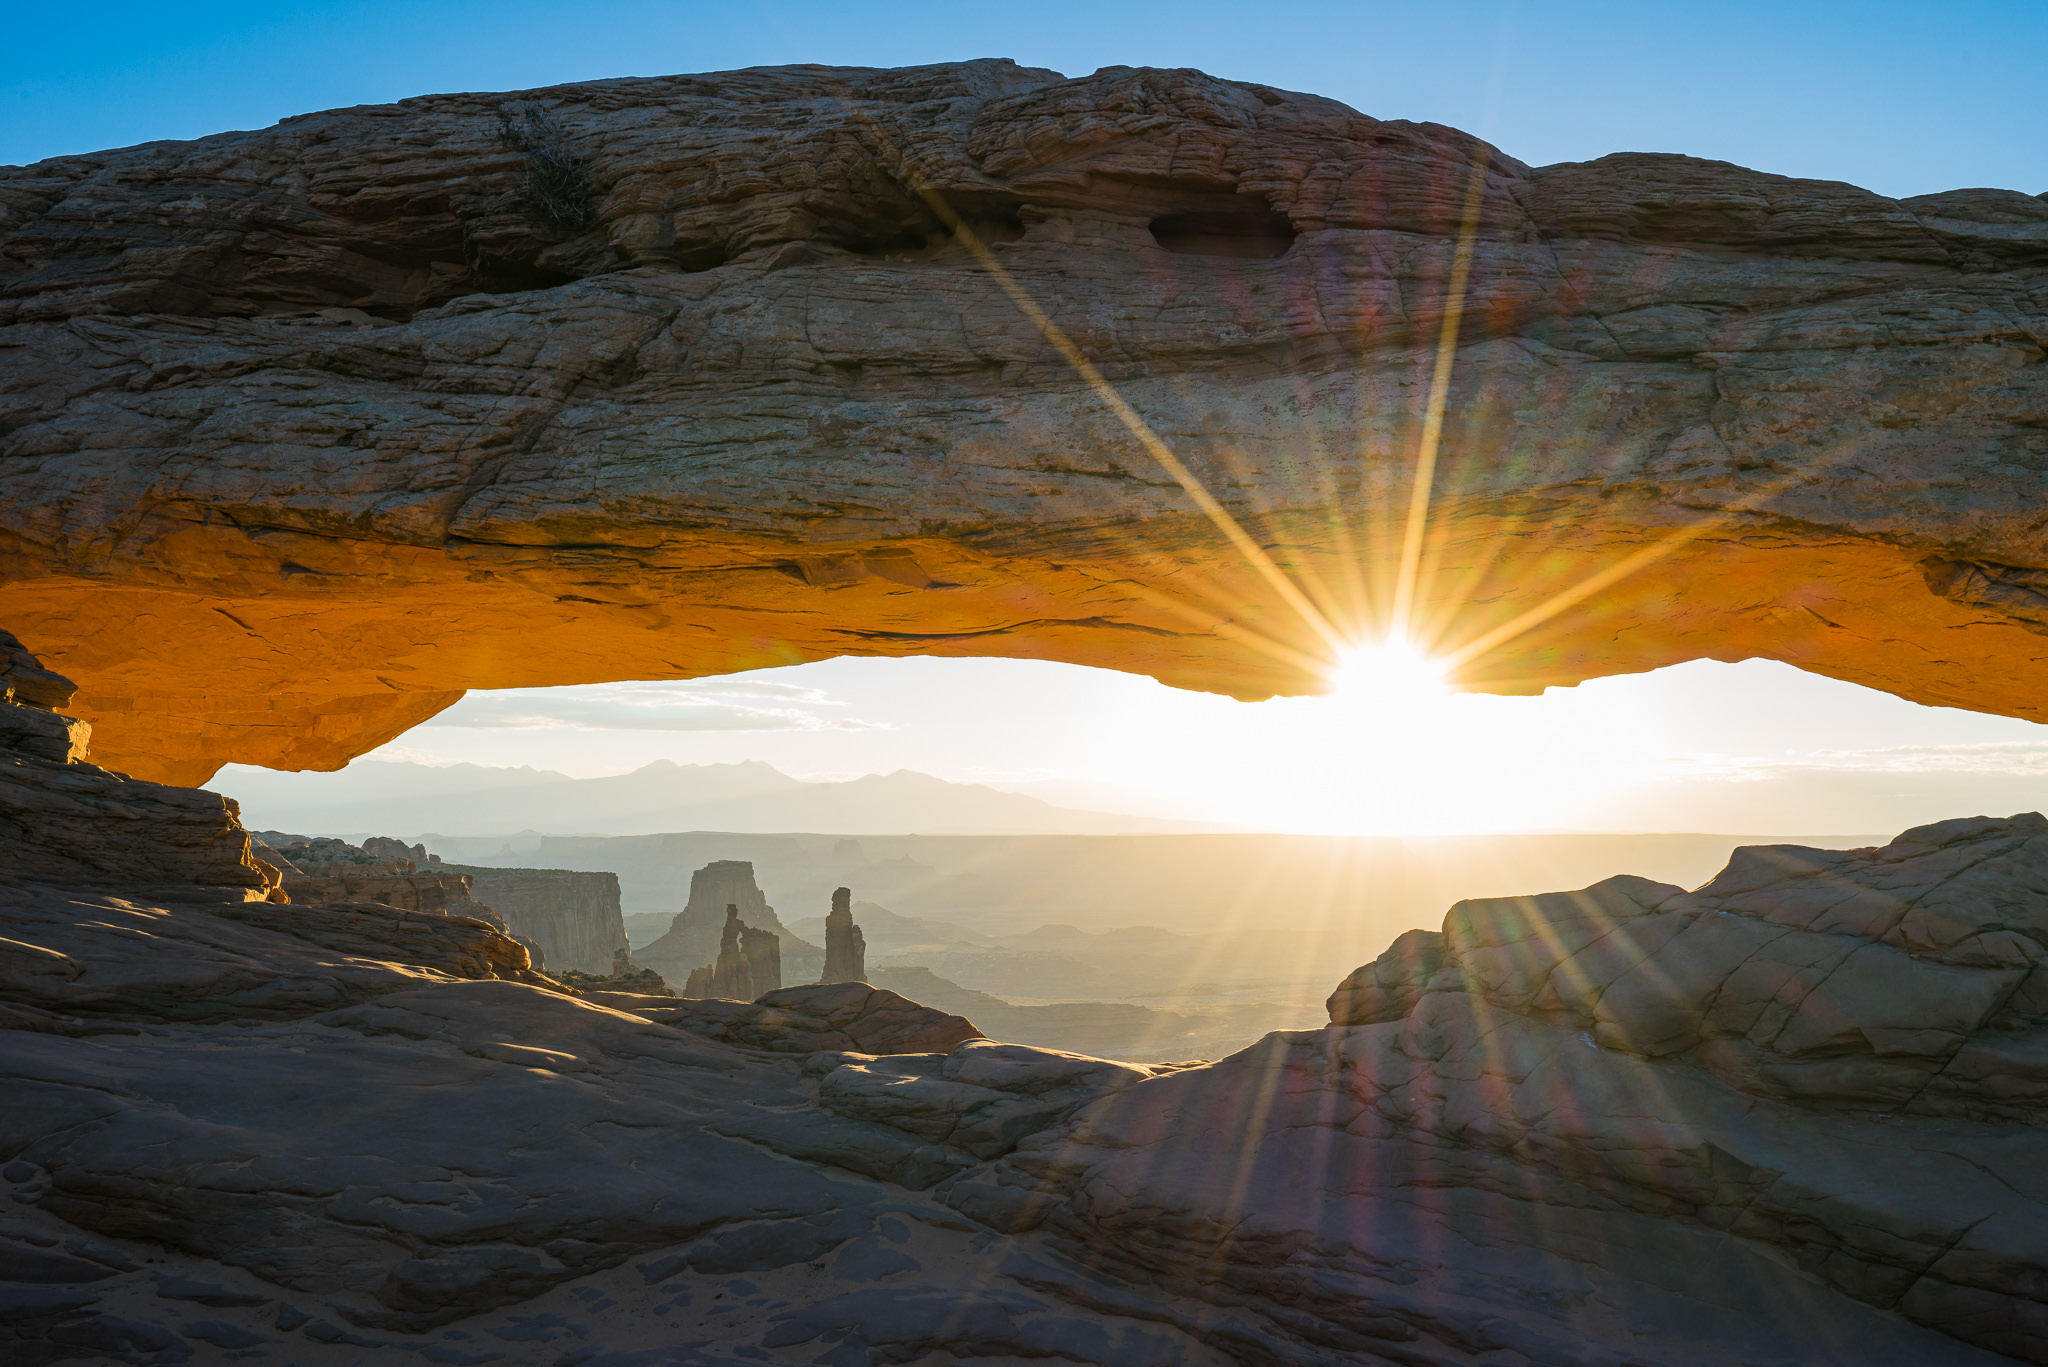
This is also an opportune time to capture a sunburst. To get a sunburst, you’ll want to close your aperture to ƒ/16 or smaller. The actual presence and quality of the burst depends on the lens that you’re using and how many blades make up its aperture. Fortunately, there are plenty of online resources to help you visualize a lens’ capabilities for creating a sunburst effect.
I hope these tips inspired you with new ideas for how to take landscape photos. Like with virtually any creative endeavor, the best thing you can do is practice and have fun. Try not to take things too seriously because something will almost always go sideways and if you’re in the mindset of rolling with the punches, you’ll find the experience to be that much more enjoyable despite possible setbacks. Don’t forget to share your favorite tips for landscape photography in the comments, too!

© 2005 - 2024 Topaz Labs. All rights reserved.