Topaz Tutorial: Editing Landscapes with Miroslav Petrasko
Landscape photos are quite different from cityscape photos. If you are not shooting right into the sun, you usually have much less local contrast and extreme differences in brightness in the photos. You can’t just take one and be done with it, so some editing is always required–even if it’s only to fix lens problems.
Sharpness is really important in landscape photos. Together with a bigger depth of field, it makes landscape photos stand out more. Here is where Topaz Sharpen AI can come in handy.
A Stunning View
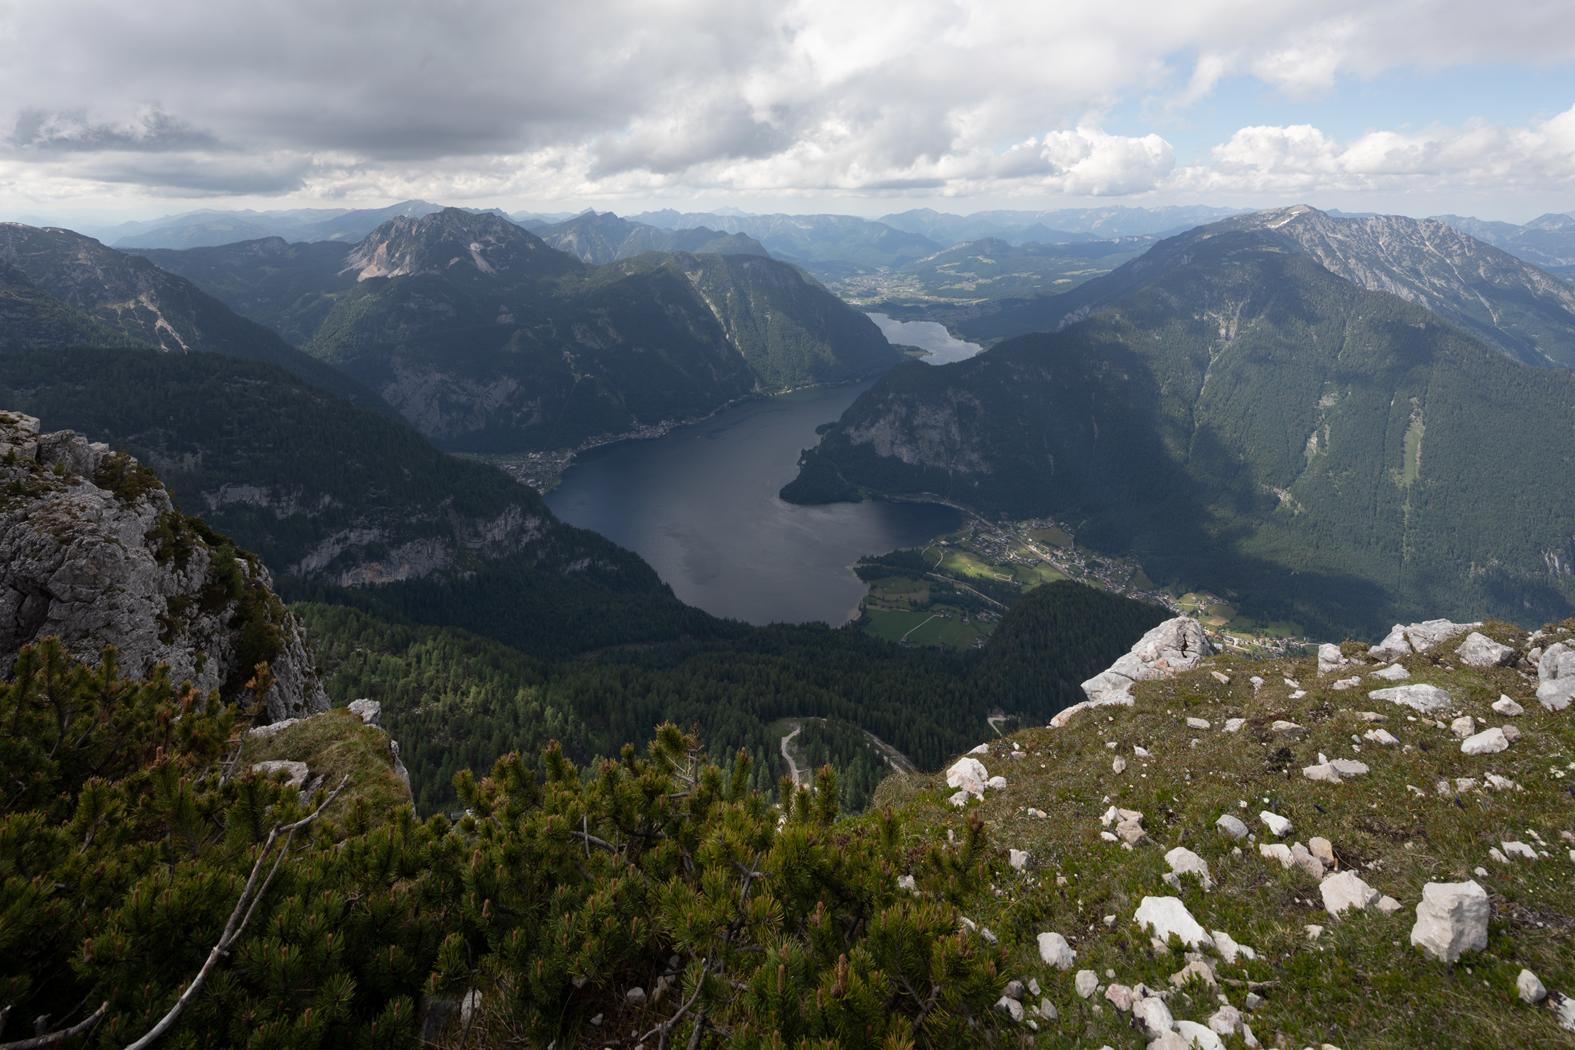
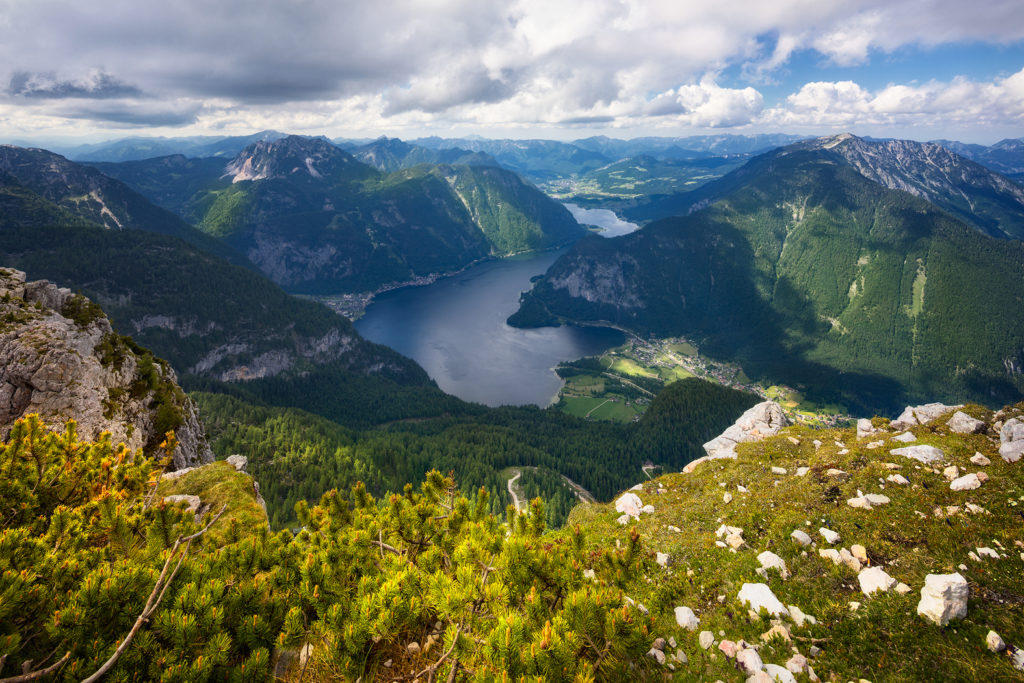
This is a view from the Five Fingers lookout platform in the Austrian Alps, high above the town of Hallstatt. It was taken during an overcast day, so while it’s properly exposed, it’s a bit dark, hazy and bland. I won’t go through every edit I did on these photos, but will point out some of the most important techniques to help you get more from your landscape photos.
Original Image (Click to view at 100%)
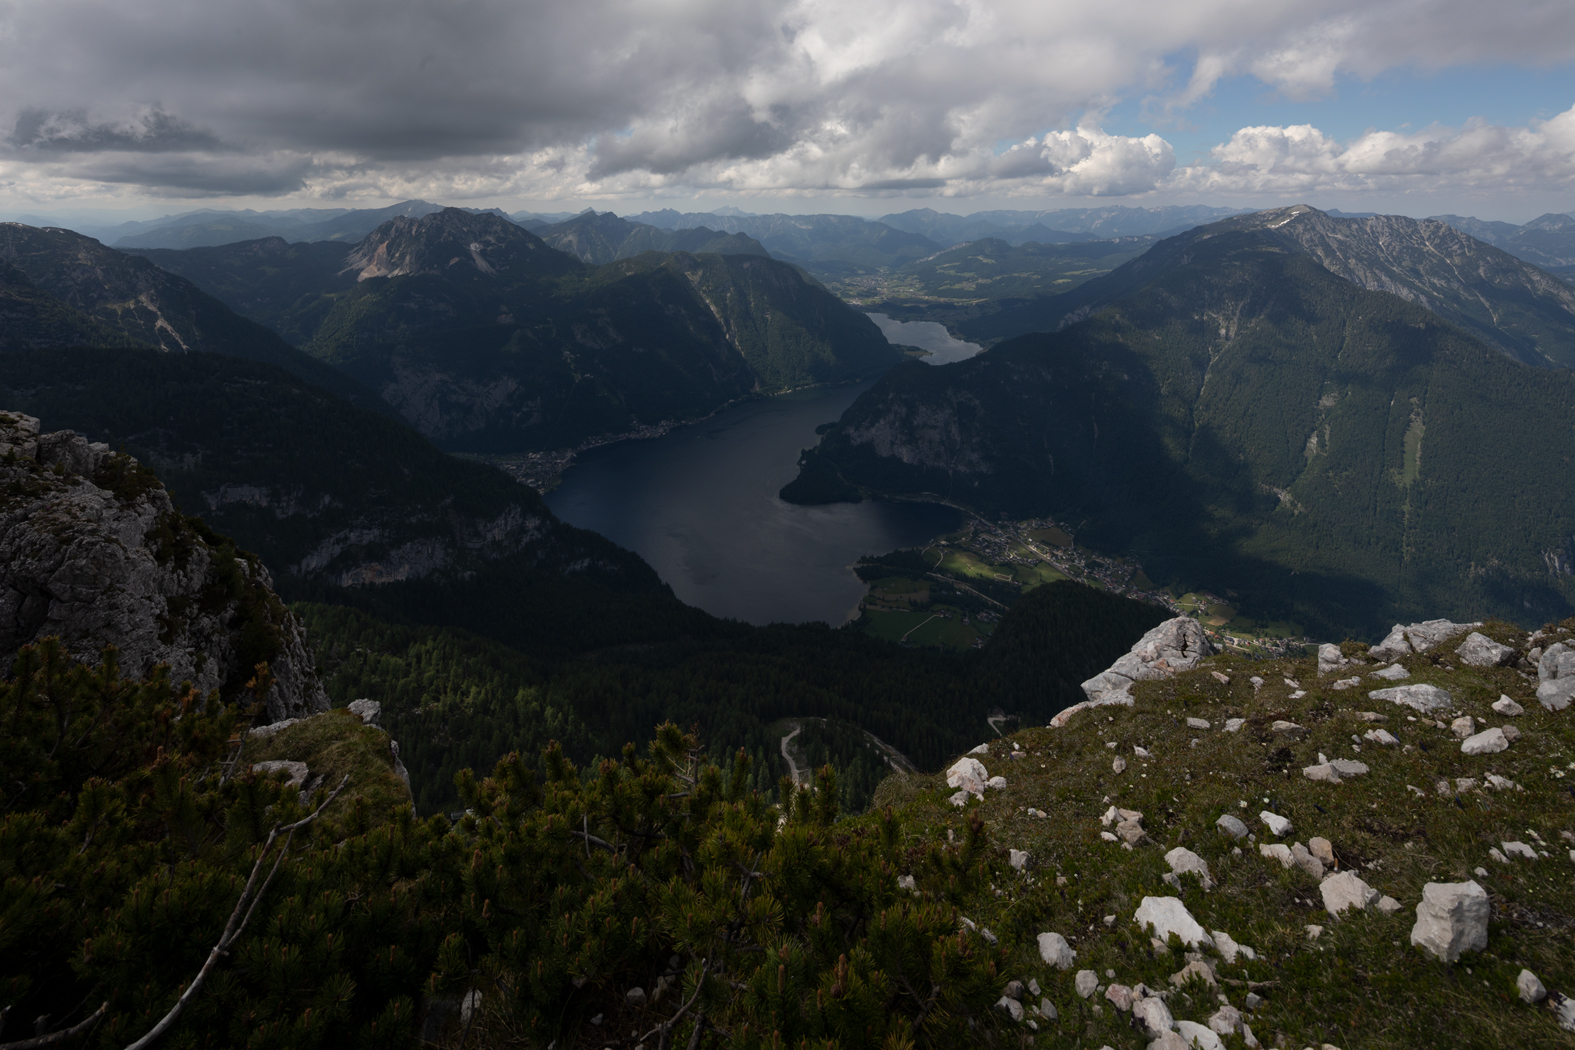
I took three exposures for this photo in 1EV increments. I could have gotten away with just using a single exposure, but I knew I would want to lighten and darken certain areas. So, having a proper exposure of every area makes for a cleaner photo than one that was over or underexposed in post-processing. Here are the two additional exposures.
(Click to view at 100%)
(Click to view at 100%)
There is a photo post-processing technique called matching, which I’ll show you below. By doing so, you end up with a nice even blend that looks like one seamless photo. The idea behind it is to take the RAW files as smart objects into Photoshop and blend them together to get the desired exposure everywhere.
(Click to view at 100%)
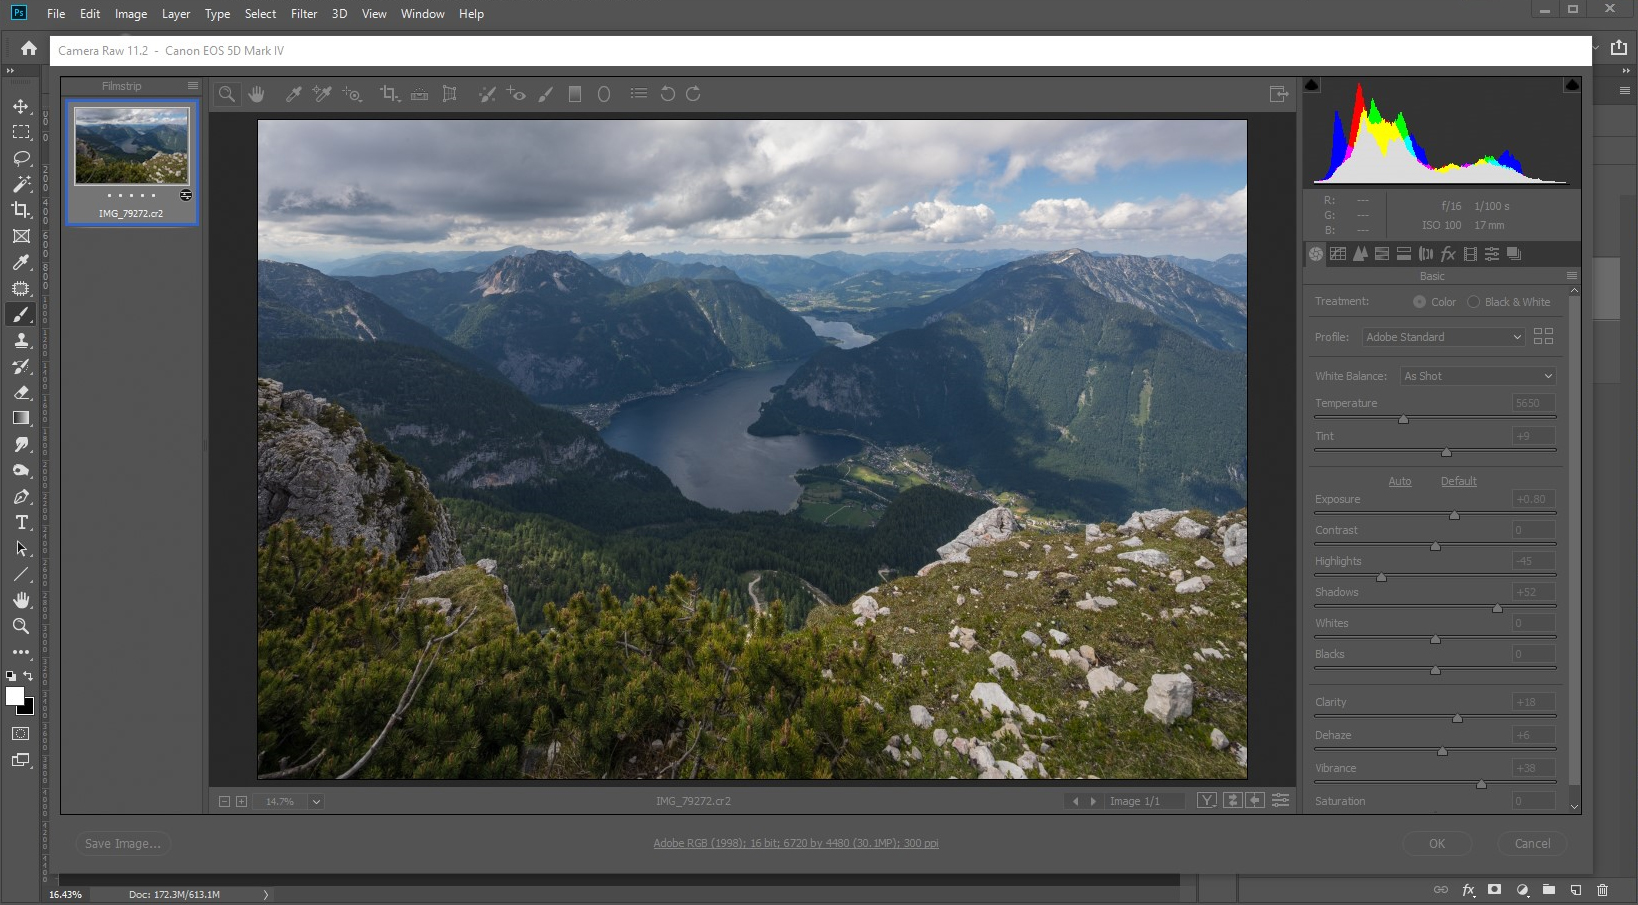
Once this is done, you go back into the RAW editor and tweak the RAW files, to create a similar look for each one. You do this by mostly tweaking the exposure, highlights, and shadows. You can also add enhancements like vibrance, dehaze and clarity to the RAWs, to make further editing even easier.
(Click to view at 100%)
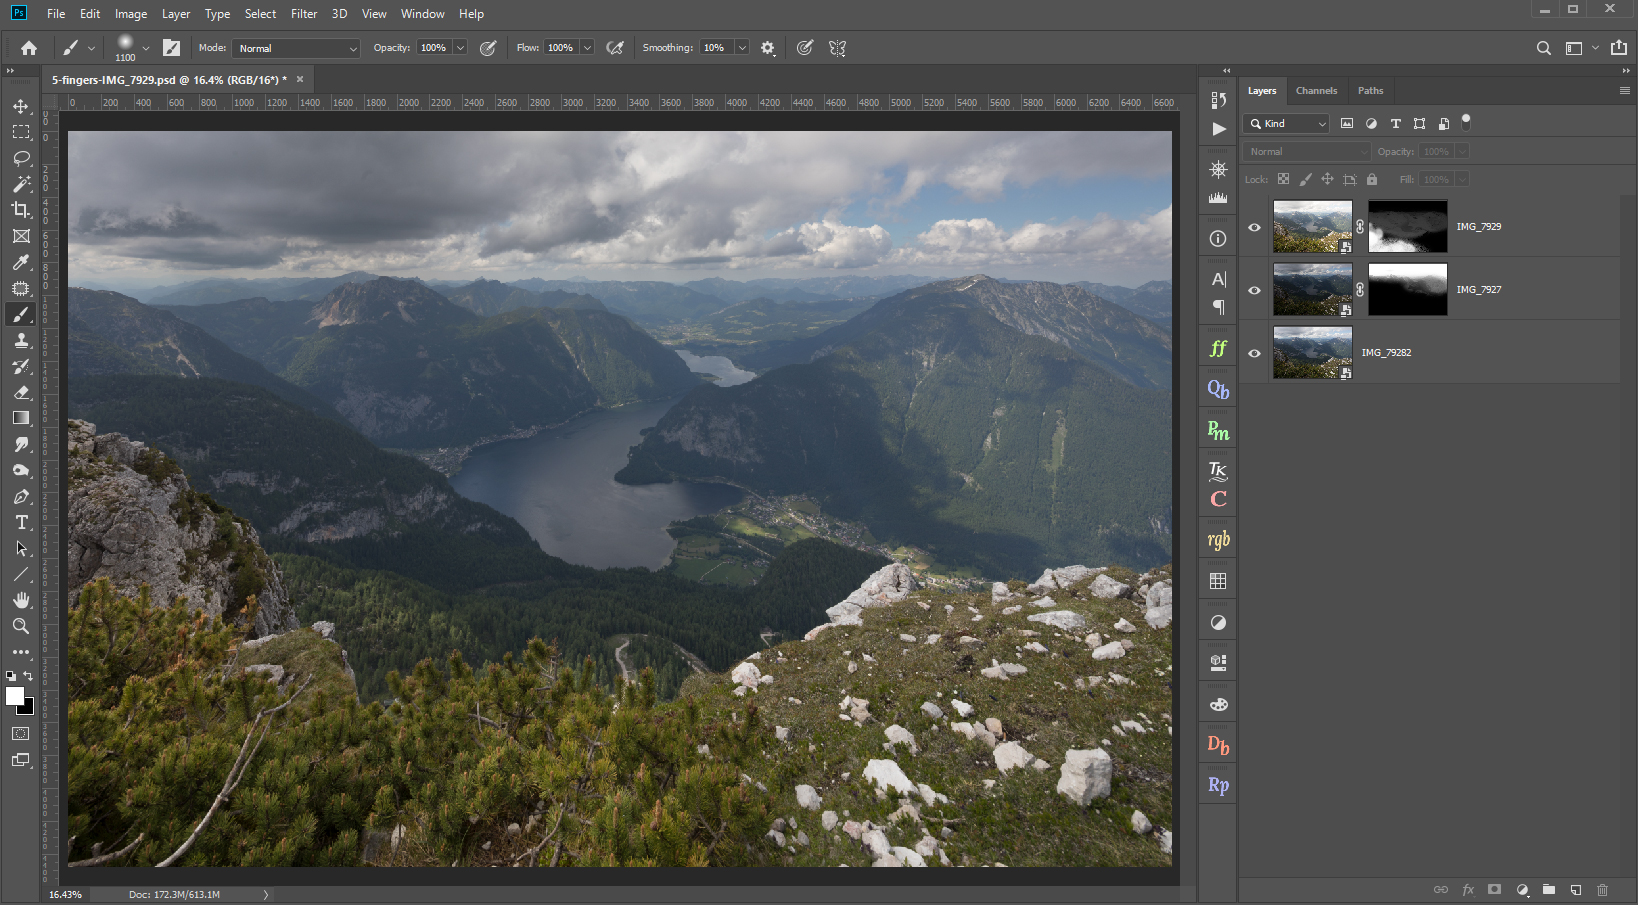
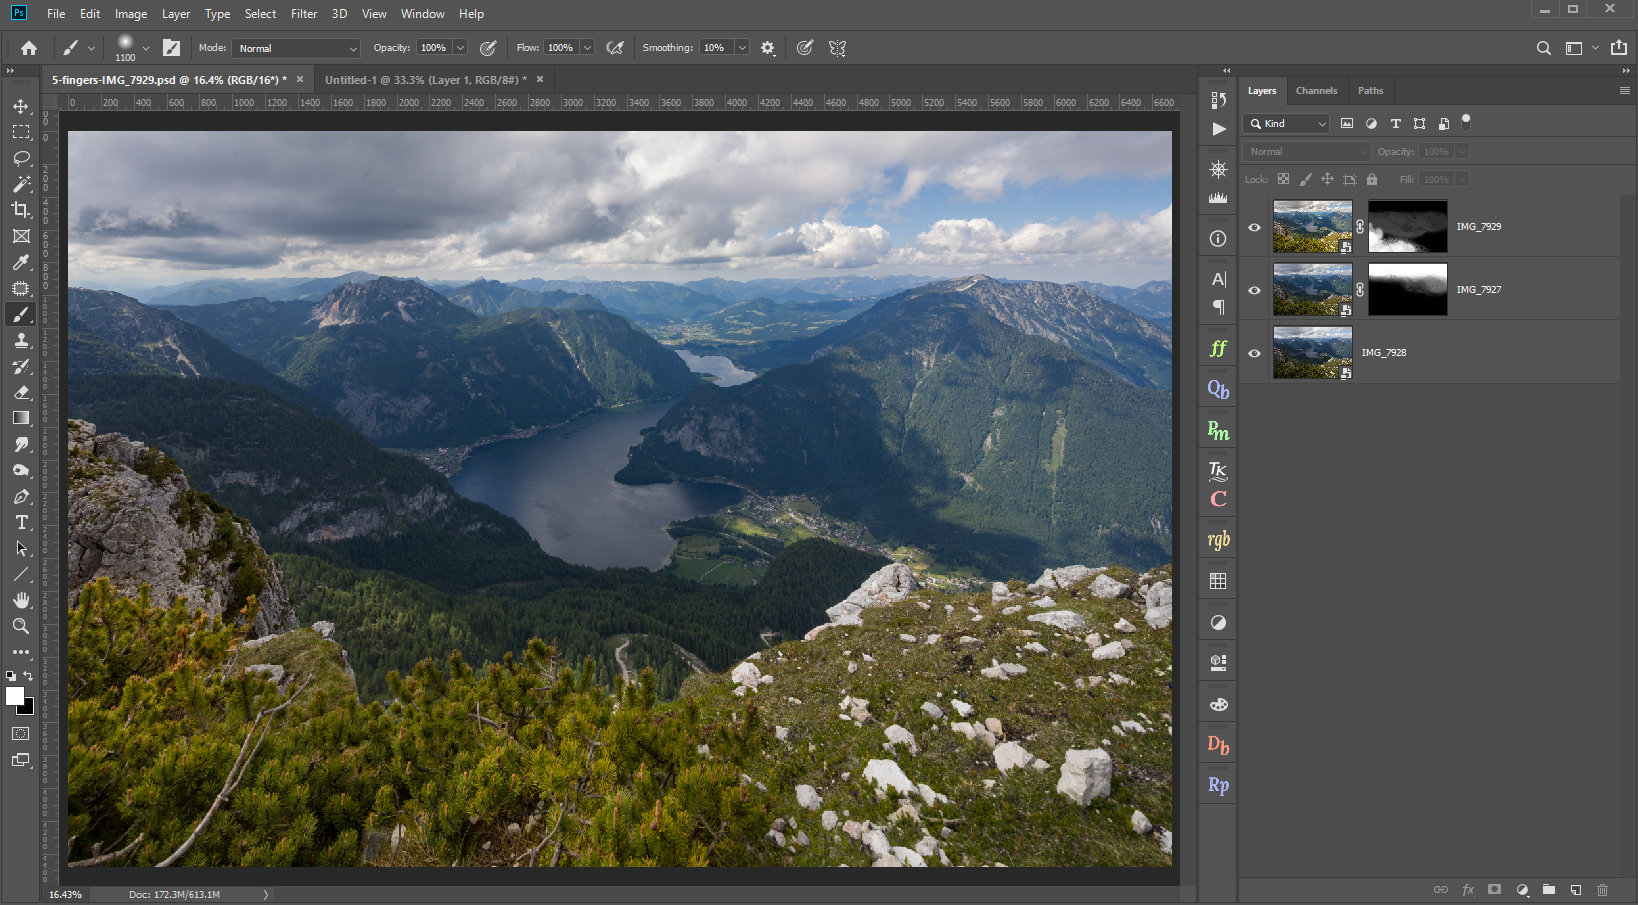
I blended the photos into one by using layer masks and luminosity selections. Once done, I matched the exposures and added vibrance, clarity, and dehaze to them. Above is a screenshot of the blended, tweaked underexposed RAW and below is how it looked afterward. You can see that the blend has almost no contrast to it. That is normal because when you remove highlights and shadows, you also remove contrast.
(Click to view at 100%)
From this point on, all of my edits are just tweaking brightness and contrast, maybe a bit of saturation here and there. Usually, you don’t need to edit saturation at all, as adding contrast makes the photo more saturated on its own. But as this was very overcast, I wanted the foreground color to stand more.
(Click to view at 100%)
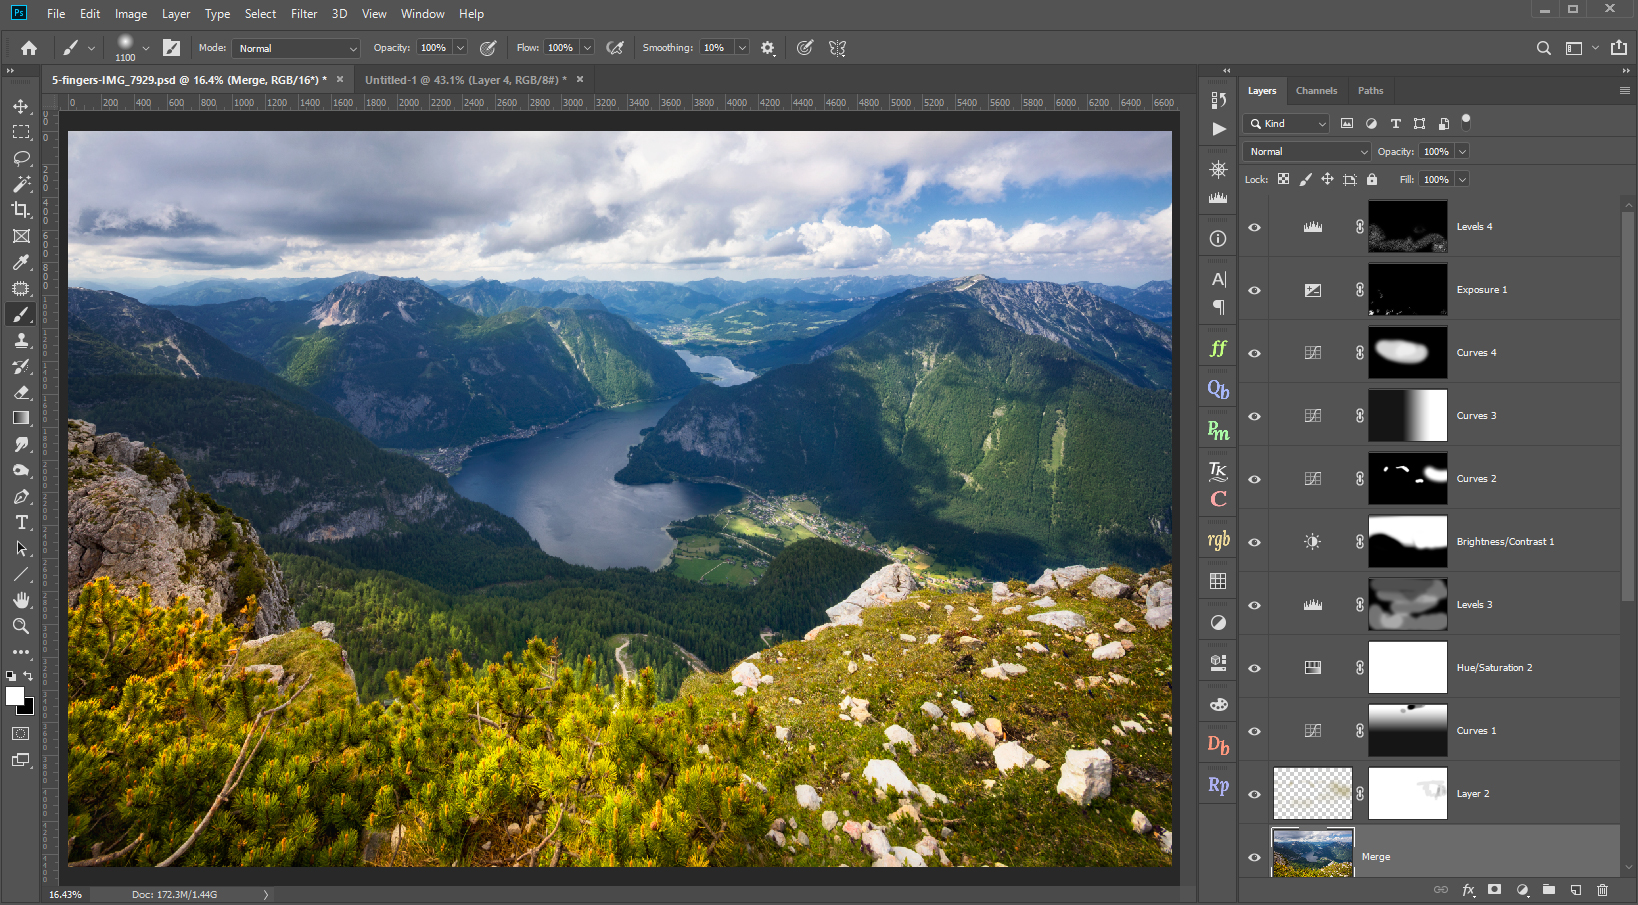
You can see in this Photoshop screenshot all the layers I used and how I only painted them by hand to the areas I needed them in.
Best Practices for Sharpening
With this done, we’ll move on to sharpening. There are three things to consider here. Firstly, the whole photo should not be of the same sharpness. Our eyes are drawn towards sharper (and brighter) areas so you can use that to draw it towards your main subject. In this photo, that would mostly be the foreground and the middle area around the lake.
Secondly, not everything should be sharp. For instance, you would not expect the peaks in the further background to be as sharp as the closer ones. And you wouldn’t expect to have much darker clouds than the rest of the scenery.
Thirdly, it is good practice to resize the photo to your final desired resolution and only afterwards sharpen it.
Topaz Sharpen AI
Let’s sharpen this photo now. We need to merge all the layers into a new one, and then use Topaz Sharpen AI from the plugin menu. There are multiple processing modes available in Sharpen AI to target specific problems–Sharpen, Stabilize, and Focus.
With a landscape photo, you can use all of them. For instance, if you got your focus a tiny bit off, you can try the focus mode to return some sharpness to the out of focus areas. Or perhaps you had a bit of wind come through and the foliage moved. In that case, you can try the stabilize mode.
Sharpening in Topaz Sharpen AI (Click to view at 100%)
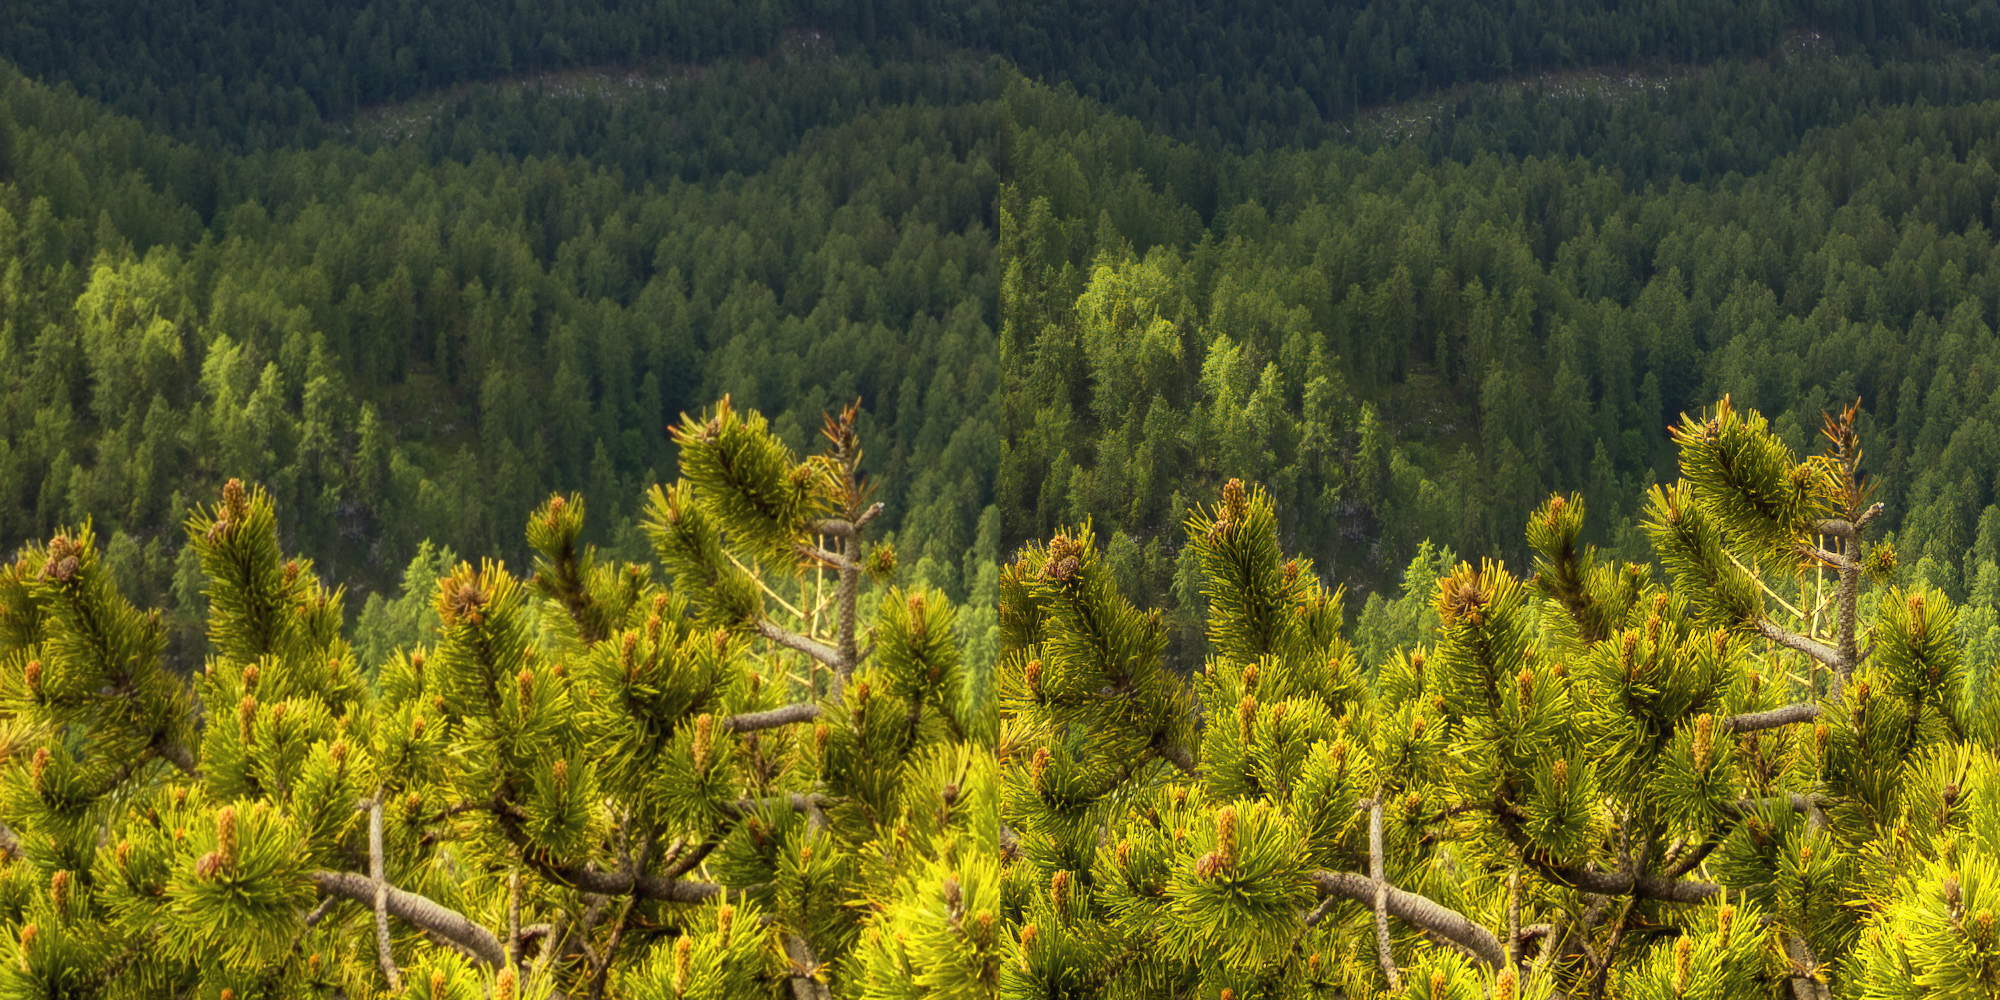
For this photo, let’s go for the standard Sharpen mode. The standard settings look a bit strong for this photo, so let’s move the Remove Blur slider to 0.4. You can see a few areas in comparison below, all are at 100% zoom.
(Click to view at 100%)
(Click to view at 100%)
We can remove the sharpness from the areas where it’s not needed, and tone it down in others. You can choose to go back to Photoshop and remove the sharpness from the clouds, if you want them to be a bit blurry and soft. I also removed the sharpness from the peaks in the distance and toned it down on the peaks that are close. Like this, there is a nice progression, with the sharpest things close to you, losing the sharpness the further away you look.
The Final Result
Final Result (Click to view at 100%)
About Miroslav Petrasko
While I started as a game designer, I switched to photography around 10 years ago. Since then I have been working with different luxury travel brands and almost daily, stubbornly updating my blog at hdrshooter.com with new photos, articles, and guides. It really is not an easy task.
Below are a few other landscape photos from my travels. The first three are from Austria: the view from Dürnstein Castle, Grossglockner High Alpine Road and the reflection at Altaussee. The last two are from Switzerland: the peaks over Zermatt and Matterhorn.
Get the Topaz Application Featured
Topaz Sharpen AI
Sharpen AI is the first sharpening and shake reduction software that can tell difference between real detail and noise. Create tack-sharp images even when you’re shooting handheld, at night, or with a shallow depth of field.