Tutorial: How to Boost Blue Skies with Topaz Studio 2
One of the most common things you will want or need to do when processing your landscape photos is to enhance the sky. This could involve improving the colors of the sky during sunrise or sunset, or simply giving a dull blue sky a little more life. Skies are obviously an important element in most landscape photos, and Lightroom makes it pretty simple to work with skies. In this tutorial, we will walk you through the process of enhancing your skies in Topaz Studio 2 using two essential filters: HSL Color Tuning and Precision Contrast.
Step 1: HSL Color Tuning
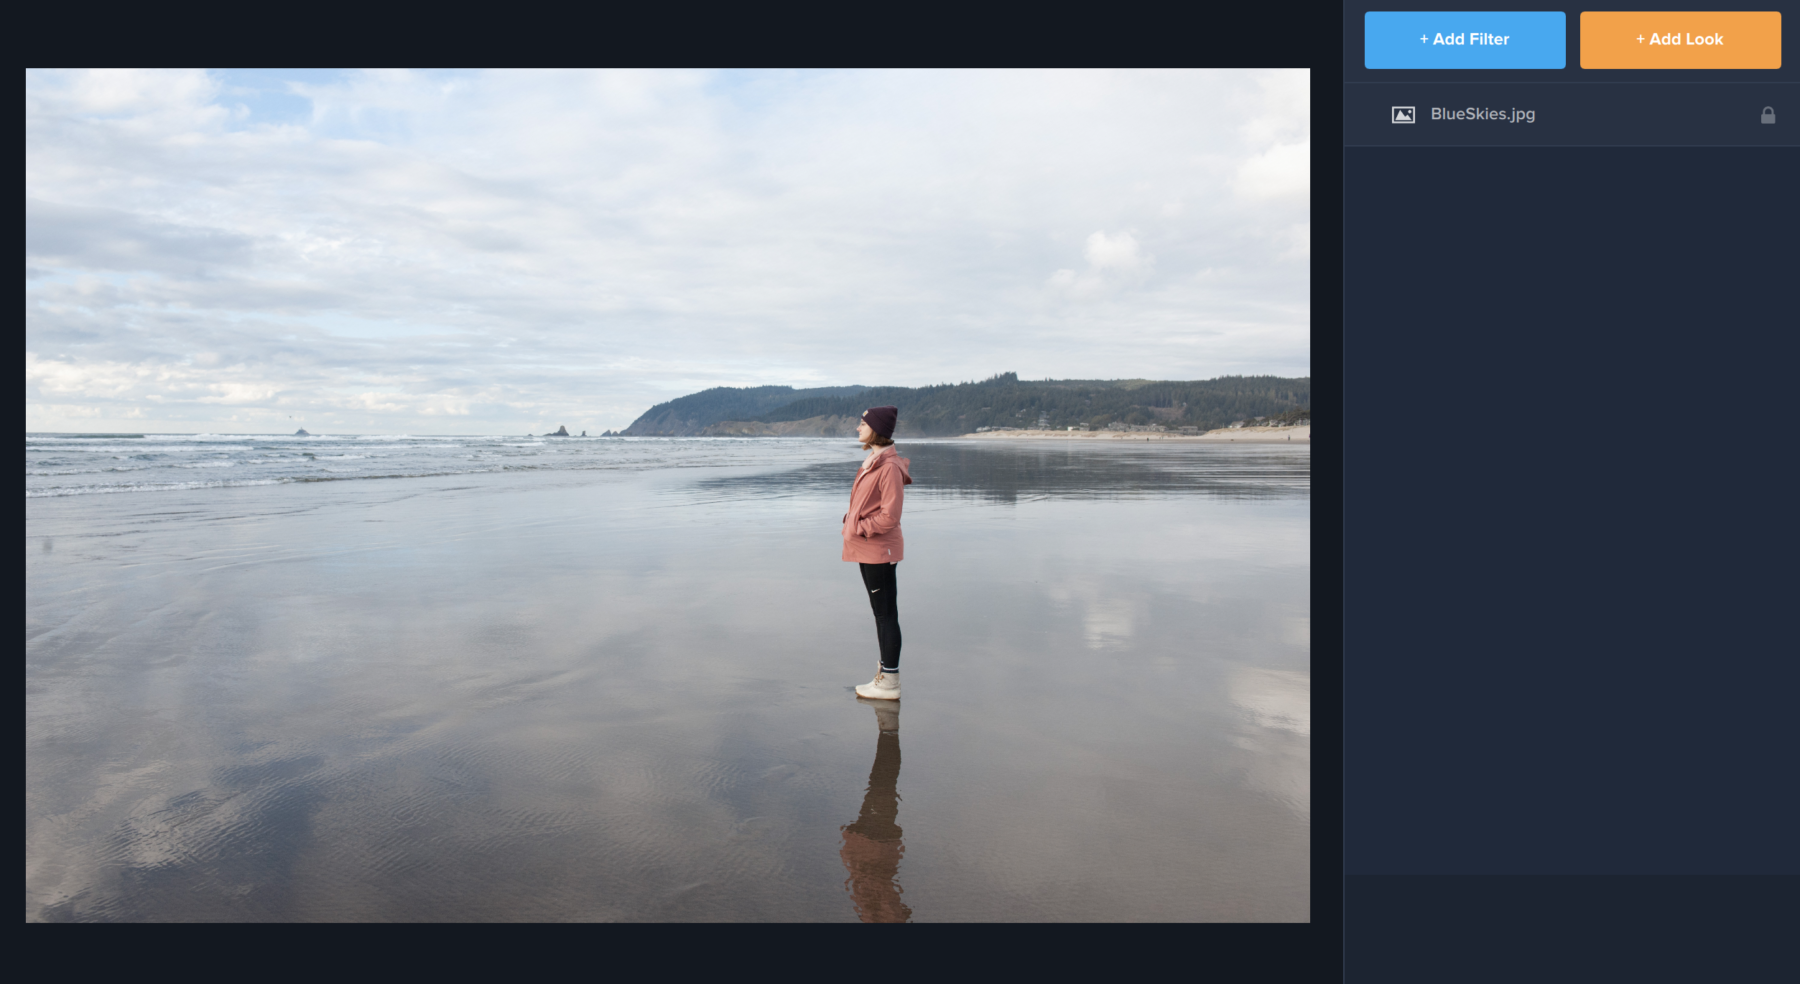
We’ll start off by opening our image in Topaz Studio 2. From the beginning, you’ll notice that the colors in this raw image are a little dull. This is a commonality when shooting an image in raw, but the good news is that your file is easy to manipulate when you shoot in raw. If you’ve shot your photo in another format, don’t worry. This tutorial will work for you, too!
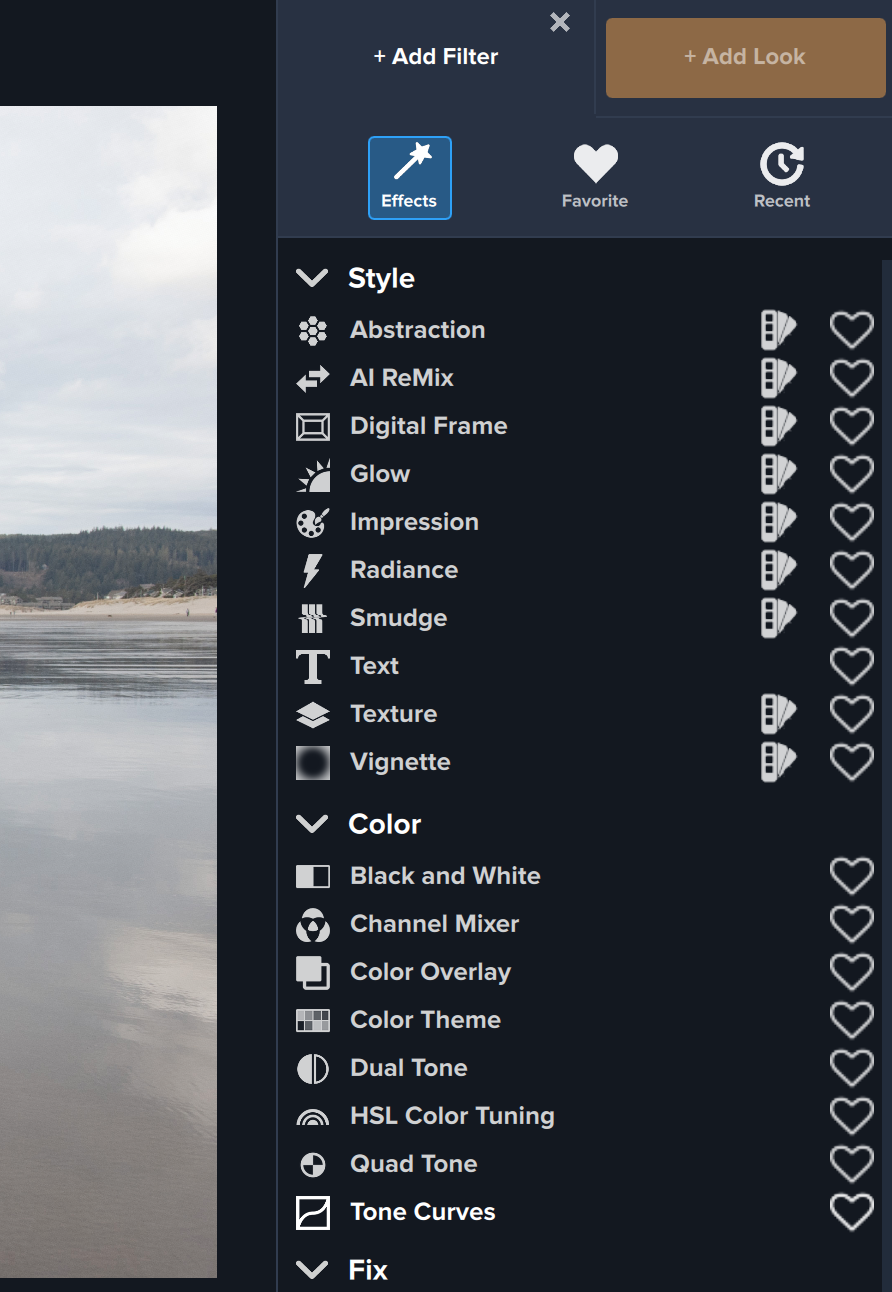
The first thing you’ll want to do is click the blue Add Filter button in the right-hand menu. This is where you’ll find over 30 unique and customizable filters to use on your image. Today we’re going to focus on two filters that will help you enhance the sky in your image. The first filter you will select is HSL Color Tuning in the second category of filters: Color.
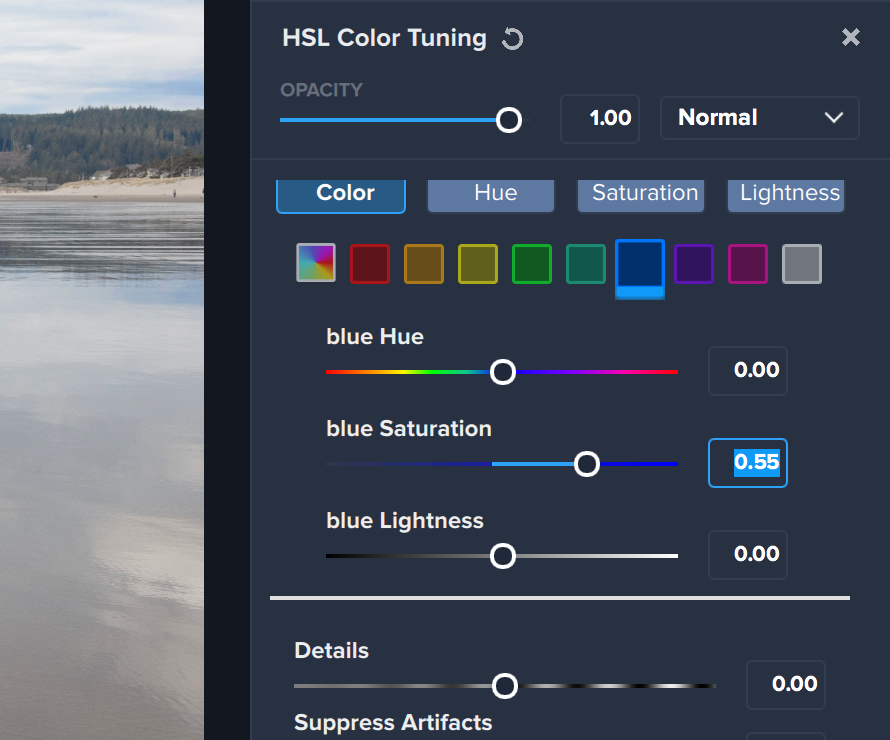
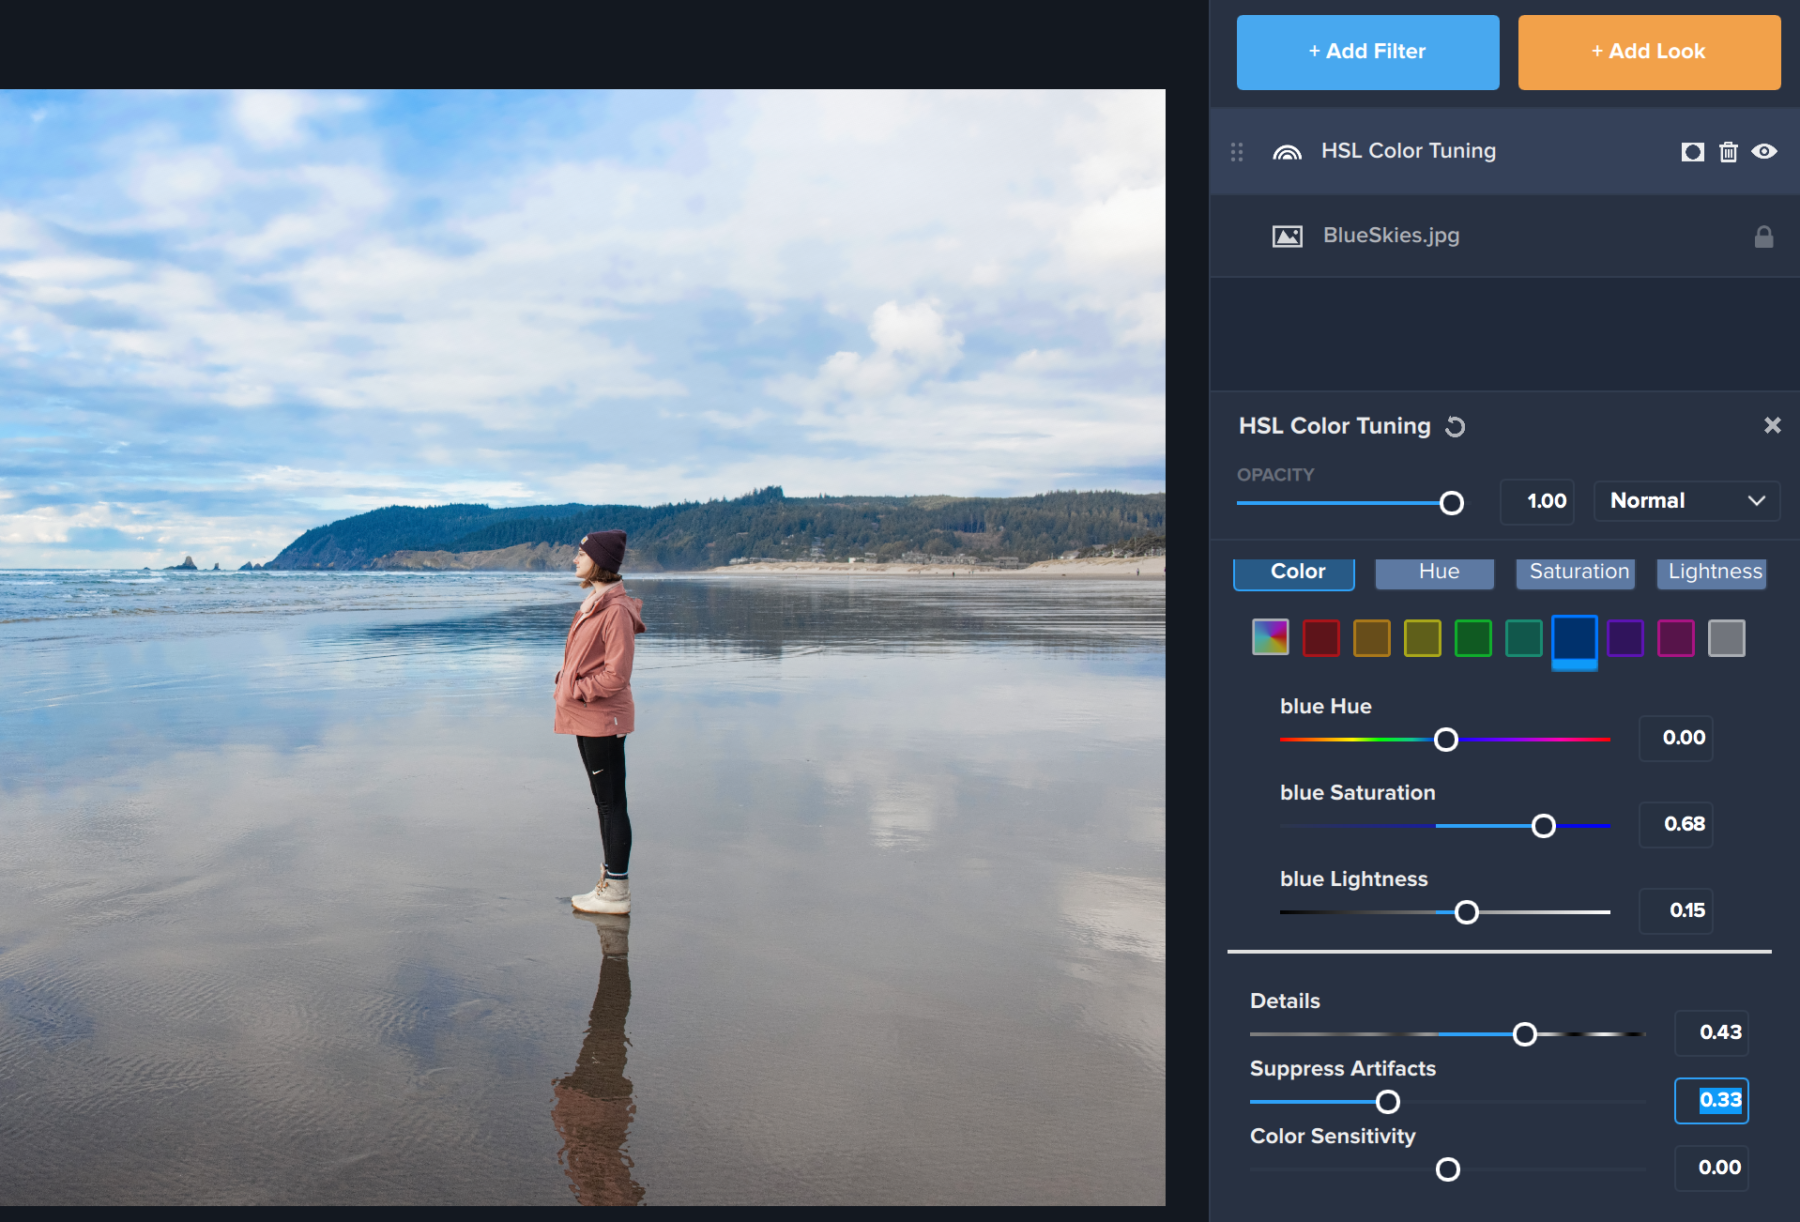
Once you apply HSL Color Tuning, the first thing you’ll want to do is click on the blue square under the Color tab (which will be the default tab selected). This allows you to specifically adjust the blue hues in your photograph. Next, you will want to slide the blue Saturation bar up as high as you want until you get the color of blue in your sky that you desire. For this photo, we adjusted the saturation to .55. This bumped up the blues in our photo so that the sky was visible through the clouds.
We also looked at the sliders below the first section and adjusted the Details slider to .43 and the Suppress Artifacts slider to .33 so that you could see more of the details of the blue between the clouds without introducing artifacts that might have appeared in the image. From there we moved on to our next step.
Step 2: Precision Contrast
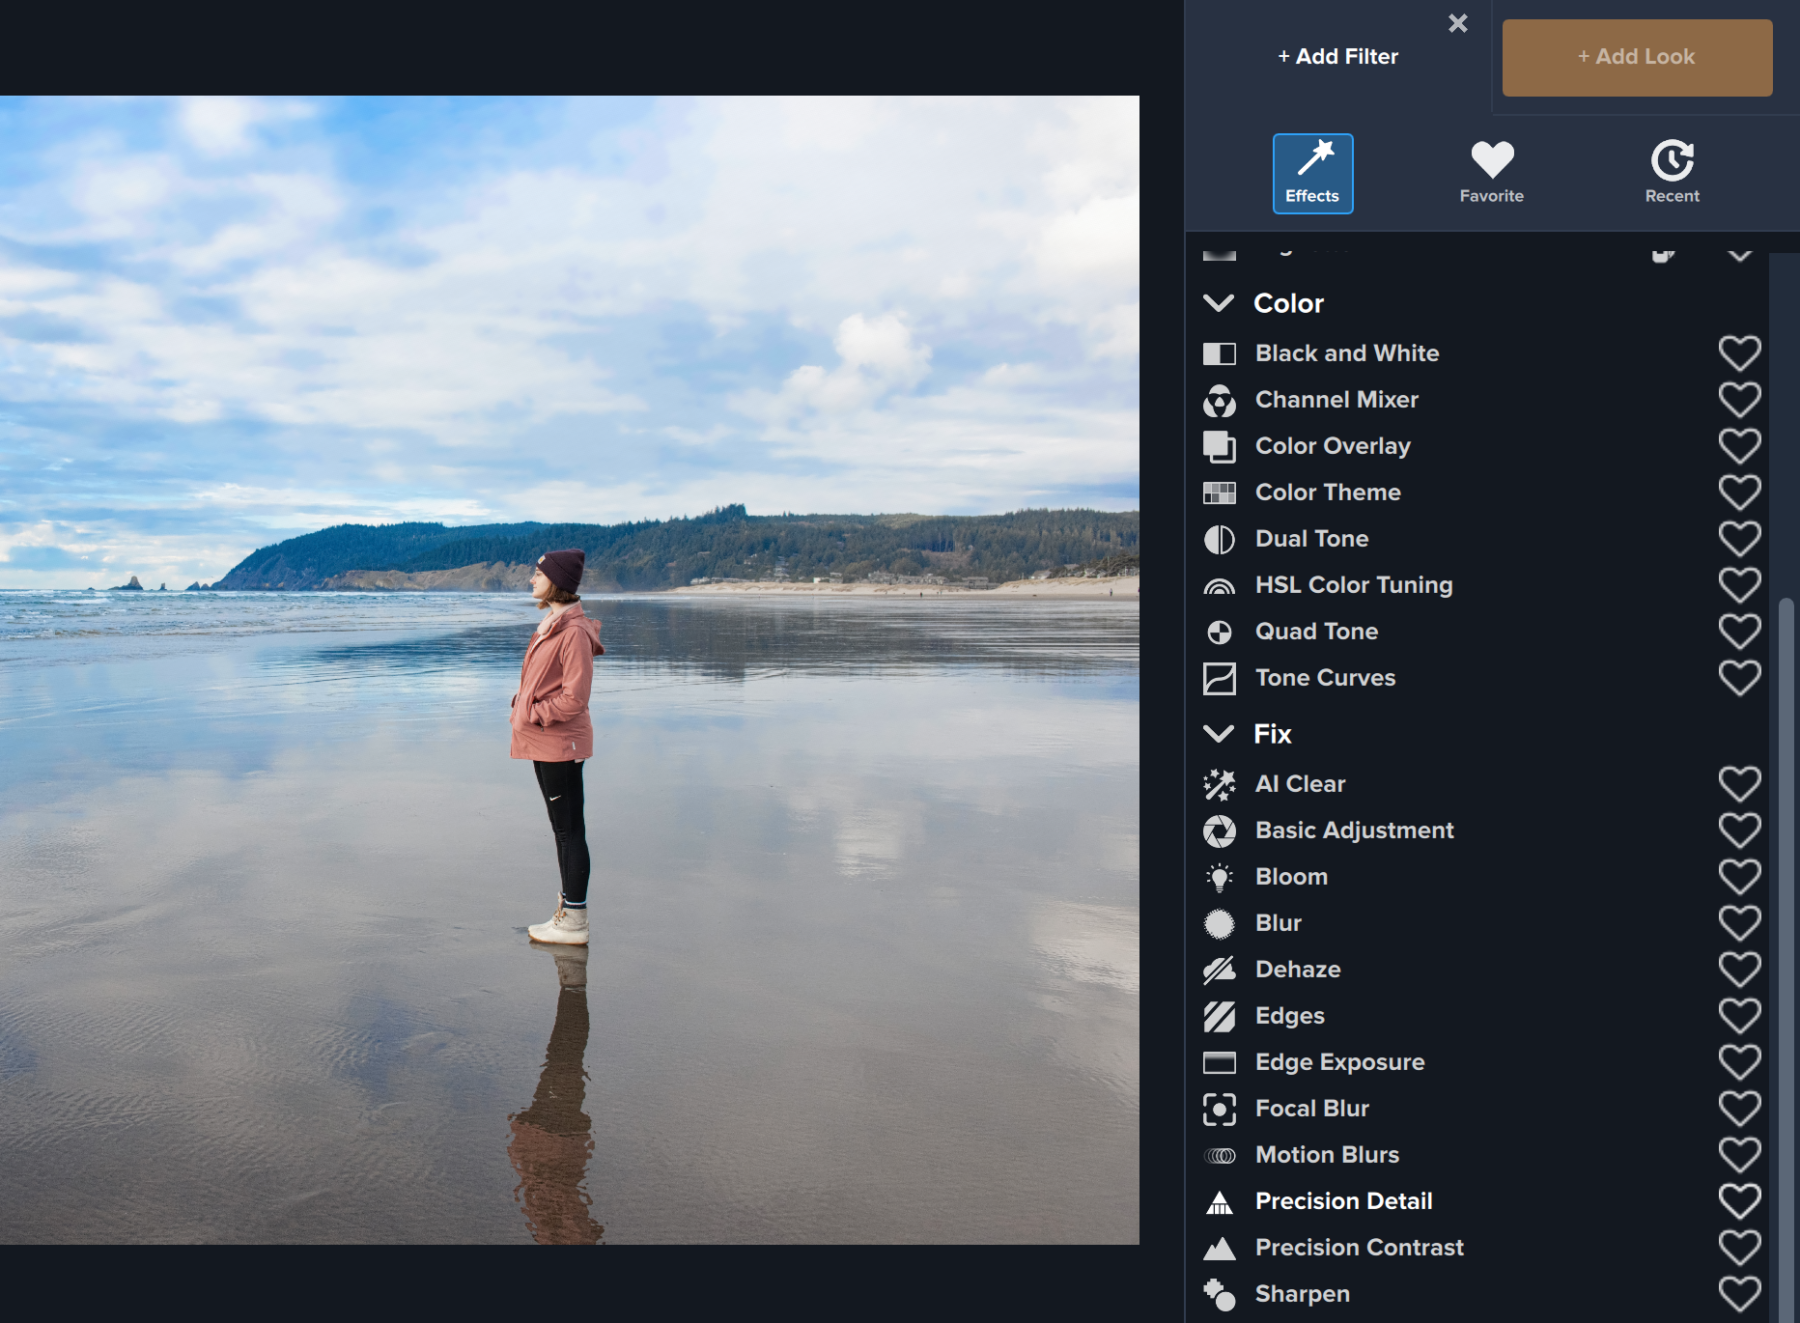
The second filter we applied to our image was Precision Contrast. This is because after increasing the saturation in the image, we wanted the sky to appear more dynamic and to more clearly notice the difference between the clouds and the sky. To apply Precision Contrast, we clicked on the blue Add Filters button again and then scrolled all the way down to Precision Contrast under the Fix category.
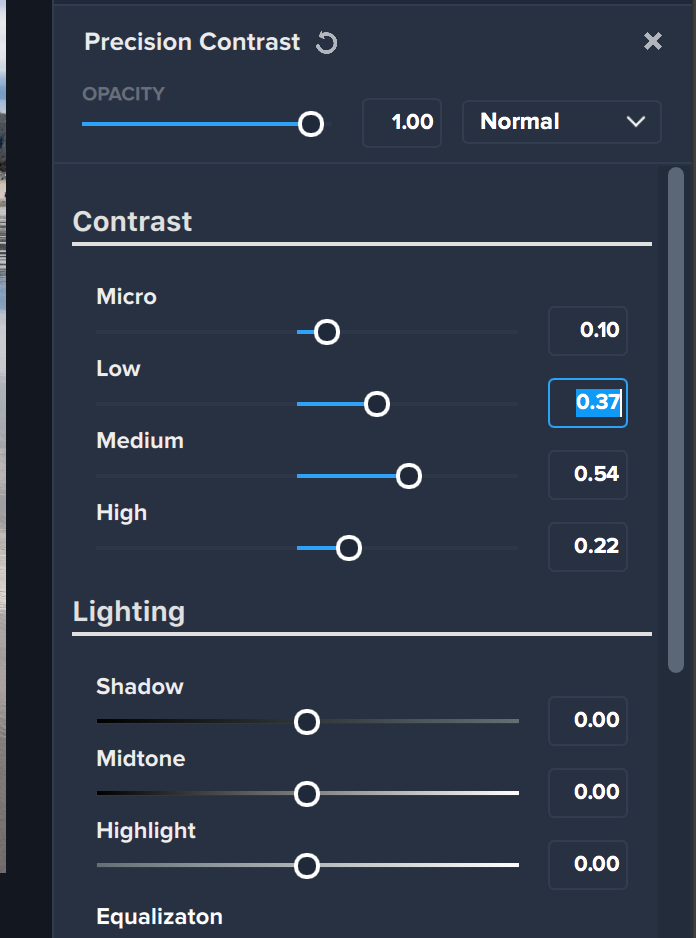
Once we applied Precision Contrast, we adjusted a few sliders, starting with the sliders under the Contrast section. You’ll notice we adjusted all four sliders (Micro, Low, Medium, and High) by different amounts. These sliders affect all images different depending on the composition. The easiest way to bring out details in the clouds was by adjusting the Low and Medium contrast settings, but we also liked that the High and Micro settings adjusted the rest of the image: the water, the individual, and the mountains in the distance. We encourage you to play around with the sliders until the image appears the way you like! Like everything else in Topaz Studio 2, there’s not an exact science to the perfect image. And your image will be uniquely your own depending on the amount you use the sliders!
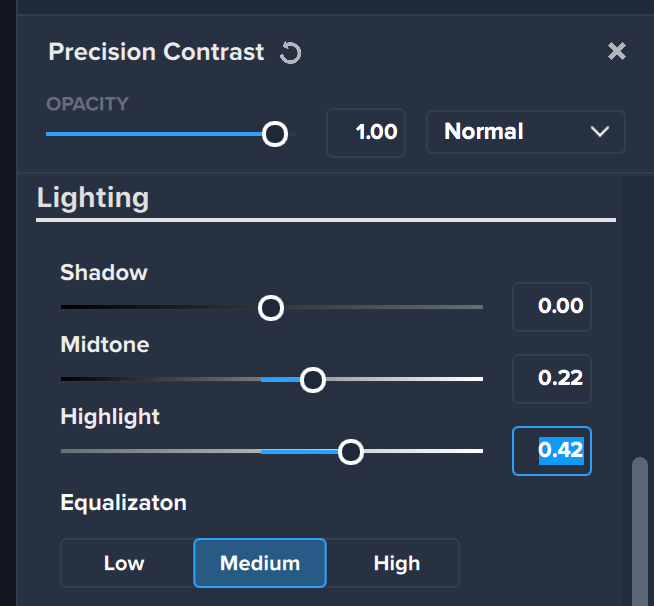
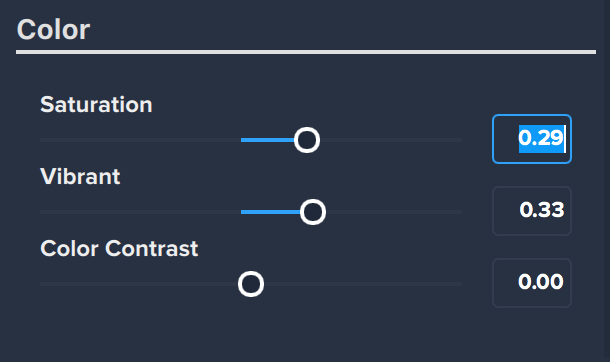
The last sliders we adjusted were in the Lighting and Color sections of Precision contrast. In order to bring out the whites of the clouds, we adjusted the Midtone and Highlight sliders with the Highlight slider adjustment higher than the Midtone slider. Then, as a final push to the bring out the colors in the sky, we adjusted the Saturation and Vibrant Sliders in the Color section by a small amount. Again, in adjusting the sliders we used a process of trial and error – every image will be different!
Step 3: The Final Result!
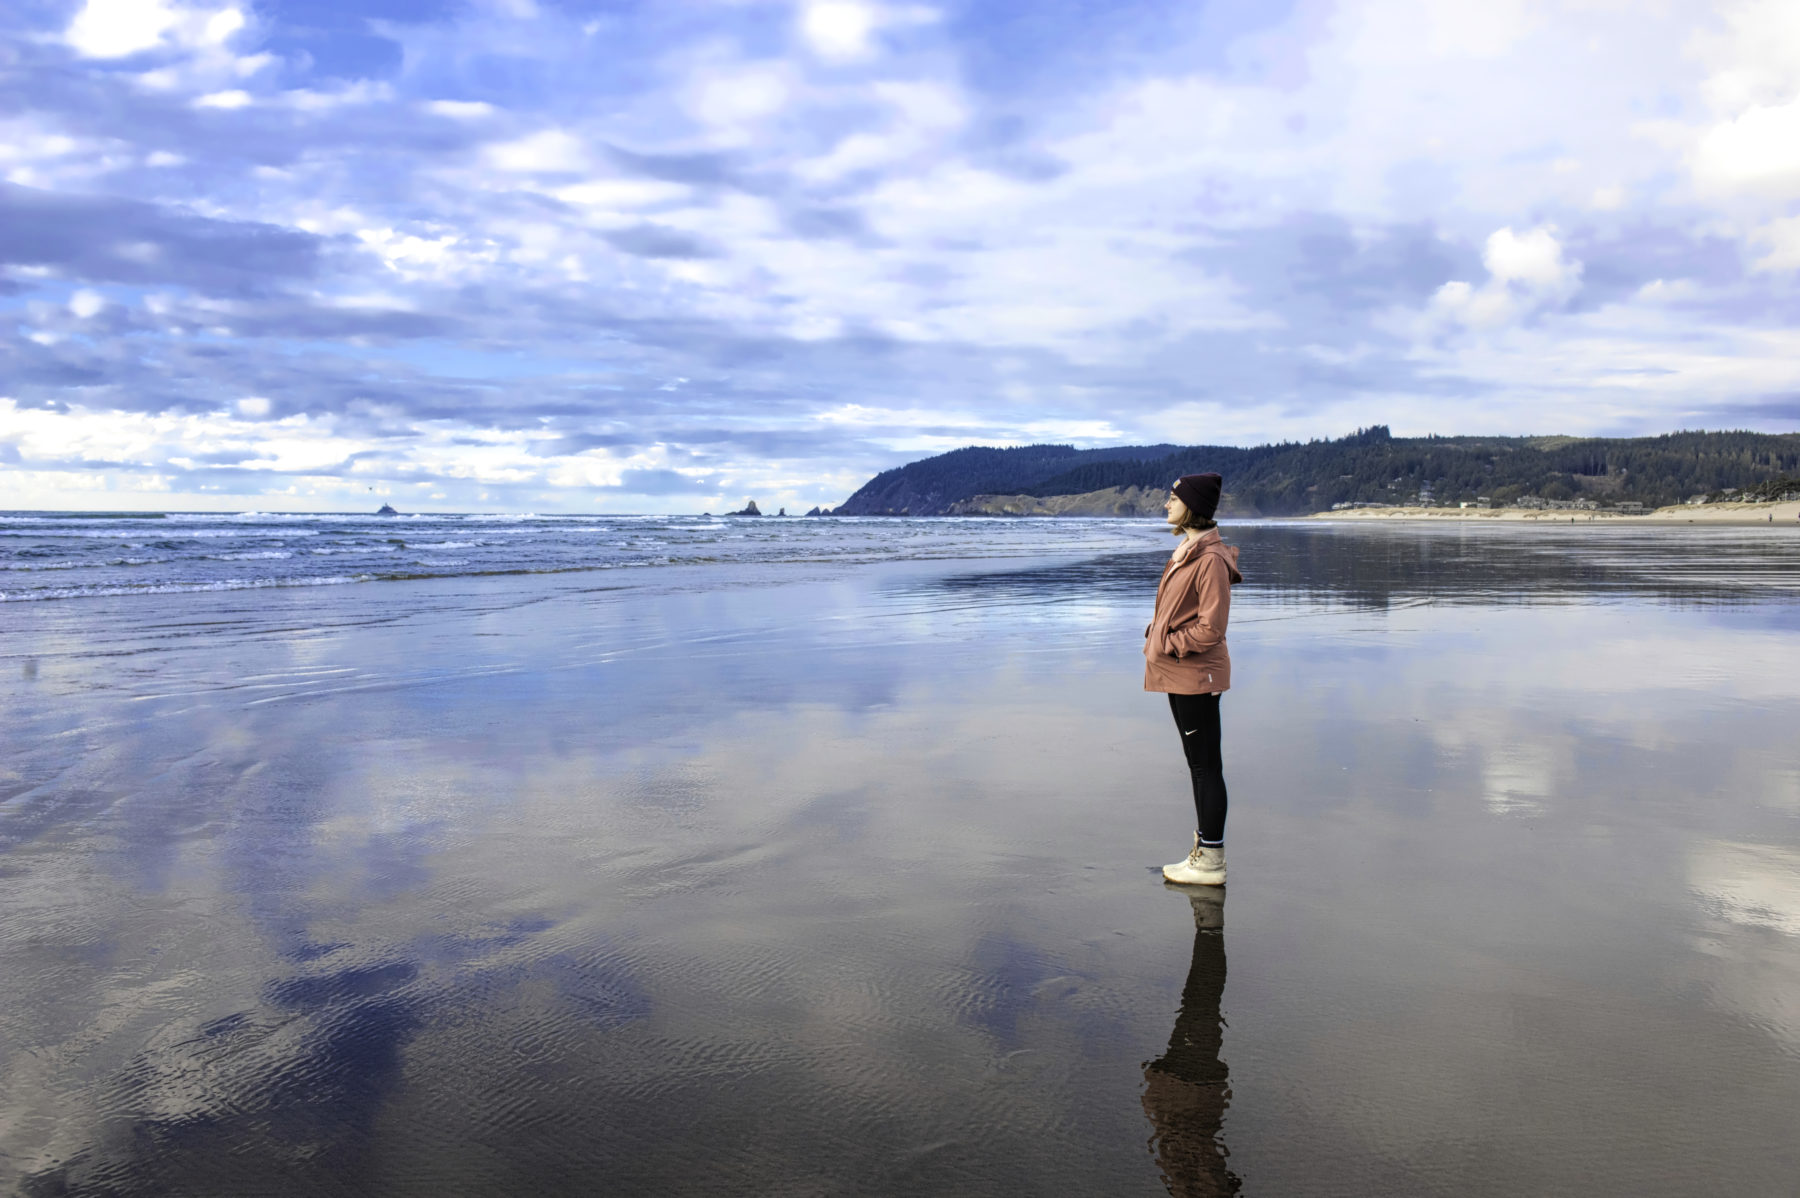
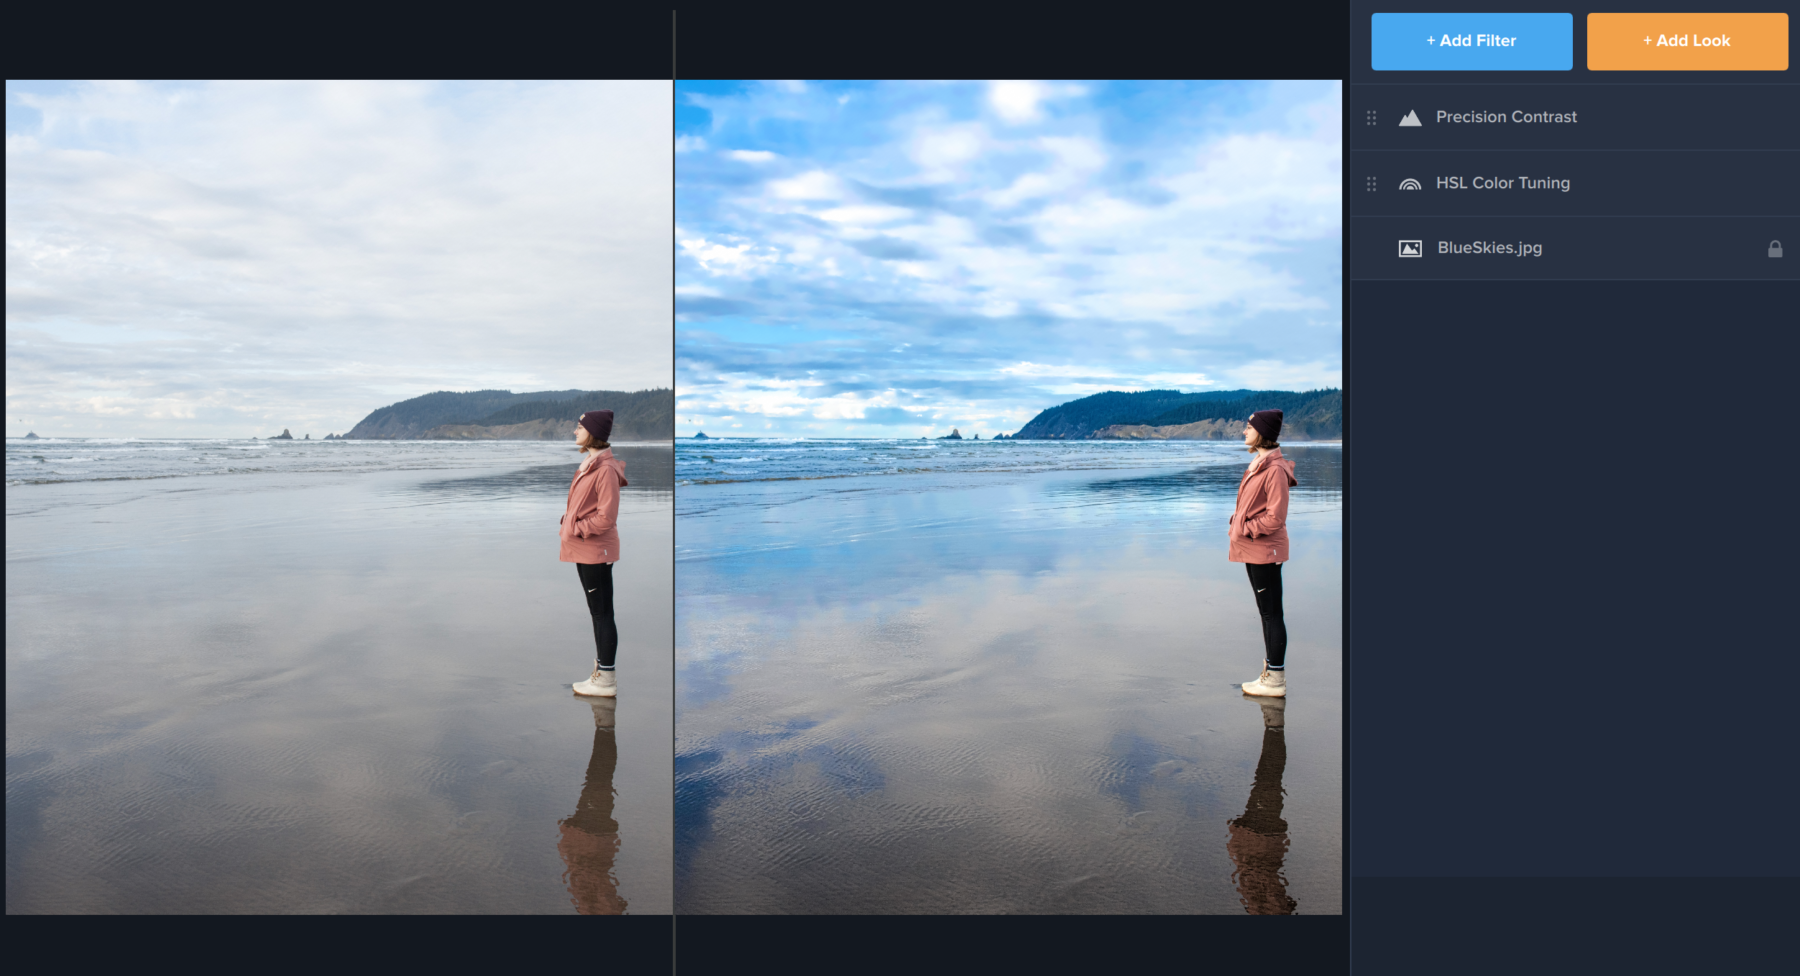
Using a combination of HSL Color Tuning and Precision Contrast, we were able to bring out the blue in our sky as well as the blue reflection of the sky on the water, without directly effecting the other colors in our image. The result is a brilliant blue sky even with a surplus of clouds. This same process could be used to bring out the color orange in a sunset sky (using the orange square in HSL Color Tuning rather than the blue one) or perhaps the green out of trees in a forest. The possibilities are endless!
6 thoughts on “Tutorial: How to Boost Blue Skies with Topaz Studio 2”
Shebyrev
Thank you. The interface is intuitive. You need to get used to the graphics of the tools and their location on the editing table.
Suzie West
I really like these written tutorials especially when learning something new. Thank you!
Gilbert C. Pogany
Excellent tutorial. Will be very helpful in my image processing. Thanks.
Hillary Fox
Thanks, Gilbert! 🙂
Jeanette
Very helpful tutorials. Thank you!
Margaret
I find the written tutorials very helpful. Allows me to step away from my desk and pick up where I left off. A challenge with YouTube videos and speakers with accents and quick-speaking dialogue. Thank you.


6 thoughts on “Tutorial: How to Boost Blue Skies with Topaz Studio 2”
Thank you. The interface is intuitive. You need to get used to the graphics of the tools and their location on the editing table.
I really like these written tutorials especially when learning something new. Thank you!
Excellent tutorial. Will be very helpful in my image processing. Thanks.
Thanks, Gilbert! 🙂
Very helpful tutorials. Thank you!
I find the written tutorials very helpful. Allows me to step away from my desk and pick up where I left off. A challenge with YouTube videos and speakers with accents and quick-speaking dialogue. Thank you.
Comments are closed.