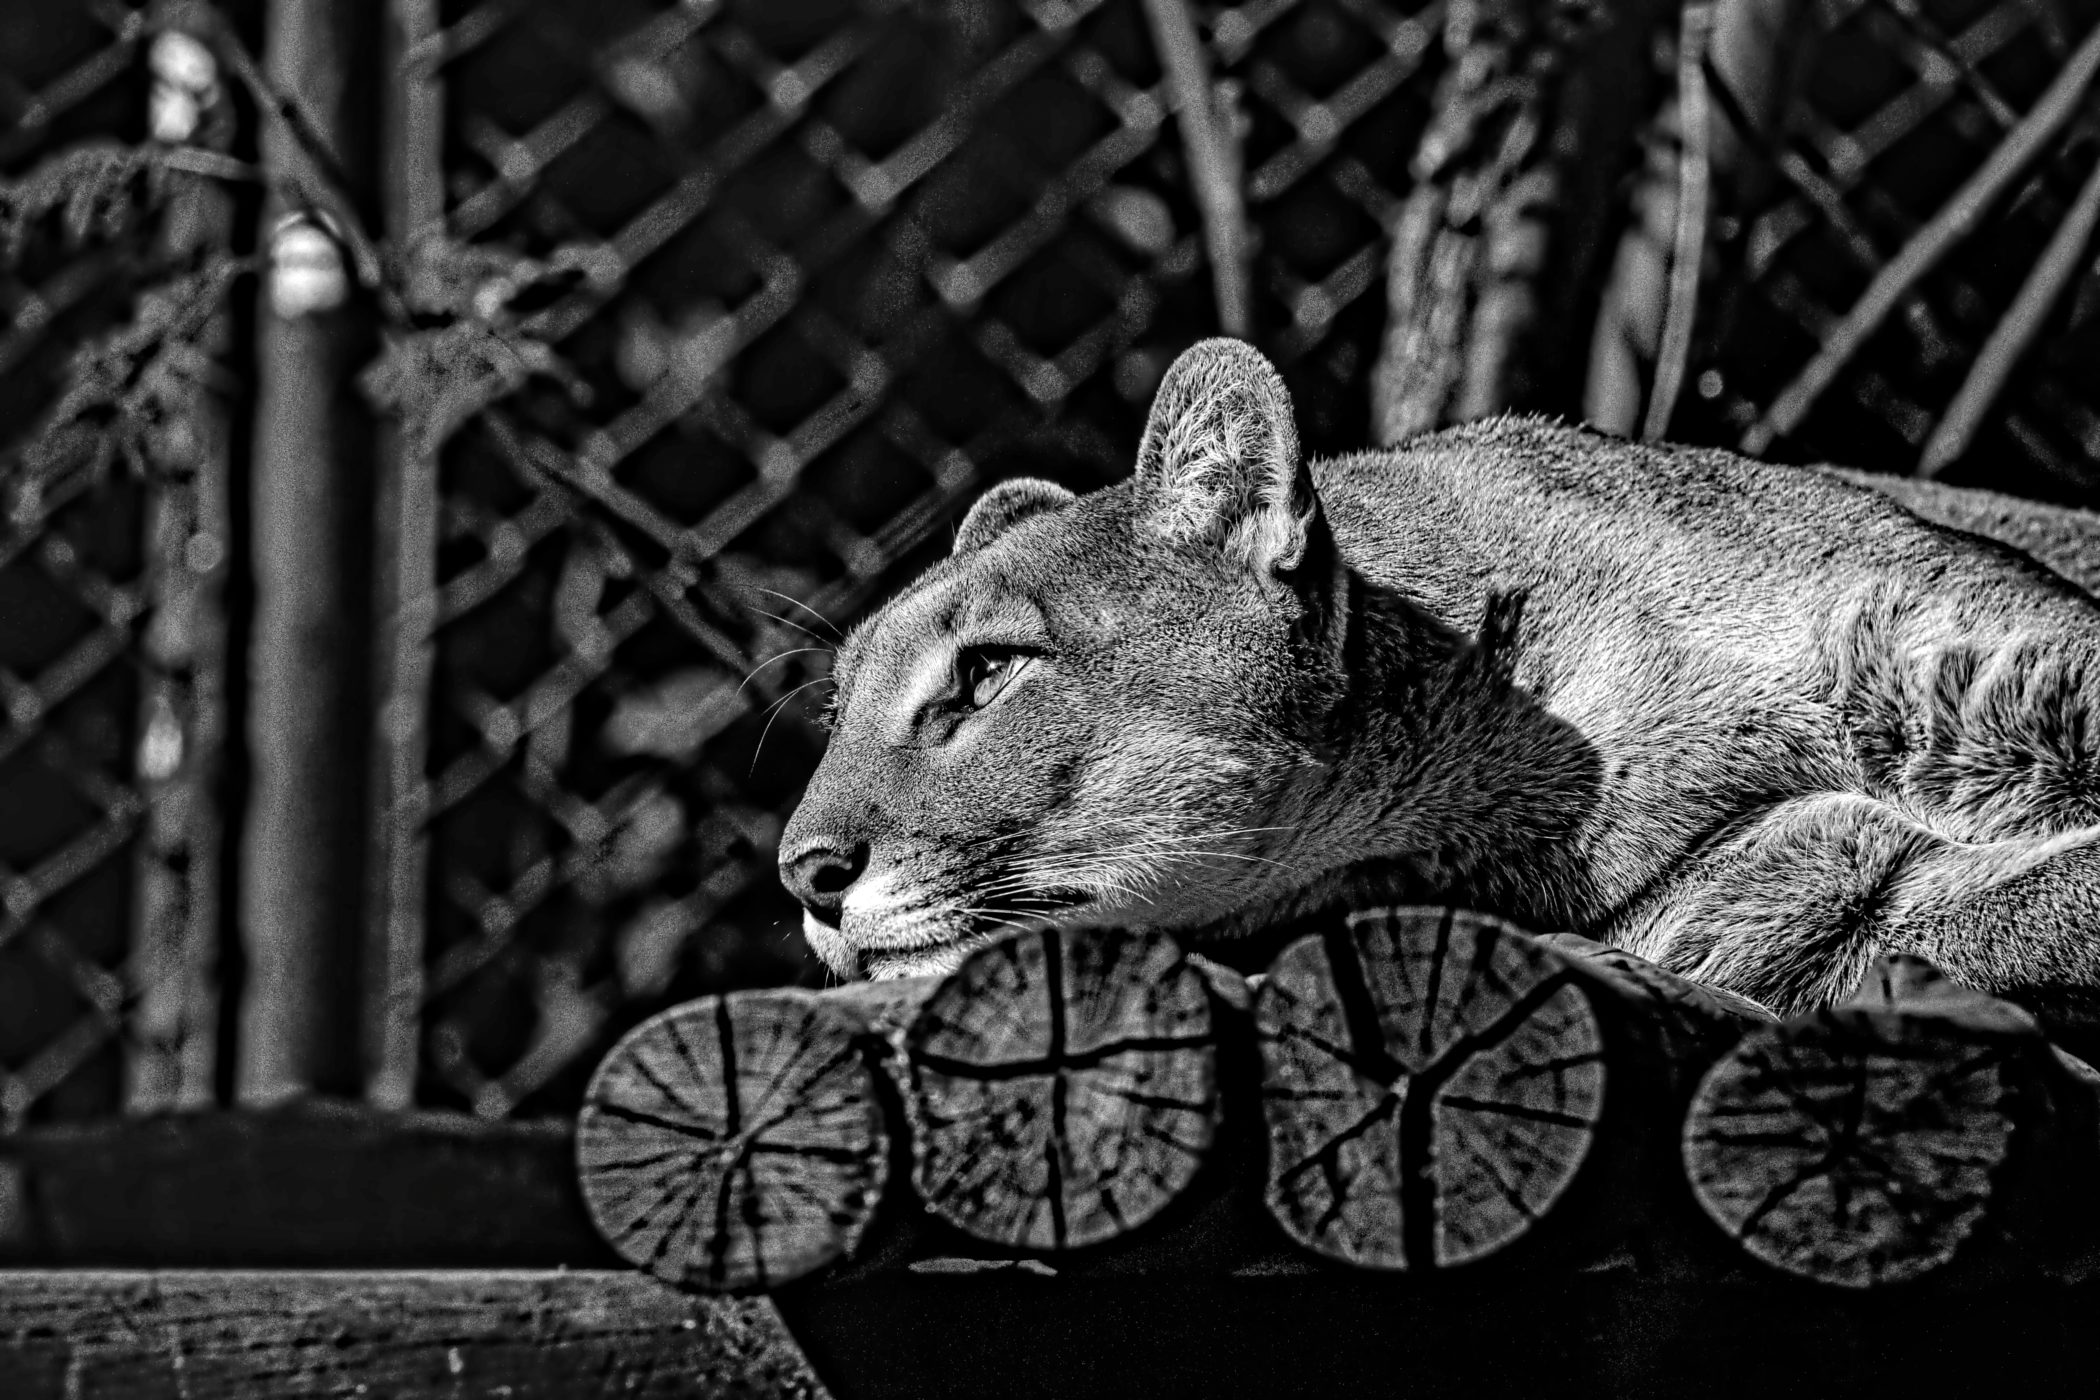
There’s nothing quite as captivating as a dramatic black and white image. It can turn a simple photo into an eye-catching masterpiece. Some assume this process can be made simple by simply turning your photo Black and White. But there are a few more steps to take that can really make your black and white image pop. In this tutorial, we will walk you through that simple process and show you how to create a high contrast black and white image in Topaz Studio 2 using three essential filters: Black and White (of course), Precision Contrast, and Precision Detail.
Step 1: Black and White
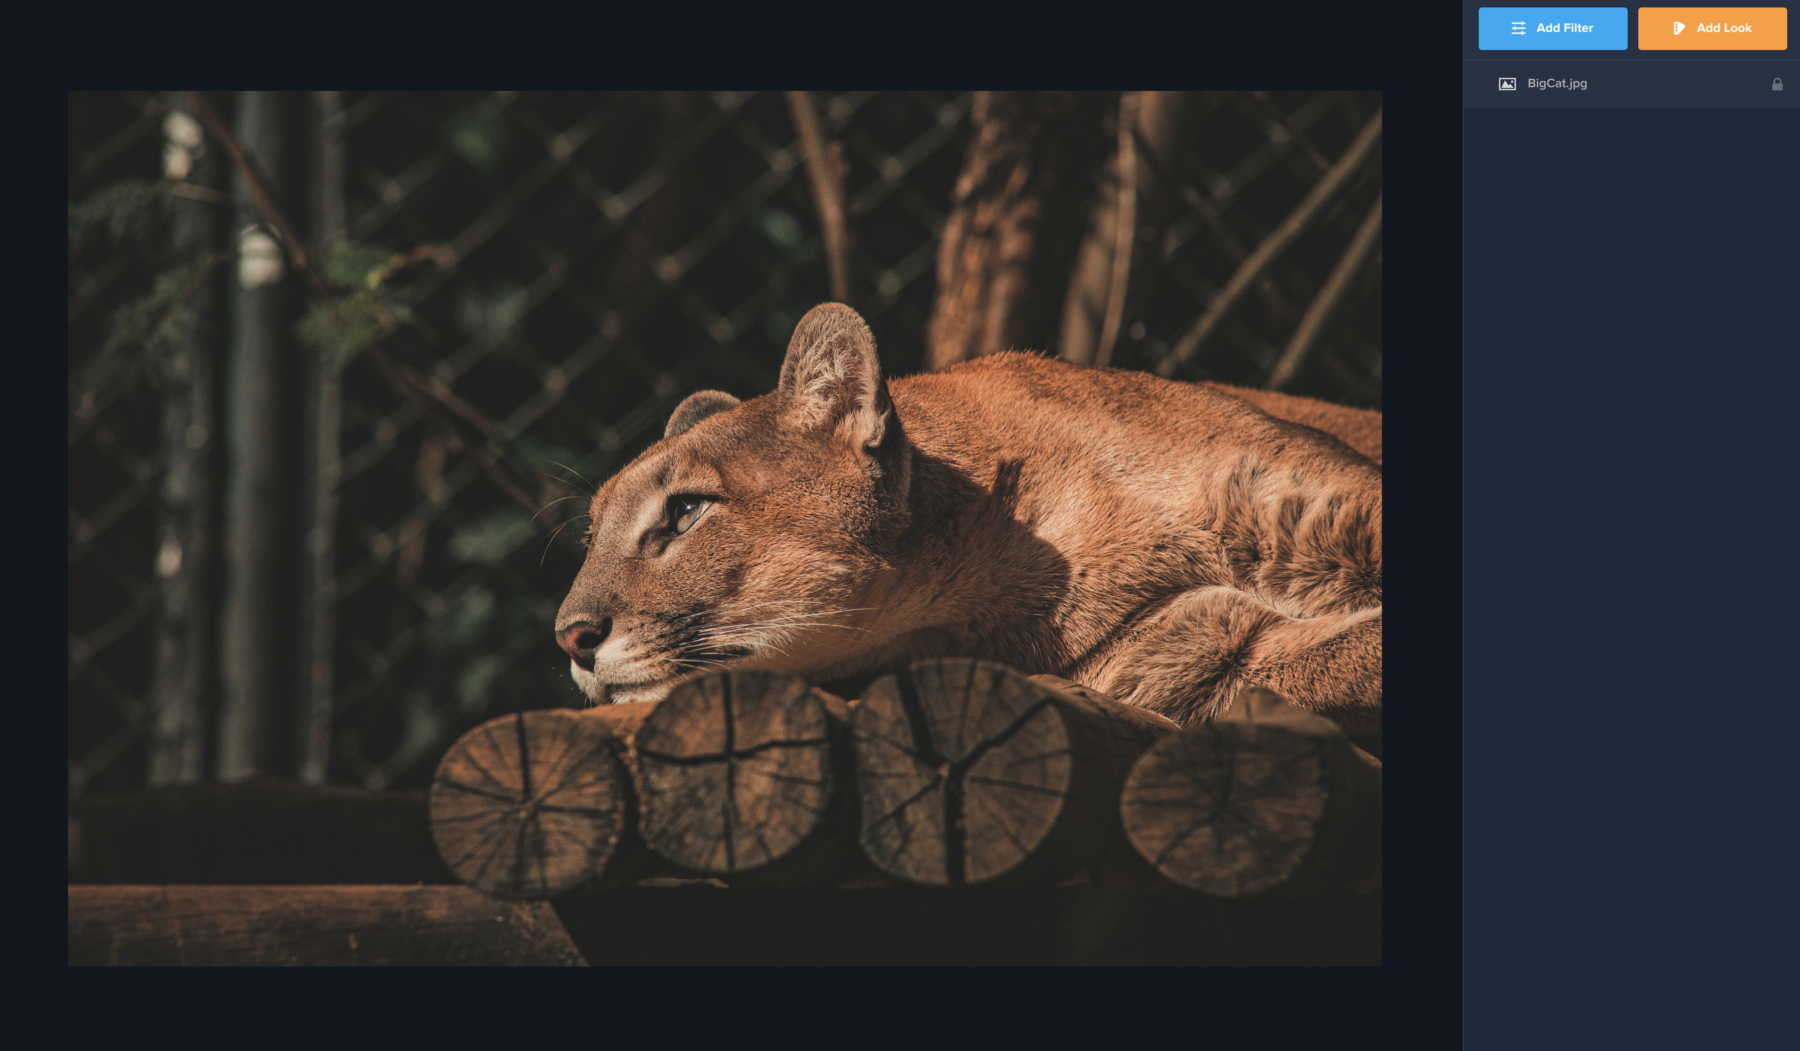
We’ll start off by opening our image in Topaz Studio. From the beginning, you’ll notice that the image is a little dark and a little muted. This shadows in this image will benefit us later on to create a striking difference between the big cat and his background.
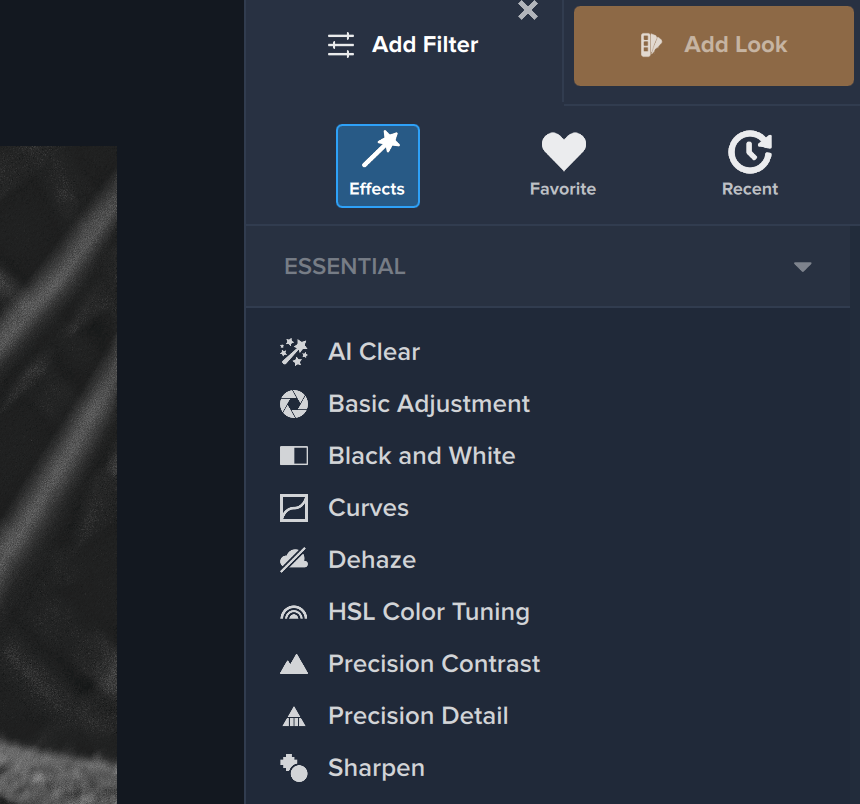
The first thing you’ll want to do is click the blue Add Filter button in the right-hand menu. This is where you’ll find over 30 unique and customizable filters to use on your image. The first filter you will select is Black and White in the first category of filters: Essential.
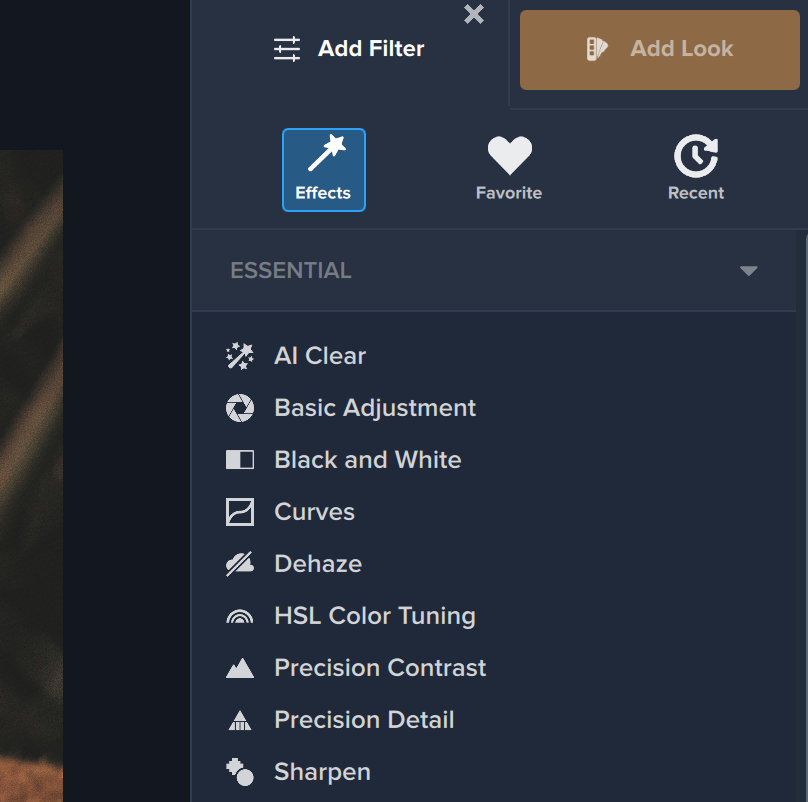
We’re actually not going to do much in this Filter today, though if you have a high concentration of a single color in your image (blue, for example) we suggest you play around with the color sliders in the filter to see how they affect your image. For us, this Filter serves a simple purpose: to turn our image black and white. We did alter one slider, the “Details” slider” near the bottom of the filter. We wanted to bring out some of the detail in the lion’s whiskers and fur before we moved on to our next step.
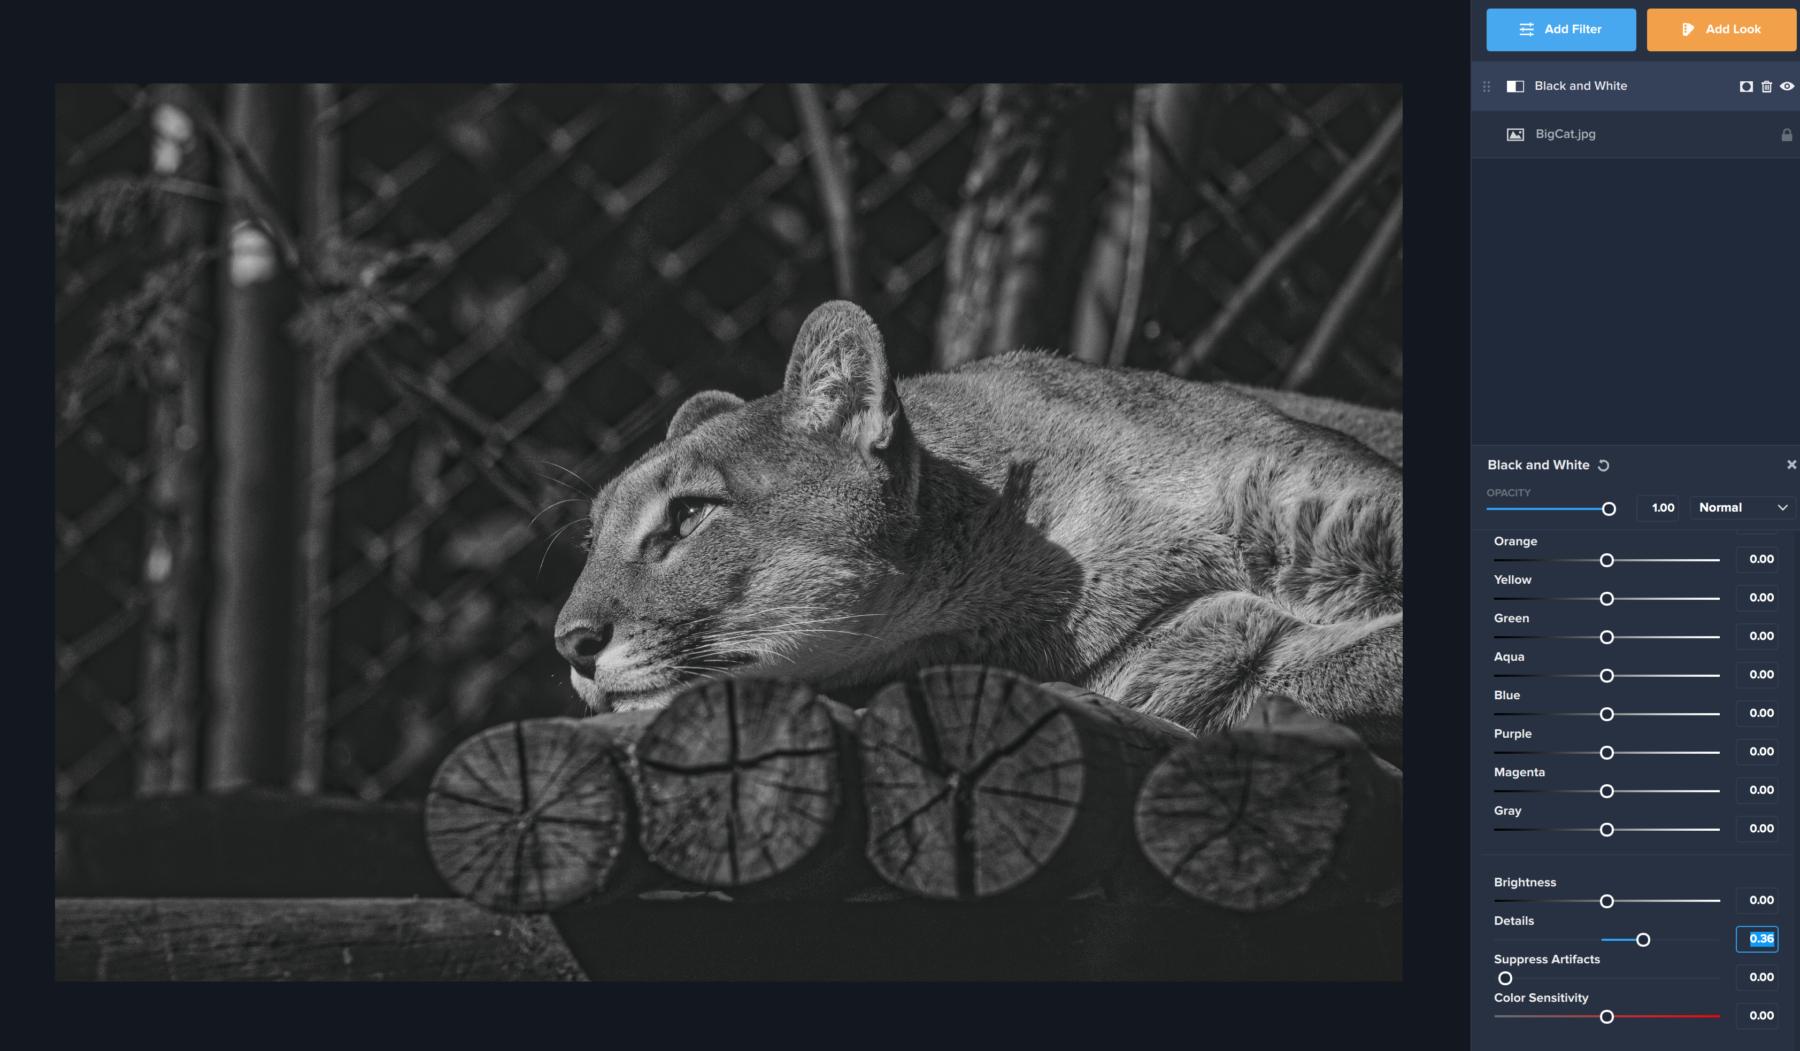
Step 2: Precision Contrast
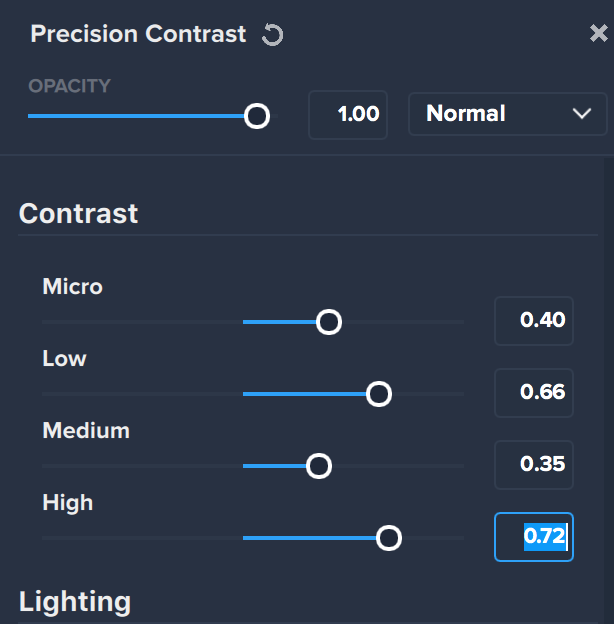
The second filter we will apply is also in the Essential category – Precision Contrast. (Pro tip: simply click the blue Add Filter button again to add a new filter!) Once we applied Precision Contrast, we adjusted a few sliders, starting with the sliders under the Contrast section. You’ll notice we adjusted all four sliders (Micro, Low, Medium, and High) by different amounts. These sliders affect all images differently depending on the composition. We encourage you to play around with these sliders to see what’s right for your image, as each image has different levels of light and contrast.
The easiest way to bring out details in the cat as well, as darkening the background and shadows beneath the logs, was by adjusting the Low and High contrast settings, but we also liked how the Medium and Micro settings adjusted the rest of the image: the patterns in the wood, the chain link fence, and the shadows on it’s fur.
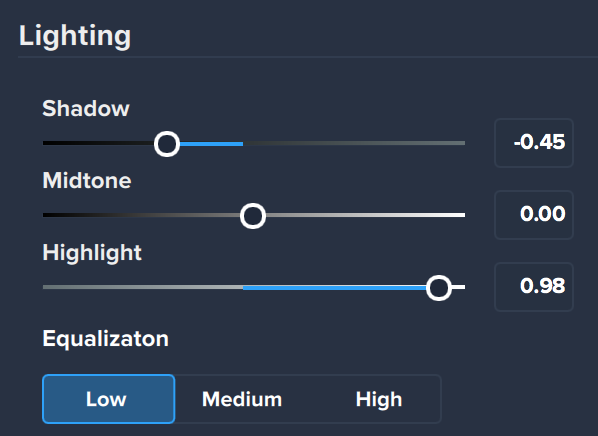
Next, we adjusted the sliders in the Lighting section. We left the midtones alone because they made the fur a bit too sharp, but we moved the Shadow slider down to darken the already dark areas, and brought the Highlight slider way up high to bring out the highlights on the fur. It created a stark effect where the big cat stood out from it’s surroundings. Lastly, we moved the Equalization tab to Low in order to remove some of the busyness from the background of the image.
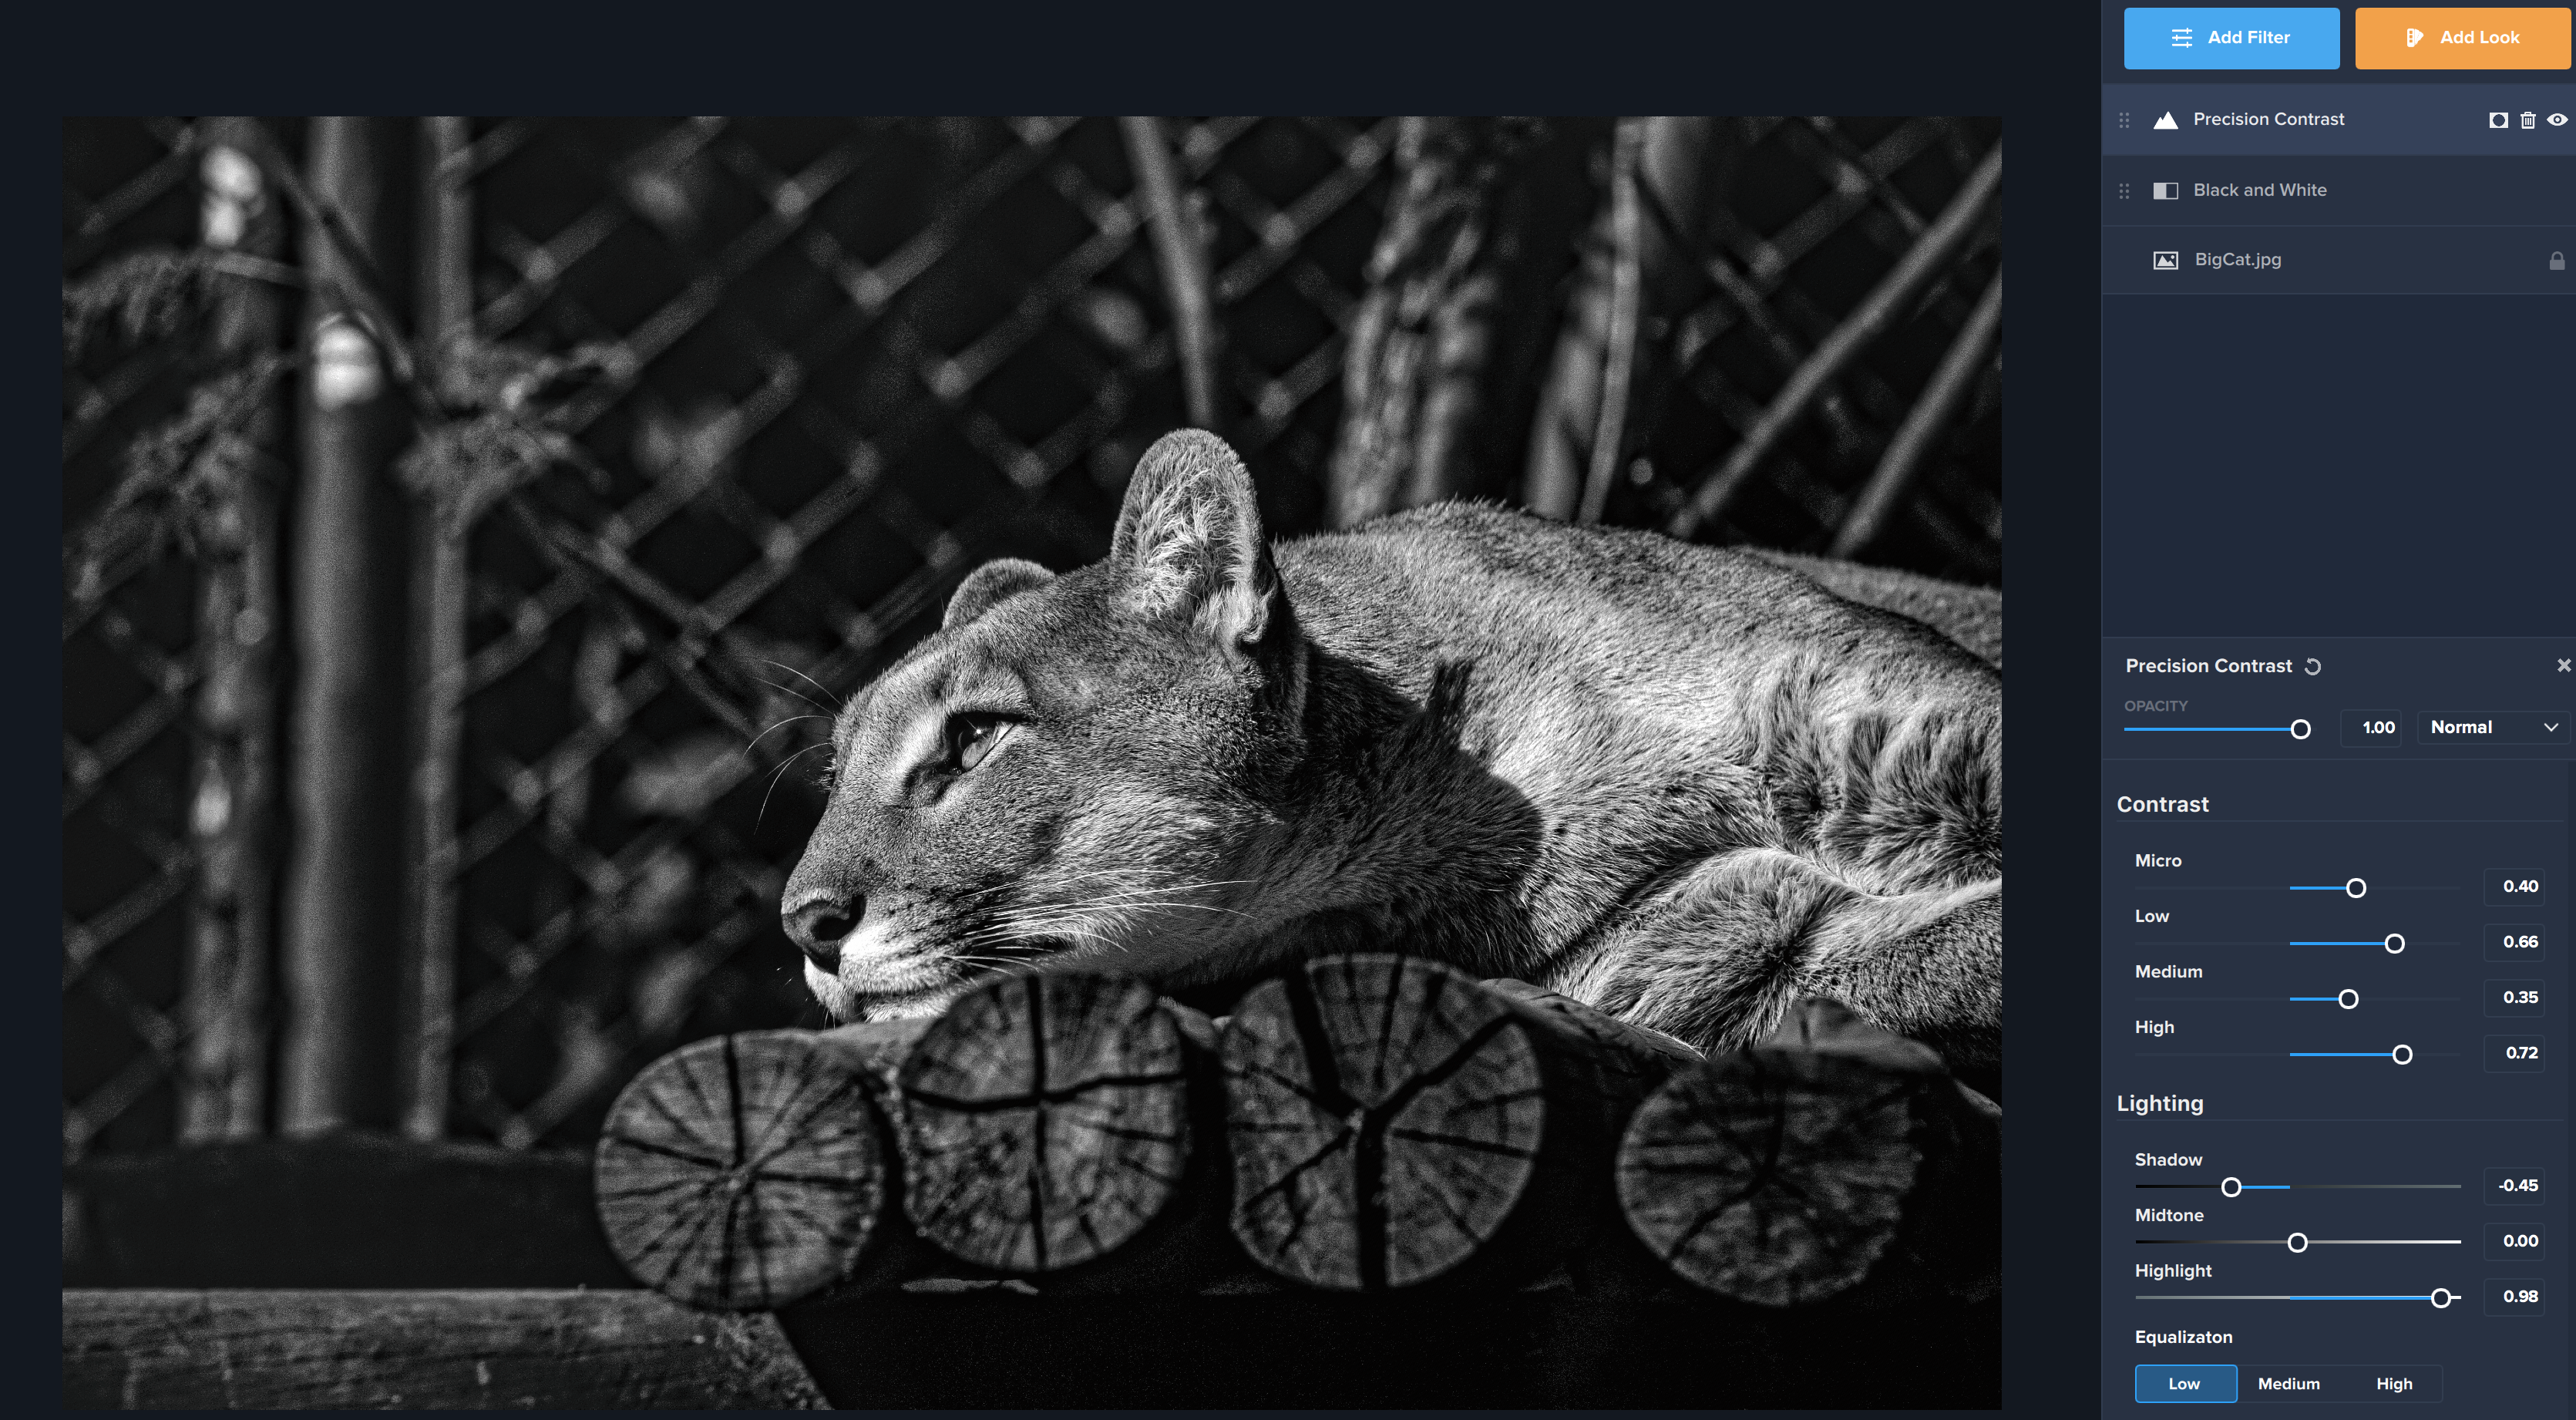
Step 3: Precision Detail
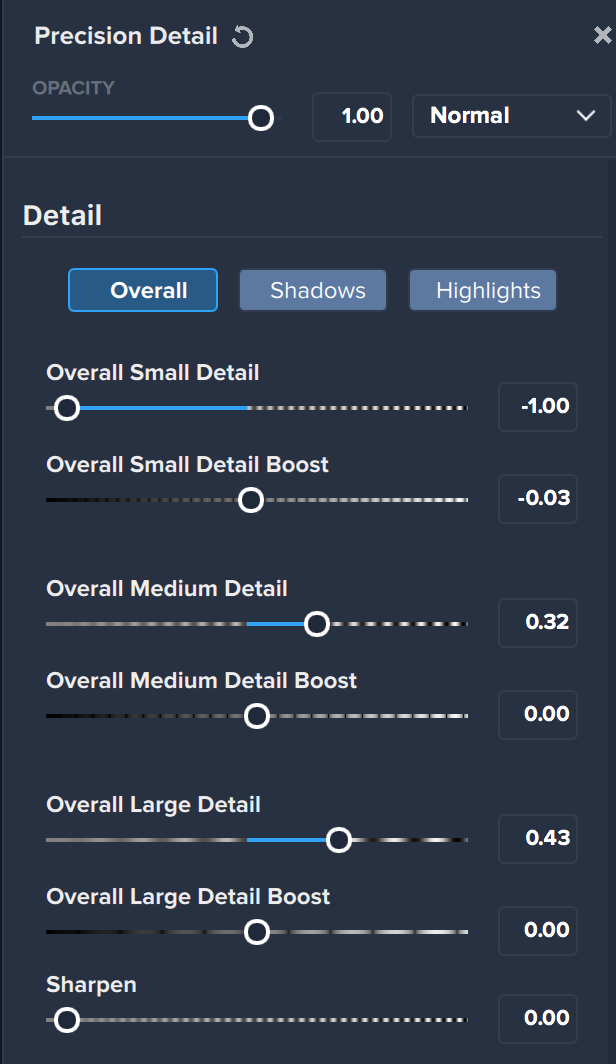
Our final filter that we applied was Precision Detail. This filter is also in the Essential category under the Add Filter menu. We liked the levels of light and contrast in our image but wanted a little extra detail to stand out in the lion specifically. Once we applied the filter, we only made a few small changes. First, we moved the Overall Small Detail slider all the way down to -1. This is because when we used Precision Contrast, we got a little noise int he background of our image (and noise is certainly a very small detail). Next, we made subtle adjustments to the Overall Medium Detail and Overall Large Detail sliders. Again, we eyeballed our image as we were doing this and picked a position on the slider that we thought best enhanced our image. Your image may be completely different from ours! So play around with these settings until you find what’s right for you. For all we know, boosting that Overall Large Detail slider all the way up may make your image just right!
Step 4: The Final Result!
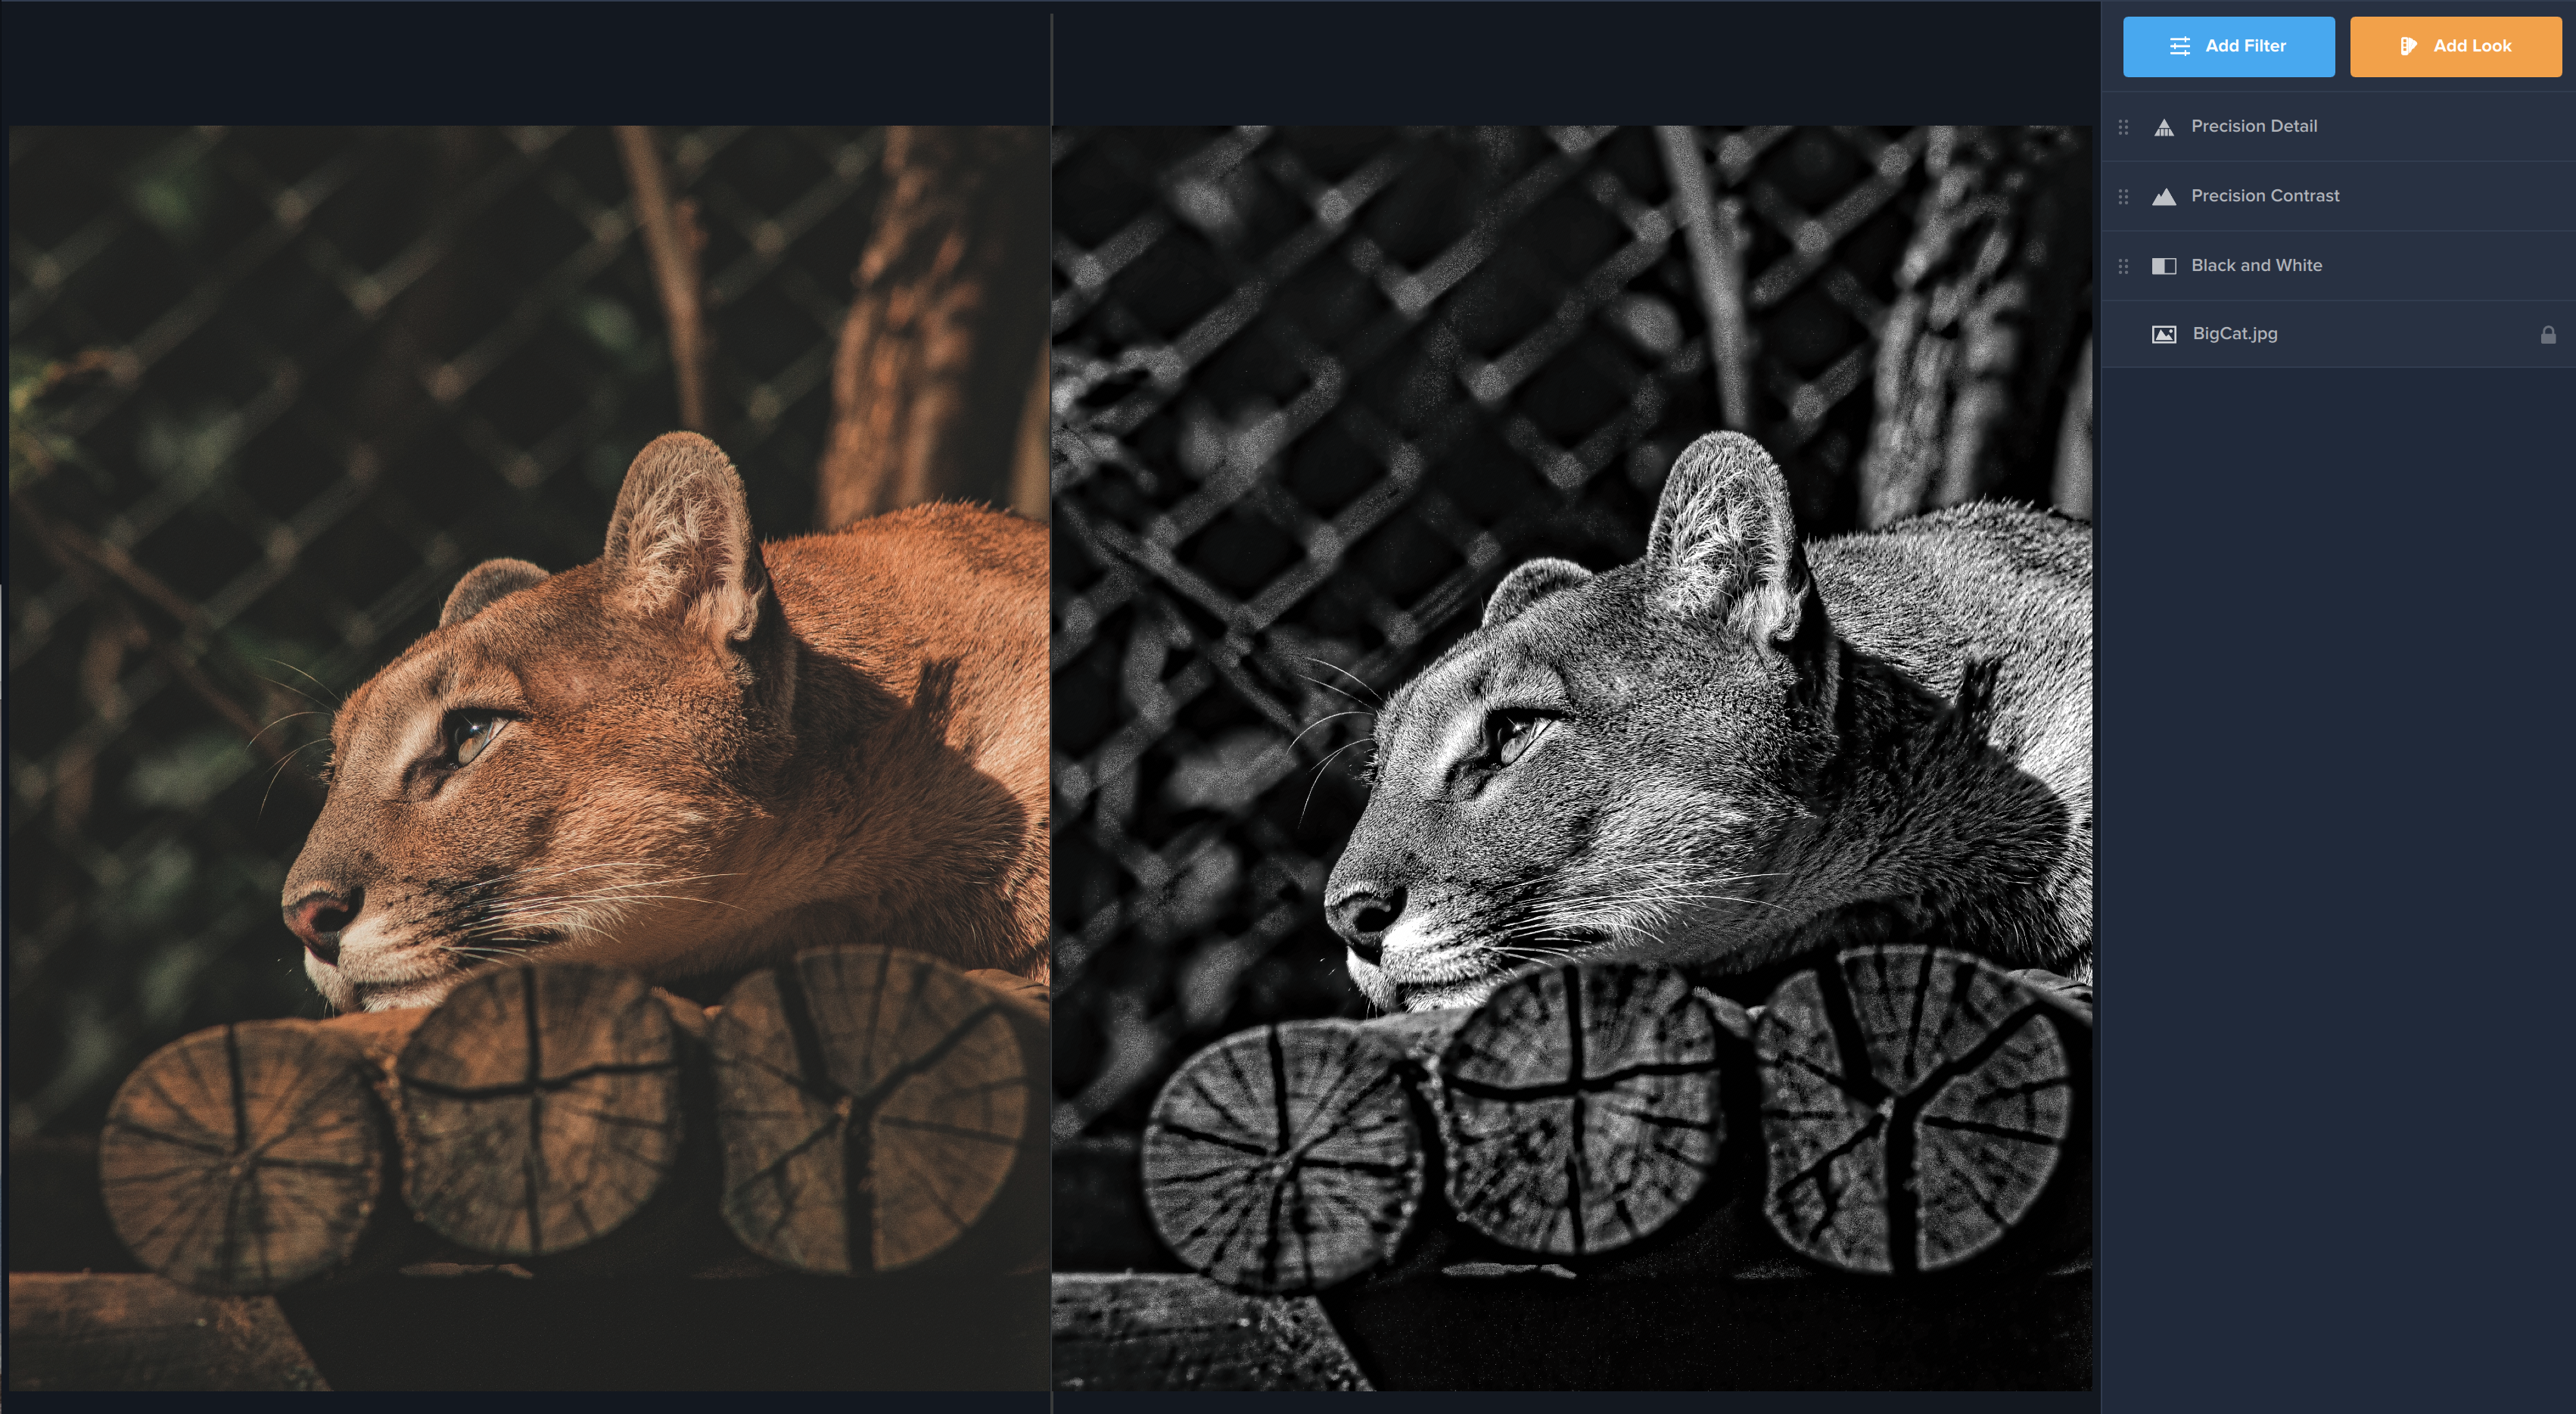
In just a few simple steps, we were able to take our faded image of this big cat and transform it into a high contrast, dramatic black and white image. We love that we can see the detail in the cat’s fur, the sharpness of it’s whiskers, and the moody gaze as it rests. Try out this process on one of your images and tell us how it went! We can’t wait to see what you create.



11 thoughts on “Tutorial: How to Create a High Contrast Black and White Effect in Topaz Studio 2”
wanted to try but wont let us log on or register, or download and open
no place to get any help either, I would like to buy, but concerned with support or the lack of it , could you help??
Bad luck . Working under Win10 with a GetForce Graphic card . Had never any problem with trials or release versions . Try again and be more specific on what’s not working for you . Topaz people always very responsive , just my experience
Usually, customer support is very fast. I’ve been using Topaz products for a couple of years now and when I’ve needed help, they’ve been very good about responding. There are times when it takes 48 hrs. instead of same day or 24. They have always given good support eventually, depending on timing. When a new product is released, it can take a little longer than normal. I hope this helps. Good luck!
Excellent.
No problem with the program at all. Topaz fan from day 1…
Nice tutorial, giving me some nice ideas. I always follow but don’t use the settings because I use my own photos.
Noreen, I have been using Topaz Labs for over 5 years since purchasing it at a camera show in Australia. Customer service has never been an issue and the tutorials are very insightful. Check that you haven’t missed seeing their contact details on their site. Good luck it is worth persevering with.
Topaz Studio 2 (TP2) is amazing. I haven’t stopped using it since I downloaded it. I’m truly amazed by this editor.
So happy to hear that! Thanks, Hugo! 🙂
Topaz support has been perfect, they replied within 24 hours and have helped me everytime. Other companies did not such fast reaction times.
Happy to hear that! We’re working to speed up our response time even more. 🙂
Thank you for the walk through, I’ll use the tips. The results in this case are a bit unnatural to my eye; maybe the contrast levels pushed too far giving a gritty look to the fur, whereas cat fur is very soft in real life. I prefer tuning when the viewer can’t really see what has been done but the best features of the image have been brought out.
Comments are closed.