The new Topaz Studio 2 features intuitive and easy-to-use masking tools! Choose from five types of masking or combine masking options for perfectly masked adjustments. Here is a quick run-through of the five masking tools in Topaz Studio 2.
Brush Masking
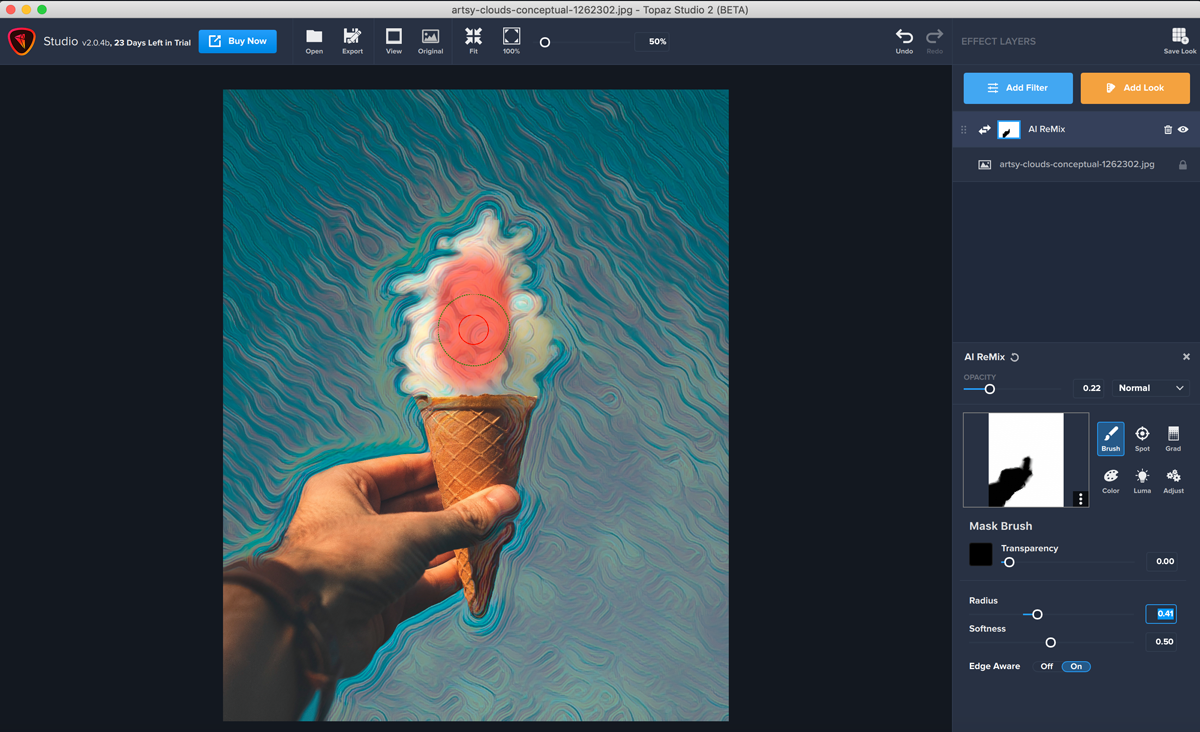
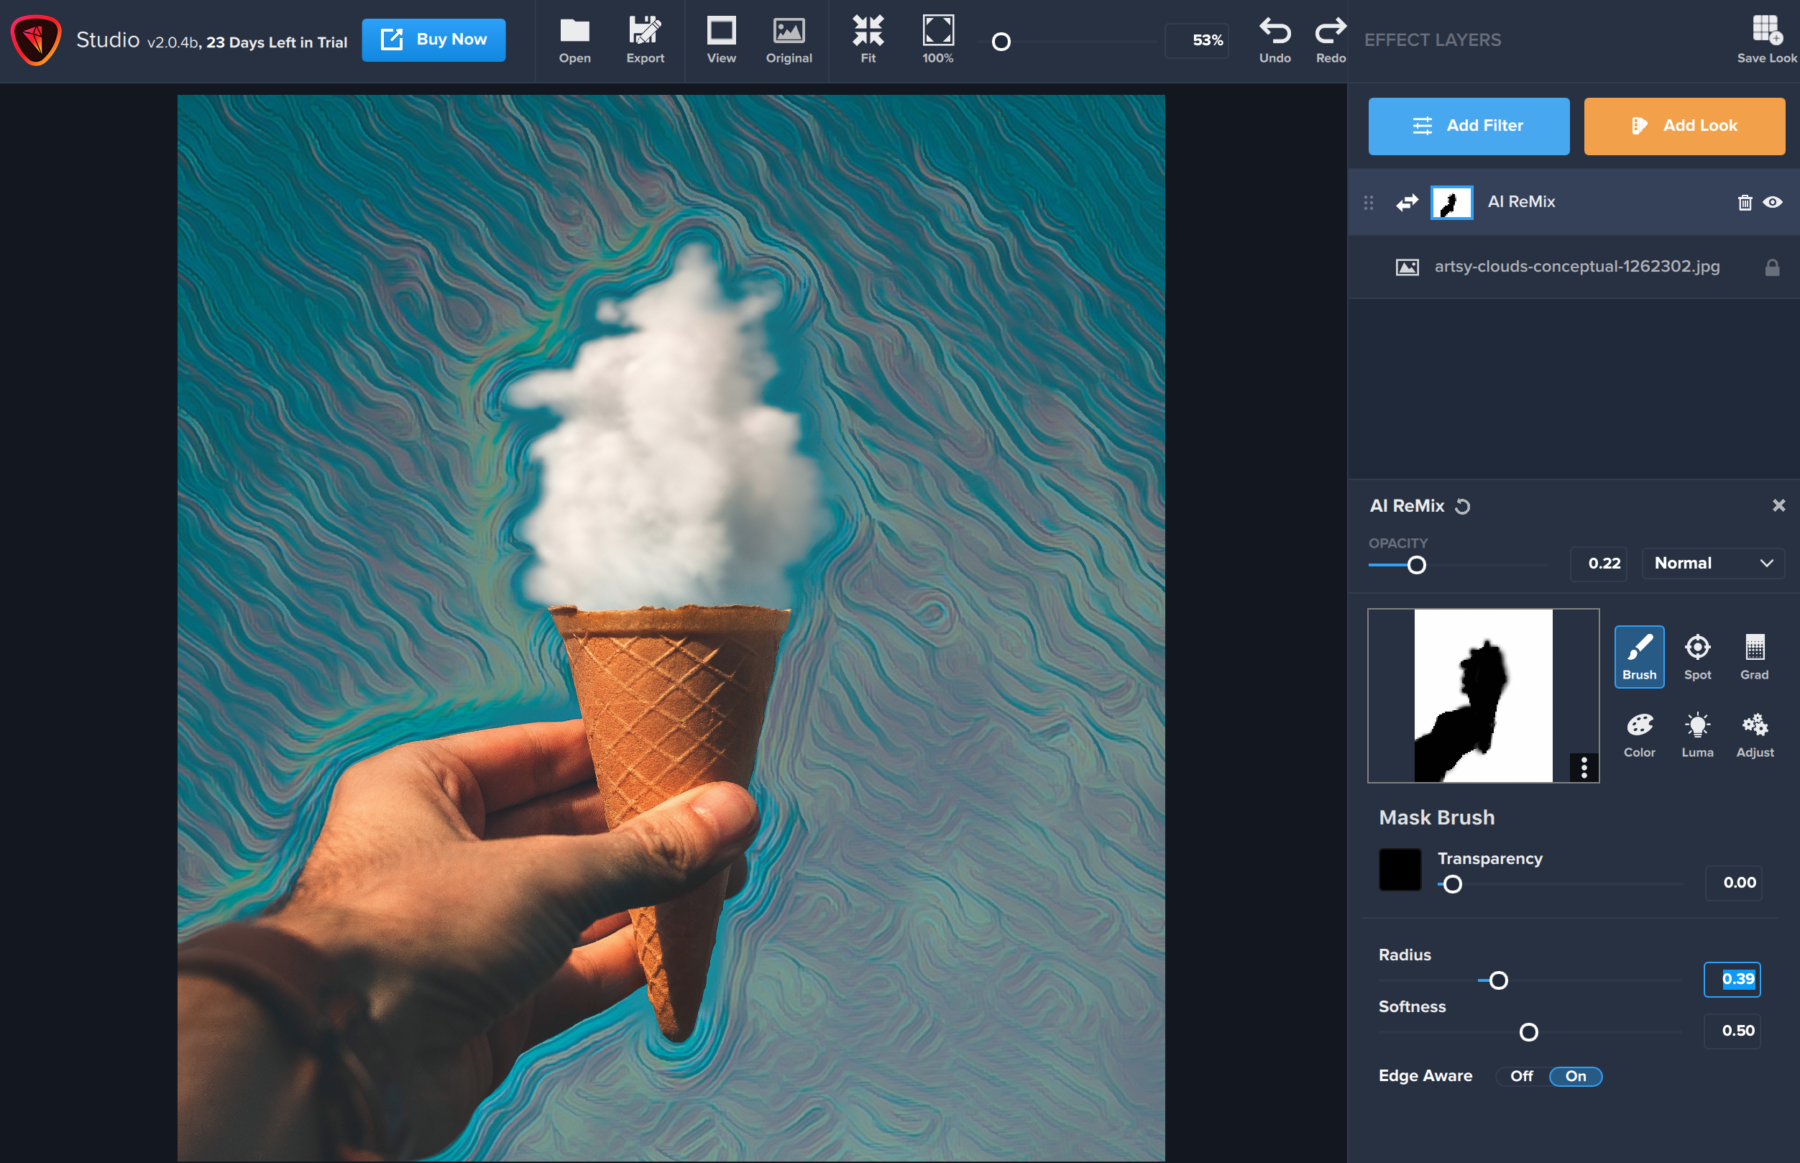
To get started, I’ve imported an image and applied AI Remix to this achieve an artistic background on a creatively staged photo.
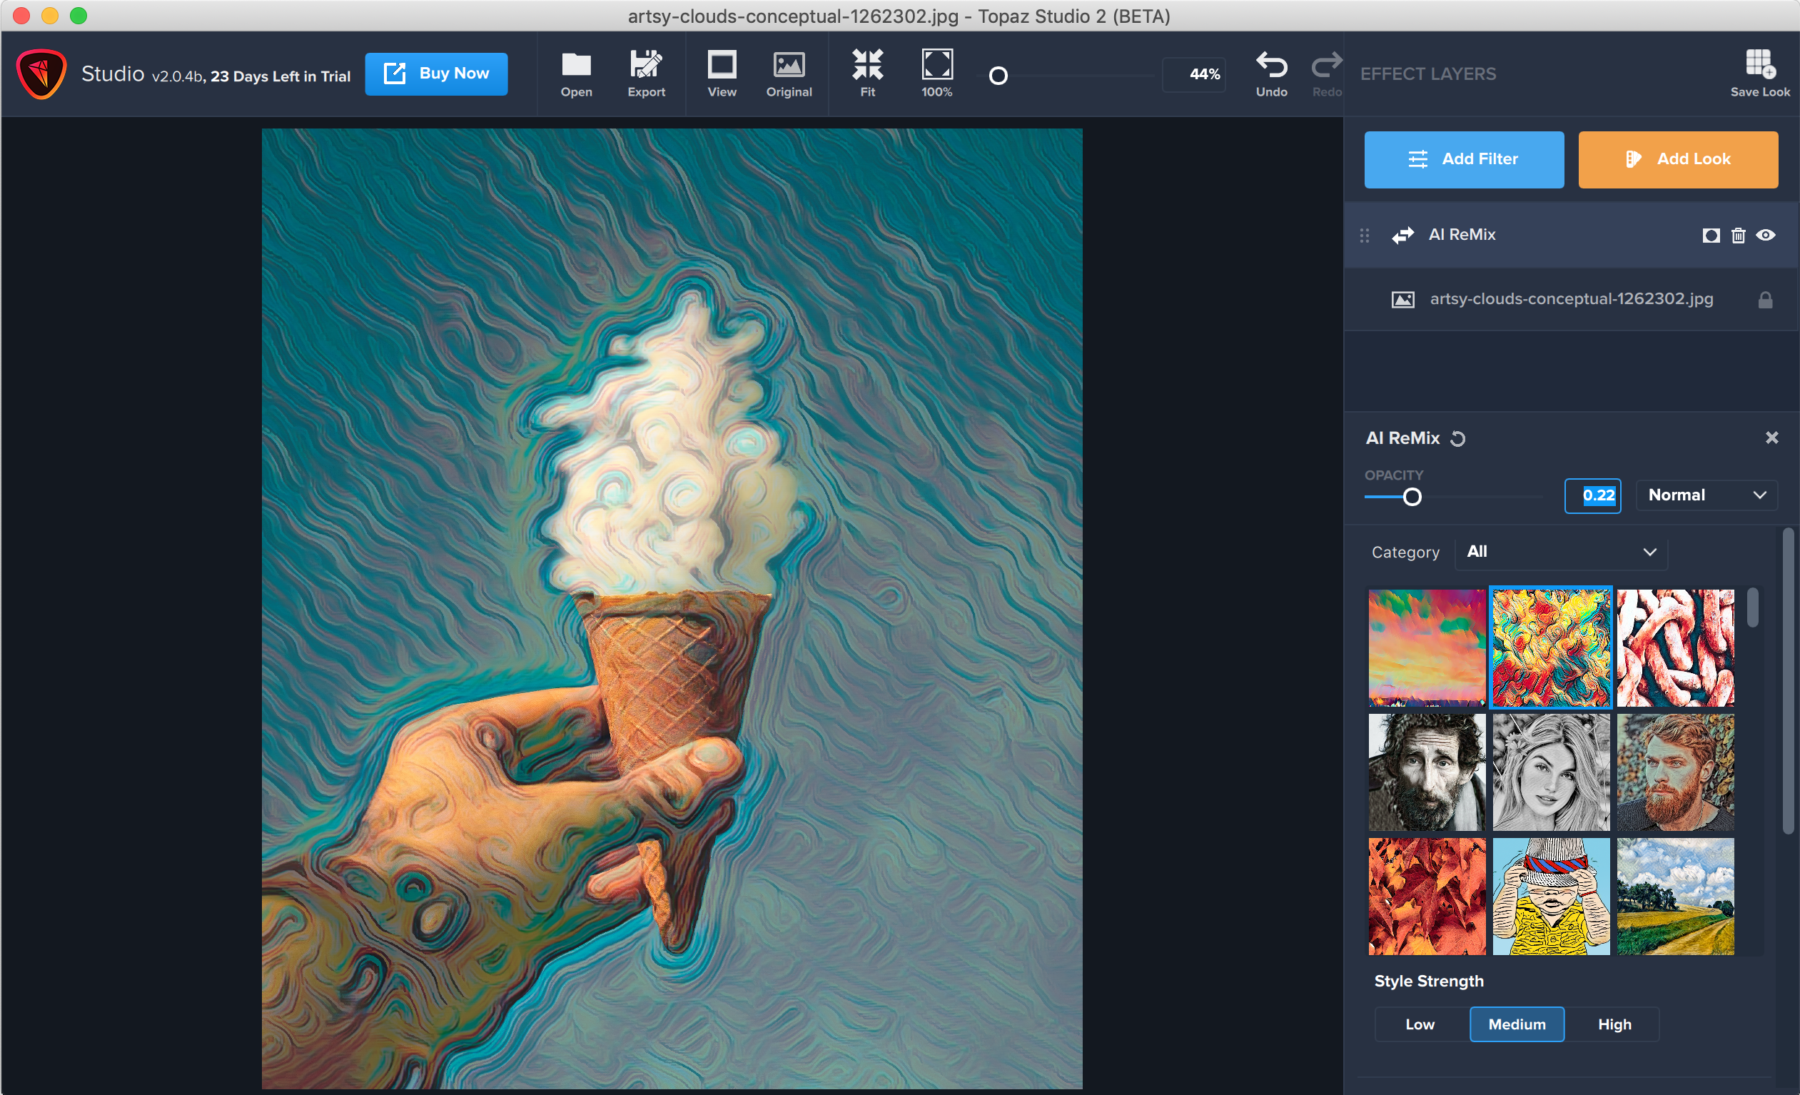
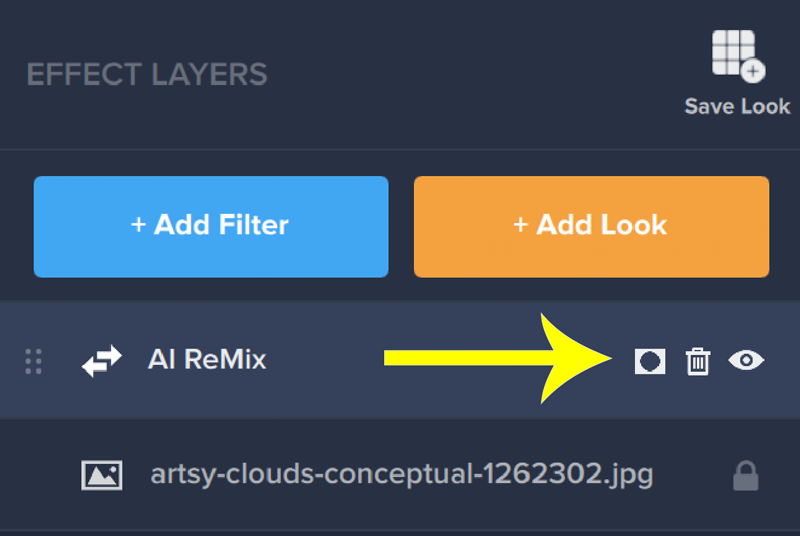
I want to keep the cloud and ice cream cone but keep the swirl background intact, so this is where masking will come in handy. To access the masking options, click the square and circle icon beside the Effect Layer name. See the illustration below!
Below you’ll see the different masking options within Topaz Studio 2.
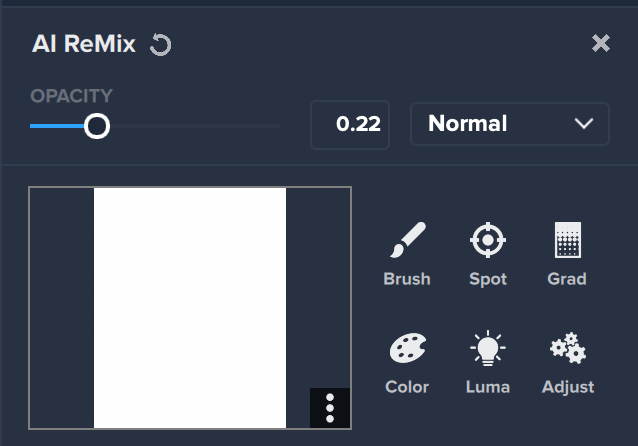
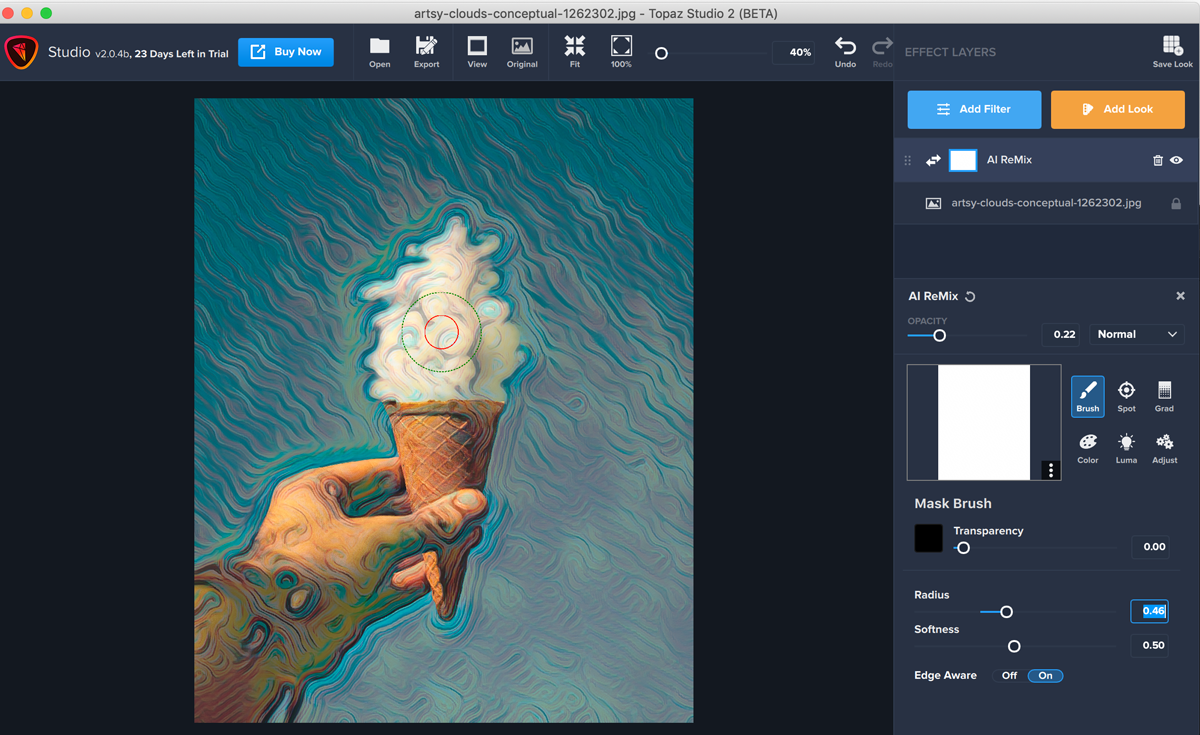
Brush masking allows you to apply or remove the applied effect in a more fluid way. You can selectively paint out where you’d like to remove the effect. Here are a few pointers on the Brush Mask panel: The Transparency slider controls the opacity of your brush mask from 0.00 to 1.00. The Radius slider controls the overall size, while the Softness slider controls edge softness.
Depending on how long you’ve been around the Topaz community, Edge Aware may not be new to you or may be completely unfamiliar. This unique technology allows you to have more freedom in masking: you don’t have to be excruciatingly perfect with your drawing technique, because our technology will intelligently identify edges and perfect your mask accordingly! All you have to do is keep the edge that you want to be detected between the red inner circle and the green outer circle. Our technology will automatically detect the edge. You’ll also see the Edge Aware tool featured throughout the other masking options in Topaz Studio 2.
Spot Masking
Depending on the content of your image and the effect applied, the spot masking tool may be the quickest one for you.
In this example image, I applied the Black & White effect from the Effect Layer panel. I want to keep the subject and her colorful sweater my focal point, so let’s try a spot mask.
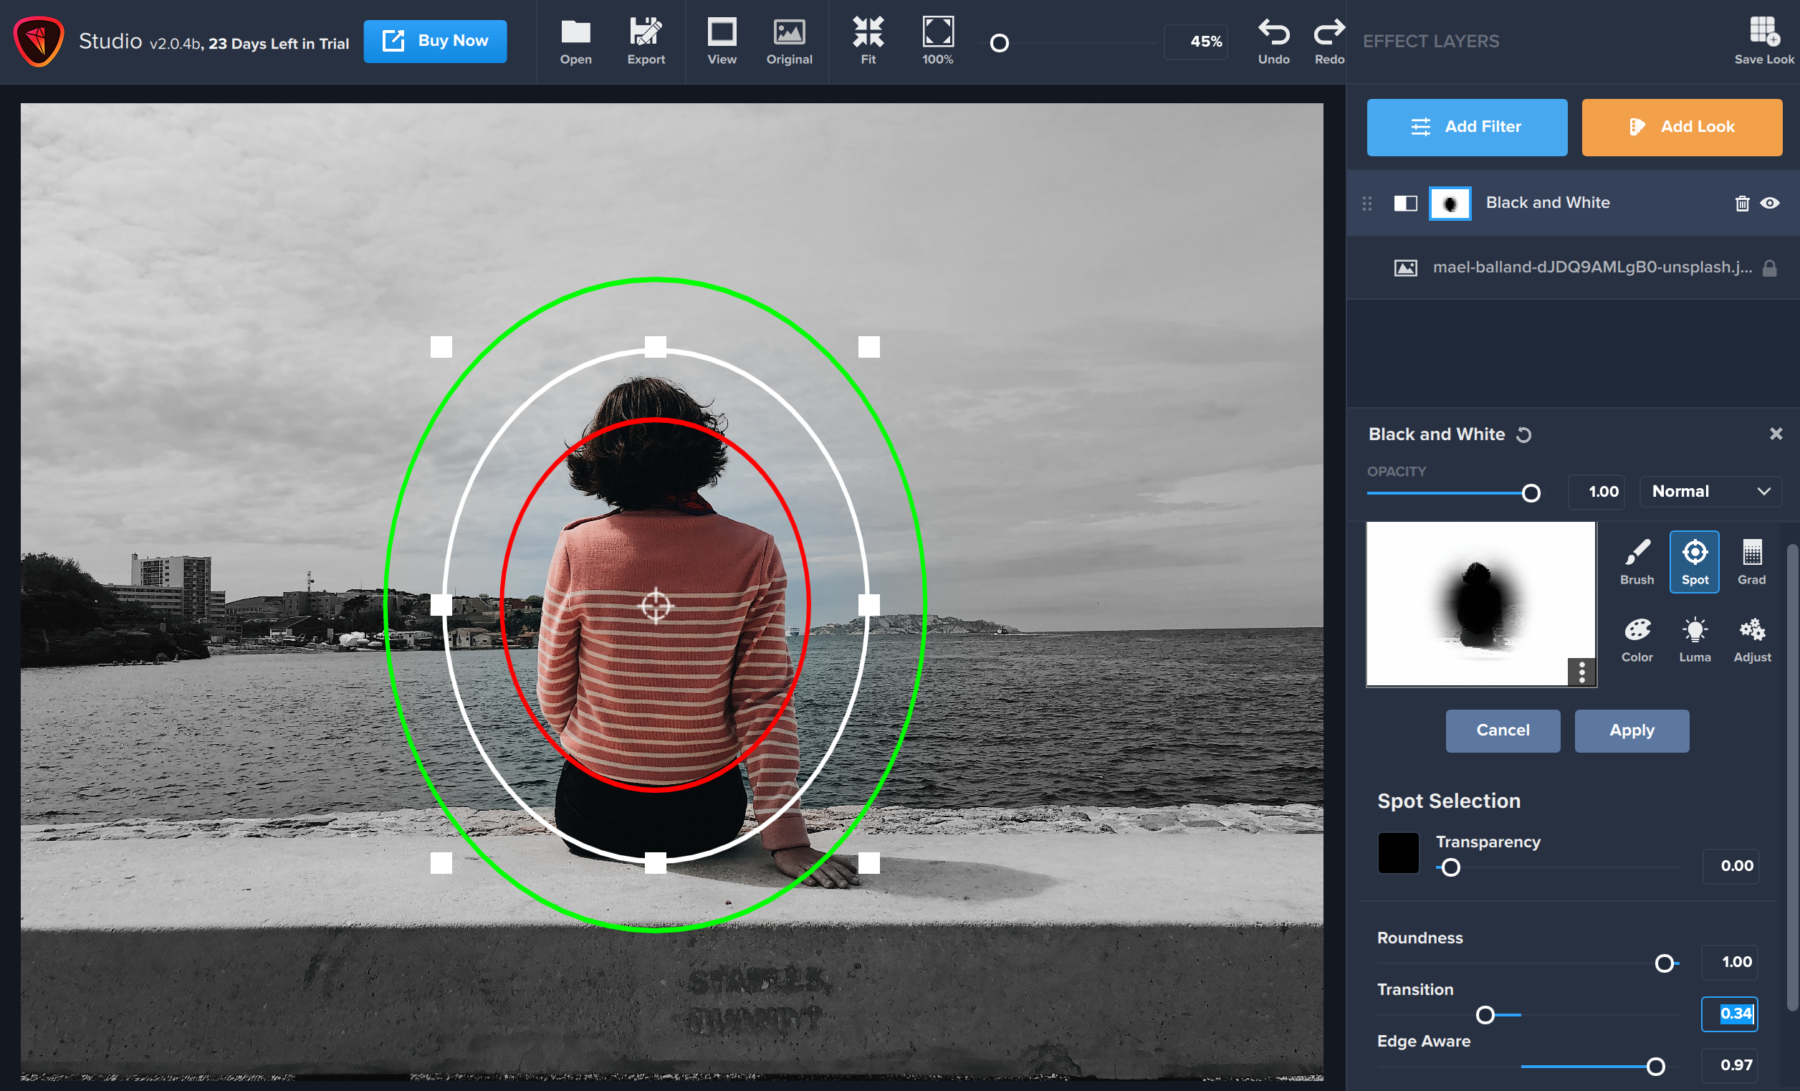
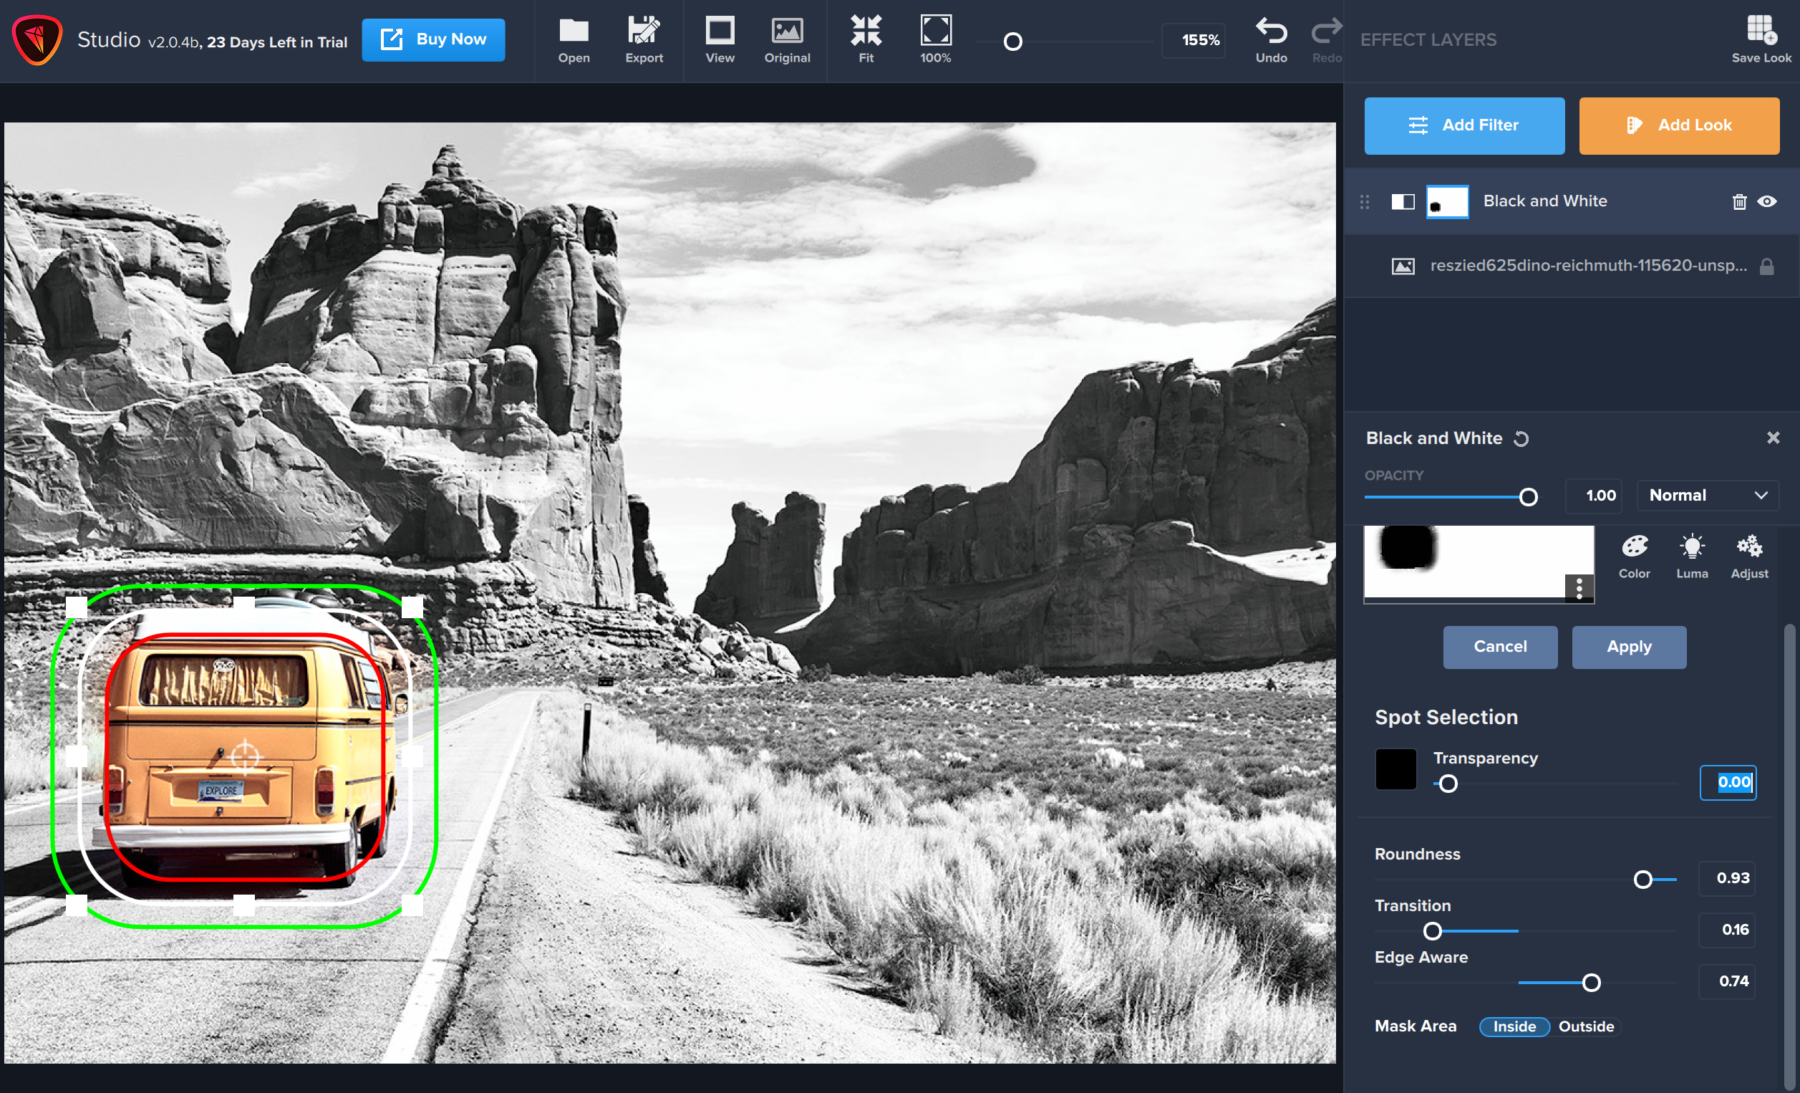
With a combination of the Roundness and Transition sliders, you can change the shape of your spot mask like below to better accommodate your mask subject.
Gradient Masking
Ideal for landscapes or anywhere you want to create a natural transition, gradient masking is a powerful tool to have in your masking toolbox. In this example image, I’d like to selectively apply the Radiance effect layer to just the stars in the sky and not the house on the horizon.
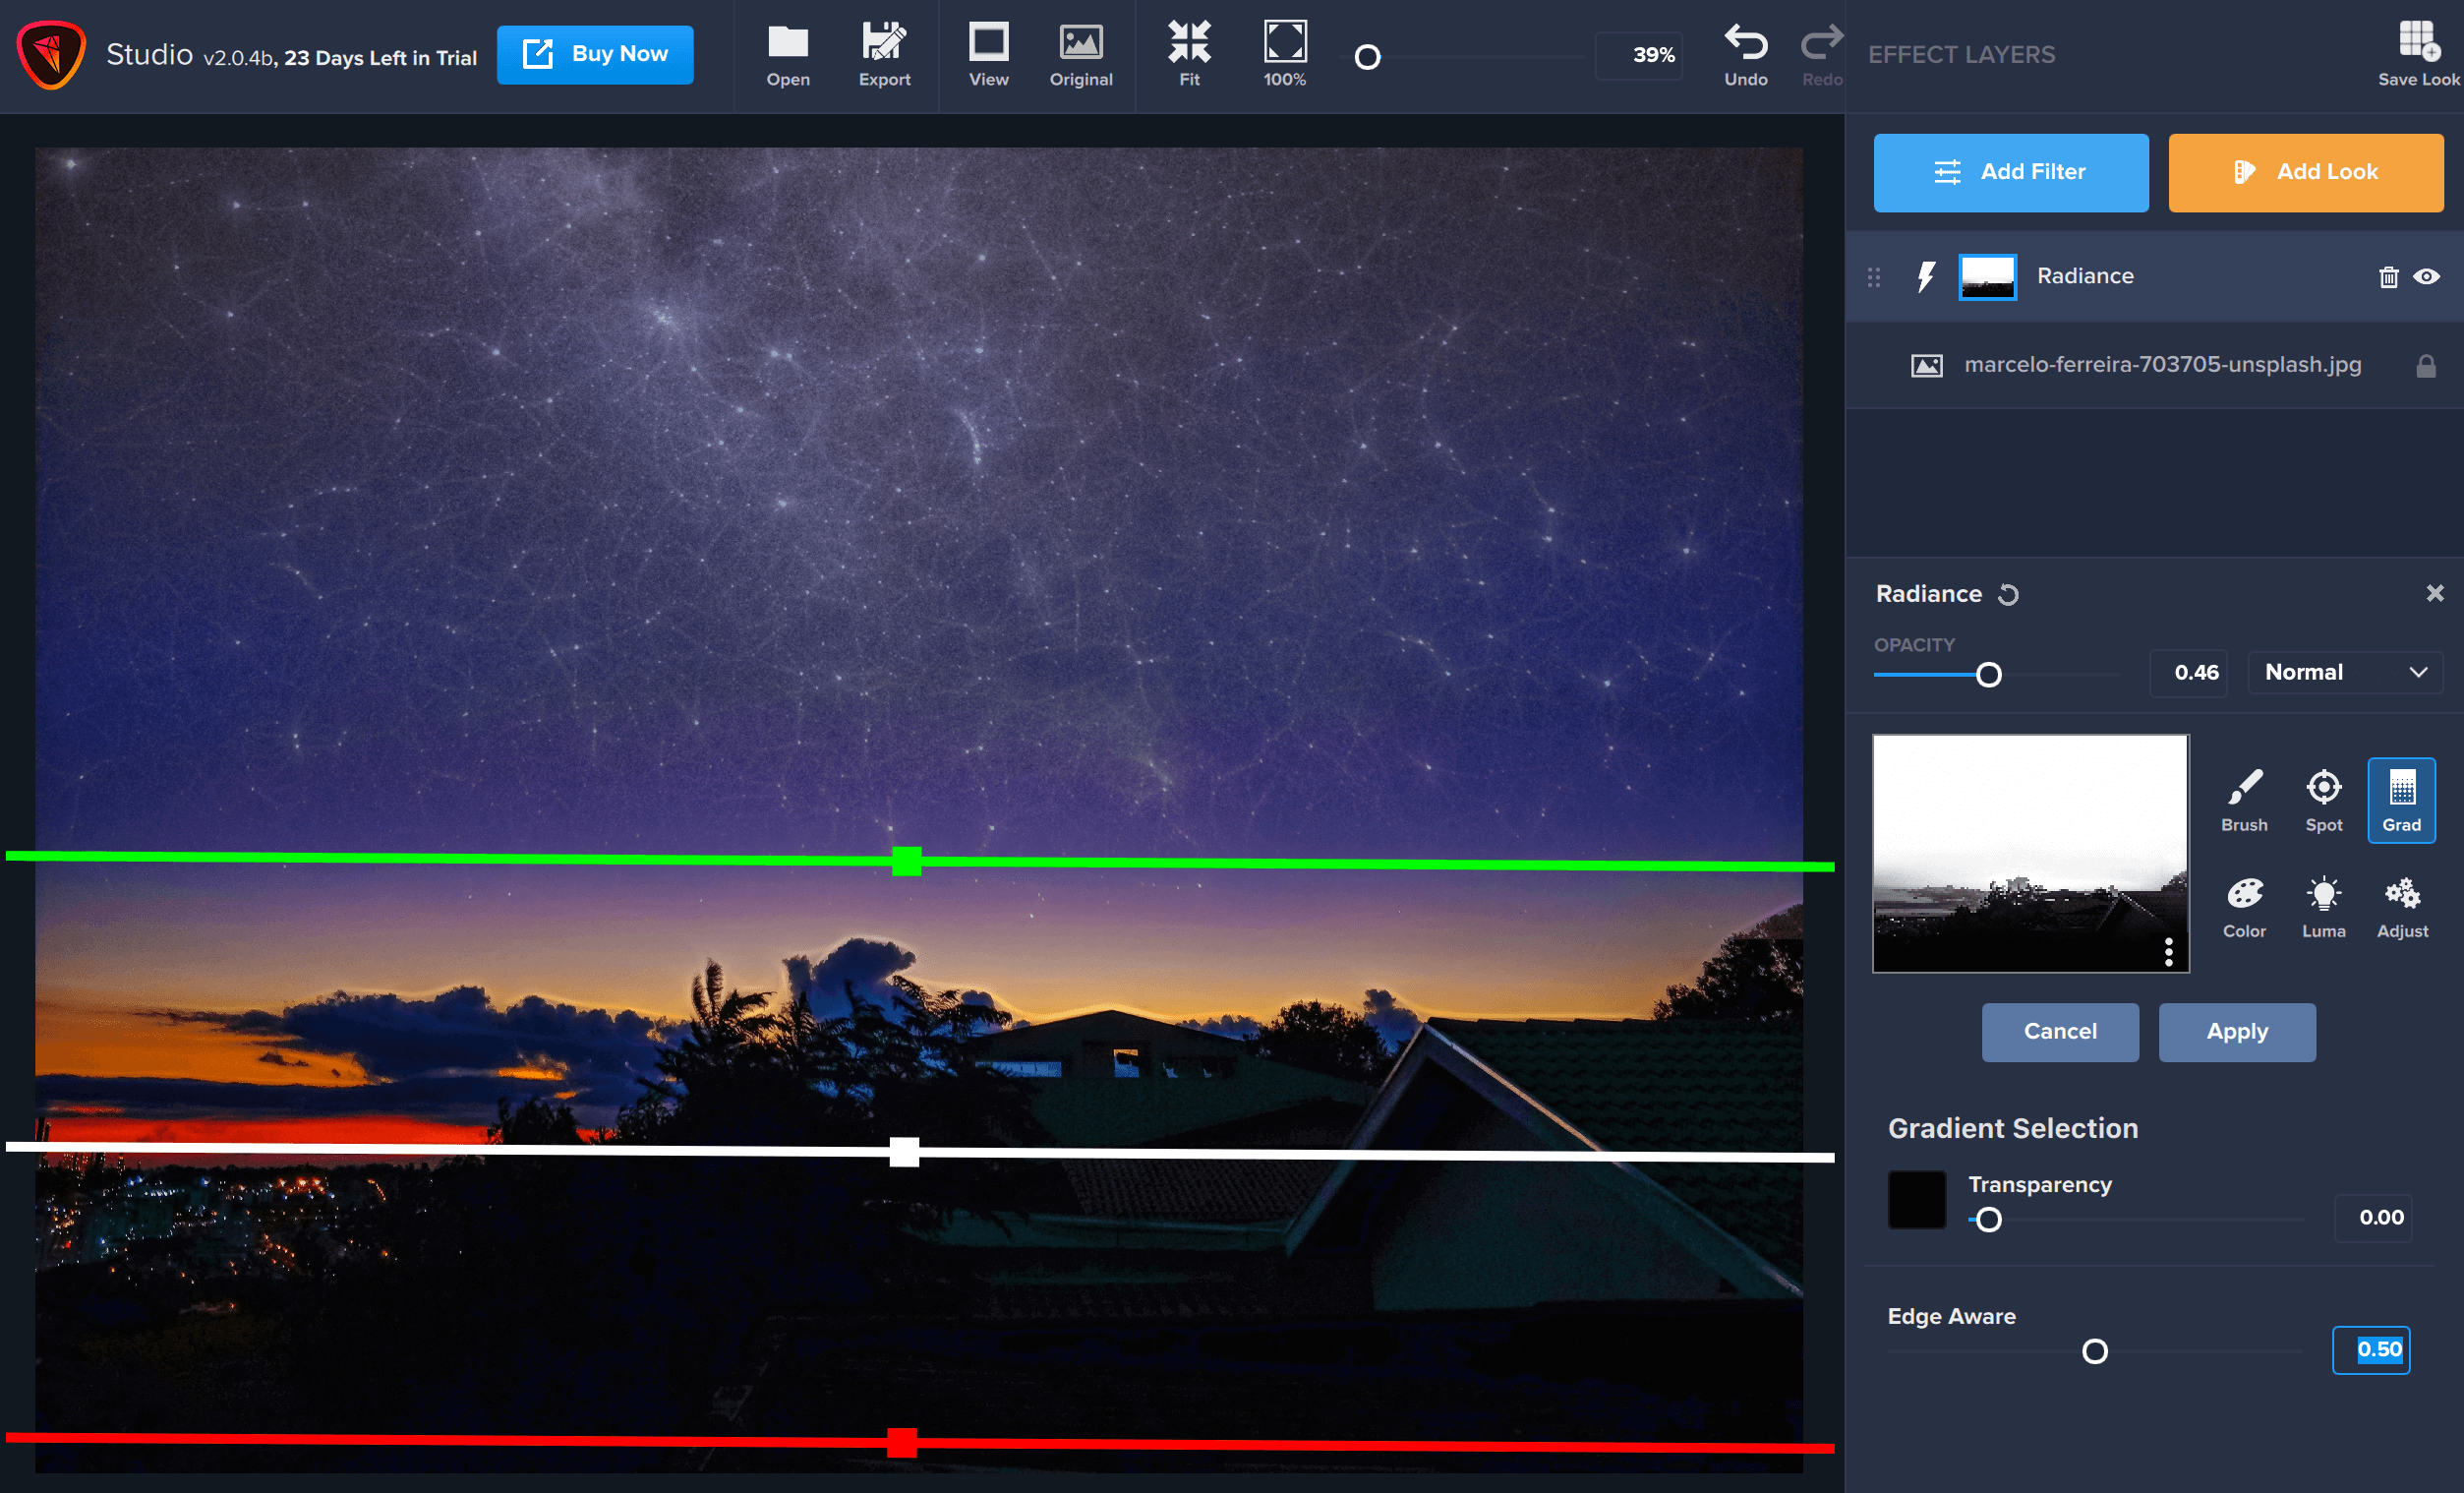
The effect above the red line will be removed and the effect below the green line will remain. You can also grab the handles and rotate them to manipulate the order of the gradient. The white handle will collectively move the gradient while moving the green or red handle can create longer and shorter transitions. You can also easily change the direction of the gradient mask to be applied vertically.
Color Masking
The color masking tool allows you to create masks based upon colors found in your image.
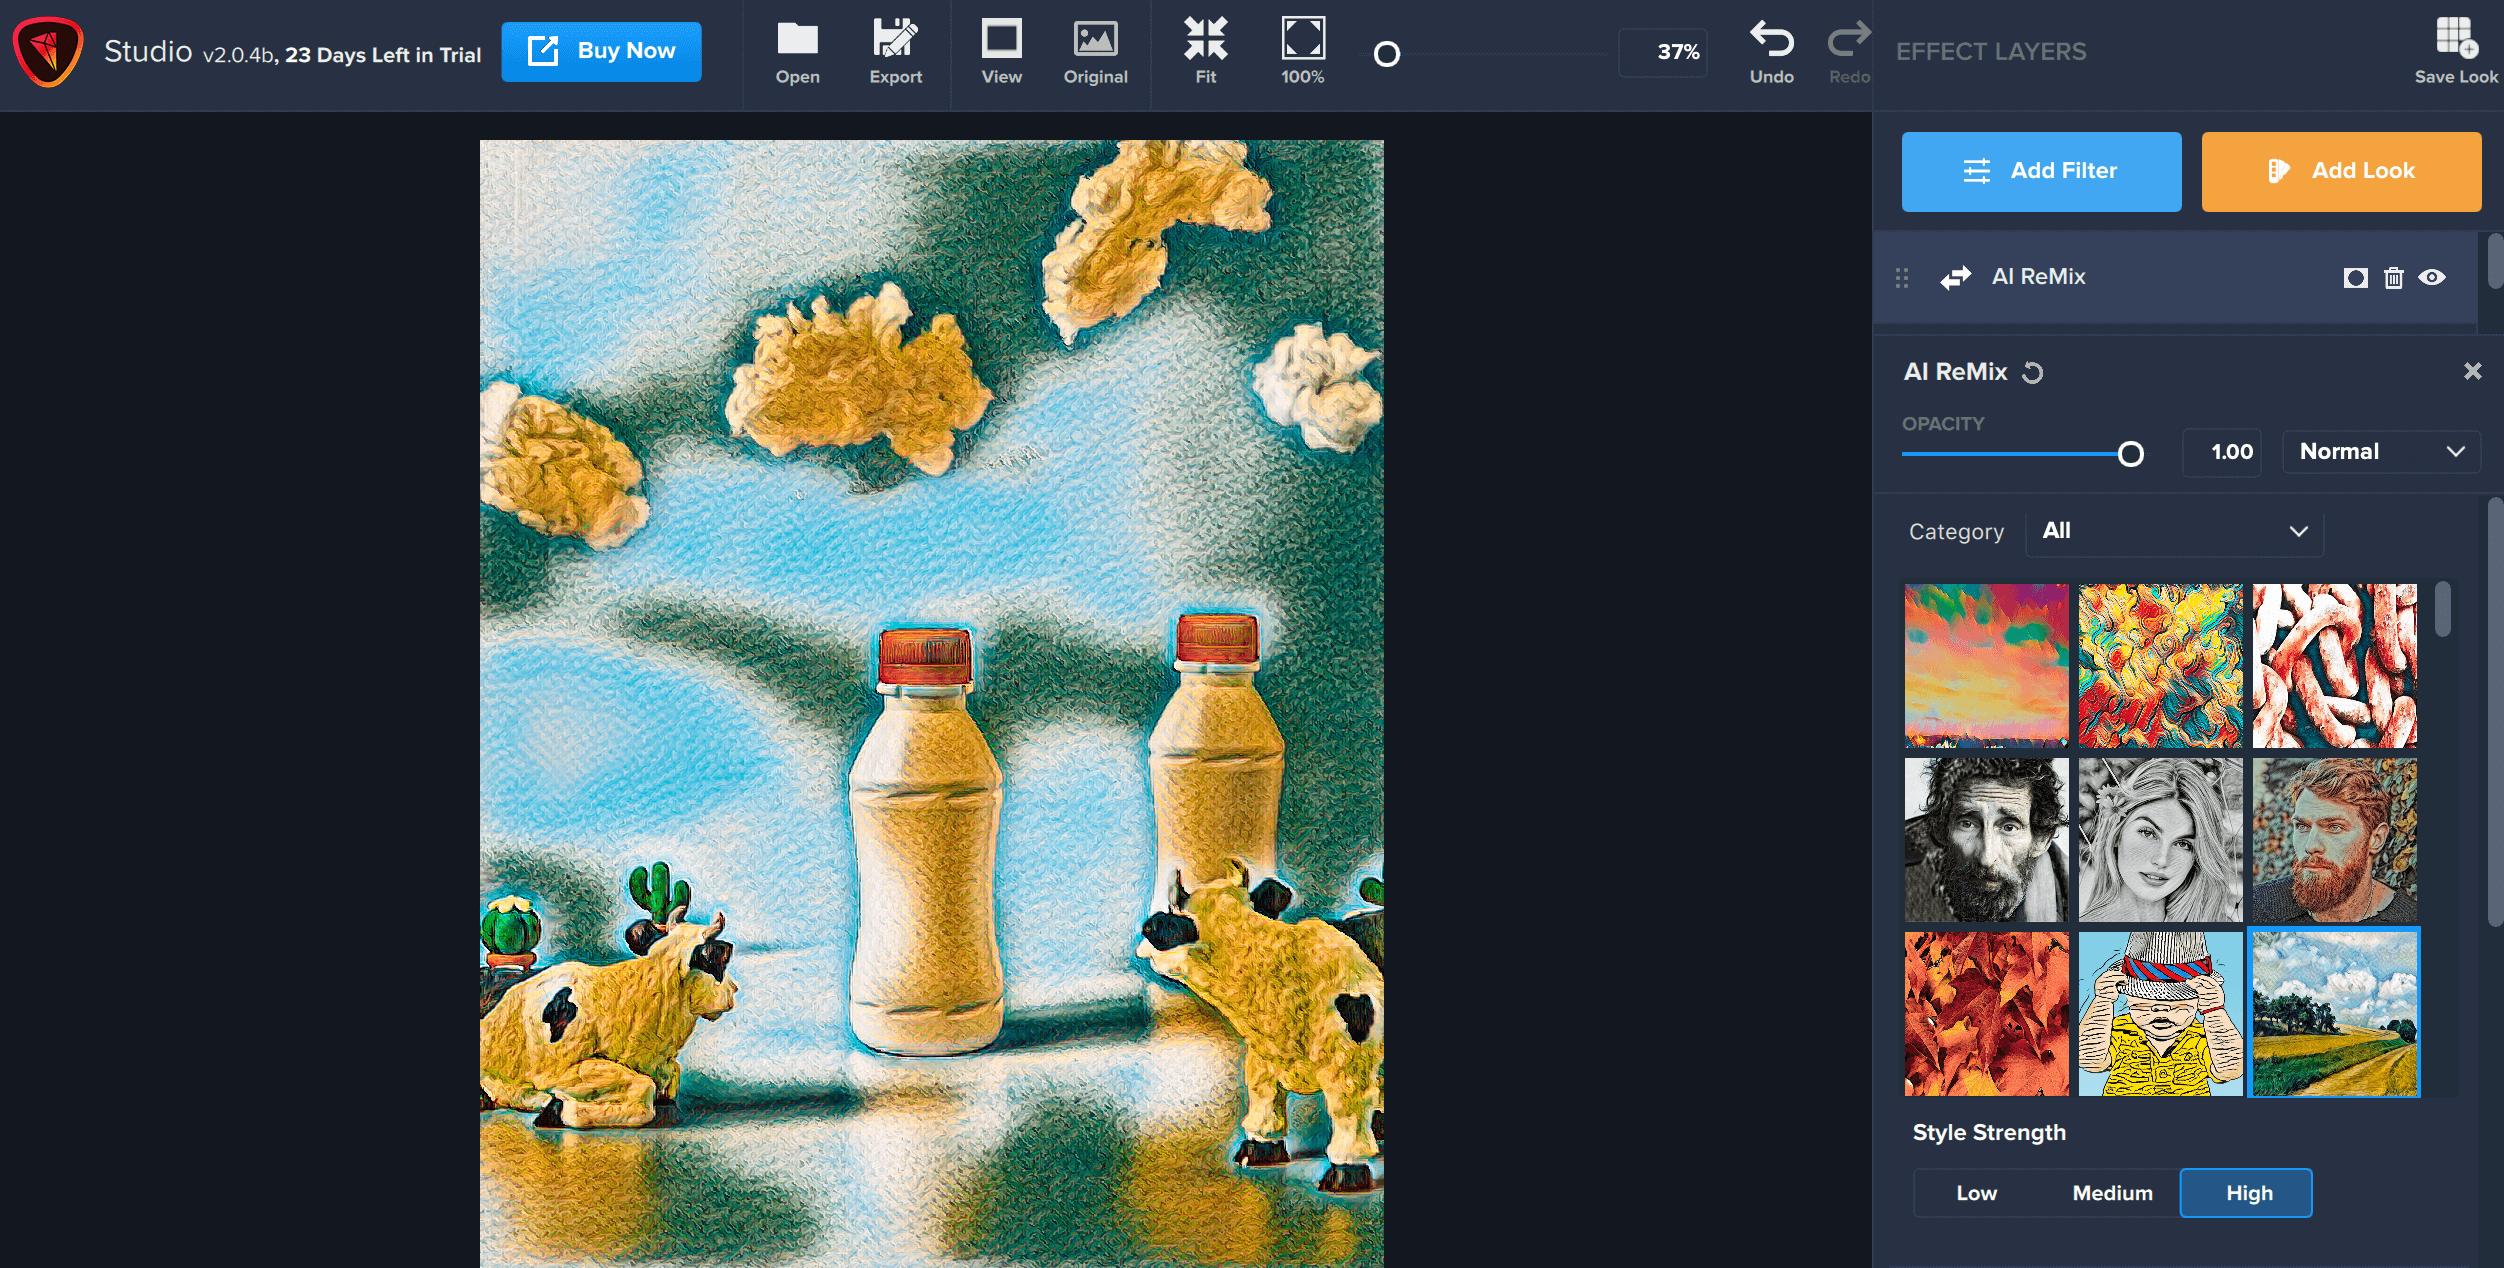
In this example image, I’ve applied AI ReMix to create an artistic product image. Let’s say I want to retain the photorealistic red caps on the milk bottles. With the color masking tool, I can place the dropper over the red to select it.
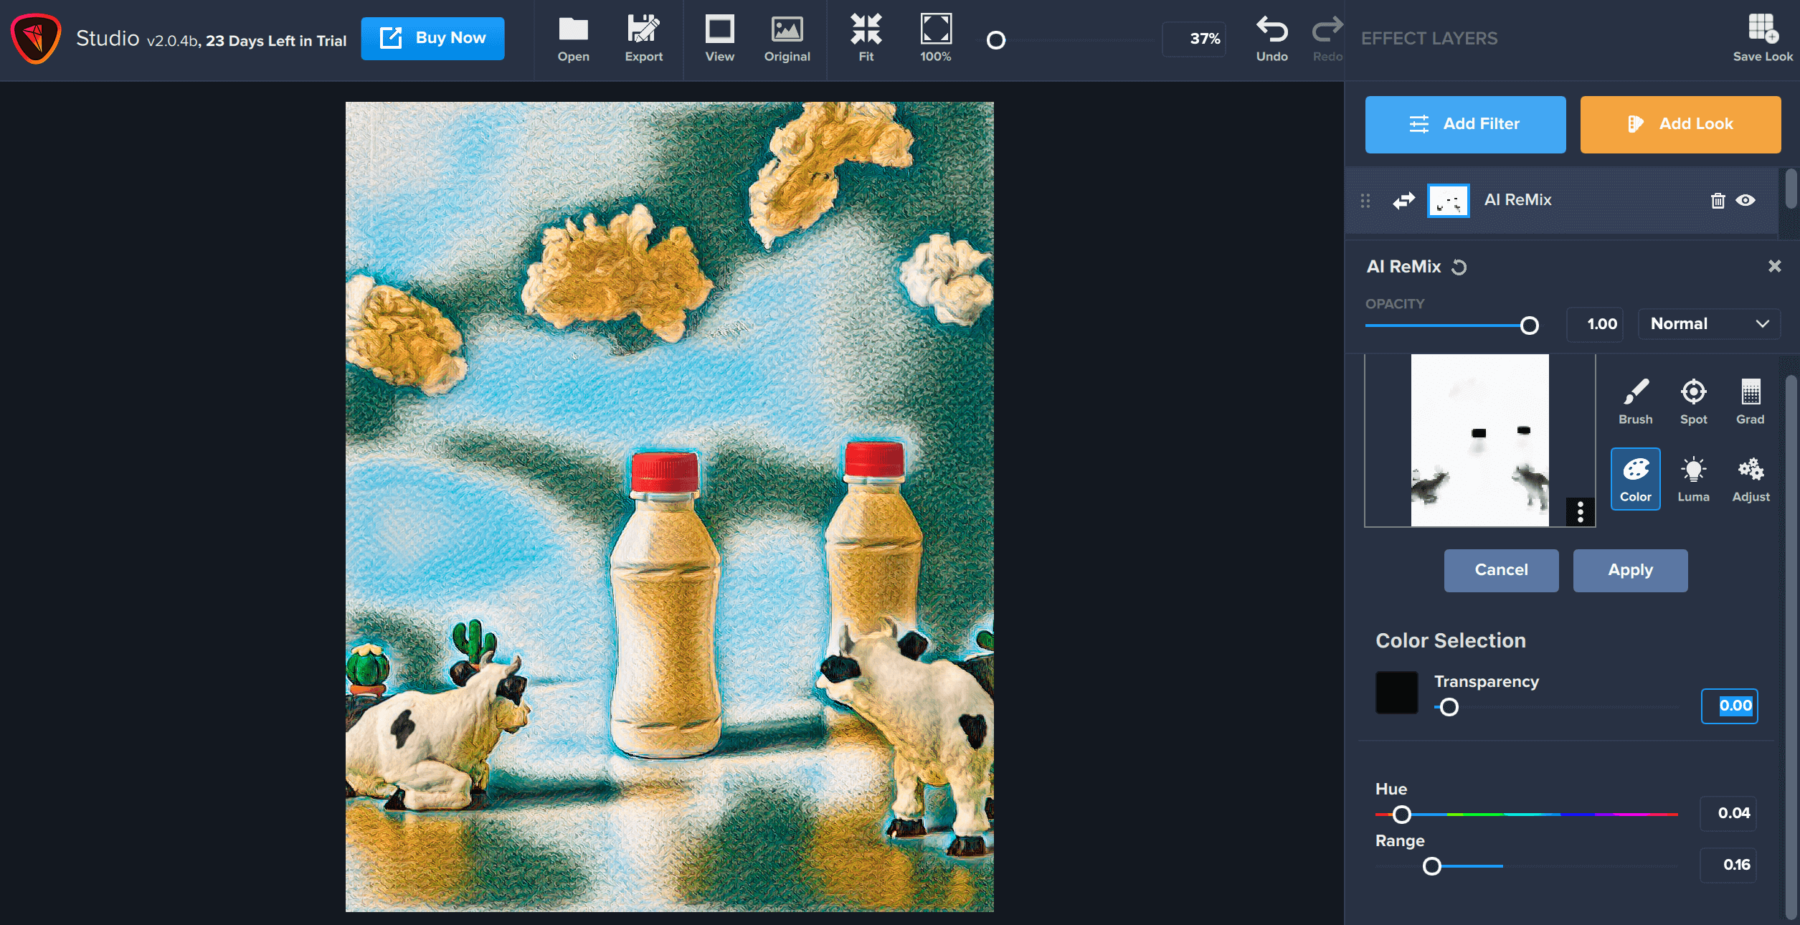
The Range slider allows you to adjust for a larger or smaller range of colors. Since I wanted a precise selection here, I opted for a smaller range of colors.
Luminosity Masking
The luminosity masking tool allows you to create mask selections derived from the brightness in your image. In this example, I’ve applied an abstract swirl effect from AI ReMix.
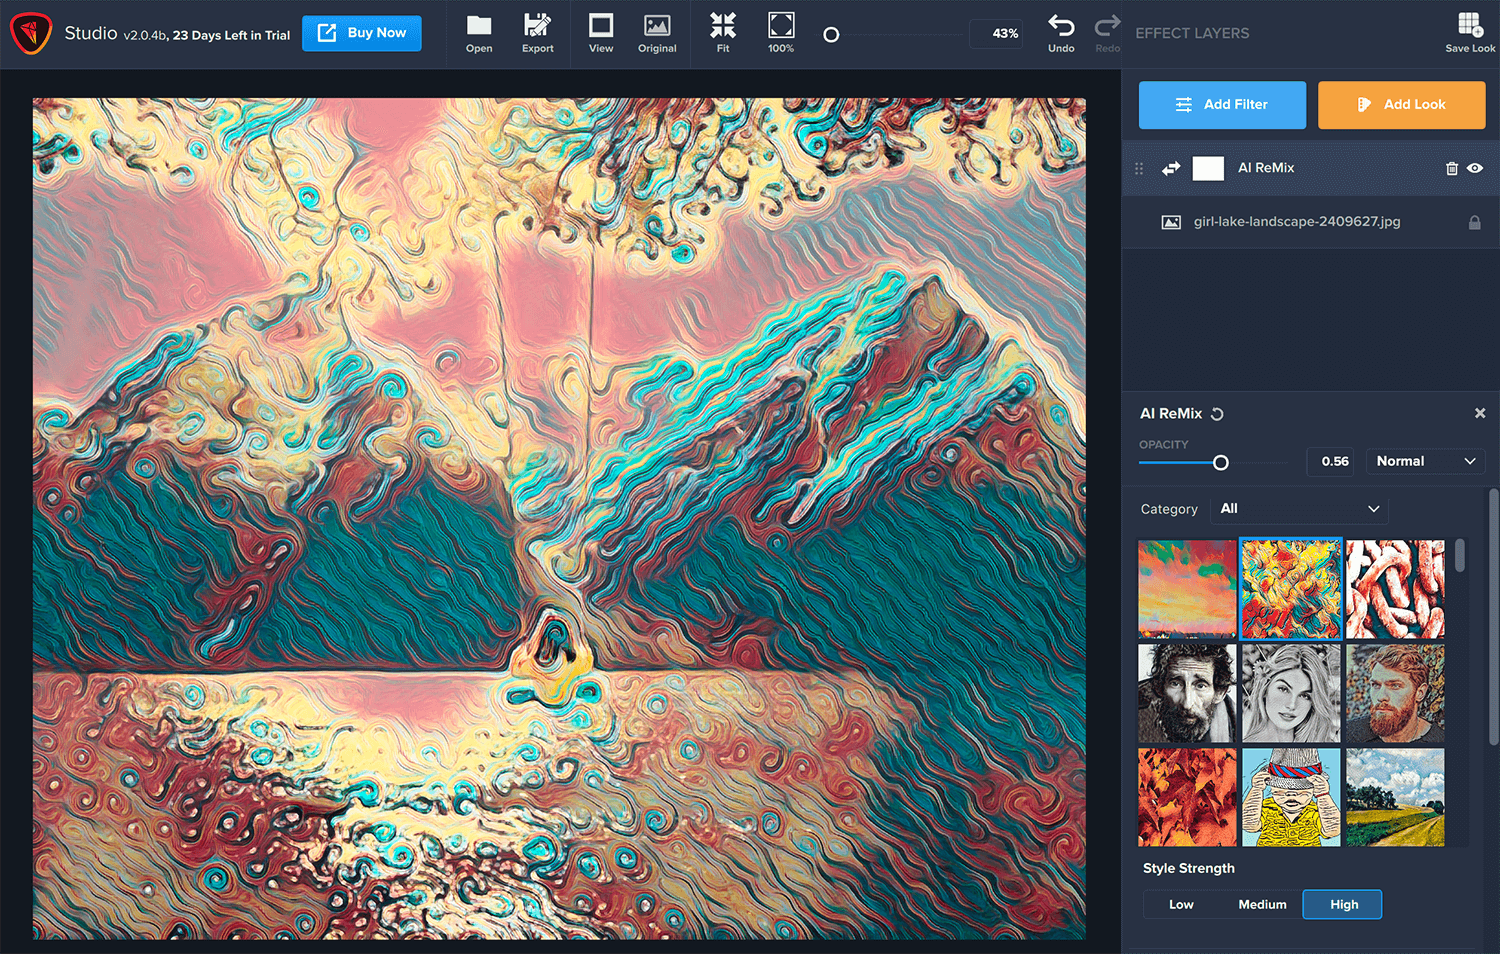
I only want the swirls to be applied to the luminous, bright highlights in the image. Luminosity masking is an ideal tool for this situation.
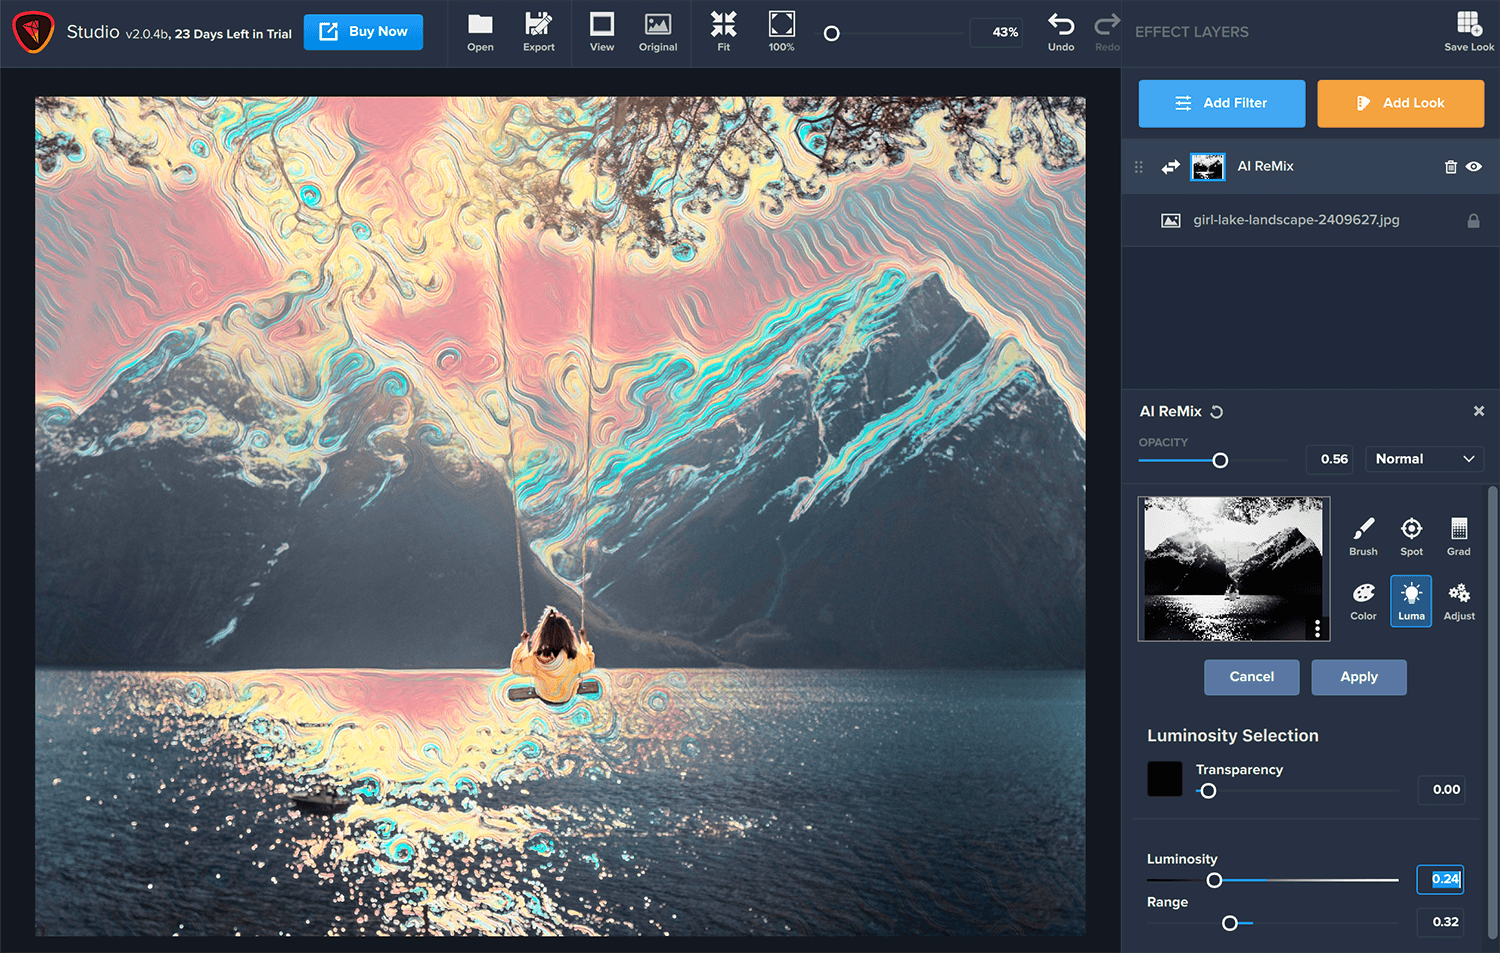
By placing the dropper over the bright part of your image, you’ll mask the brightness and apply the swirl effect to the dark part of the image. So, since we want to achieve the opposite, we’ll place the dropper in the darkest part of the image (the right-hand corner of the water). You can adjust the Range slider accordingly to capture various lengths of color. With just a few clicks, the luminosity mask achieves exactly the artistic effect I wanted and in just right the places. Other masking tools would be infinitely harder to mask such a difficult area to distinguish.
These five types of masking tools were created to power up your workflow, so you can find an ideal tool for your unique masking situation. But don’t forget, you can also combine multiple types of masks to achieve your desired look! All you’ll have to do hit “Apply” after you finish with one type of masking to move right on to the next.
We hope you’ll find Topaz Studio 2 an easy-to-use and intuitive tool for your creative and artistic digital images!
We have several other tutorials on Topaz Studio 2! Here are just a few you might be interested in:
- How to Create a Vintage Film Effect in Topaz Studio 2
- How to Boost Blue Skies with Topaz Studio 2
- How to Create a Soft Pastel Effect in Topaz Studio 2
- How to Selectively Saturate and Desaturate in Topaz Studio 2
You can find other answers by visiting our Help Center here. Still not finding the answer you’re looking for? Submit a support request for one of our Topaz experts to come to your rescue!


5 thoughts on “Tutorial: How to Use the Masking Tools in Topaz Studio 2”
The ability to have multiple mask change events is a huge game-changer for me. I use the old Impression app in my work, simply because it so fast on drawing process time. This new feature will be worth a new purchase for me. I will be purchasing asap!!
Thanks a bunch,
fine art by Christy
Glad to hear it, Christy! We hope you enjoy it.
I’ve followed the instructions for the Masking Tool and have tried the following:
Used the Black and White Filter.
Colored part of the item that I wanted to color using the brush.
The green edge of the brush target is barely visible. How can I make it more visible?
There are some small sections within the area that I want colored, that I want to keep black and white, however, the edge control doesn’t seem to be that sensitive. How do I, either control that or change it back to black and white after I’ve completed coloring the rest of what I want?
I tried pasting the image I was working on, but can’t.
I hope I’ve explained it correctly.
Is Topaz Mask AI distinct from the Masking tools in Studio?
Hi Mark, yes! Mask AI uses machine learning technology to intelligently compute the mask with less input required from the user. I highly suggest you download the free 30-day trial and see for yourself! 🙂
Comments are closed.