Posted on

Tutorial: How to Create a Vintage Film Effect in Topaz Studio 2

There’s a certain kind of nostalgia you get when you view a vintage photograph. Perhaps an old photo of one of your family members is a treasured memory even with it’s fading edges and scratched surface. Today, we wanted to help you recreate that effect in your own images to give them a weathered and well-loved feel.  In this tutorial, we will walk you through the process of creating your own vintage film look in Topaz Studio 2 using four essential filters: Precision Contrast, Tone Curves, Texture, and Vignette.

Step 1: Precision Contrast

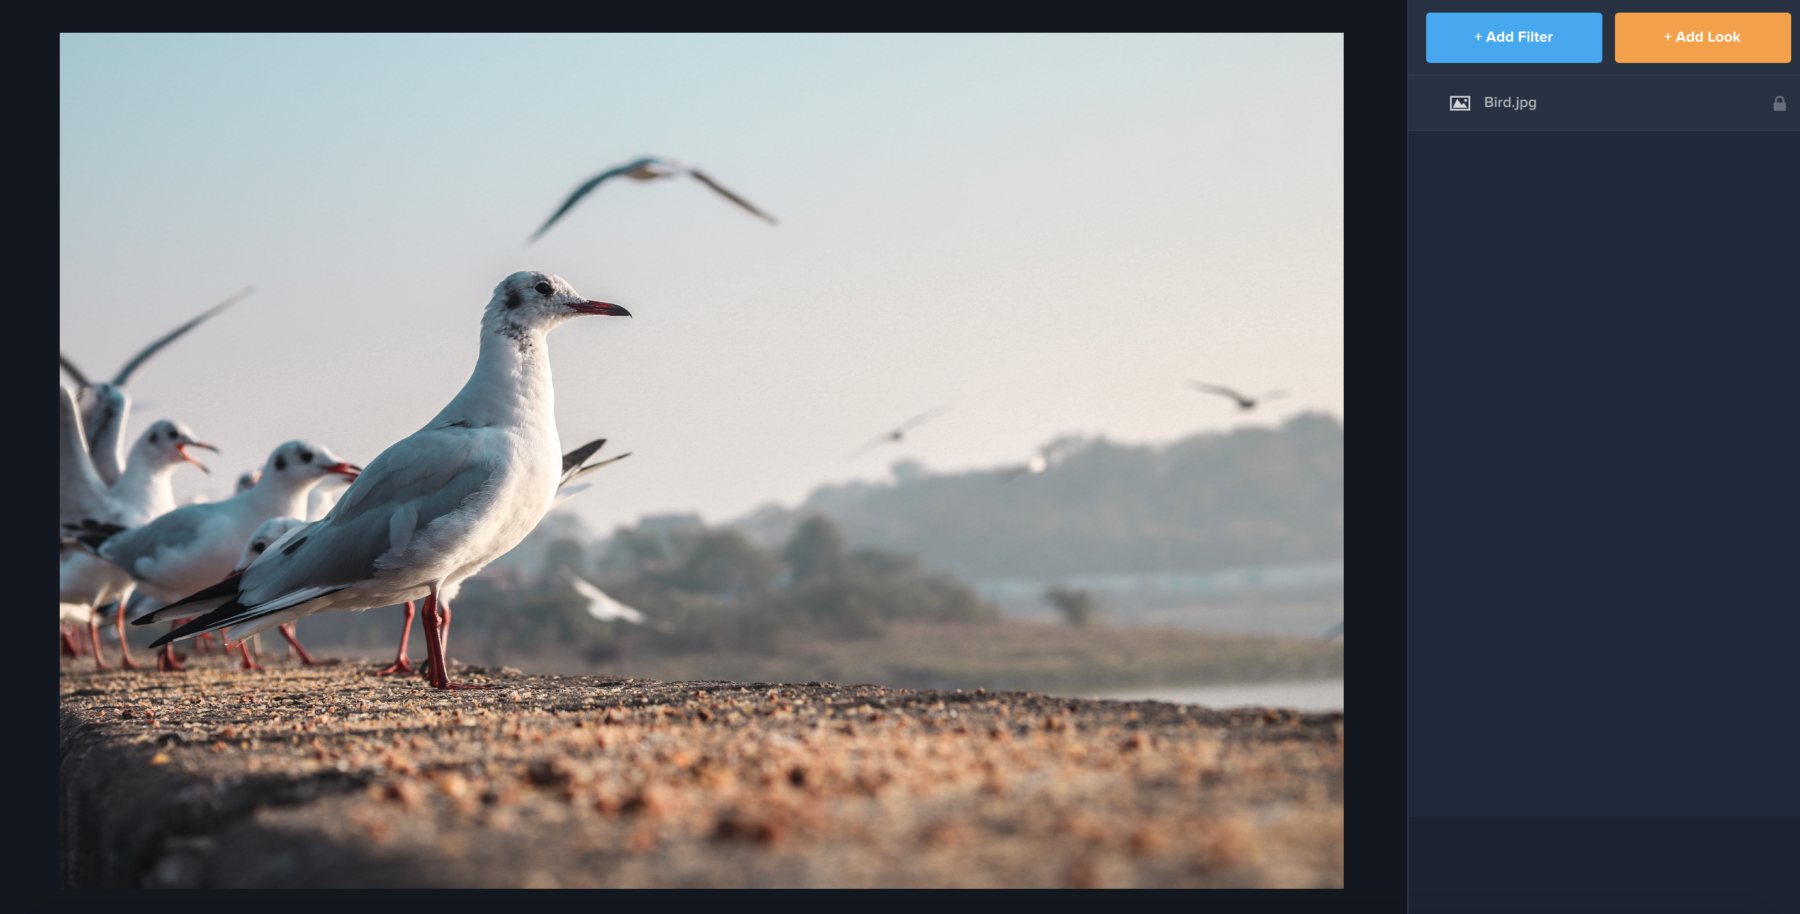
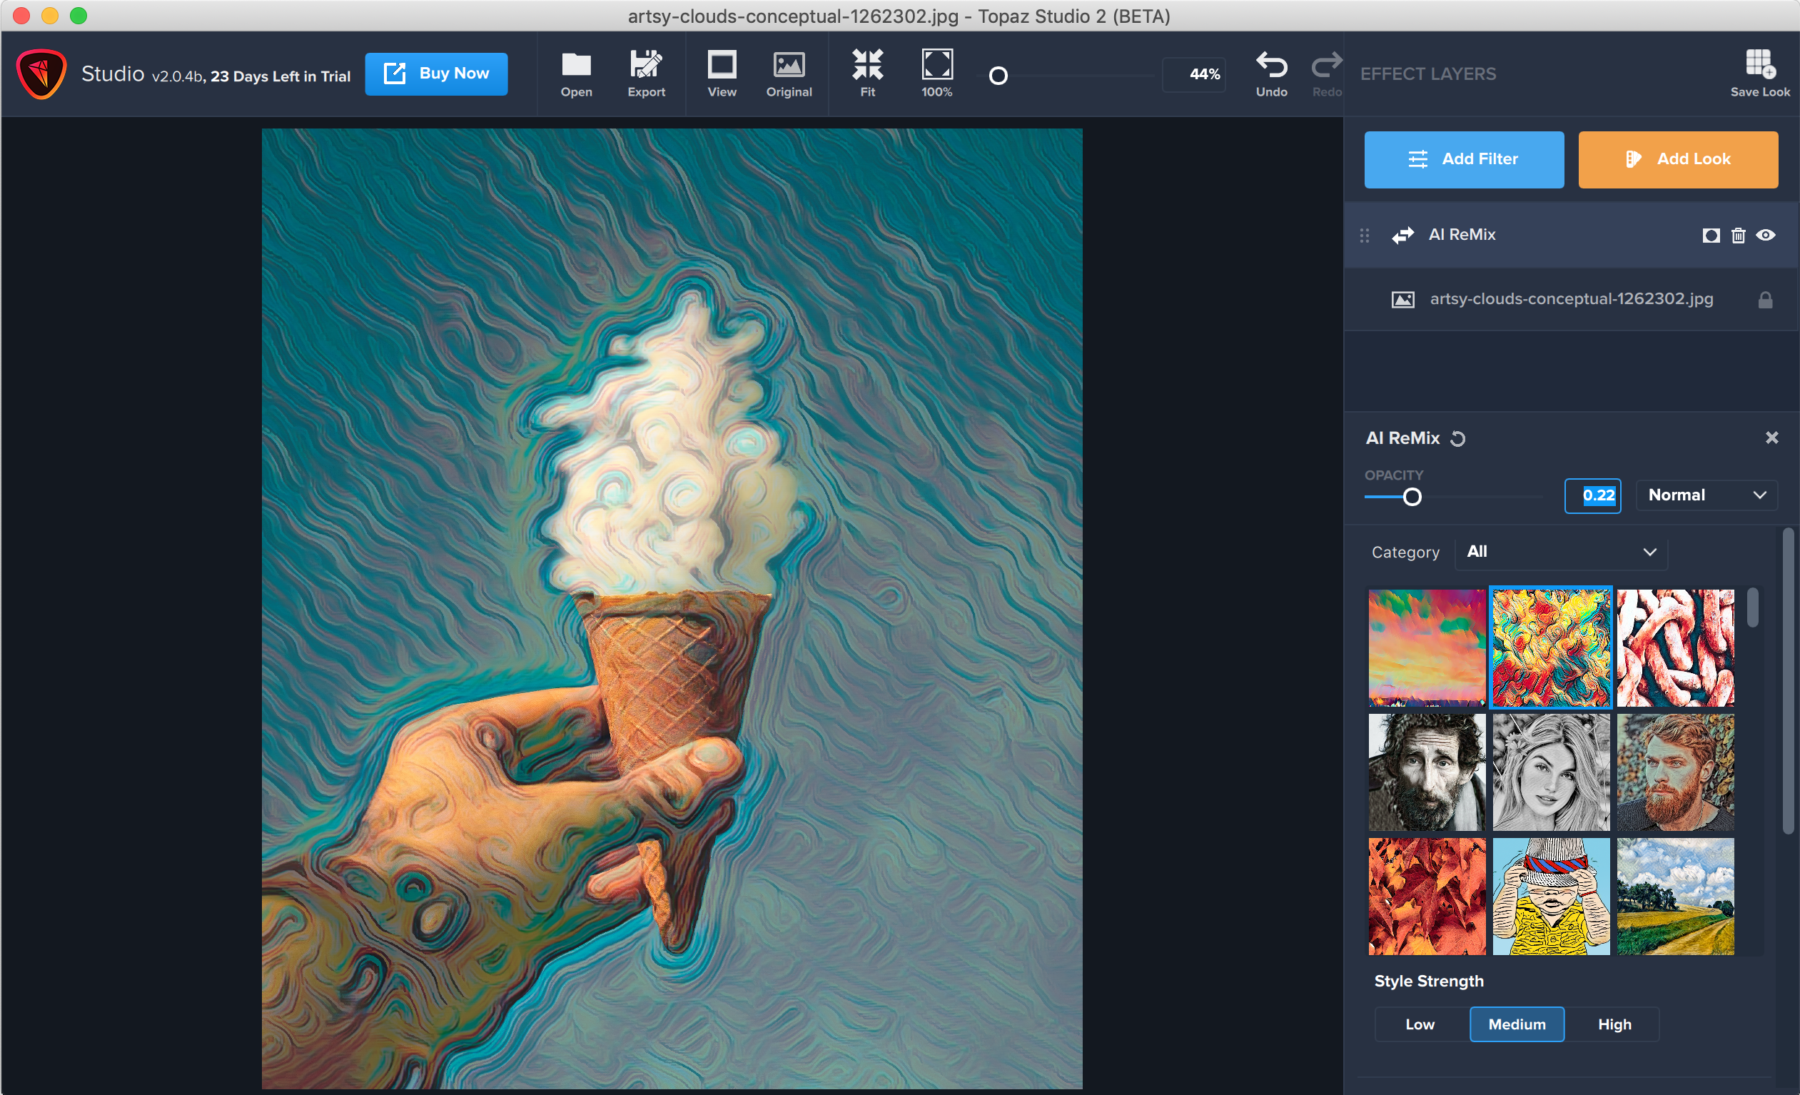
We’ll start off by opening our image in Topaz Studio 2. From the beginning, you’ll notice that the color in this image has a mix of yellows and blues, a contrasting effect that looks fine in an original photograph. However, to give this a true vintage look, we want to dull the contrast to give the photo a weathered look.

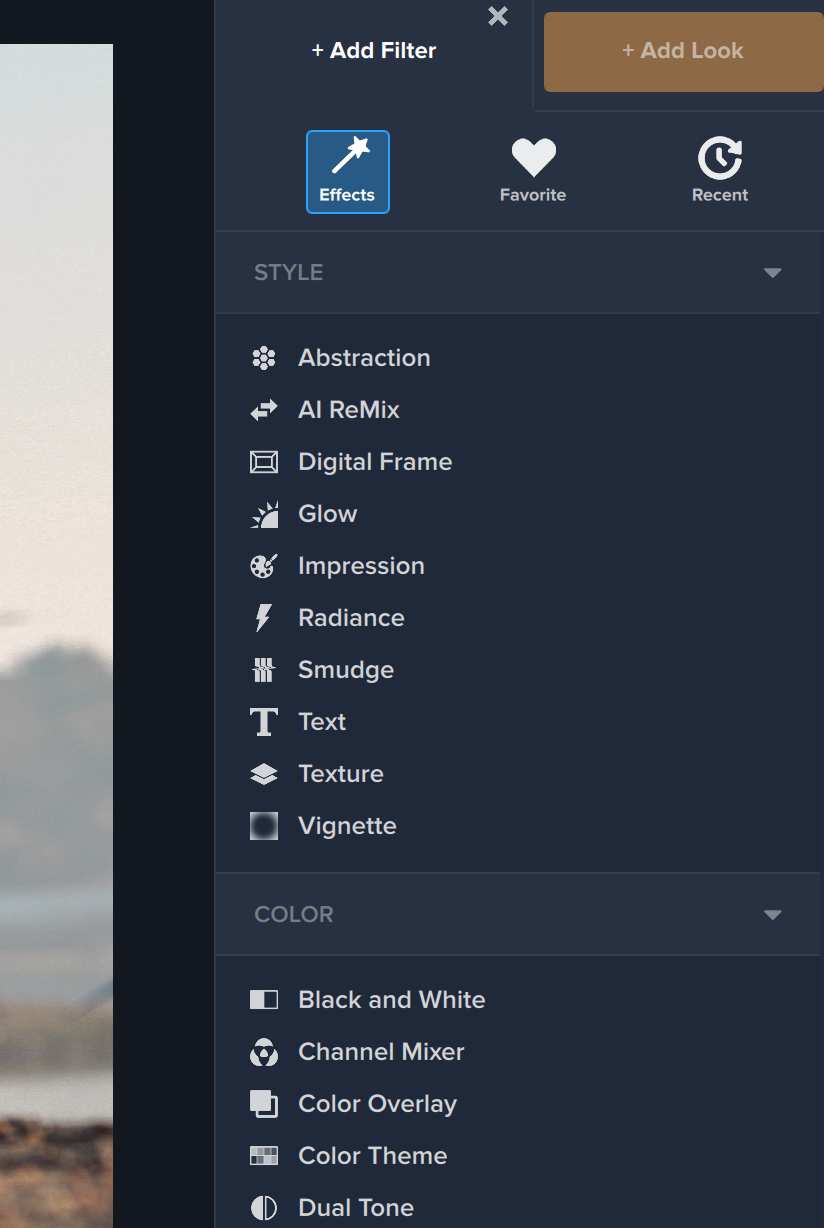
The first thing you’ll want to do is click the blue Add Filter button in the right-hand menu. Though Topaz Studio comes with many customized Looks that mimic a vintage effect, the process of creating your own allows you a much more personal touch. The Add Filter menu is  where you’ll find over 30 unique and customizable filters to use on your image. Today we’re going to focus on four filters that will give your image a vintage look. The first filter you will select is Precision Contrast in the first category of filters: Essential.

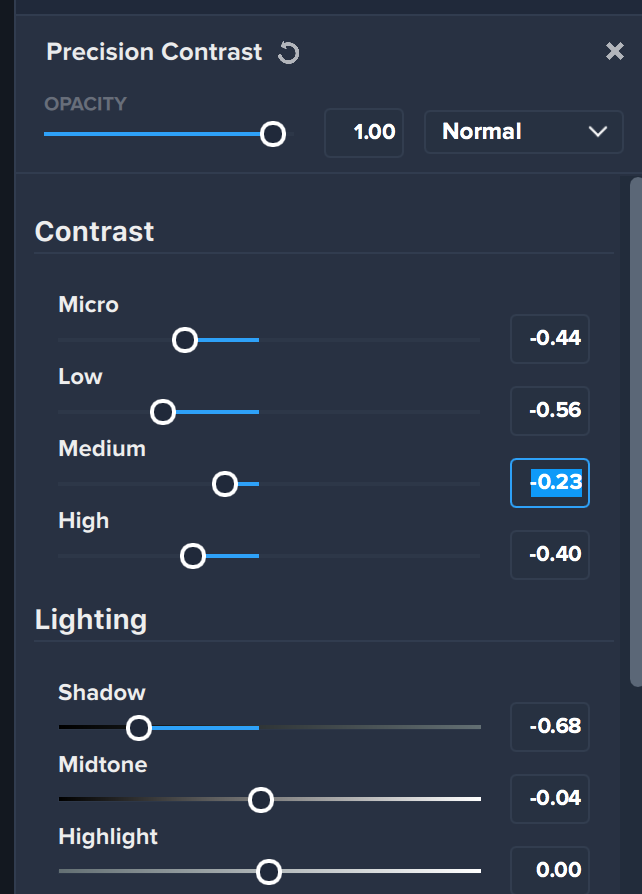
Once you apply Precision Contrast, the first thing you’ll want to do is adjust the Contrast levels in your image. To give your image a faded look, we’ll want to decrease the contrast on all four sliders: Micro, Low, Medium, and High. Use your own eyes to see just how low you want to slide them depending on the existing contrast in your image. We’re also going to lower the Shadow slider to make sure that even though we’re fading out the contrast, we can still see the shadows in the image 

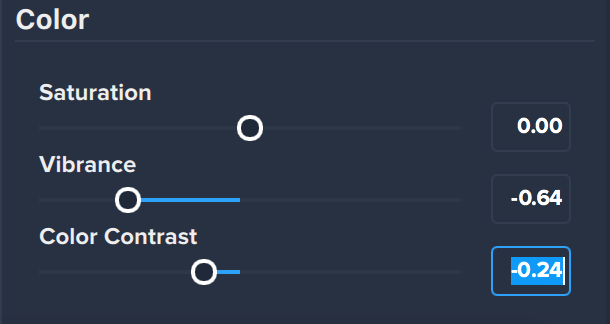
You’ll also notice that vintage film photographs have a duller color scheme than modern photographs. To decrease the color in your image, scroll down to the Color sliders and lower the Vibrance and Color Contrast sliders.

Step 2: Tone Curves

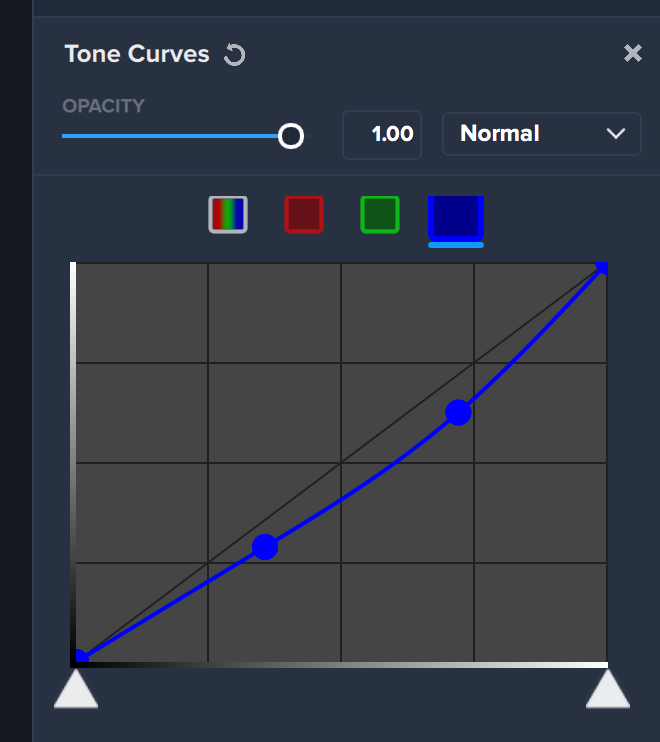
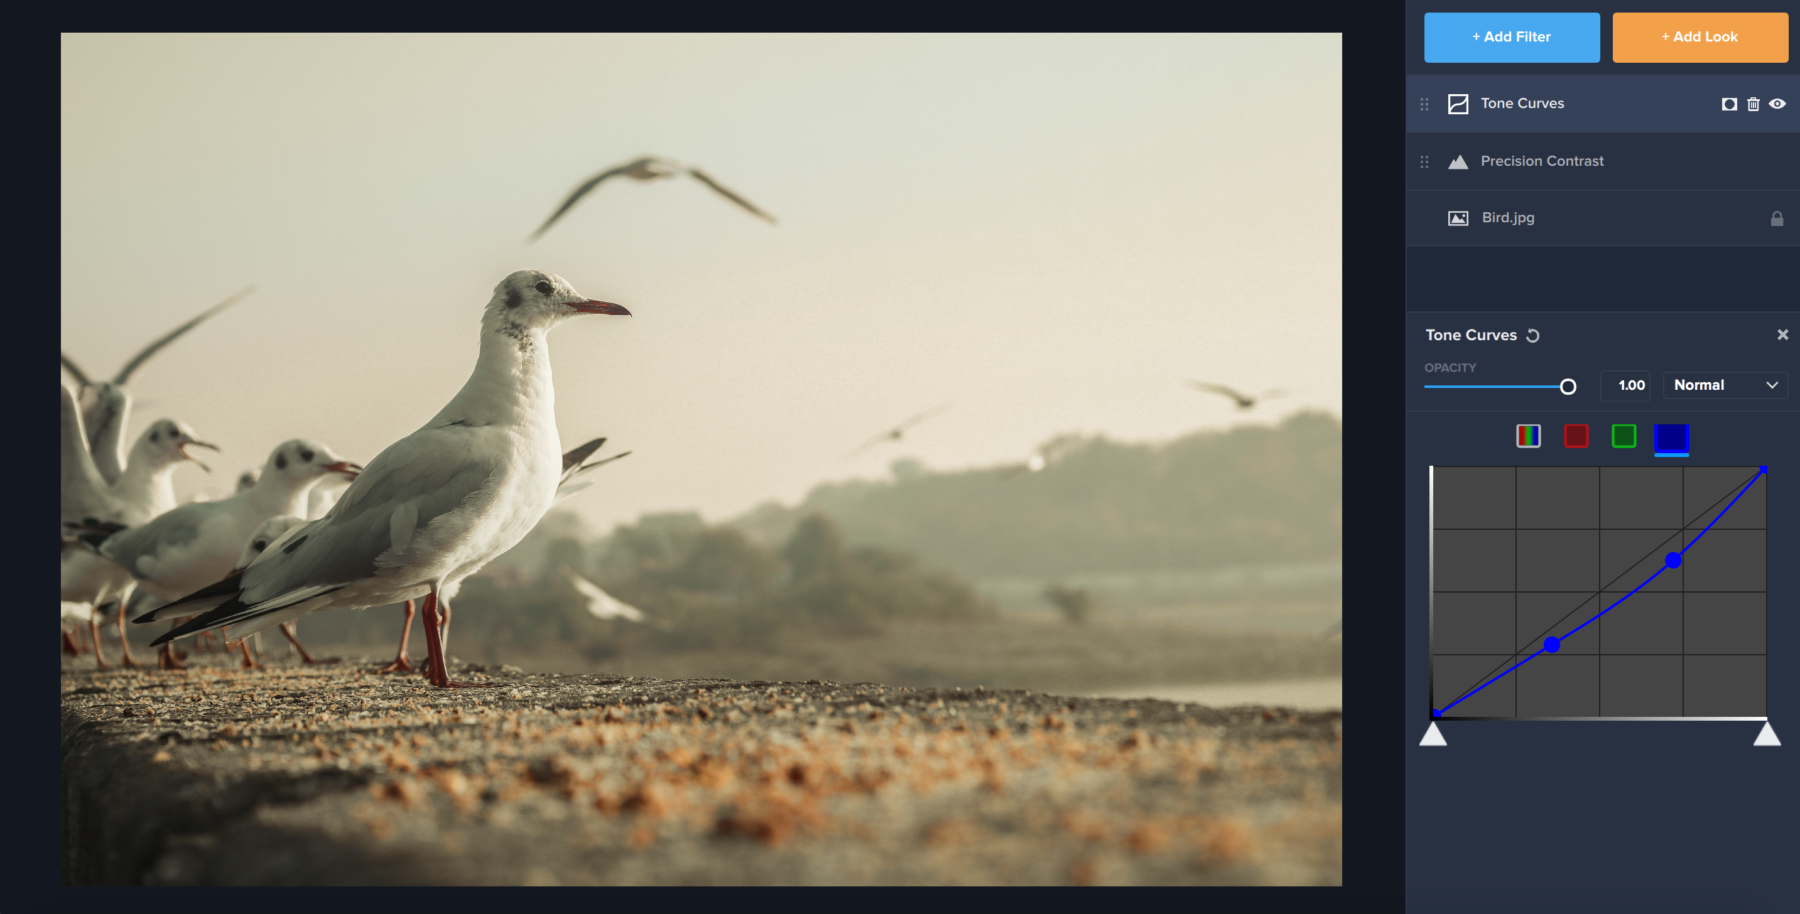
The second filter we applied to our image was Tone Curves. Tone Curves is an incredible Filter that can allow you to shift the way colors (and their accompanying shadows and highlights) appear in your image. To give our image a faded yellowing-paper sort of look that is common in vintage photos, we made a sort of bowed shape after selecting the blue box in tone curves. Since blue is a contrasting color to yellow, by adjusting the way blues look in our image, we’re able to see the yellow in the image a lot clearer. The resulting image appears in the window below. You’ll notice we’ve already created a faded look with these two filters.

Step 3: Texture and Vignette

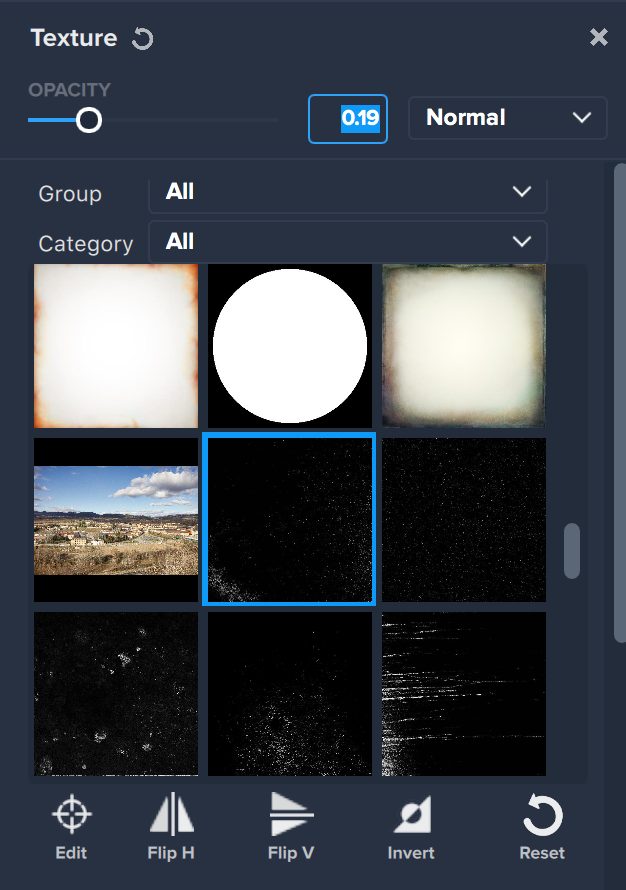
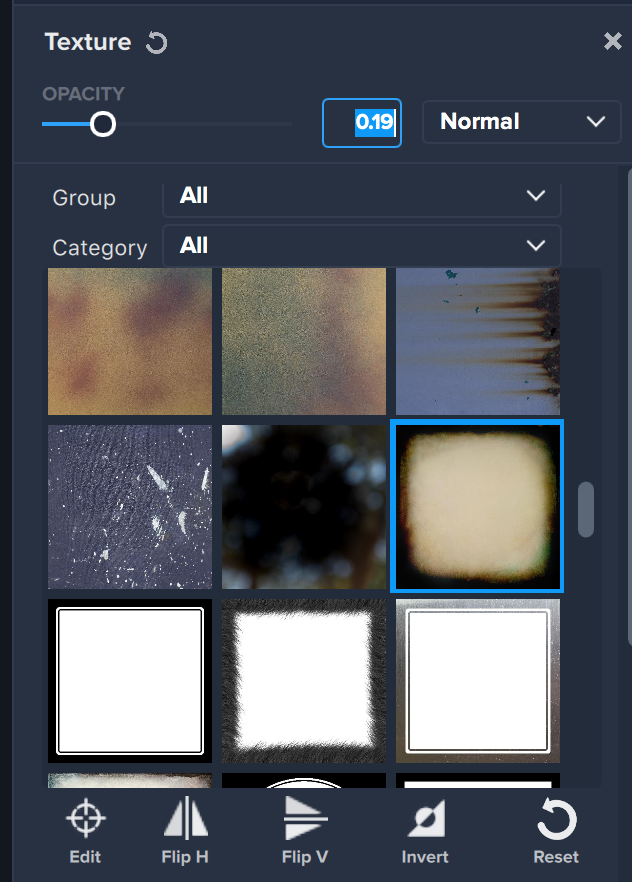
The last settings we’ll use for our photo are Texture and Vignette. We started by scrolling through our textures and applying two that gave our photo a weathered look. There are dozens of textures in the Texture Filter that could work for this purpose. We chose one filter with a scratched appearance and one with a faded and blackened border, then lowered the opacity of each so they didn’t overwhelm the image. We were going for a bit of subtlety! 

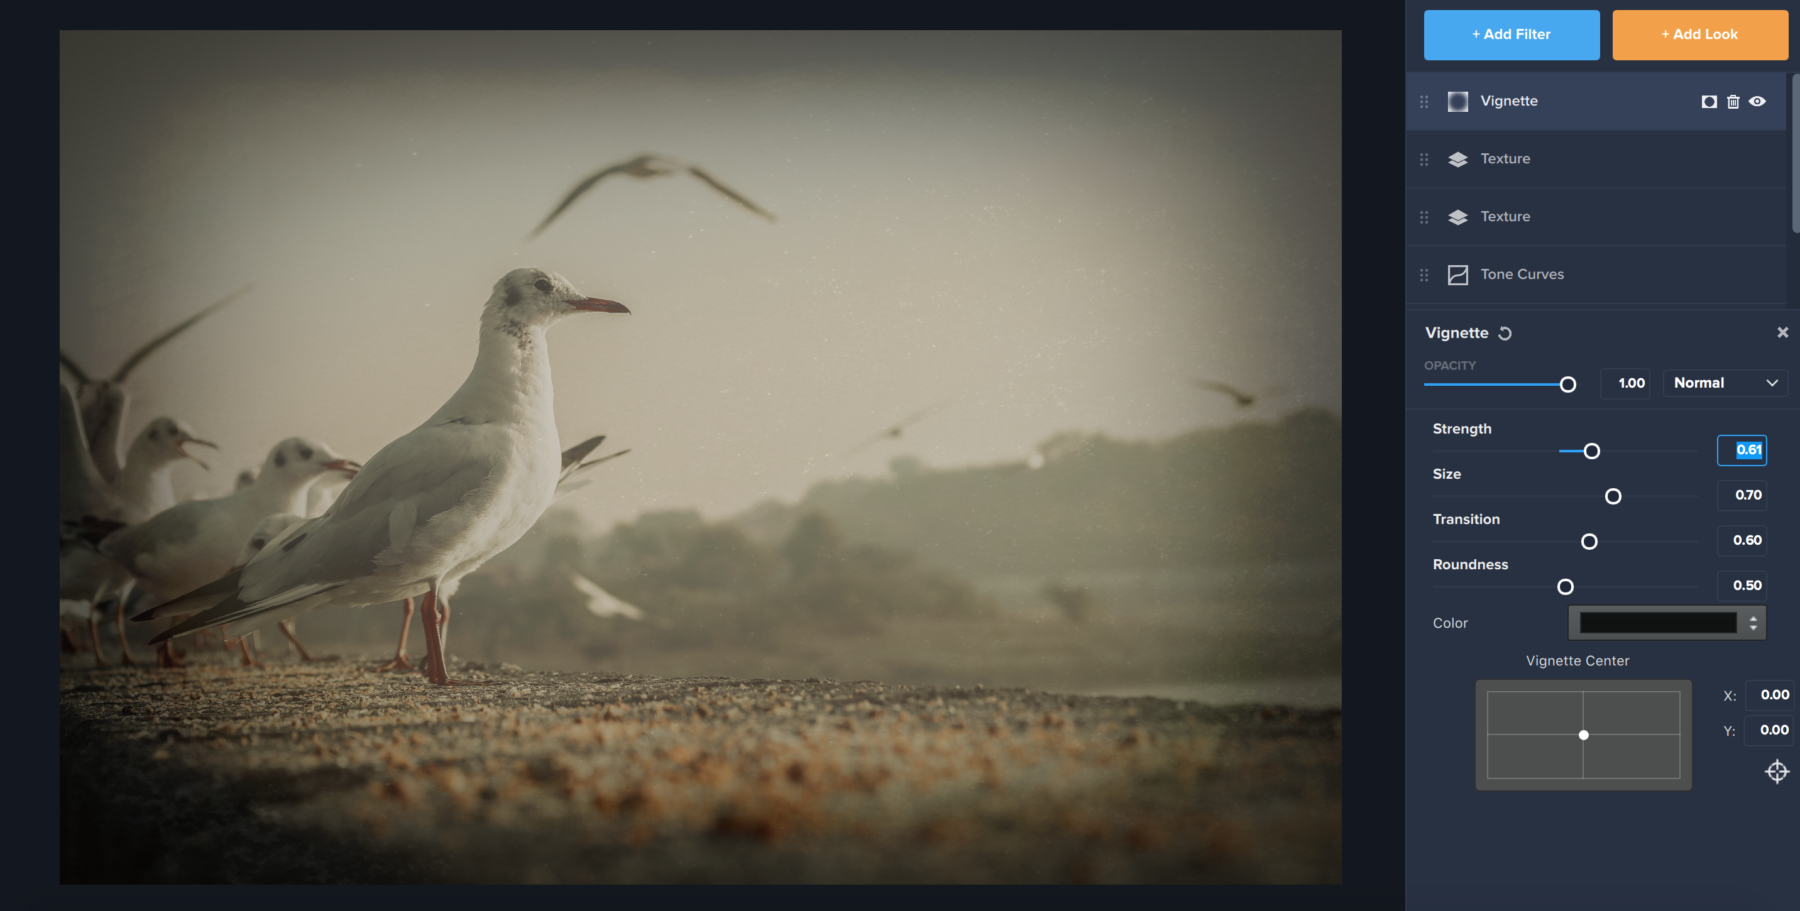
The last filter we added was a vignette, with a subtle strength of .61 and a subtle Size and Transition change as well. You’re more than welcome to make your vignette more bold if you would like your vintage photo to look a bit more dramatic!

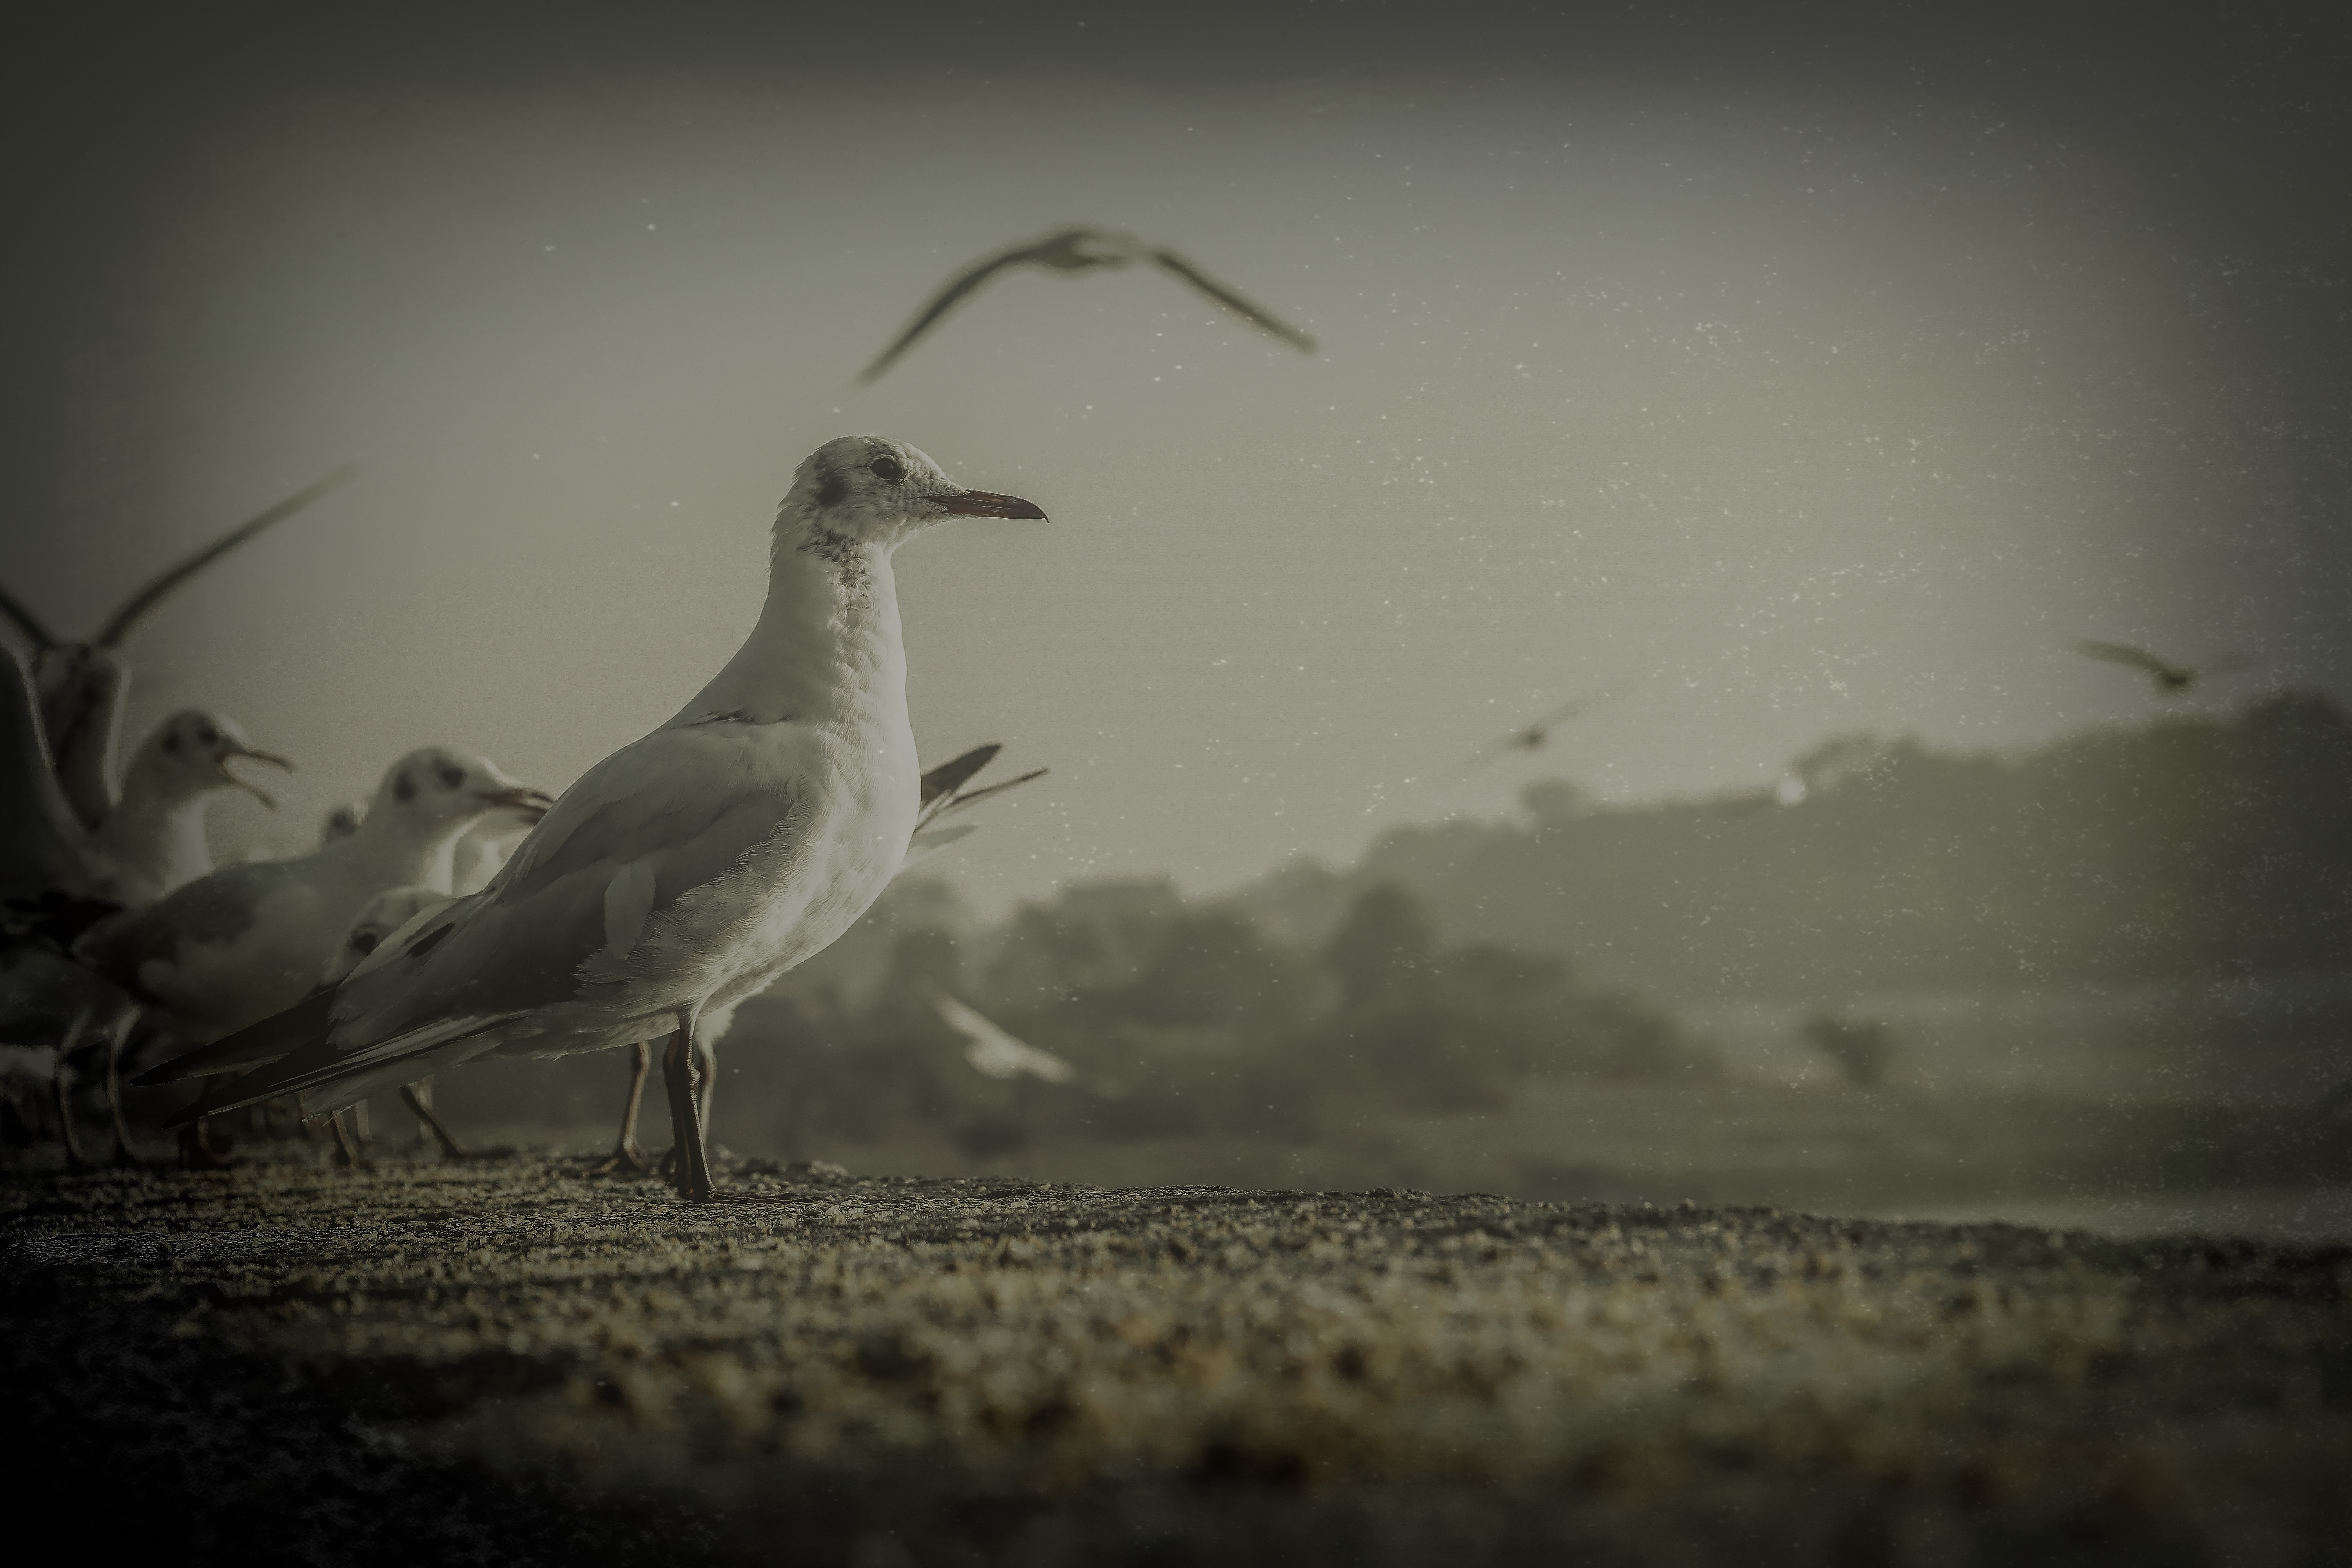
Step 3: The Final Result!

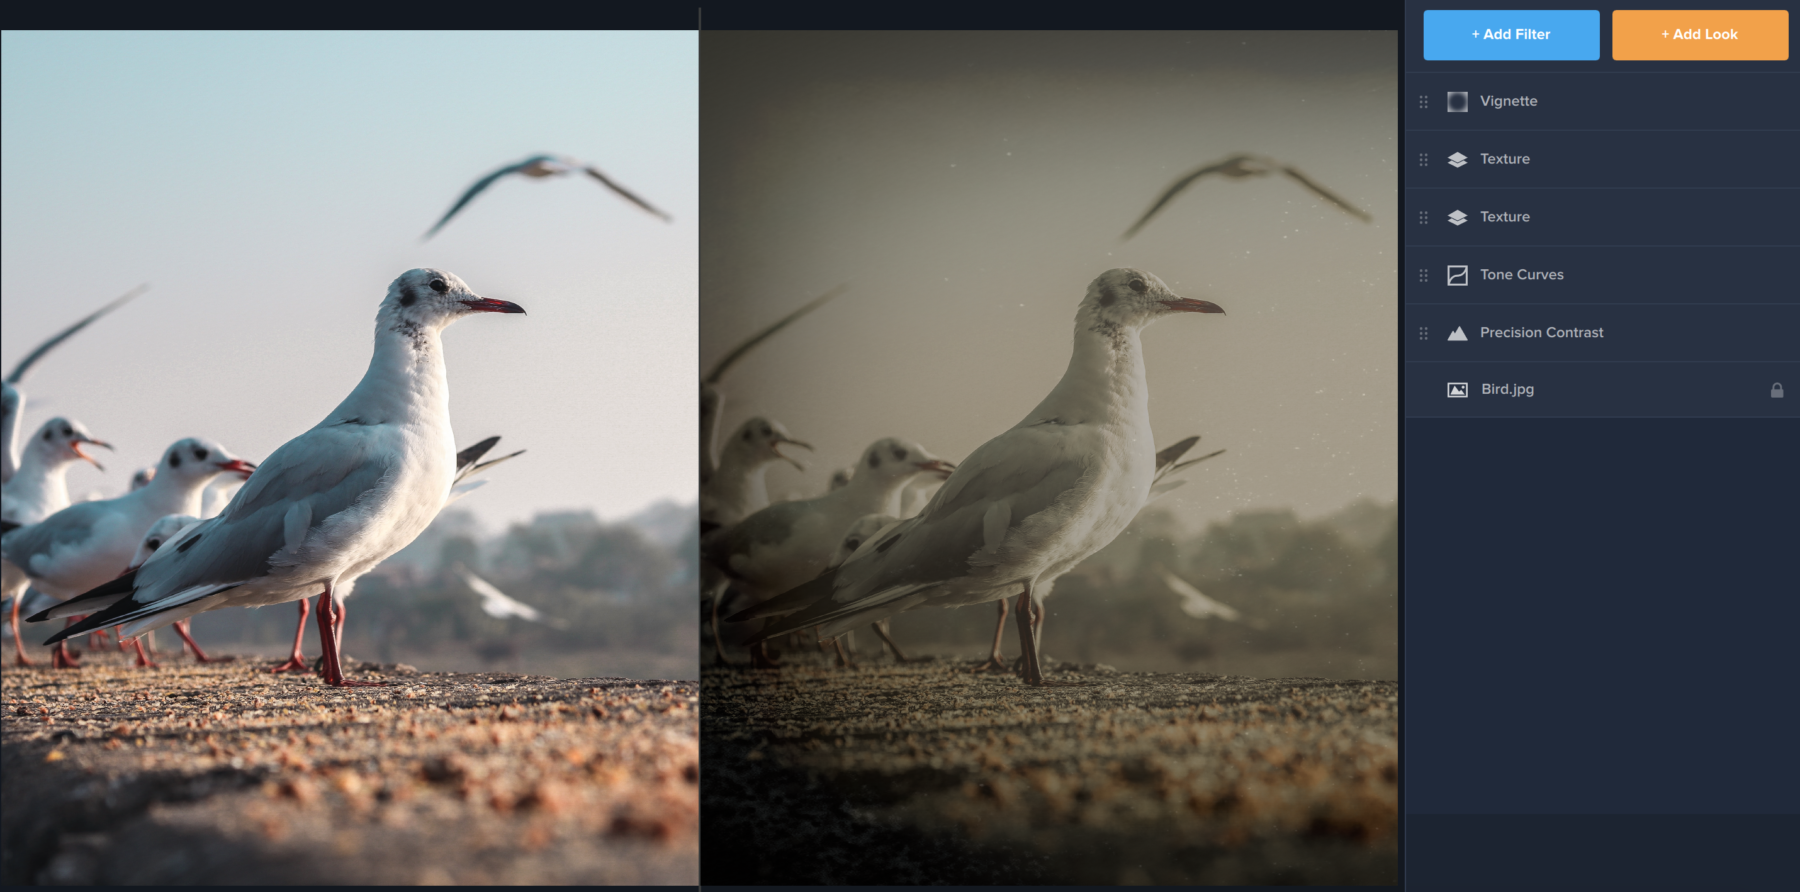
Using a combination of four Filters in five layers, we were able to five our seagull a weathered, aged look as though this photo was taken on the beach in the 1950s. This effect works great on portraits, landscapes, or still-life. We encourage you to play around with textures and make it your own. Happy creating!

Posted on 5 Comments

Tutorial: How to Use the Masking Tools in Topaz Studio 2

The new Topaz Studio 2 features intuitive and easy-to-use masking tools! Choose from five types of masking or combine masking options for perfectly masked adjustments.  Here is a quick run-through of the five masking tools in Topaz Studio 2.

Brush Masking

To get started, I’ve imported an image and applied AI Remix to this achieve an artistic background on a creatively staged photo. 

I want to keep the cloud and ice cream cone but keep the swirl background intact, so this is where masking will come in handy. To access the masking options, click the square and circle icon beside the Effect Layer name. See the illustration below!

Below you’ll see the different masking options within Topaz Studio 2.

Brush masking allows you to apply or remove the applied effect in a more fluid way. You can selectively paint out where you’d like to remove the effect. Here are a few pointers on the Brush Mask panel: The Transparency slider controls the opacity of your brush mask from 0.00 to 1.00. The Radius slider controls the overall size, while the Softness slider controls edge softness.

Depending on how long you’ve been around the Topaz community, Edge Aware may not be new to you or may be completely unfamiliar. This unique technology allows you to have more freedom in masking: you don’t have to be excruciatingly perfect with your drawing technique, because our technology will intelligently identify edges and perfect your mask accordingly! All you have to do is keep the edge that you want to be detected between the red inner circle and the green outer circle. Our technology will automatically detect the edge. You’ll also see the Edge Aware tool featured throughout the other masking options in Topaz Studio 2.

Spot Masking

Depending on the content of your image and the effect applied, the spot masking tool may be the quickest one for you.

In this example image, I applied the Black & White effect from the Effect Layer panel. I want to keep the subject and her colorful sweater my focal point, so let’s try a spot mask.

With a combination of the Roundness and Transition sliders, you can change the shape of your spot mask like below to better accommodate your mask subject.

Gradient Masking

Ideal for landscapes or anywhere you want to create a natural transition, gradient masking is a powerful tool to have in your masking toolbox. In this example image, I’d like to selectively apply the Radiance effect layer to just the stars in the sky and not the house on the horizon.

The effect above the red line will be removed and the effect below the green line will remain. You can also grab the handles and rotate them to manipulate the order of the gradient. The white handle will collectively move the gradient while moving the green or red handle can create longer and shorter transitions. You can also easily change the direction of the gradient mask to be applied vertically. 

Color Masking

The color masking tool allows you to create masks based upon colors found in your image. 

In this example image, I’ve applied AI ReMix to create an artistic product image. Let’s say I want to retain the photorealistic red caps on the milk bottles. With the color masking tool, I can place the dropper over the red to select it.

The Range slider allows you to adjust for a larger or smaller range of colors. Since I wanted a precise selection here, I opted for a smaller range of colors.

Luminosity Masking

The luminosity masking tool allows you to create mask selections derived from the brightness in your image. In this example, I’ve applied an abstract swirl effect from AI ReMix.

I only want the swirls to be applied to the luminous, bright highlights in the image. Luminosity masking is an ideal tool for this situation.

By placing the dropper over the bright part of your image, you’ll mask the brightness and apply the swirl effect to the dark part of the image. So, since we want to achieve the opposite, we’ll place the dropper in the darkest part of the image (the right-hand corner of the water). You can adjust the Range slider accordingly to capture various lengths of color. With just a few clicks, the luminosity mask achieves exactly the artistic effect I wanted and in just right the places. Other masking tools would be infinitely harder to mask such a difficult area to distinguish.

These five types of masking tools were created to power up your workflow, so you can find an ideal tool for your unique masking situation. But don’t forget, you can also combine multiple types of masks to achieve your desired look! All you’ll have to do hit “Apply” after you finish with one type of masking to move right on to the next. 

We hope you’ll find Topaz Studio 2 an easy-to-use and intuitive tool for your creative and artistic digital images! 

We have several other tutorials on Topaz Studio 2! Here are just a few you might be interested in:

You can find other answers by visiting our Help Center here. Still not finding the answer you’re looking for? Submit a support request for one of our Topaz experts to come to your rescue!

Posted on 8 Comments

Setting Up Topaz Studio 2 as an Adobe Photoshop or Lightroom Plugin

Topaz Studio 2 can be used as both a standalone application and plugin for Adobe Photoshop and Lightroom. Here are step-by-step instructions to set up Topaz Studio 2 as a plugin.

Photoshop CC + Mac Instructions

  1. Open “Finder”
  2. Select “Go” > “Go to Folder”

3. Copy and paste the following path: /Applications/Topaz Studio 2/Topaz Studio 2.app/Contents/Resources/PS_Plugins/TopazStudio2.plugin

4. Click “Go”.

5. Right-click (or CTRL+Click) on the “TopazStudio2.plugin file”.

6. Select Copy “TopazStudio2.plugin”.

7. Open your Applications folder.

8. Go to /Applications/Adobe Photoshop CC [year number]/Plug-ins

9. Paste “TopazStudio2.plugin” file in the “Plug-ins” folder.

Photoshop CC + Windows Instructions

  1. Open Windows Explorer.
  2. Go to C:\Program Files\Topaz Labs\Topaz Studio 2\PS_Plugins_x64

3. Right-click and copy the “tltopazstudiops_x64.8bf” alias file.

4. Navigate to C:\Program Files\Adobe\Adobe Photoshop CC\Plug-ins

5. Right-click in this folder, next to “Generator”, and paste the file.

6. Restart Photoshop CC and try invoking your plug-in once more.

Lightroom Instructions (for Mac and Windows)

To use Topaz Studio 2 in Lightroom, follow these steps:

  1. Click “Preferences” → “External Editing”.
  2. In the Additional External Editor section under preset, please select “Choose” and search for Studio 2. Check that you have the application selected (make sure it is the actual icon and not the entire folder).
  3. Next, click on the preset dropdown menu and select “Save current settings as a new preset” and enter the name of your application.

 Now that you have Topaz Studio 2 set up as an external editor, just click “Photo” > “Edit In” > “Topaz Studio 2”.

Note: For Topaz Studio 2 to save back to Lightroom you will have to use “File → Save” in order to save. 

Have questions about getting started or troubleshooting with plugins? Visit our Help Center or submit a support request and one of our specialists will come to your rescue!