
In today’s tutorial, we’re going to look into an effect that we’ve been getting a lot of questions about; and honestly, it had us scratching our heads for a while. This image was inspired by @Lizzy_Pe_ on instagram, and ‘Jammie Jam’ of our facebook group.
Lizzy_Pe_ kindly sent me a more in-depth explanation of her work, so expect another tutorial later explaining a more advanced version of this technique; but for now, we’re going to do the short and sweet version.
Let’s Get Started
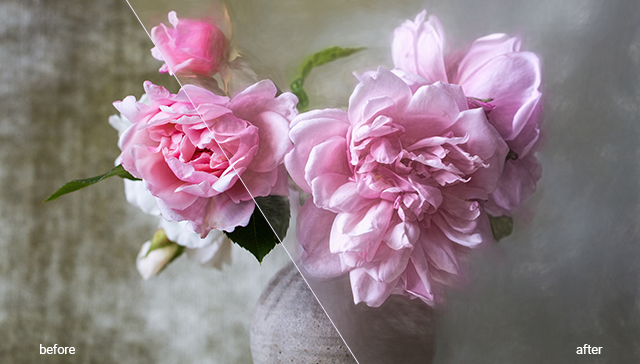
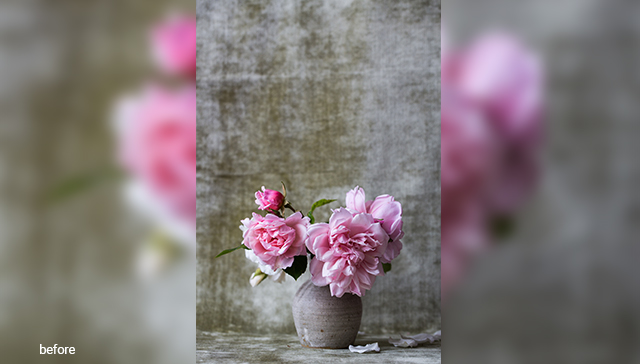
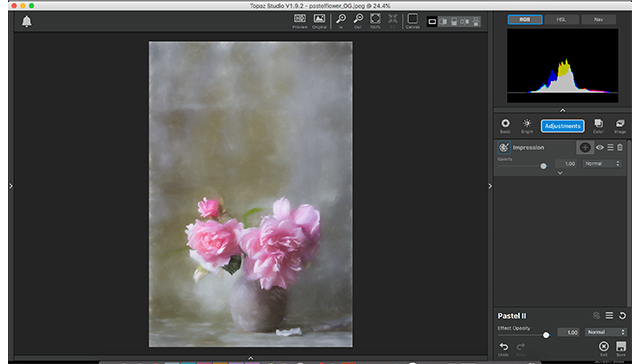
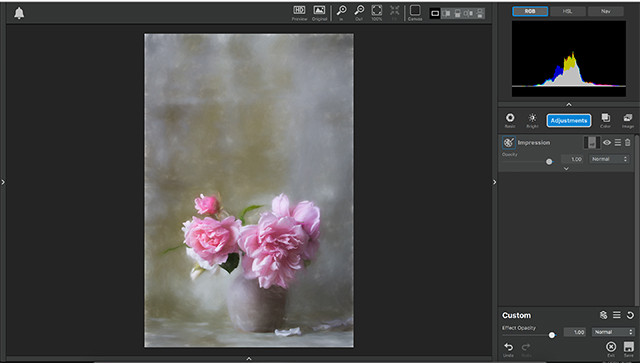
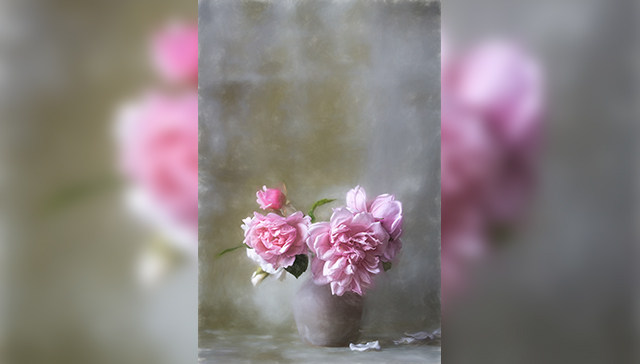
We’re going to start with an image of delicate roses in a vase. The background seems extremely rough in comparison to the flowers. It seems to drown them out to the point that you almost lose how delicate the roses are, and completely miss the rose petals at the bottom. We’re going to soften the background and give the entire image a soft, pastel-like, almost impressionistic, style while accentuating the flower’s colors, and bringing out the petals at the bottom.
We’ll be doing all this with a single pre-saved effect (Pastel ll), two adjustments (Precision Detail and Bloom), and controlling each with masks and opacity.
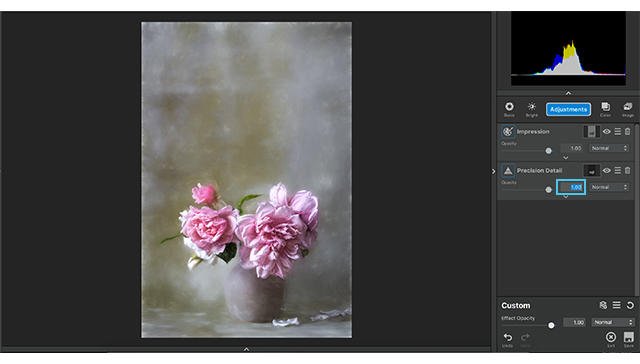
Impression
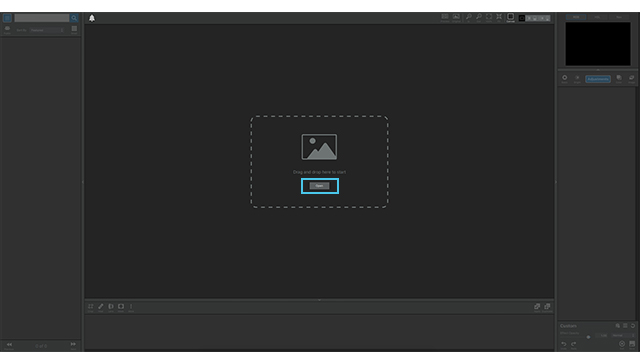
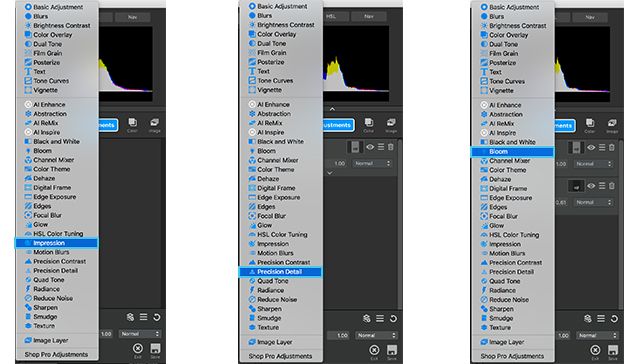
After opening your image (by either dragging and dropping directly into Topaz Studio, or selecting the “Open” button in the middle of the screen), open the Effect Panel on the left side of the screen.
This panel allows you to select from a variety of pre-saved effects created not just by the team at Topaz Labs, but also the artist community of Topaz users. We’re going to go into the “Impression” drop down, and select “Charcoal and Pastel”.
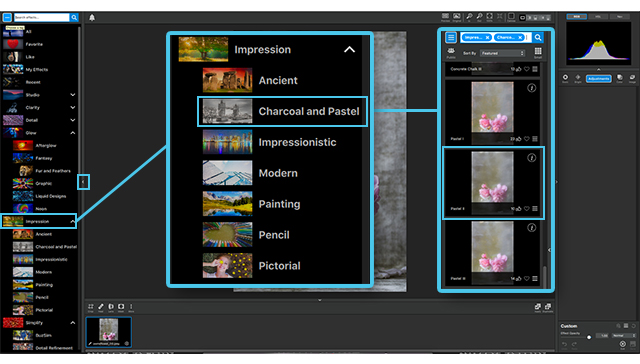
Scroll down the list until you see “Pastel ll” click this effect, and it will be automatically applied to your image.
Now we need to personalize this just a bit to bring out the flower’s detail while still keeping them soft and delicate.
We’re not going to change any of the settings, but we are going to play with the mask tool.
Click the mask icon (the white square between the adjustment name and the eye ball icon) which will open up the masking section options. Click the brush tool, and make sure the black box below it is selected. Now mask out all of the roses, except the pink bud in the background. Make sure you get all the little leaves as well, and don’t forget the petals on the floor!
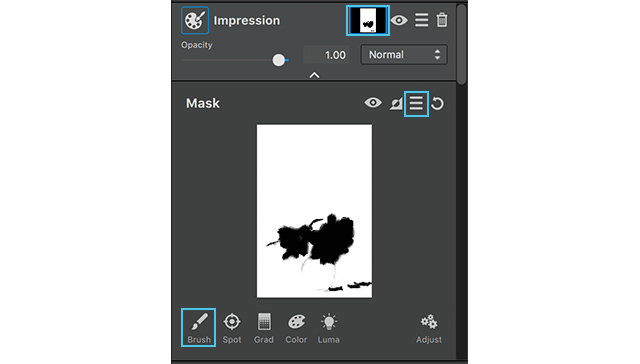
But, we’re not done with this mask yet!
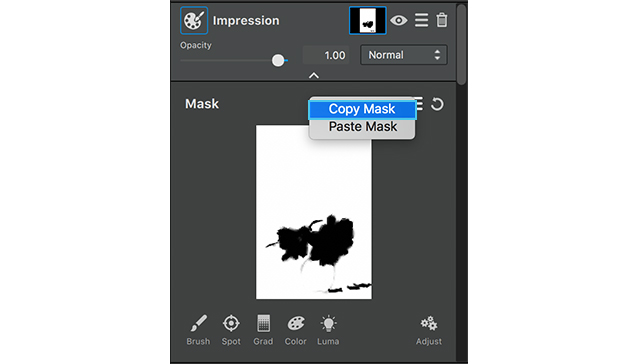
Go to the hamburger menu, between the invert and reset mask, and select “Copy Mask”. We’re about to edit this mask to bring through the softness of Impression, BUT, we need the original mask for a later adjustment. So, we will copy it so we have it for later use.
After copying the mask, click the “Adjust” button (it looks like 3 gears, at the bottom of the masking section) to reveal a hidden menu that allows you to control certain aspects of how your mask is applied.
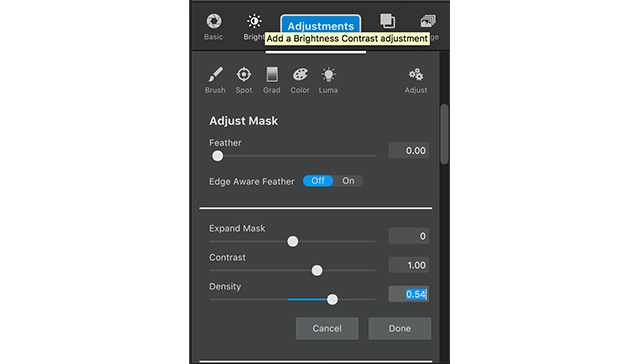
- “Feather” softens the edges of your mask.
- “Expand Mask” brings the edges of your mask in, or expands them to cover more of the image than previously selected.
- “Contrast” controls the difference of lightness or darkness of the mask in relation to the background.
- “Density” controls the depth of lightness or darkness within the mask.
We’re going to control the density on this occasion and set it to 0.54, then click “Done”.
- Density: 0.54
Now we’re going to move on to the next adjustment.
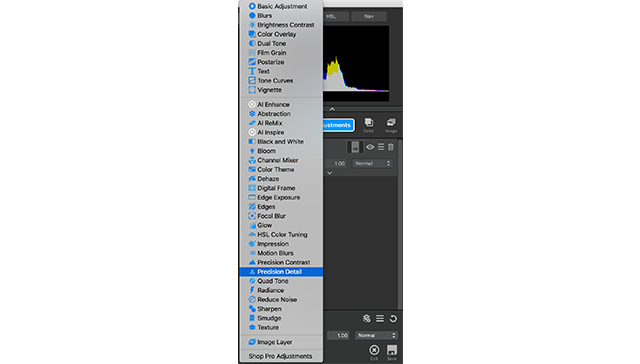
Precision Detail
This is one of my FAVORITE adjustments in Topaz Studio, and I literally use it on EVERYTHING!
I’ll explain each of the adjustments at the end of this tutorial.
Go to “Adjustments” and select “Precision Detail”. We’re only going to edit the “Overall” section in the Detail menu and Lighting at the bottom.
Before we start, I ONLY want this adjustment to affect the flowers. Remember the mask we copied from the previous adjustment? We’re about to use it. Click the masking icon, between the adjustment name and the eye icon, then go to the hamburger menu below in the masking section and select “Paste mask”.
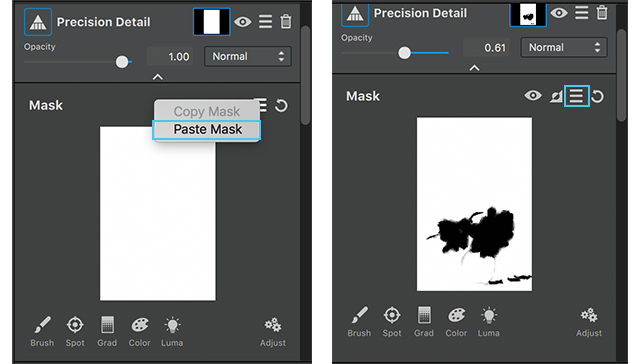
Now, we don’t want this to effect the background, so we’re going invert it by clicking the icon between the eye icon and the hamburger menu in the masking section.
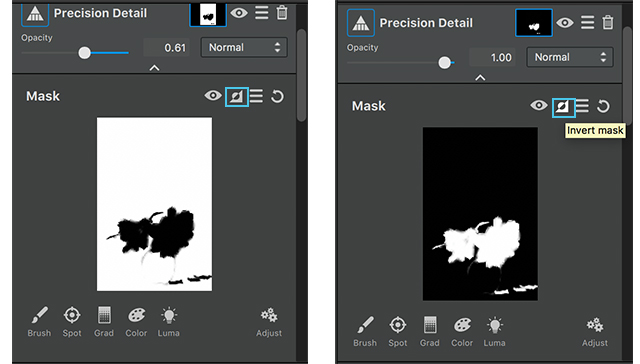
This changes the mask on the flowers to white and the background to black ensuring that the roses are the ONLY things effected.
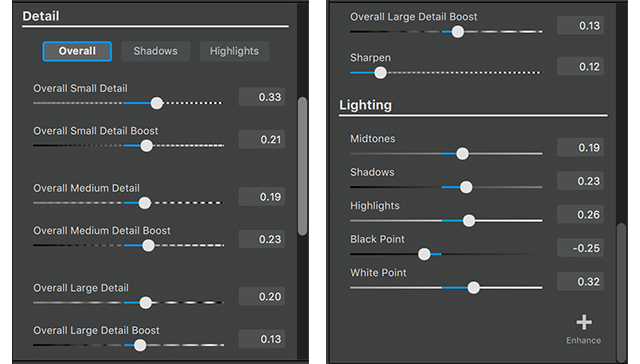
Detail:
- Overall Small Detail: 0.33
- Overall Small Detail Boost: 0.21
- Overal Medium Detail: 19
- Overall Medium Detail Boost: 0.23
- Overall Large Detail: 0.20
- Overall Large Detail Boost: 13
- Sharpen: 0.12
This allows the shadows and highlights to really pop in these flowers and brings out details in the folds that weren’t visible before.
Lighting:
- Midtones: 0.19
- Shadows: 0.23
- Highlights: 0.26
- Blackpoint: 0.26
- Highlight: 0.32
These settings exaggerate the highlights and the shadows a bit more; but we lost a bit of the softness we were trying to keep in this photos. To fix this, go to the “Opacity” setting and bring it to 0.61
- Opacity: 0.61

These setting really allow the detail in the flowers to come through, but it still looks a little dark and I feel it could be a bit more ethereal, so we’re going to add the Bloom adjustment.
Bloom
Go to “Adjustments” and select “Bloom”. After making this selection it should automatically open the drop down menu upon application. We’re going to edit these settings to put a little more brightness into the photo; but ALSO give it more of the ethereal feel we’re looking for in this photo.
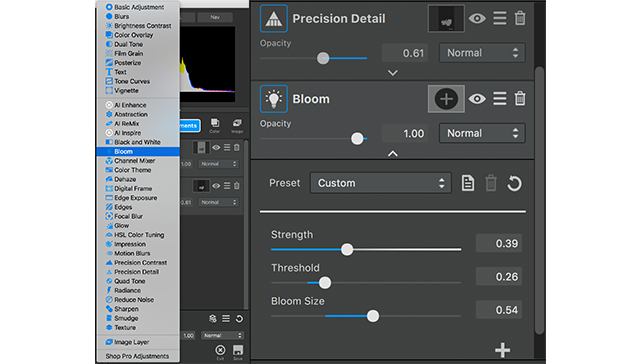
- Strength: 0.39
- Threshold: 0.26
- Bloom Size: 0.54
With the addition of that adjustment that completes this tutorial.
Let me take a little time, now that we’re done and explain these adjustments and what exactly it is that they do.
Impression:
Impression is a very artistic adjustment. From delicate oil paint to rough sketches impression allows you to control your brush size, amount of paint applied, how messy or clean your strokes are, even your painting progress so you can make your image look like a completed painting or like you just started putting paint to canvas. This adjustment even gives additional options to control, the color and lighting of the painting, even add a texture of the “canvas” your image is “placed”. Impression really gives you the freedom to explore your creativity and turn photos into paintings in a snap.
Precision Detail:
Precision Detail hones in and brings out the fine details of your images allowing you to adjust the amount of of small, medium, and large details. This adjustment goes a step further by separately controlling the detail with in the highlights and the shadows Independently, giving your images a more dramatic effect, or toning down overpowering details in your image.
Bloom:
the concept behind Bloom is to soften the lighting in an image. It gives a little bit of ethereal soft lighting to soften a harsh light, or further enhance an already delicate image
 [/vc_column_text][/vc_column_inner][/vc_row_inner][vc_empty_space][/vc_column][/vc_row][vc_row][vc_column][qodef_call_to_action full_width=”yes” content_in_grid=”yes” grid_size=”75″ type=”normal” show_button=”yes” button_size=”large” button_type=”outline” button_target=”_blank” button_font_weight=”” button_icon_pack=”” box_padding=”58px 0px” button_text=”Download Now!” button_link=”https://topazlabs.com/downloads/” button_color=”#ffffff” button_border_color=”rgba(255,255,255,0.5)” button_hover_color=”#000000″ button_hover_background_color=”#ed36e4″ button_hover_border_color=”#101010″]


