If you’re anything like me, you’ve struggled with perfecting masks at some point of you’re life. I’ll admit, I’m a perfectionist and I want to be able to apply masks exactly where I want them. Nothing is more frustrating than having a vision and not being able to accomplish it. I’m not talking about those images you look at and think “something’s missing.” I am talking about those images when you know the exact creative direction you want. You are unable to achieve it because your current software contains way too many tools that require too much time to develop the technical know-how. You’d rather spend that time out shooting!
Topaz Studio’s intuitive masking was created with the photographer in mind. Easy-to-use intuitive tools that allow you to choose from 5 types of masking and then combine masking options for perfectly masked adjustments. Our masking is seamlessly integrated into Topaz Studio to streamline your workflow.
And We’re Giving it Away! Yep, you read that right. You’ll get complete freedom to use Topaz Studio’s comprehensive masking, as well as 10 free adjustments, opacity slider, blending modes plus full functionality to use it as plugin, a host editor for all Topaz Labs existing products, and standalone all for free. If you’d like to learn more about all the free functionality within Topaz Studio, checkout our What’s Free? article.[/vc_column_text][/vc_column][/vc_row][vc_row][vc_column][vc_empty_space][vc_column_text]
Download Now
[/vc_column_text][vc_empty_space height=”15px”][vc_row_inner][vc_column_inner width=”1/2″][vc_btn title=”Windows” shape=”square” color=”primary” align=”center” button_block=”true” link=”url:https%3A%2F%2Fopen_beta.s3.amazonaws.com%2Ftopazstudio_online_installer.exe|||”][/vc_column_inner][vc_column_inner width=”1/2″][vc_btn title=”Mac” shape=”square” color=”primary” align=”center” button_block=”true” link=”url:https%3A%2F%2Fopen_beta.s3.amazonaws.com%2Ftopazstudio_online_installer.dmg|||”][/vc_column_inner][/vc_row_inner][vc_column_text]
Not Familiar with Topaz Studio?
Topaz Studio is a fast, flexible, powerful creative toolbox and it’s the next level image editor for photographers. Topaz Studio gives you lightning fast results with Topaz’s exclusive image processing technology, in an intuitive, affordable, easy to use application. You can learn more about Topaz Studio in the Announcement and Overview article.
“This is all your Topaz products wrapped into one program.”
[/vc_column_text][/vc_column][/vc_row][vc_row][vc_column][vc_empty_space][vc_column_text]
What exactly is Masking?
If you are just getting your feet wet in the photography world, don’t worry! Everyone has asked that question at some point. Masking allows you to selectively make adjustments on your image. Let’s say you want to bring out the details in your granddaughter’s hair, but don’t necessarily want to bring out all the details of her skin, like her pores. Masking is great for that. Masking allows you to enhance part of the image, without being forced to make that same edit to the overall image. You also have the choice of varying mask densities. A black (0.00) density mask will completely remove the effect, while a white (1.00) density mask will allow an effect to completely remain. You can tune the range in between those values to achieve your desired effect.[/vc_column_text][/vc_column][/vc_row][vc_row][vc_column][vc_empty_space][vc_column_text]
Masking Made Simple
[/vc_column_text][vc_empty_space height=”15px”][vc_single_image image=”8582″ img_size=”full” alignment=”center”][vc_empty_space height=”15px”][vc_column_text]The Topaz Studio Integrated Masking is unlike anything you have seen before. We have included 5 masking types: Brush, Spot, Gradient, Color, and Luminosity, as well as a Mask Adjustments panel and an option to invert or completely reset your mask. Our brush masking includes intuitive, content-aware technology that was developed in house. I’ve gotten the chance to play with it quite a bit – it’s awesome and a complete time saver to say the least! Not only are the new masking features awe-inspiring, but you can now combine masking types. After making adjustments with one type of mask, click apply or switch to another mask type and build upon that mask. It’s never been so easy![/vc_column_text][/vc_column][/vc_row][vc_row][vc_column][vc_empty_space][/vc_column][/vc_row][vc_row][vc_column width=”2/3″][vc_column_text]
1. Global and Adjustment Level Masking
[/vc_column_text][vc_empty_space height=”15px”][vc_single_image image=”8586″ img_size=”large” onclick=”link_image”][/vc_column][vc_column width=”1/3″][vc_empty_space height=”128px”][vc_column_text]In Topaz Studio, we wanted to give you full control, so we have included both Global Masking and Adjustment Level Masking. Each has the exact same functions, but Global Masking will effect your entire image while, Adjustment Level Masking will only effect that one Adjustment.[/vc_column_text][/vc_column][/vc_row][vc_row][vc_column width=”2/3″][vc_empty_space][vc_column_text]
2. How to create a Mask
[/vc_column_text][vc_empty_space height=”15px”][vc_single_image image=”8734″ img_size=”full” alignment=”center”][/vc_column][vc_column width=”1/3″][vc_empty_space][vc_empty_space][vc_empty_space][vc_empty_space][vc_column_text]How to Select Global or Adjustment Level Masking. To edit your Global Mask, select the icon (left icon) from the Adjustment Toolbar or from the Topaz Studio menu bar, select Tools > Mask Effect. To edit your Adjustment Level Masking, click on the mask thumbnail (right icon) in the Adjustment to expand the masking panel.[/vc_column_text][/vc_column][/vc_row][vc_row][vc_column][vc_empty_space][/vc_column][/vc_row][vc_row][vc_column width=”2/3″][vc_column_text]
3. Brush Masking
[/vc_column_text][vc_empty_space height=”15px”][vc_single_image image=”8712″ img_size=”large” onclick=”link_image”][/vc_column][vc_column width=”1/3″][vc_empty_space][vc_empty_space][vc_column_text]Brush Masking works great to apply effects exactly where you need them to be placed. You can paint in or paint out just one adjustment or entire effects with the global masking. In the Brush Mask Panel, you will find many easy to use controls. The Mask Density slider controls the opacity of your brush from 0.00 to 1.00. The Radius Slider controls the overall size, while the Softness Slider controls edge softness. The Edge Aware toggle allows you turn on or off our unique Edge Aware technology.[/vc_column_text][/vc_column][/vc_row][vc_row][vc_column][vc_empty_space][vc_column_text]Edge Aware[/vc_column_text][vc_row_inner][vc_column_inner width=”1/6″][vc_empty_space height=”15px”][vc_single_image image=”8711″ img_size=”medium”][/vc_column_inner][vc_column_inner width=”5/6″][vc_column_text]Topaz Studio exclusive Edge Aware technology. Our unique edge aware technology allows you to effortlessly perfect masks. Simply keep the edge that you wish to be detected between the red inner circle and the green outer circle. Our technology will automatically detect the edge. It’s that easy.[/vc_column_text][/vc_column_inner][/vc_row_inner][vc_empty_space][/vc_column][/vc_row][vc_row][vc_column width=”2/3″][vc_column_text]
4. Spot Masking
[/vc_column_text][vc_empty_space height=”15px”][vc_single_image image=”8593″ img_size=”large” onclick=”link_image”][/vc_column][vc_column width=”1/3″][vc_empty_space][vc_empty_space][vc_column_text]The Spot Mask tool allows you to add eclipse shaped masks to your image. Easily adjust the size and shape of your Spot Mask with the on screen manipulation tools. The Spot Mask Adjustment Panel allows you to adjust the Mask Density, Transition, and Color Aware with easy-to-use sliders. If you wish to add more than one Spot Mask to your image, simply click done and then click the spot mask again to add a second mask.[/vc_column_text][/vc_column][/vc_row][vc_row][vc_column][vc_empty_space][/vc_column][/vc_row][vc_row][vc_column width=”2/3″][vc_column_text]
5. Gradient Mask
[/vc_column_text][vc_empty_space height=”15px”][vc_single_image image=”8612″ img_size=”large” onclick=”link_image”][/vc_column][vc_column width=”1/3″][vc_column_text]The Gradient Mask allows you to create natural transitions. To add a Gradient Mask, simply click the gradient icon. When the gradient mask is added you will see three lines – a red, white, and green. Anything above the red line will be completely removed and anything below the green line will completely remain. You can manipulate the gradient on screen by grabbing the handles. The white handle will move the entire gradient, while moving the green or red handle can create longer and shorter transitions. You also have the power to manipulate it to have it going any direction you wish, such as mirrored or vertical. You can increase the Content Aware Slider or add more than one Gradient Mask to create interesting effects.[/vc_column_text][/vc_column][/vc_row][vc_row][vc_column][vc_empty_space][/vc_column][/vc_row][vc_row][vc_column width=”2/3″][vc_column_text]
6. Color Masking
[/vc_column_text][vc_empty_space height=”15px”][vc_single_image image=”8614″ img_size=”large” onclick=”link_image”][/vc_column][vc_column width=”1/3″][vc_empty_space][vc_empty_space][vc_column_text]The Color Mask allows you to create masks based upon colors found in your image. You can select a color by moving the Hue Slider. Whatever hue you select, will be masked out. The Range Slider allows you to capture a larger range or smaller range of colors. If you wish to have a more natural selection, use a larger range, but if you wish for a more precise selection, use a smaller range. If you wish for the hue you selected to remain, simply invert the mask once you are satisfied with your edits.[/vc_column_text][/vc_column][/vc_row][vc_row][vc_column][vc_empty_space][/vc_column][/vc_row][vc_row][vc_column width=”2/3″][vc_empty_space][vc_column_text]
7. Luminosity Masking
[/vc_column_text][vc_empty_space height=”15px”][vc_single_image image=”8617″ img_size=”large” alignment=”center”][vc_empty_space][/vc_column][vc_column width=”1/3″][vc_empty_space height=”120px”][vc_column_text]Luminosity Masking allows you to make masking selections based upon the brightness of you image. You can select the brightness you would wish to be masked using the Luminosity Slider. The range slider allows you to adjust if you would like smoother or more precise selection.[/vc_column_text][/vc_column][/vc_row][vc_row][vc_column][vc_empty_space][/vc_column][/vc_row][vc_row][vc_column width=”2/3″][vc_column_text]
8. The Adjustment Panel
[/vc_column_text][vc_empty_space height=”15px”][vc_single_image image=”8623″ img_size=”large” onclick=”link_image”][/vc_column][vc_column width=”1/3″][vc_empty_space height=”96px”][vc_column_text]The Adjustment Panel is where you can modify the mask you just created. You can change the feathering to be a smoother transition, as well as the contrast and density to create more drastic or less drastic masking transitions. These are all dependent on the look you wish to achieve. When you are satisfied with your adjustments to your mask, all you have to do is click done to burn your mask in.[/vc_column_text][/vc_column][/vc_row][vc_row][vc_column][vc_empty_space][vc_column_text]
9. Masking Tools
[/vc_column_text][vc_row_inner][vc_column_inner width=”1/6″][vc_empty_space height=”15px”][vc_empty_space height=”15px”][vc_single_image image=”8640″ img_size=”medium” alignment=”center”][/vc_column_inner][vc_column_inner width=”5/6″][vc_column_text]Invert, Reset, and Hide. You have the ability to completely invert, reset, and hide your mask all from the Masking Panel. Inverting a mask can be great for creating unique effects or in the various ways stated earlier in section 2 & 4. If you’re not happy with your mask, you can always reset it and start fresh. If you’d like to see how a particular mask effected your image, feel free to hide and unhide the mask to make comparisons.[/vc_column_text][/vc_column_inner][/vc_row_inner][vc_empty_space][/vc_column][/vc_row][vc_row][vc_column width=”2/3″][vc_column_text]
10. Combining Multiple Masks
[/vc_column_text][vc_empty_space height=”15px”][vc_single_image image=”8658″ img_size=”large” onclick=”link_image”][/vc_column][vc_column width=”1/3″][vc_empty_space height=”64px”][vc_column_text]There is something very unique about the Topaz Studio Masking. We allow you to combine multiple types of masks. For example, you could create a luminosity mask, but then perfect it by adding a gradient mask. Add multiple masks of the same type or combine all 5! To combine multiple masking options, all you have to do is click done after you have completed one type and then move on to the next type of masking. There are no limits to what you can do. Creating perfect masks has never been so fast…or easy.[/vc_column_text][/vc_column][/vc_row][vc_row][vc_column][vc_empty_space][vc_column_text]
From Start to Finish
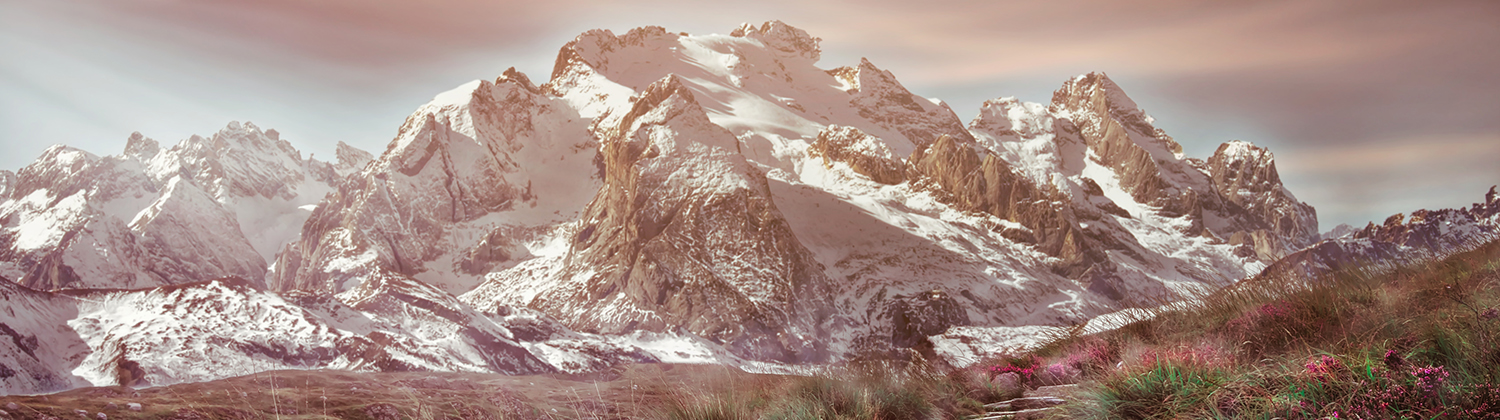
[/vc_column_text][/vc_column][/vc_row][vc_row][vc_column][vc_empty_space height=”15px”][vc_column_text]Here’s a quick walk through of what I did to create the mountain and valley image. I added these presets one by one and tweaked each one for this image. To make everyone’s life a little easier, I have shared this preset to the community as Intro to Masking. You can search for this effect in the Effects Panel on the left-hand side of the application. When this effect is initially applied, it won’t look like the final image until you add a few masks. If you wish to follow along with the same image, you can download it here.
You can also watch the entire tutorial by clicking play on the video below. Enjoy![/vc_column_text][vc_empty_space][vc_video link=”https://youtu.be/uDU5pWA5sQw” el_width=”70″ align=”center”][/vc_column][/vc_row][vc_row][vc_column][vc_empty_space][vc_column_text]
Open Your Image
[/vc_column_text][vc_column_text]First things First. Open your image into Topaz Studio. You can do this by simply dragging and dropping or by using the File > Open Image.. function in the top menu bar.[/vc_column_text][vc_empty_space][/vc_column][/vc_row][vc_row][vc_column][vc_column_text]
Search for the Effect
[/vc_column_text][/vc_column][/vc_row][vc_row][vc_column width=”1/4″][vc_empty_space height=”15px”][vc_single_image image=”8626″ img_size=”large”][/vc_column][vc_column width=”3/4″][vc_empty_space][vc_column_text]When you open your image, you will see a list of presets on the left-hand side of your screen. Search for Intro to Masking and hit Enter. Click on the Effect to apply it to your image. Once applied, you will see the adjustment stack populate on the right hand side. We will be working with the adjustment stack on the right-hand side for the remainder of this tutorial.[/vc_column_text][/vc_column][/vc_row][vc_row][vc_column width=”2/3″][vc_empty_space][vc_column_text]
Masking the Dehaze Adjustment
[/vc_column_text][vc_empty_space height=”15px”][vc_single_image image=”8631″ img_size=”full” alignment=”center”][vc_empty_space height=”15px”][/vc_column][vc_column width=”1/3″][vc_empty_space][vc_empty_space][vc_empty_space][vc_empty_space][vc_column_text]Select the Dehaze Adjustment’s Masking thumbnail (the box with the + sign). This will automatically expand the Masking Panel. I applied a gradient mask that was black at the top that transitioned to white towards the base of the mountains. I wanted the Dehaze Adjustment to effect the hazy valley, but not the mountain or flowers. When you are satisfied with your mask, click done to close the Masking Panel.[/vc_column_text][/vc_column][/vc_row][vc_row][vc_column width=”2/3″][vc_empty_space][vc_column_text]
Masking the Basic Adjustment
[/vc_column_text][vc_empty_space height=”15px”][vc_single_image image=”8631″ img_size=”full” alignment=”center”][vc_empty_space height=”15px”][/vc_column][vc_column width=”1/3″][vc_empty_space][vc_empty_space][vc_empty_space][vc_empty_space][vc_column_text]Next, select the Basic Adjustment’s Masking thumbnail. For this mask, I used a Luminosity Mask. I set the luminosity to 0.76 and the range to 0.12. This brought a little bit of the highlights back into the image. When you are satisfied with your mask, click done to close the Masking Panel.[/vc_column_text][/vc_column][/vc_row][vc_row][vc_column width=”2/3″][vc_empty_space][vc_column_text]
Masking the Texture Adjustment
[/vc_column_text][vc_empty_space height=”15px”][vc_single_image image=”8649″ img_size=”full” alignment=”center”][vc_empty_space height=”15px”][/vc_column][vc_column width=”1/3″][vc_empty_space][vc_empty_space][vc_empty_space][vc_column_text]Finally, on the Texture Adjustment, I applied another gradient mask towards on the bottom of the image that fades to white at the top. I wanted the top of the mountain to be warm and have a slight glow effect, but I didn’t want to wash out the grass and flowers below. I changed the mask to lock onto the input image, which means that it will use the mountain image as a reference and not the Texture Adjustment. I also changed the content aware value to 0.34, to create a more natural transition. I then clicked done to close my Masking panel.[/vc_column_text][/vc_column][/vc_row][vc_row][vc_column][vc_empty_space][vc_column_text]
Other Tweaks
[/vc_column_text][vc_column_text]I was satisfied with the edit after that, but this preset may not be perfect for every image right out of the box. There may be some more tweaking needed. I would suggest making further edits in the Basic Adjustment, Brightness Contrast, and Tone Curves Adjustment to perfect this preset for your image. Feel free to add more adjustments to create even more interesting effects. Here’s the before and after! Pretty amazing results for an edit that was done in a matter of minutes.[/vc_column_text][vc_empty_space height=”15px”][vc_row_inner][vc_column_inner width=”1/2″][vc_single_image image=”8702″ img_size=”full” alignment=”center”][vc_empty_space height=”15px”][vc_column_text]
Before
[/vc_column_text][/vc_column_inner][vc_column_inner width=”1/2″][vc_single_image image=”8703″ img_size=”full” alignment=”center”][vc_empty_space height=”15px”][vc_column_text]
Intro to Masking Effect
[/vc_column_text][/vc_column_inner][/vc_row_inner][/vc_column][/vc_row][vc_row disable_element=”yes”][vc_column][vc_empty_space height=”15px”][vc_separator border_width=”3″][vc_empty_space height=”15px”][vc_column_text]
Technical Information
All you need is a Topaz Studio account to access your software. Existing users use their same login info, while new users can create an account. You will only have to have an internet connection every 60 days to authenticate your account.[/vc_column_text][vc_empty_space][vc_row_inner][vc_column_inner width=”1/2″][vc_column_text]
Compatibility:
Photoshop CS4+, Photoshop CC, Photoshop Elements 12+, Paintshop Pro X 6+, Serif PhotoPlus X5+, Lightroom 4+, Lightroom CC, and photoFXlab
*Not compatible with Fusion Express
[/vc_column_text][/vc_column_inner][vc_column_inner width=”1/2″][vc_column_text]
System Requirements:
Mac OSX 10.9+
Windows 7/8/10 x 64bit + OpenGL 3.3
RAM: ≥4GB
GPU VRAM: ≥1GB
*Does not support Windows 32bit
[/vc_column_text][/vc_column_inner][/vc_row_inner][/vc_column][/vc_row][vc_row][vc_column][vc_empty_space][vc_empty_space height=”15px”][/vc_column][/vc_row][vc_row disable_element=”yes”][vc_column][vc_empty_space][vc_column_text]
It’s Easy to Update
Topaz Studio is designed to be easy to update, by prompting you when updates are available and allowing you to update your application without having to go through an entirely new installation through the new update manager application included with Topaz Studio.[/vc_column_text][vc_empty_space height=”15px”][vc_separator border_width=”3″][vc_empty_space height=”15px”][vc_empty_space][/vc_column][/vc_row][vc_row][vc_column][vc_separator border_width=”3″][vc_empty_space height=”15px”][vc_column_text]
That’s all for today…
That’s a wrap! While I have touched on every aspect of Topaz Studio Masking, this is only a few things that are possible with it. As you play with it more, I know you will discover new, awesome ways to use it.
Stay tuned! We will be adding lots of tutorials and videos, so keep your eye out if you’d like to learn more!
If you’d like to share your images with us, tag us on Instagram with @topazlabs and Twitter with @topazlabs. We’re also on Facebook and YouTube!
[/vc_column_text][vc_empty_space height=”15px”][vc_column_text]
Download Now
[/vc_column_text][vc_column_text]
If we’ve got you sold on Topaz Studio, you can download it for free using the buttons below.
[/vc_column_text][vc_empty_space height=”15px”][vc_row_inner][vc_column_inner width=”1/2″][vc_btn title=”Windows” shape=”square” color=”primary” align=”center” button_block=”true” link=”url:https%3A%2F%2Fopen_beta.s3.amazonaws.com%2Ftopazstudio_online_installer.exe|||”][/vc_column_inner][vc_column_inner width=”1/2″][vc_btn title=”Mac” shape=”square” color=”primary” align=”center” button_block=”true” link=”url:https%3A%2F%2Fopen_beta.s3.amazonaws.com%2Ftopazstudio_online_installer.dmg|||”][/vc_column_inner][/vc_row_inner][vc_empty_space height=”15px”][vc_row_inner][vc_column_inner][vc_empty_space height=”15px”][vc_separator border_width=”3″][vc_empty_space height=”15px”][vc_column_text]
About Taylor L. Seaton
[/vc_column_text][vc_empty_space height=”15px”][/vc_column_inner][/vc_row_inner][vc_row_inner][vc_column_inner width=”1/6″][vc_single_image image=”8720″ img_size=”medium” style=”vc_box_circle_2″][/vc_column_inner][vc_column_inner width=”5/6″][vc_empty_space height=”15px”][vc_empty_space height=”15px”][vc_column_text]Taylor Seaton is a 2016 graduate from Angelo State University. While attending ASU, she obtained her Bachelor of Fine Arts with a concentration in Graphic Design and an area of emphasis in Business Management and Marketing. She also played volleyball at the collegiate level. She is currently the Social Media Manager at Topaz Labs.[/vc_column_text][/vc_column_inner][/vc_row_inner][vc_empty_space height=”15px”][vc_separator border_width=”3″][vc_empty_space height=”15px”][/vc_column][/vc_row]


