Posted on 47 Comments

DeNoise AI v3.2 – Improved RAW color processing and performance

Download DeNoise AI v3.2

Windows | MacOS

DeNoise AI  v3.2 at a glance

  • Improved color and tone processing for RAW and DNG files – When available, DeNoise AI will apply a camera-specific color profile as well as provide improved overall color accuracy.
  • Improved metadata support – DeNoise AI now supports reading Canon CR3 and HEIC metadata
  • Performance and UI improvements – Several bug fixes and minor visual changes for a better user experience

Better RAW color and tone processing

We’re moving forward towards providing more accurate color and tones when loading your RAW and DNG files in DeNoise AI.

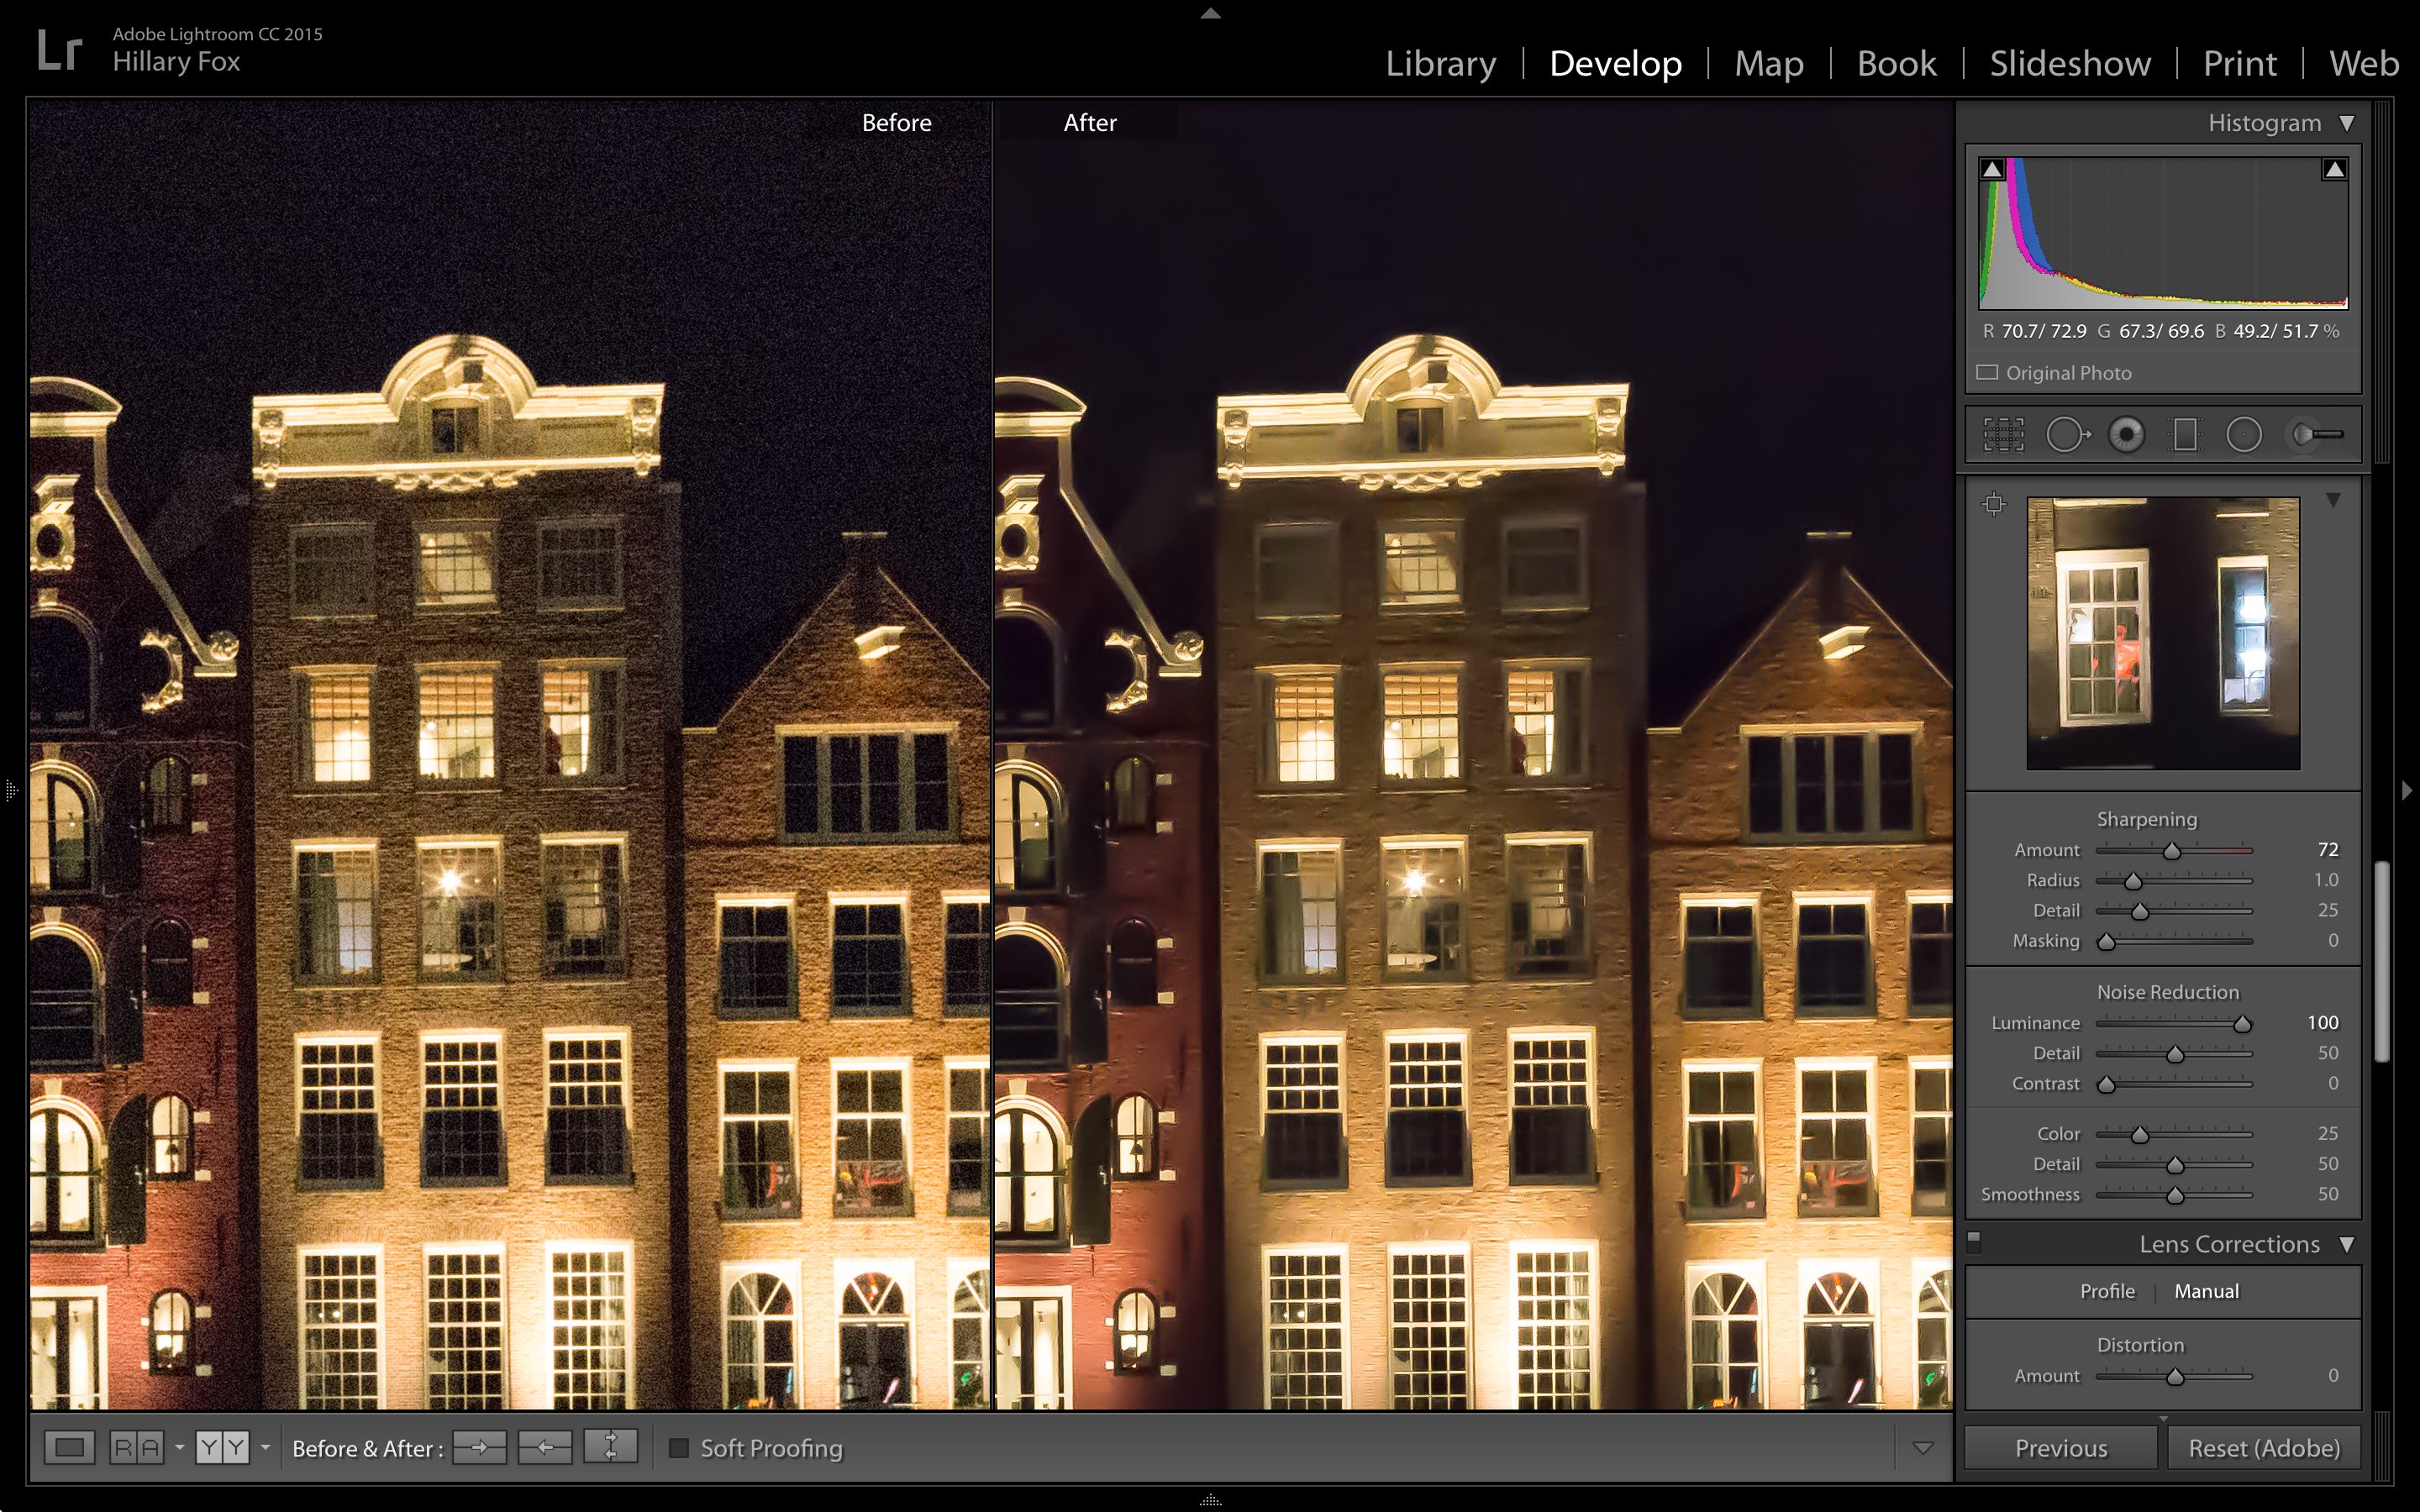
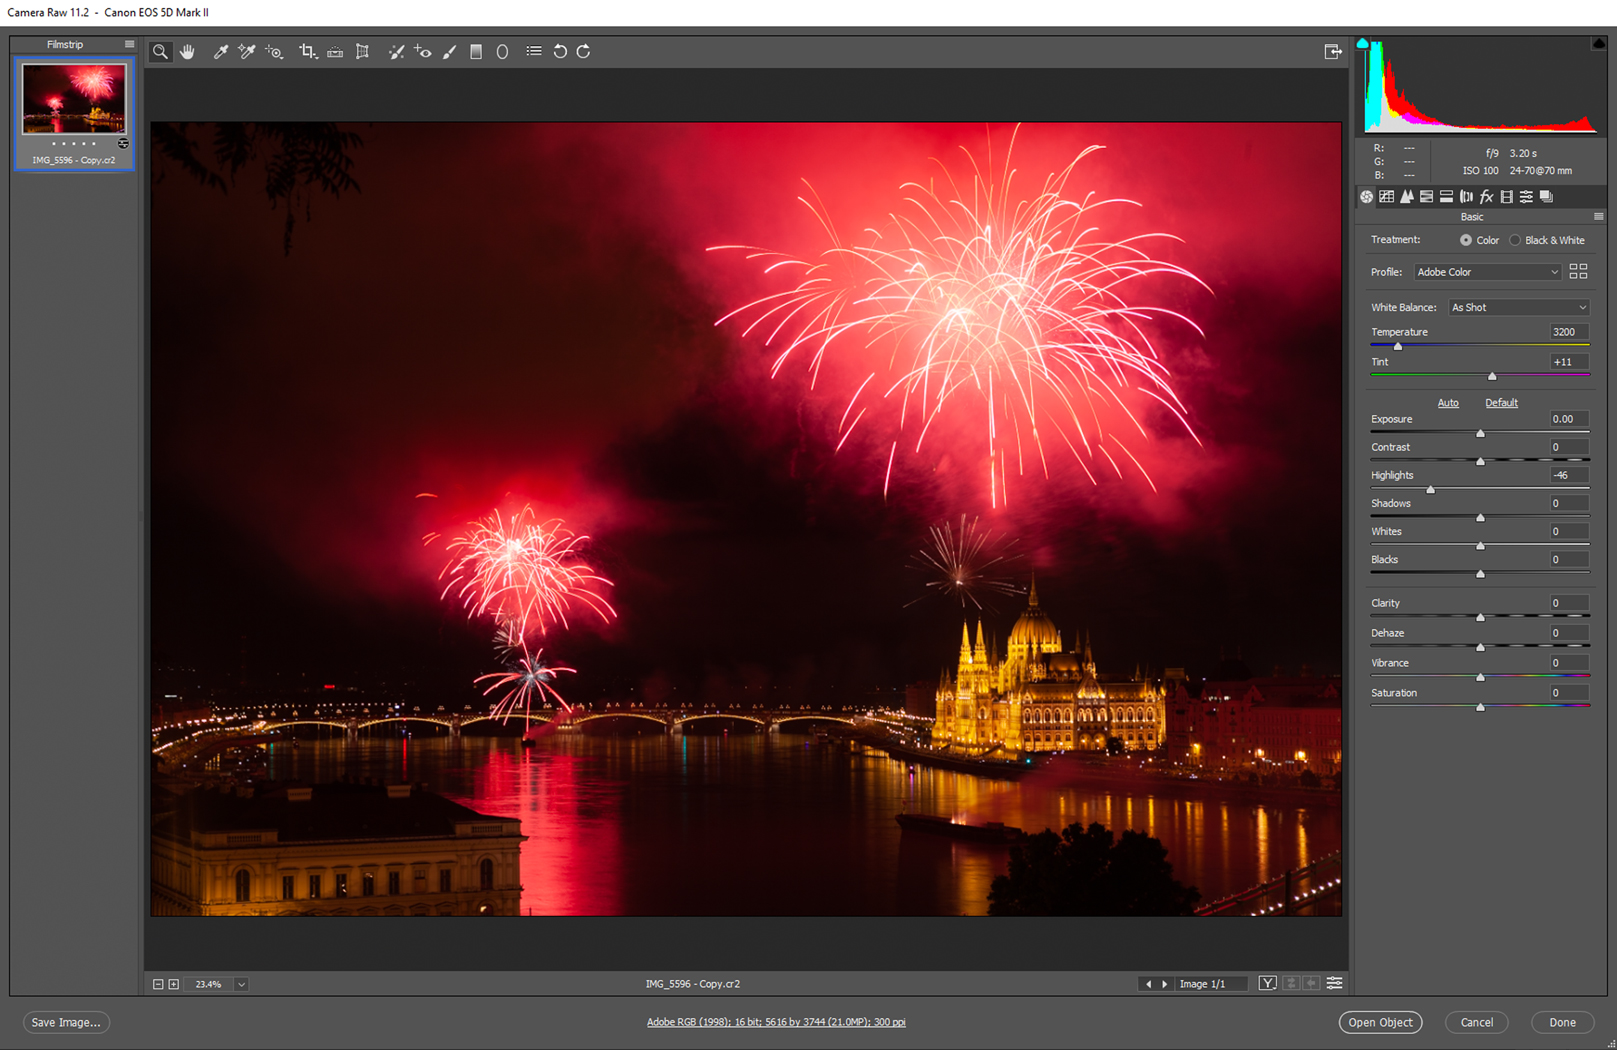
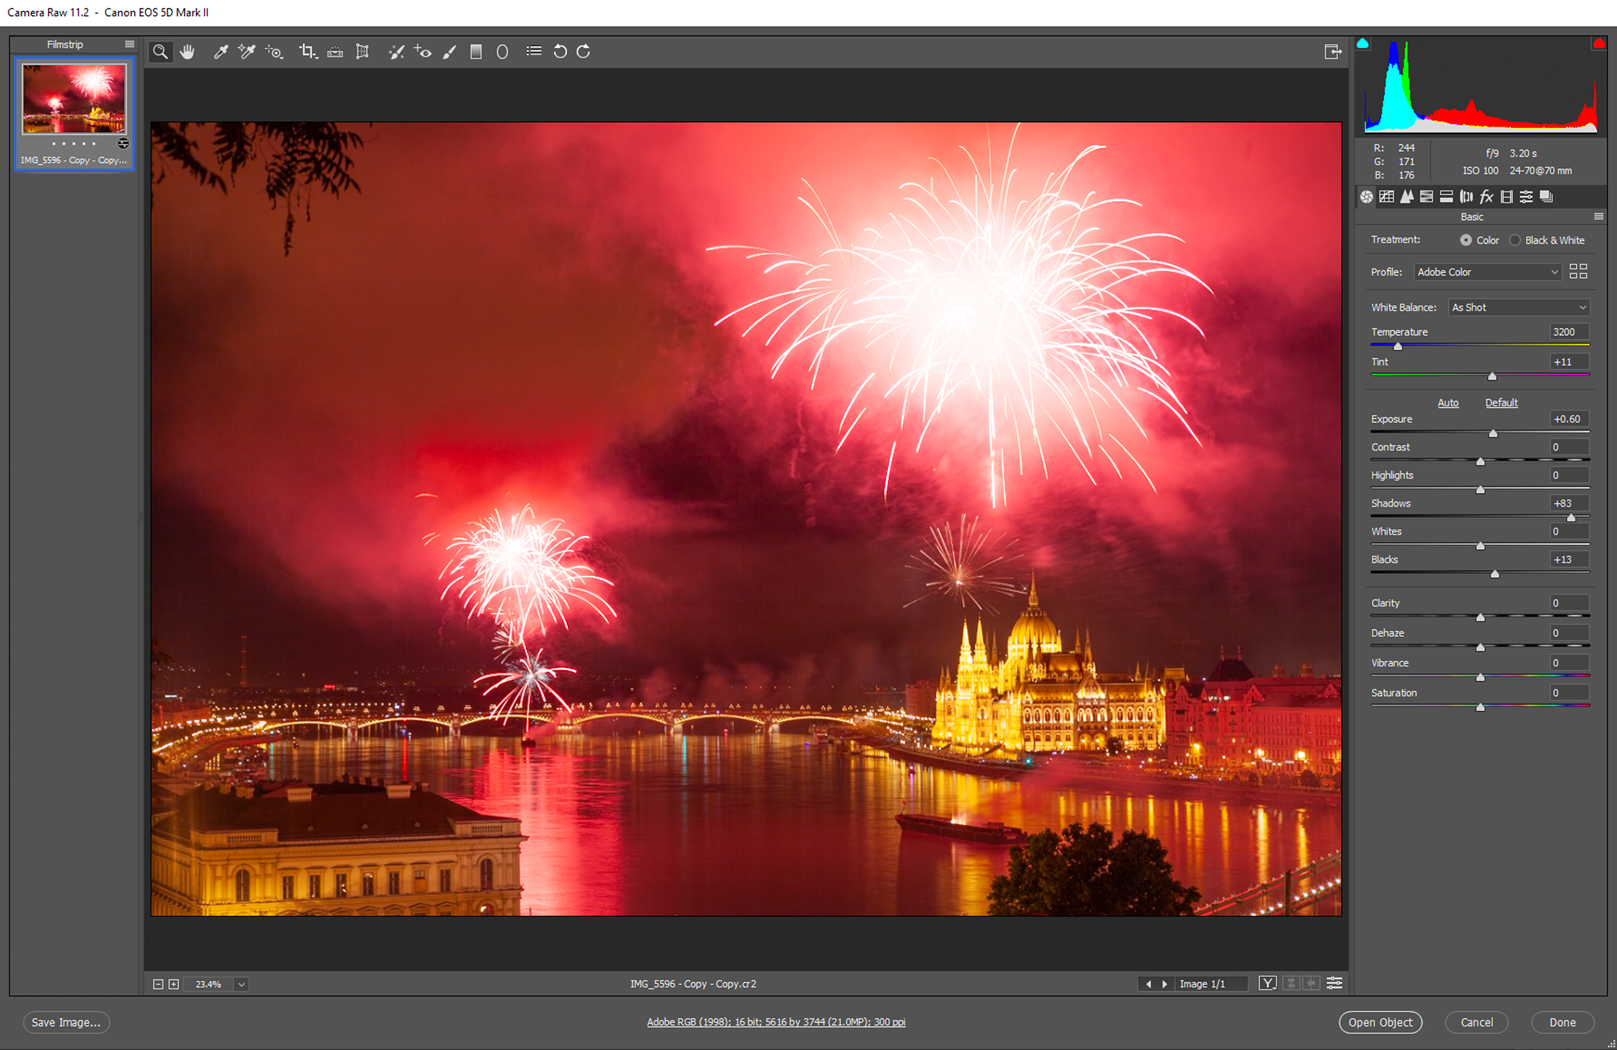
Now, when you open a RAW or DNG file in DeNoise AI v3.2 as a standalone app (as opposed to loading it as a plugin via Adobe Lightroom or Photoshop), we will apply the appropriate DCP camera profile if available as well as an improved tone curve, resulting in a more accurate version of your photo with better color accuracy. You also have the option to disable this setting.

And this is just the beginning. We’re working on even more ways to improve RAW handling and color accuracy in DeNoise AI. 

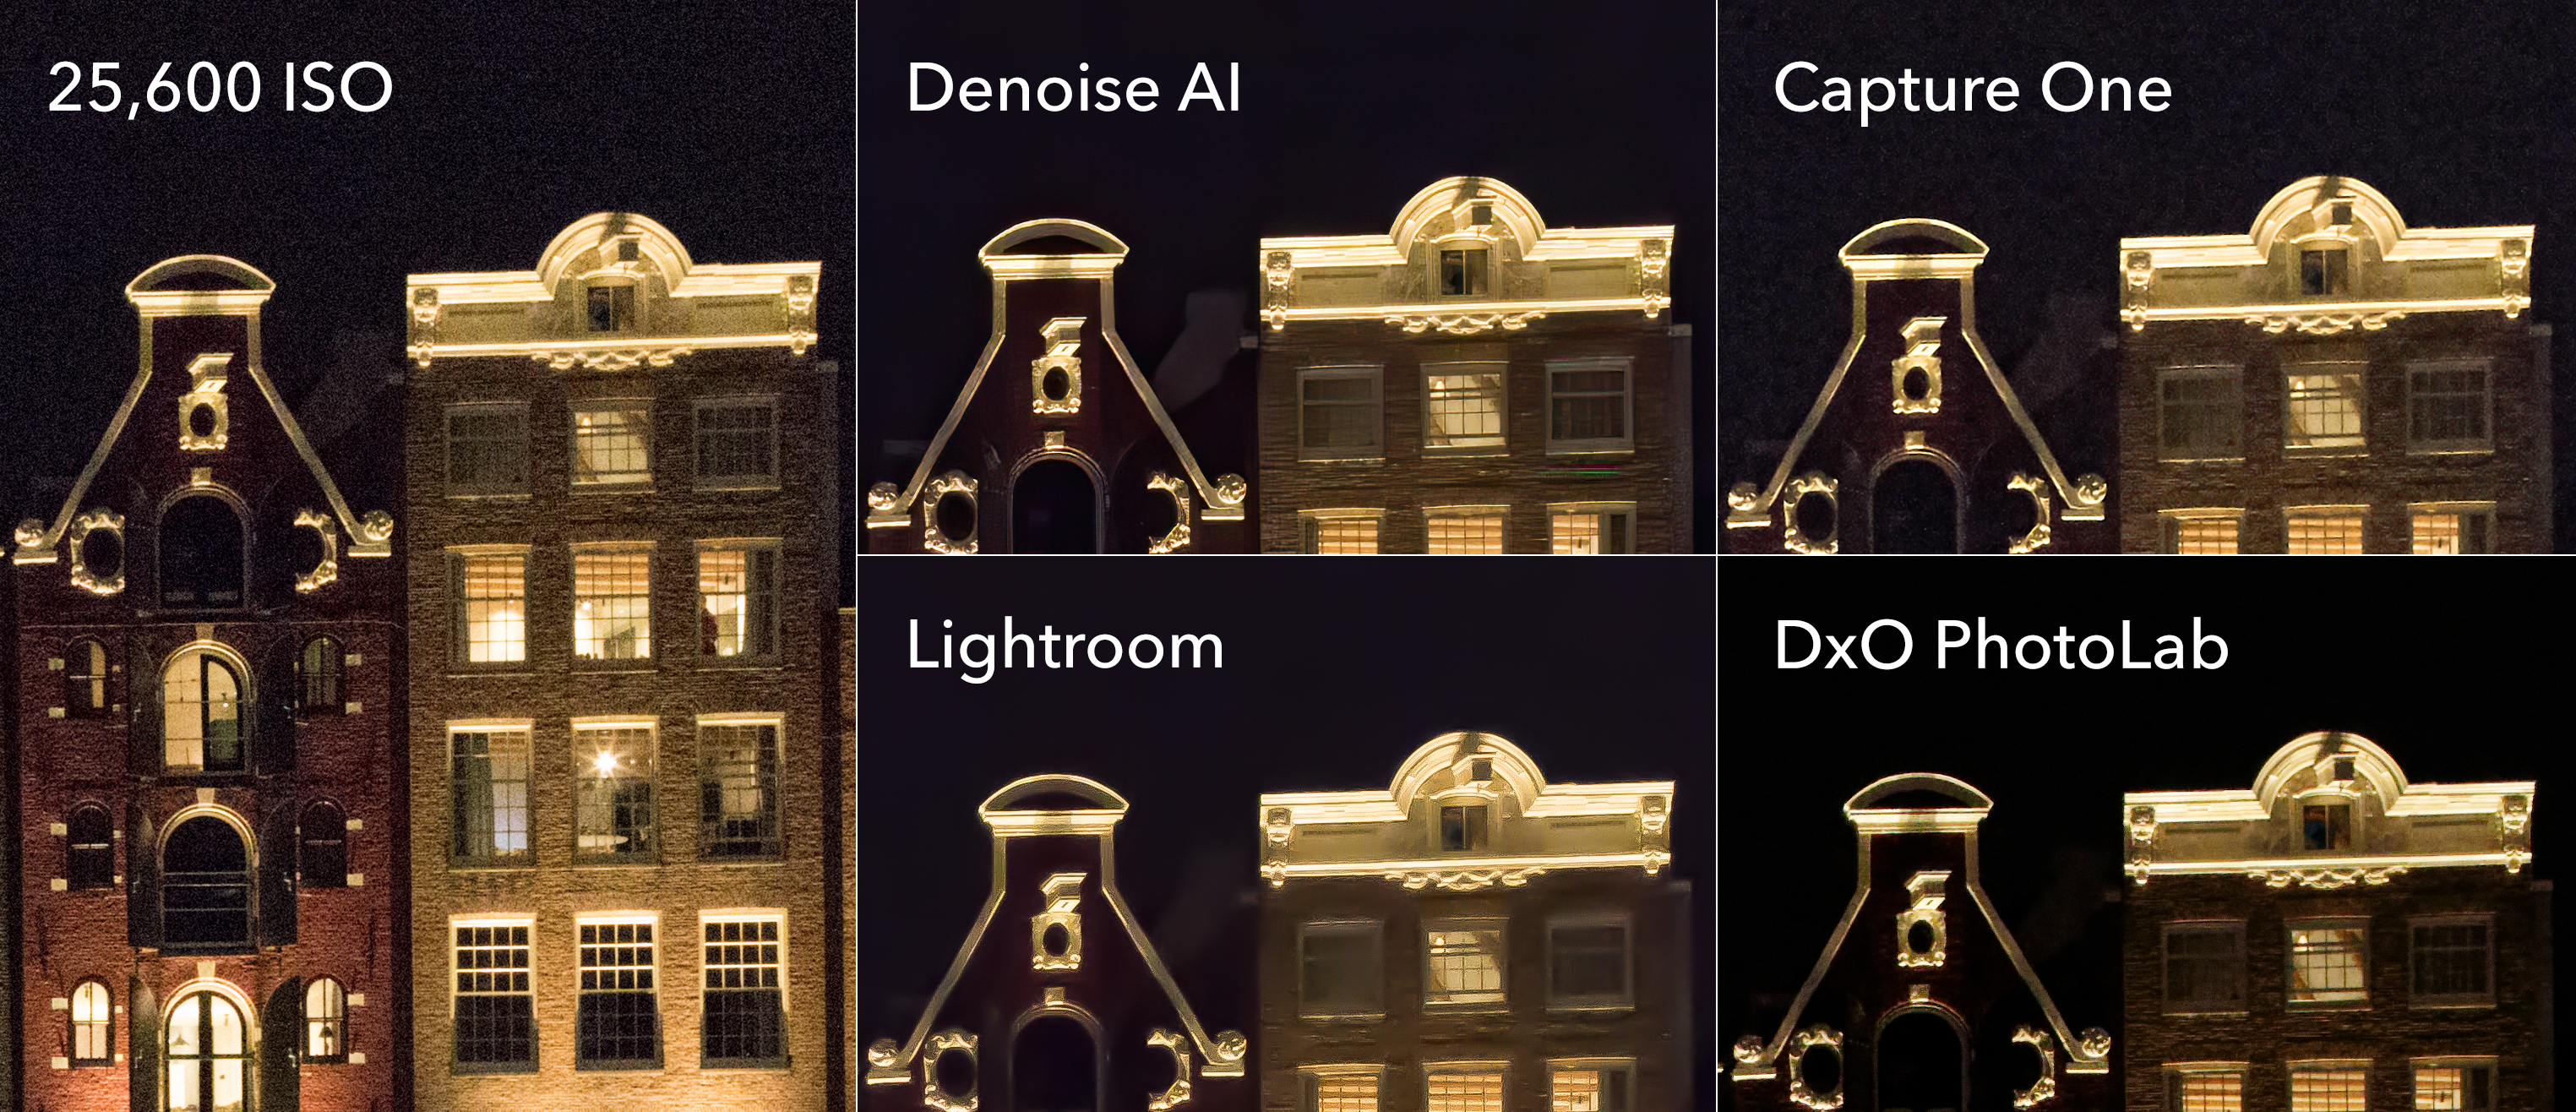
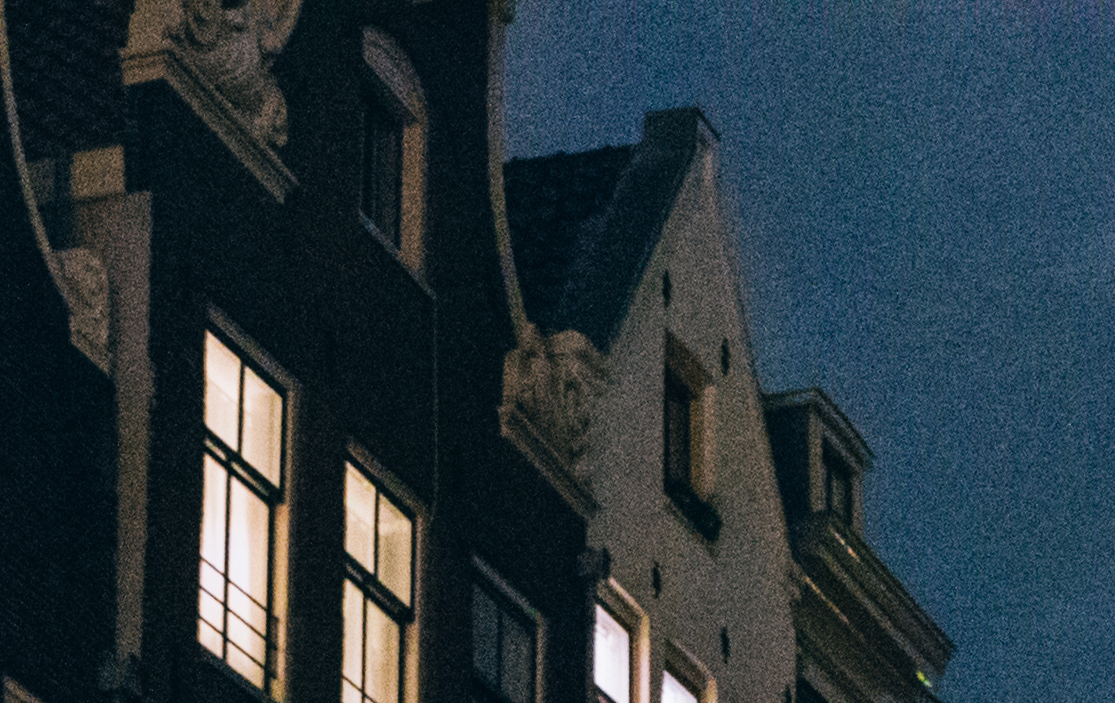
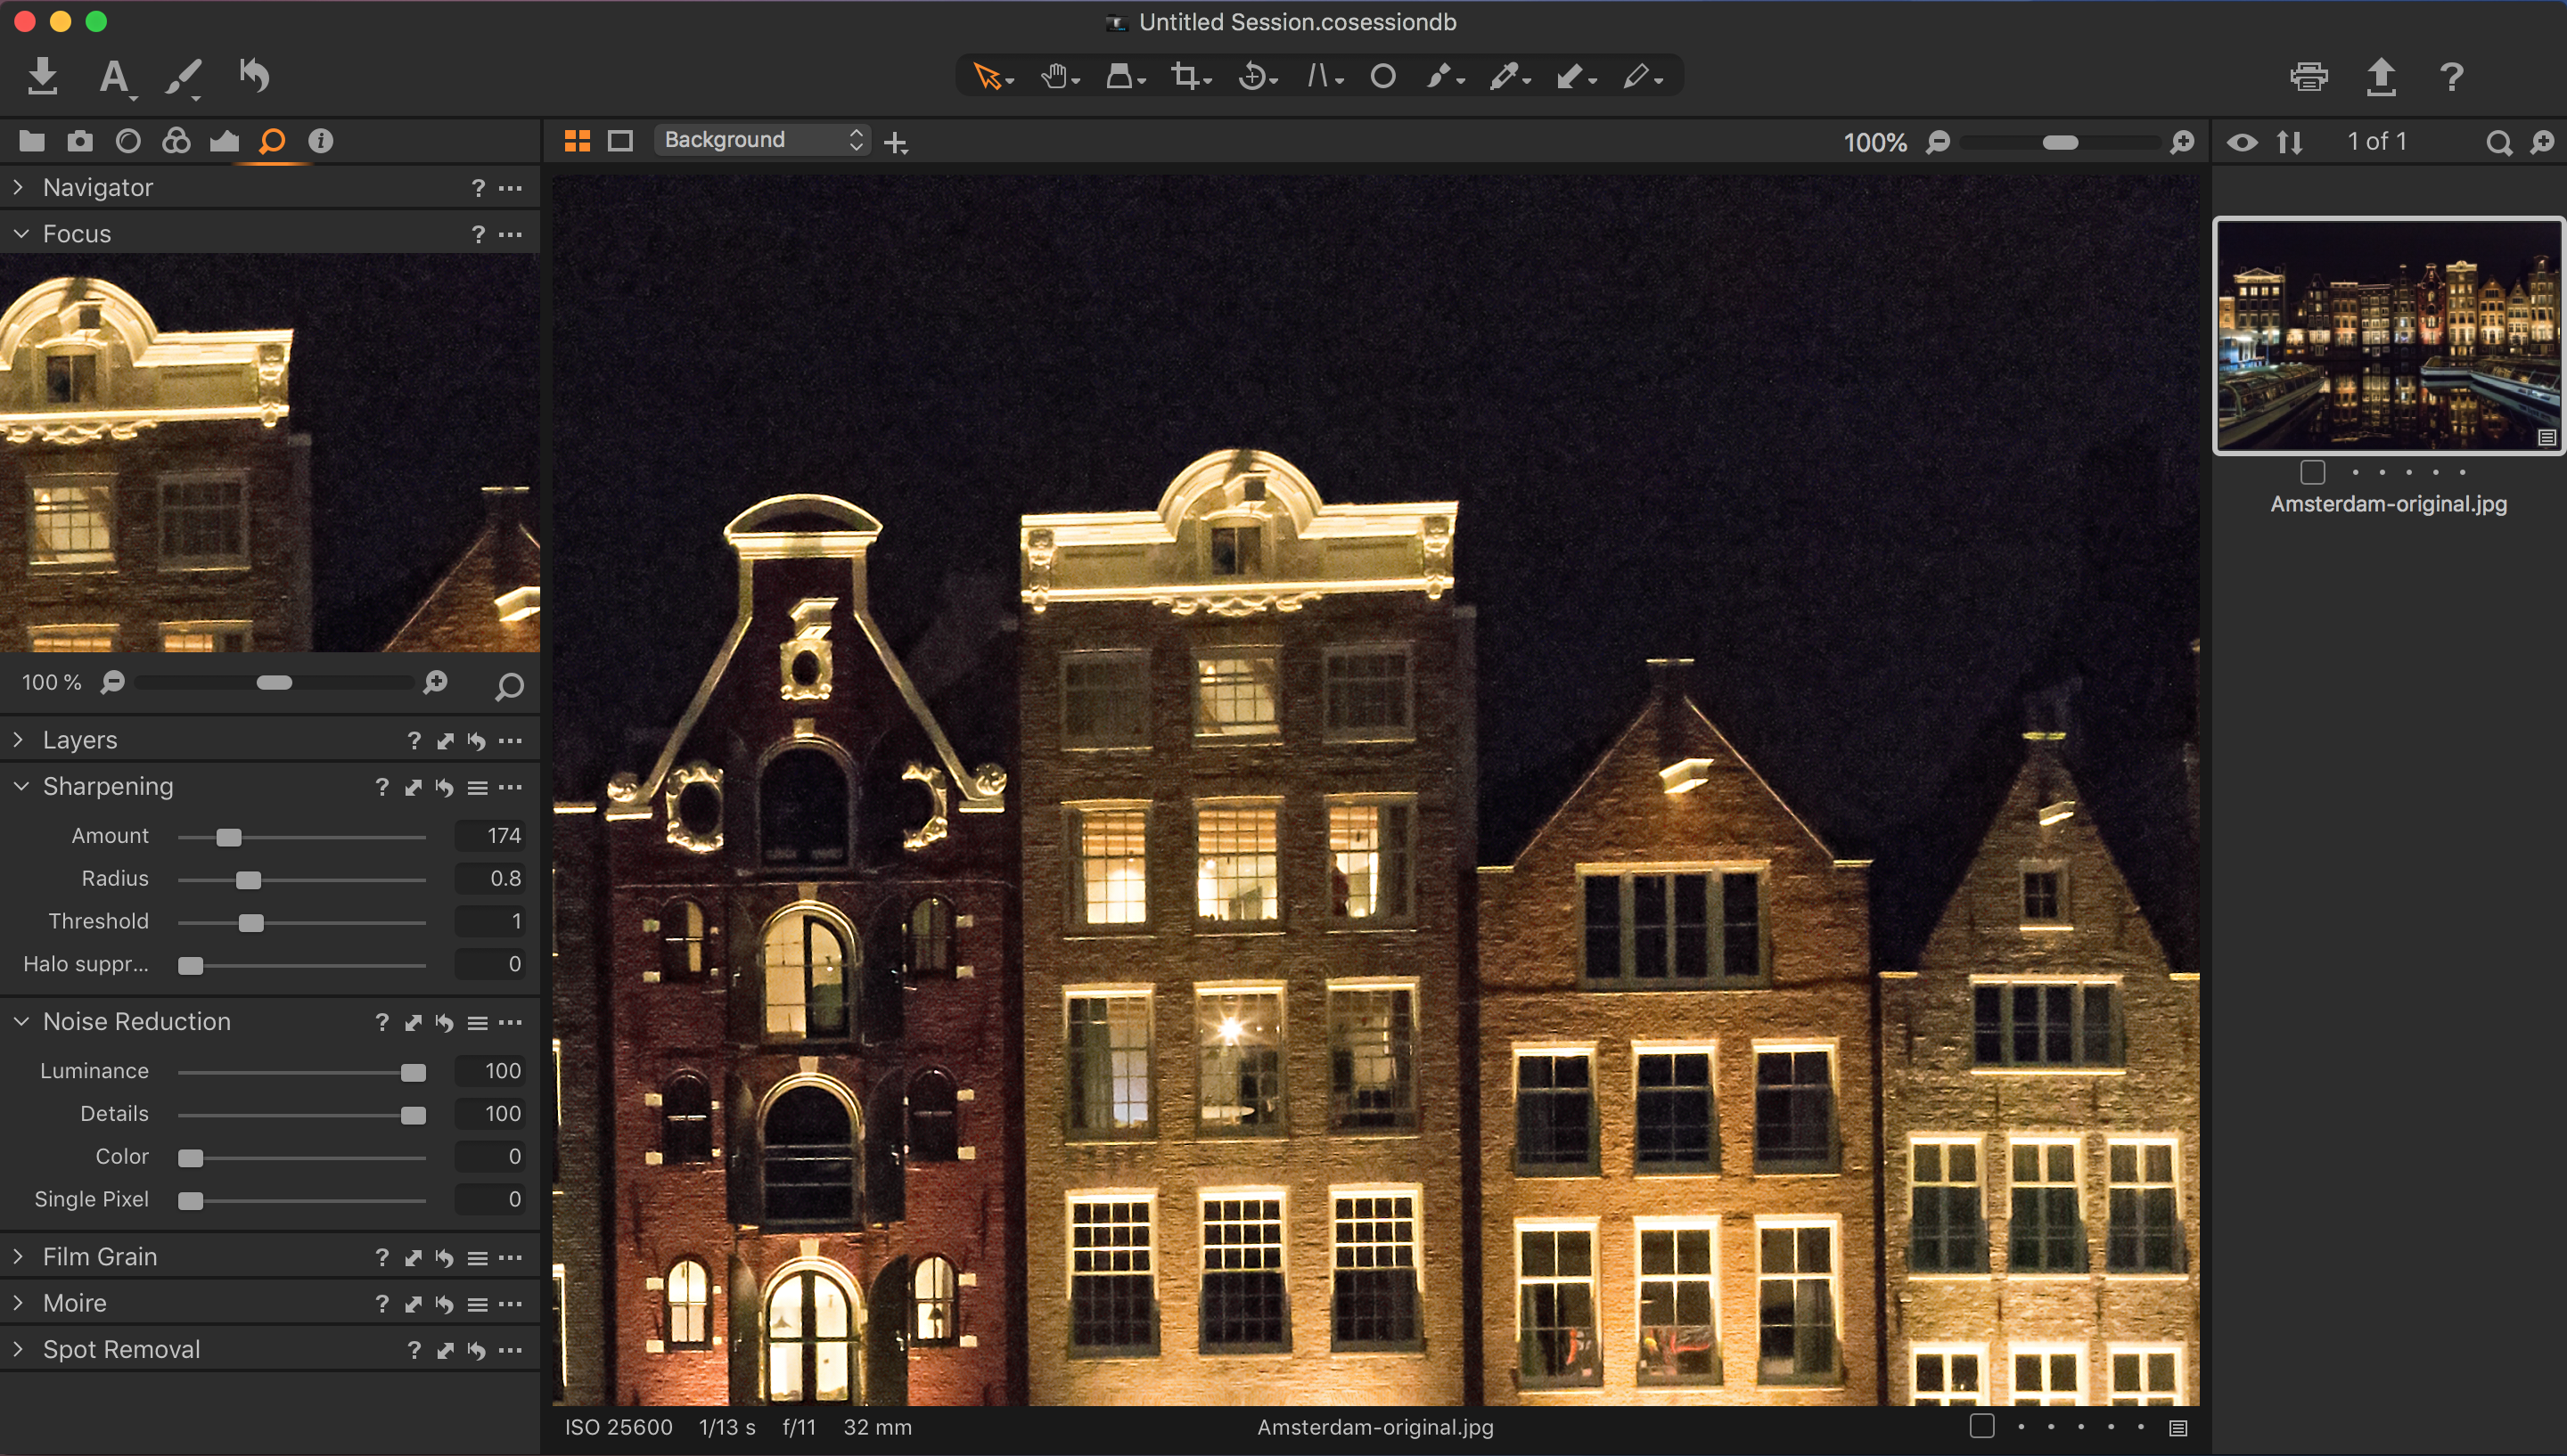
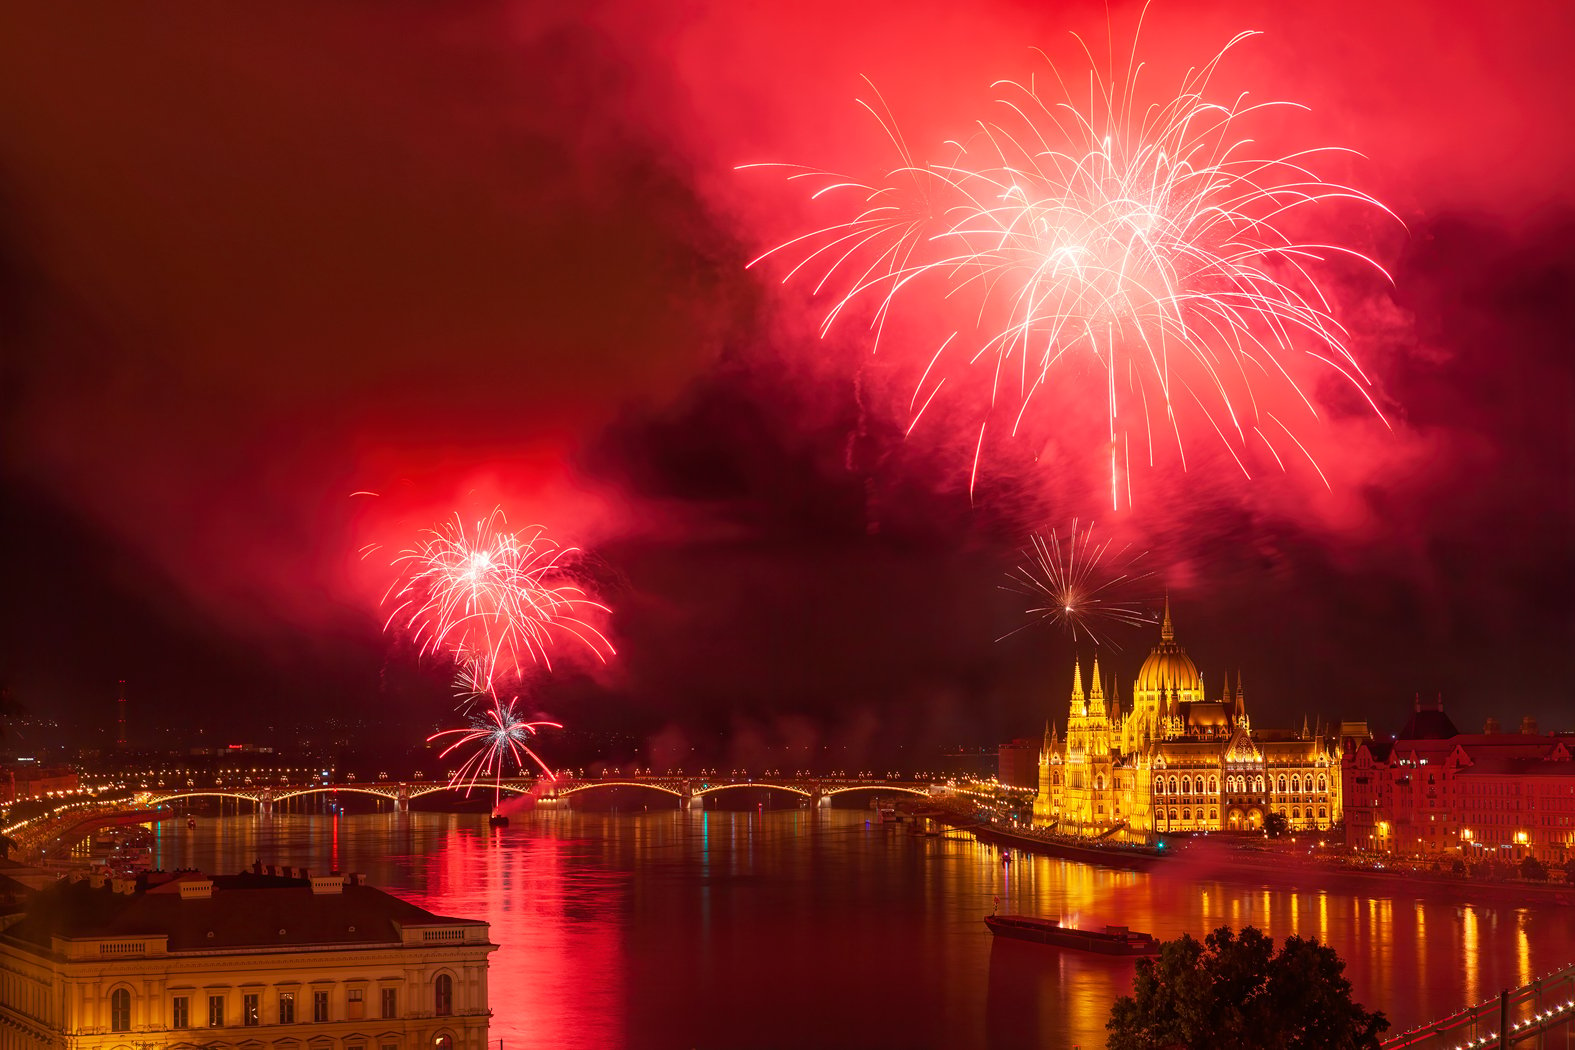
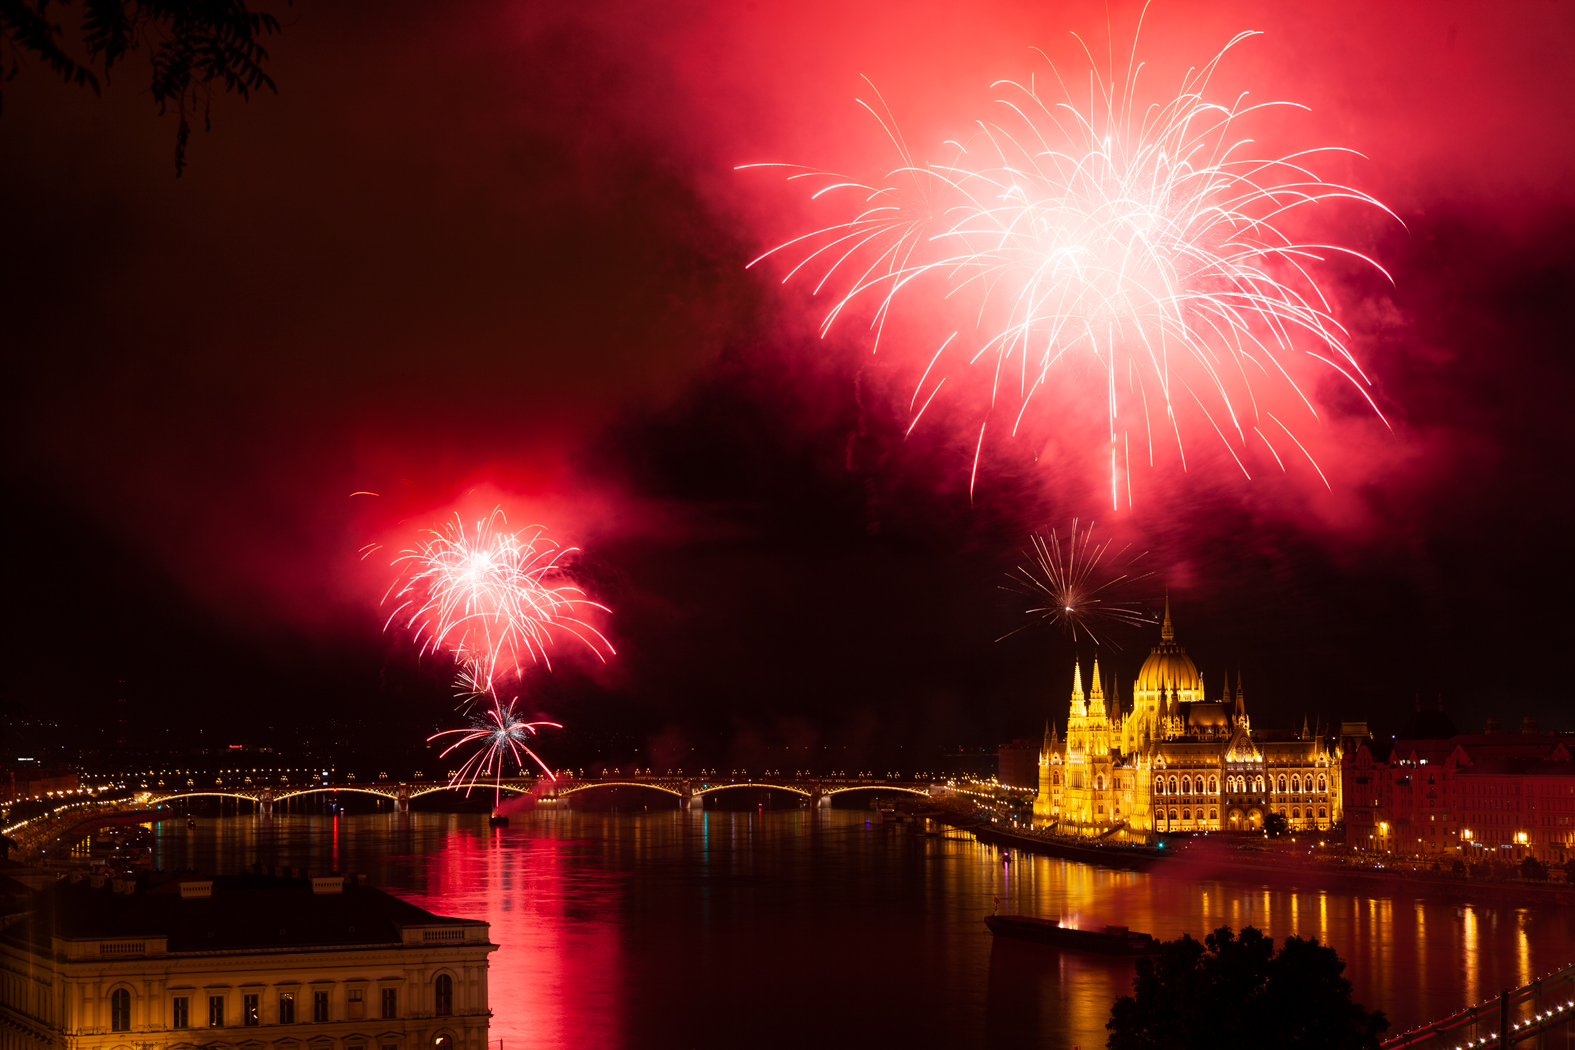
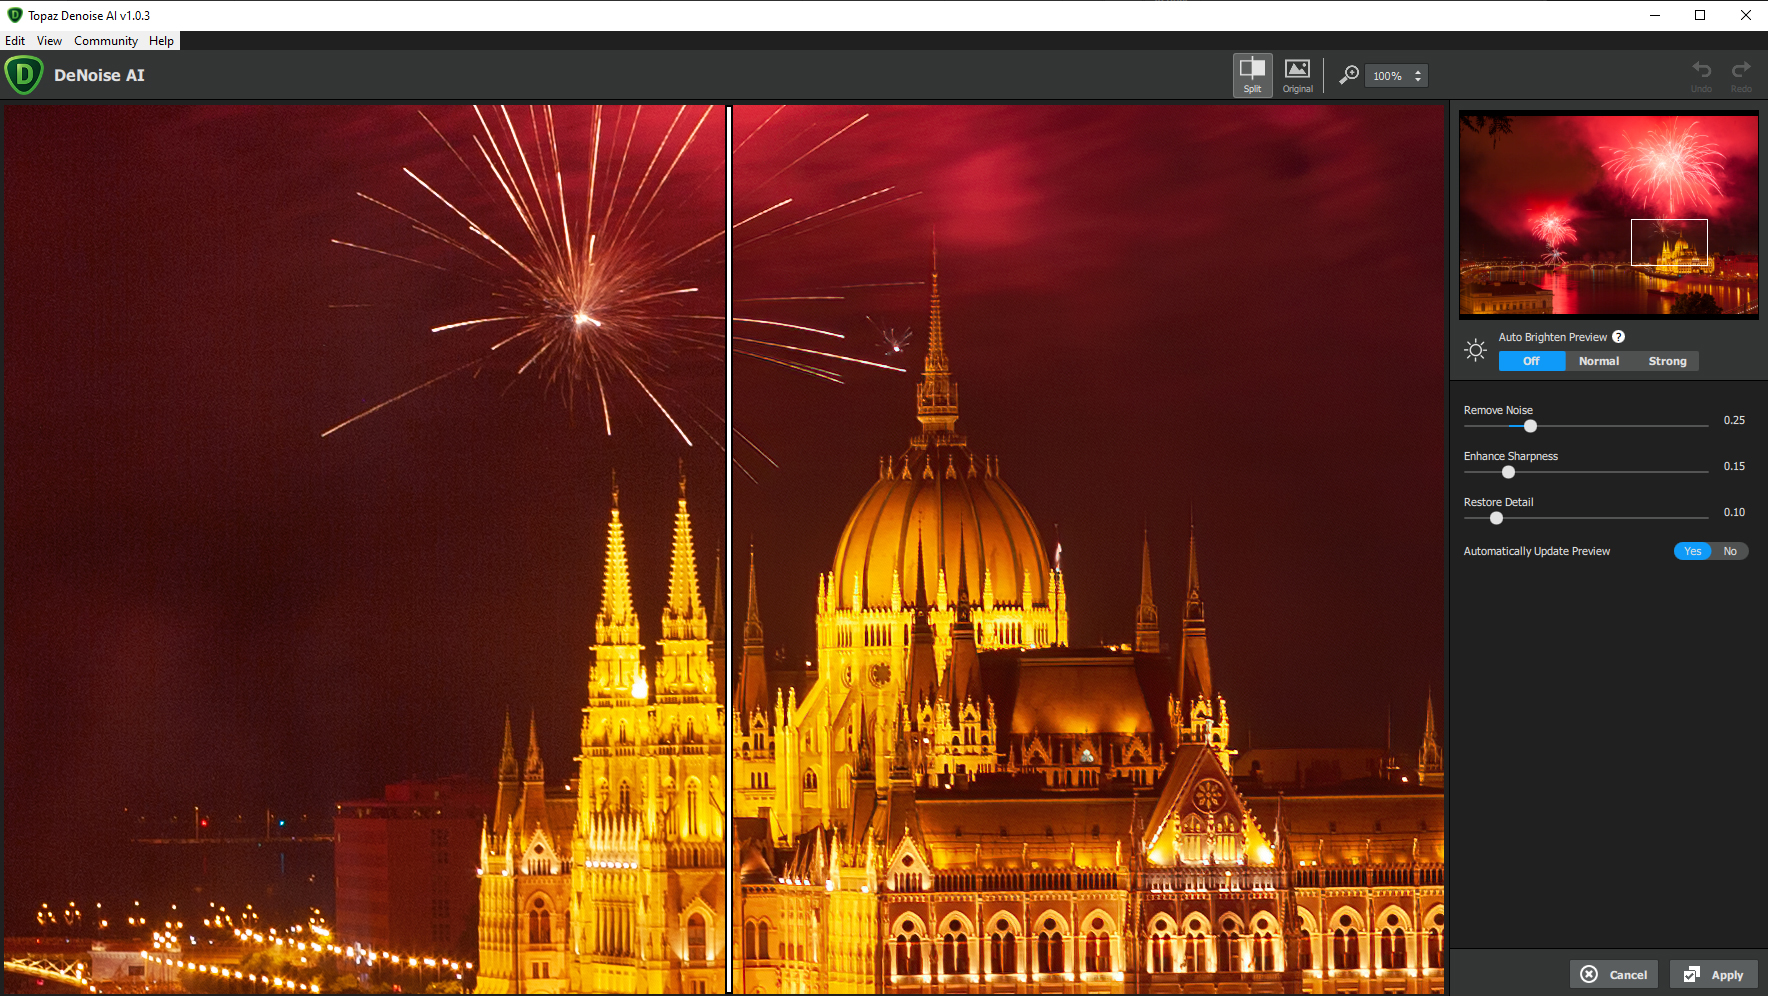
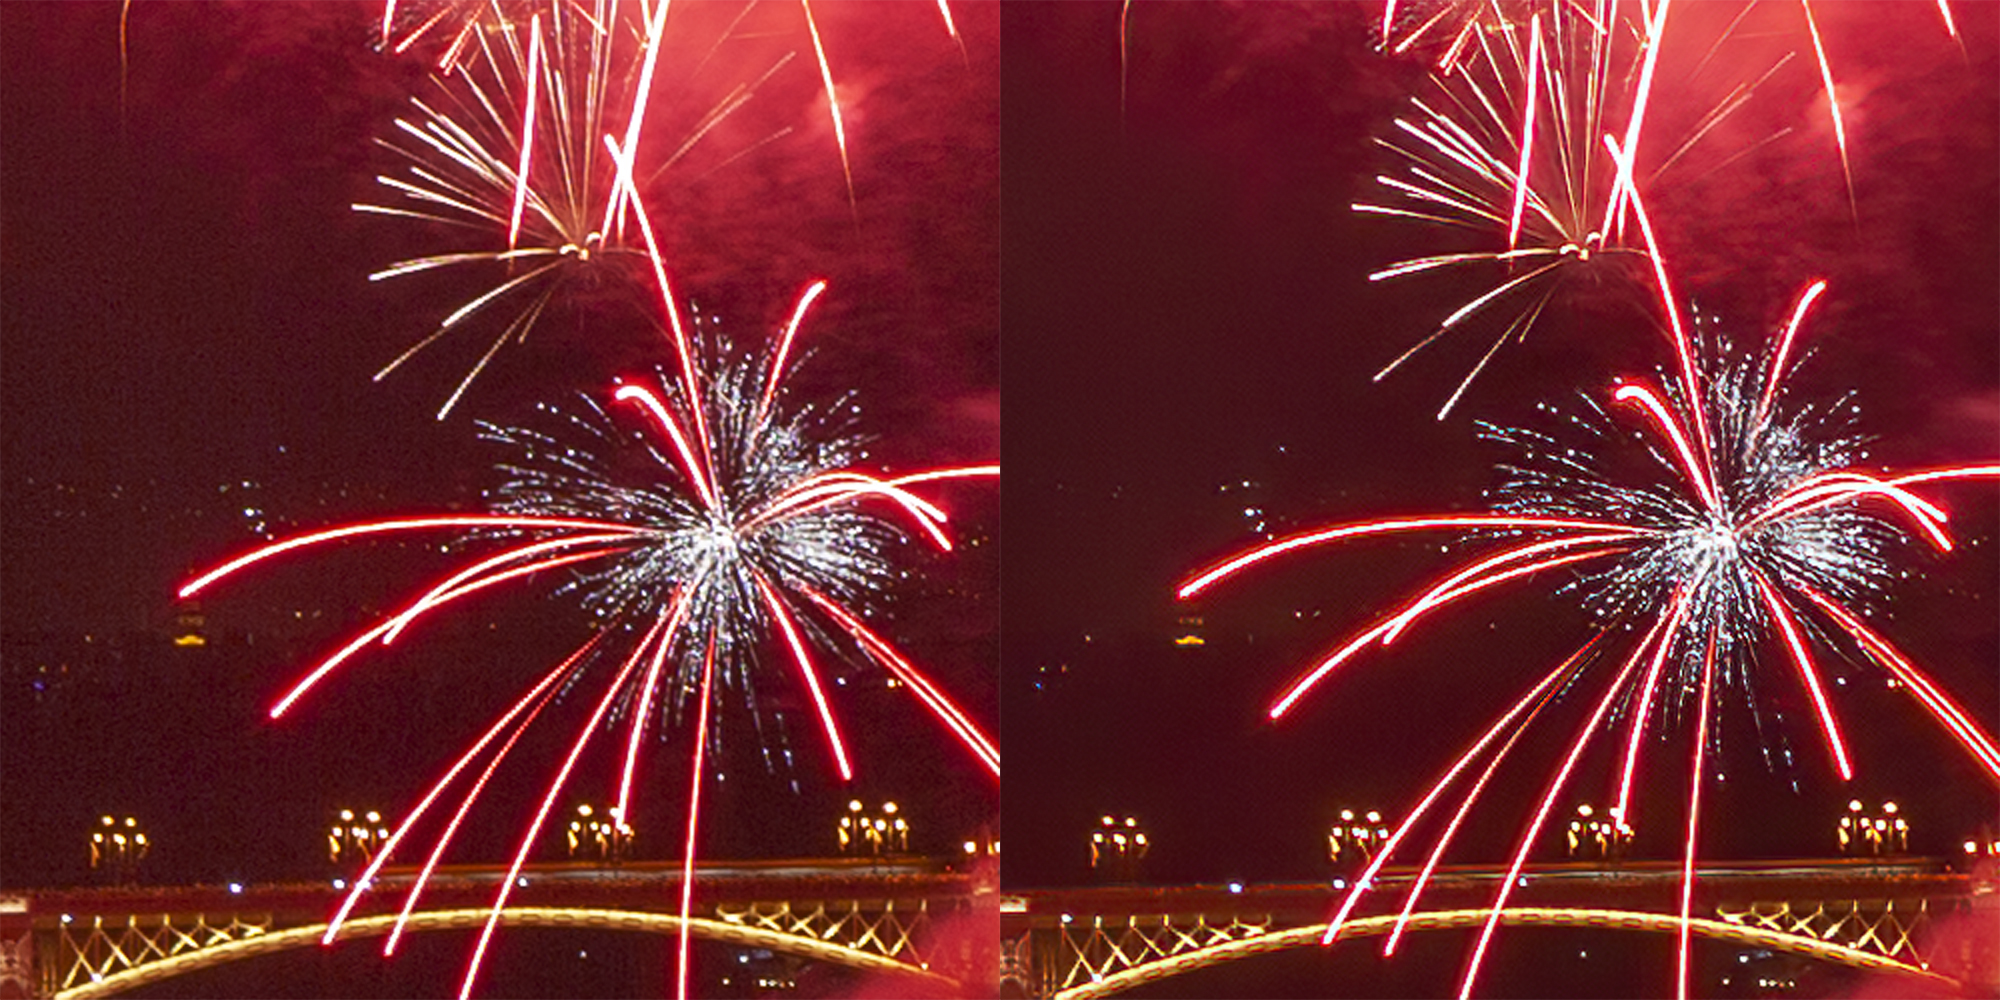
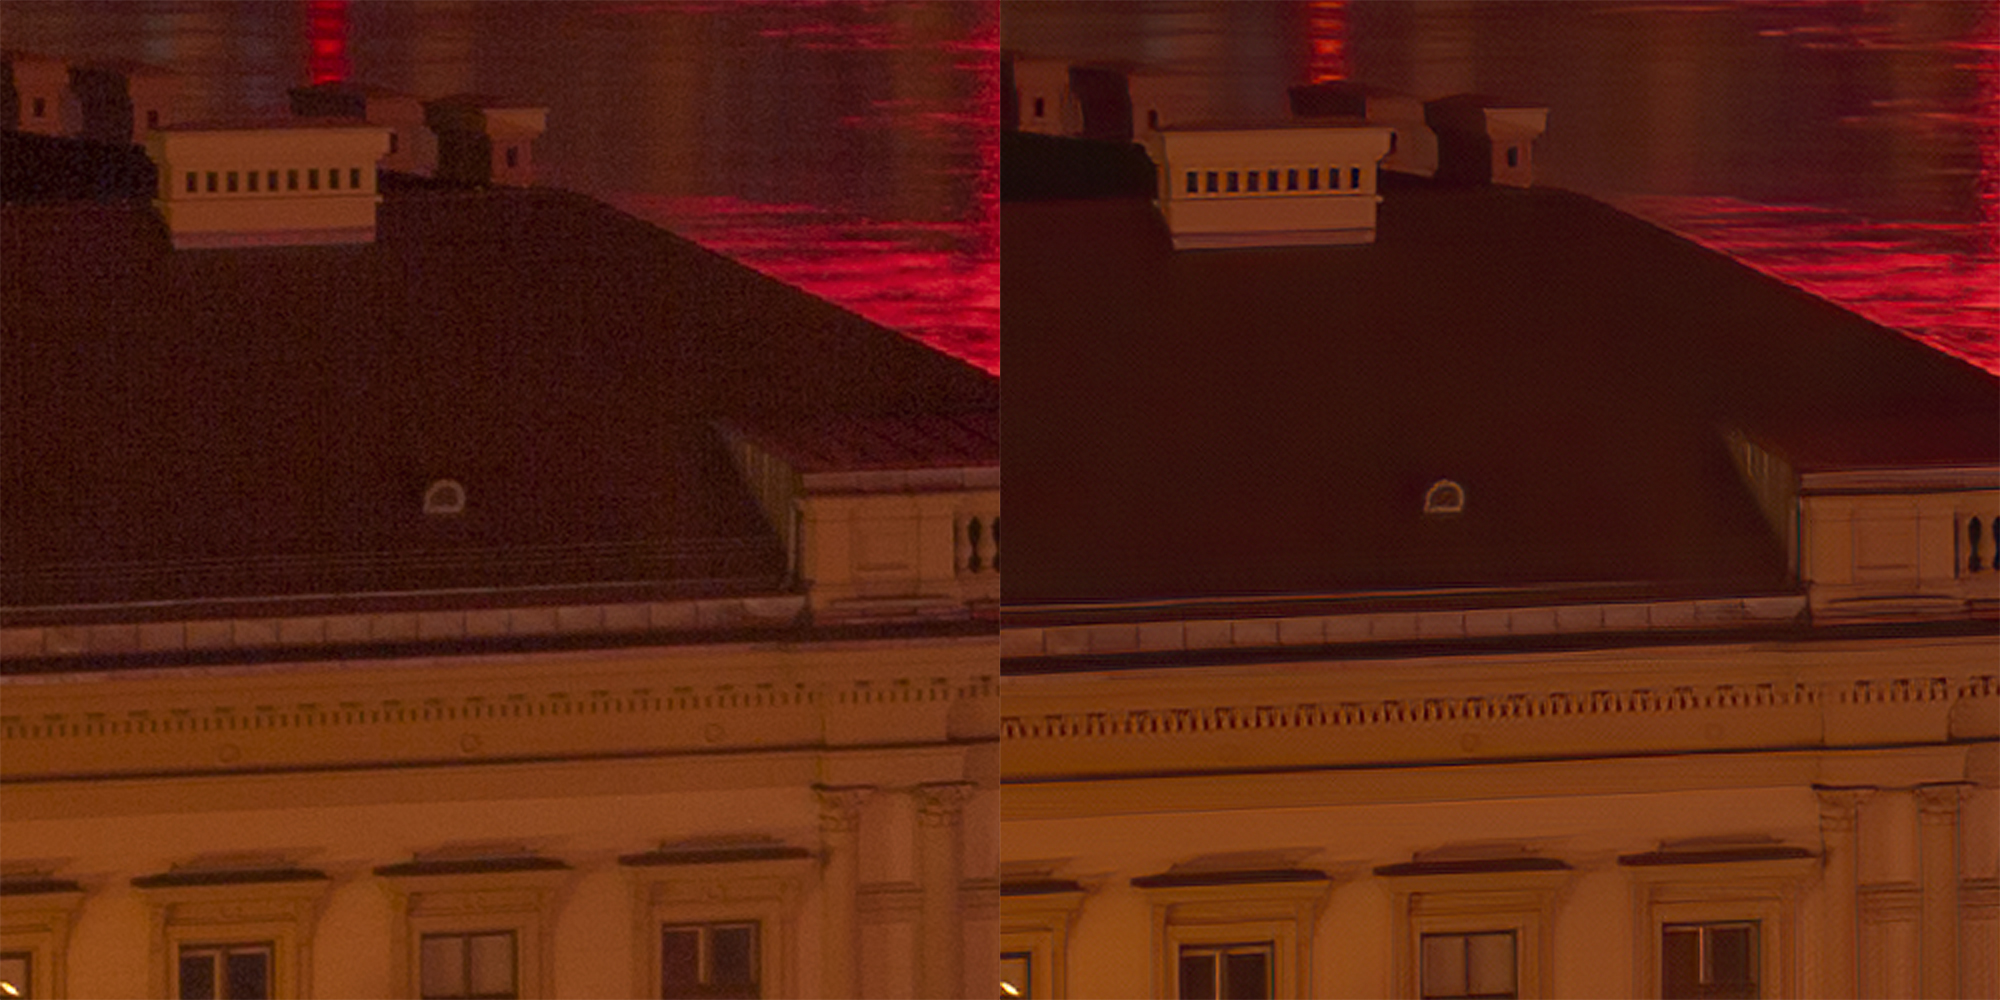
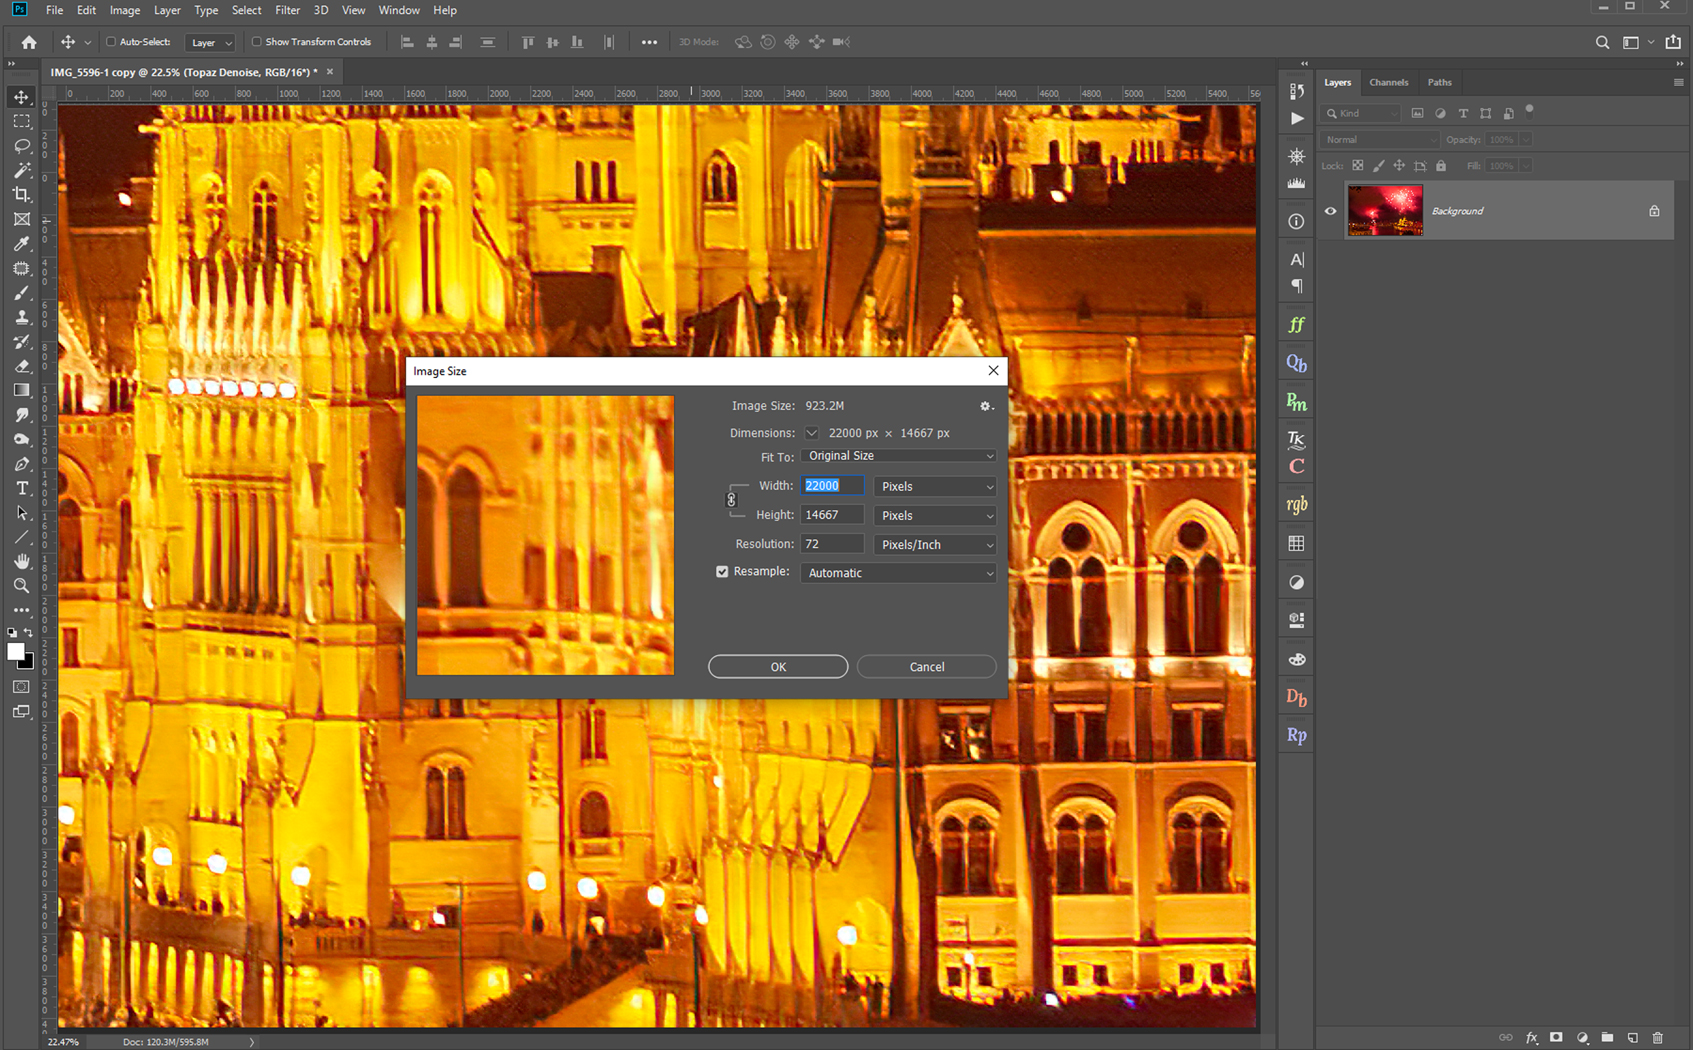
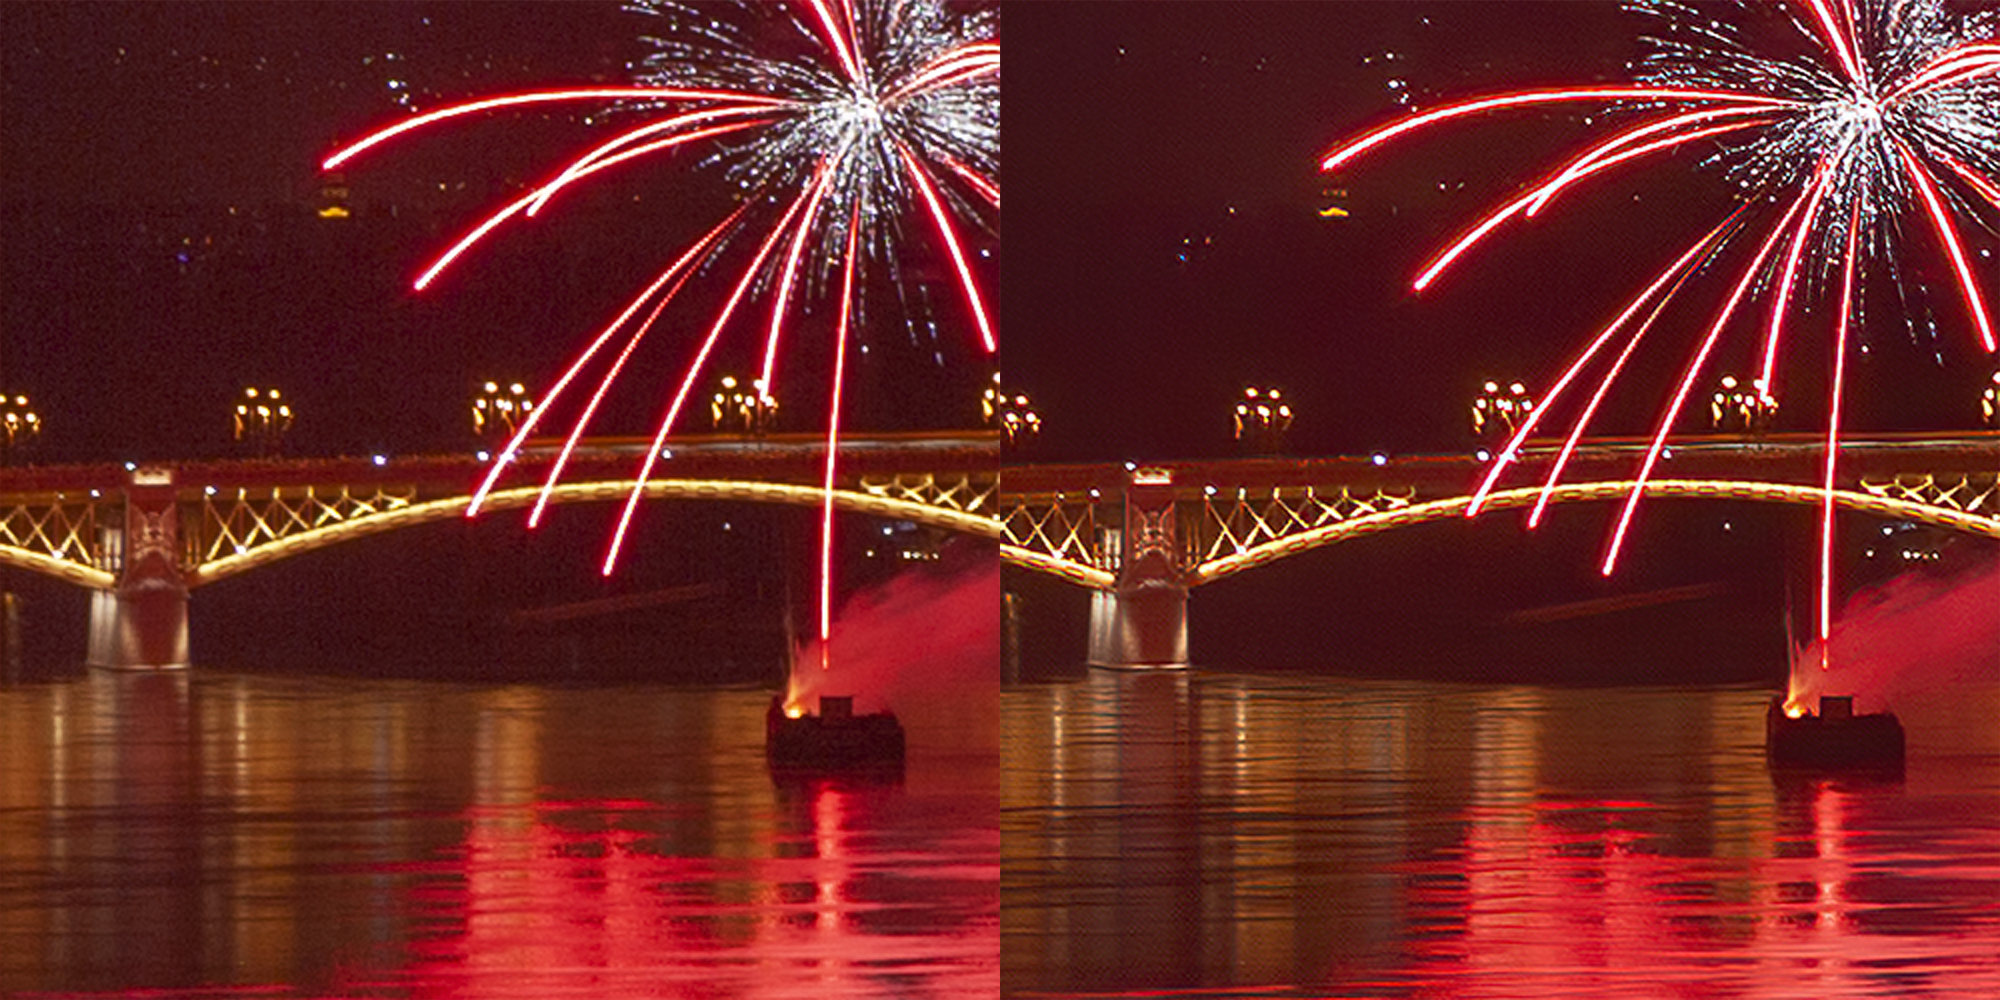
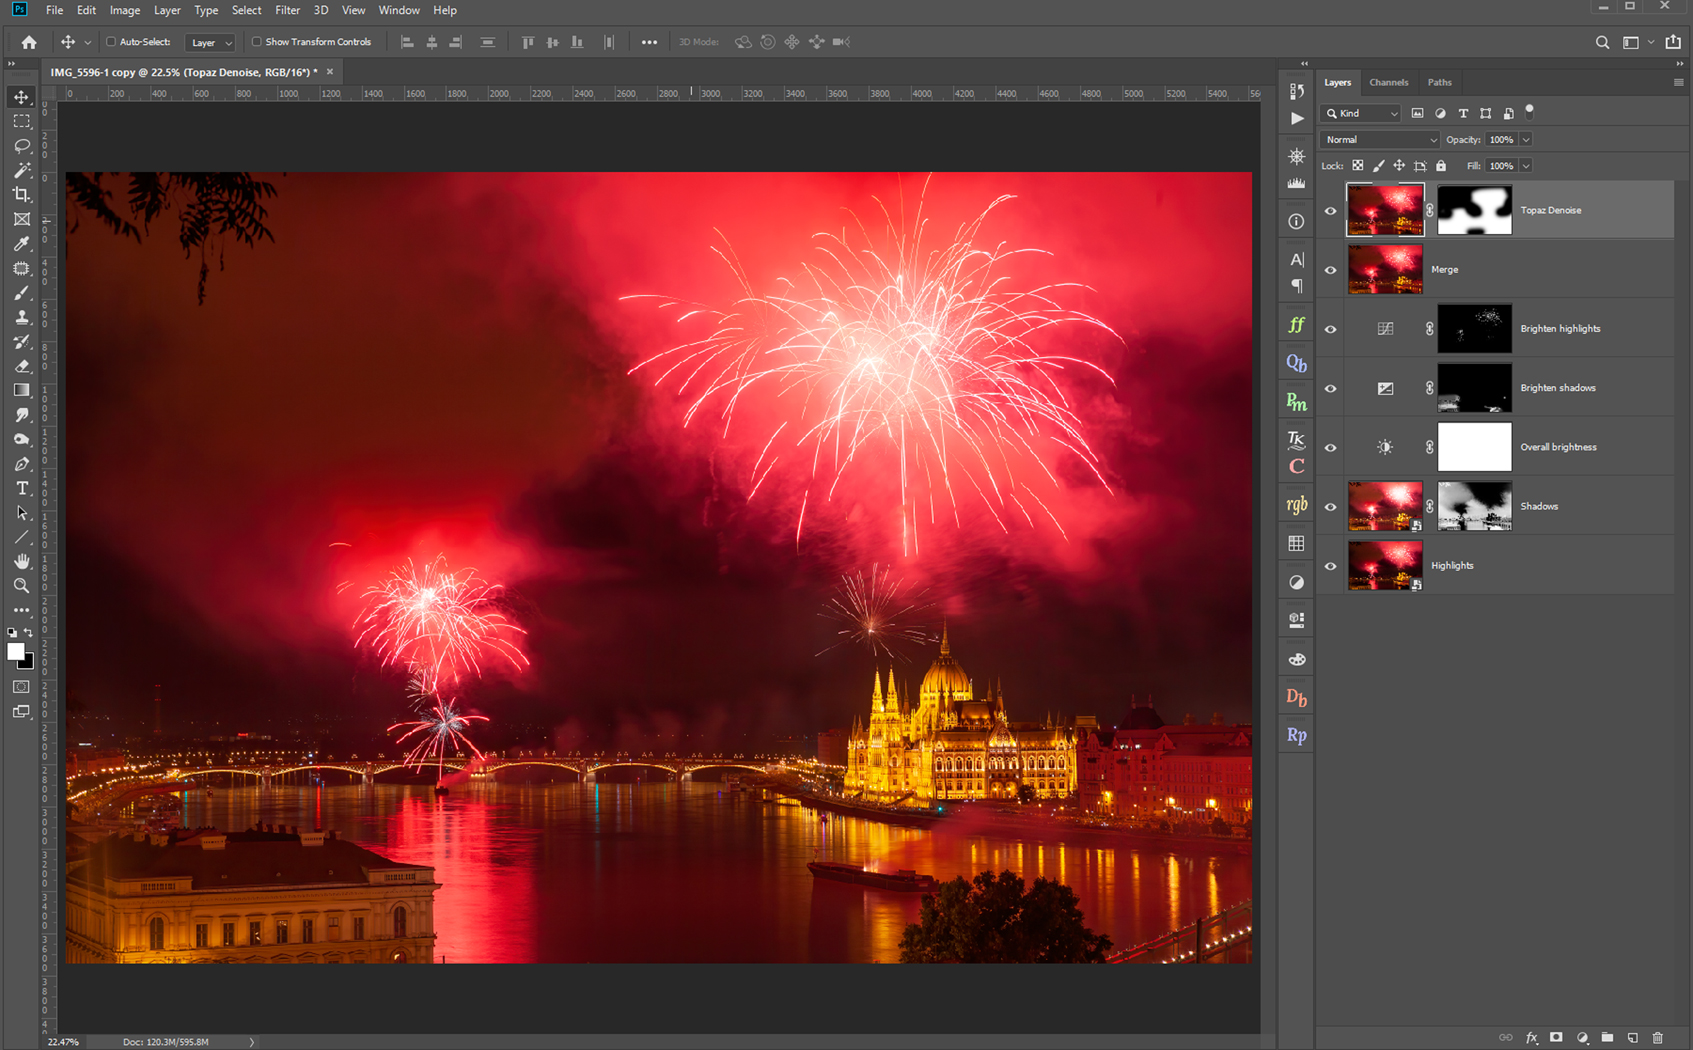
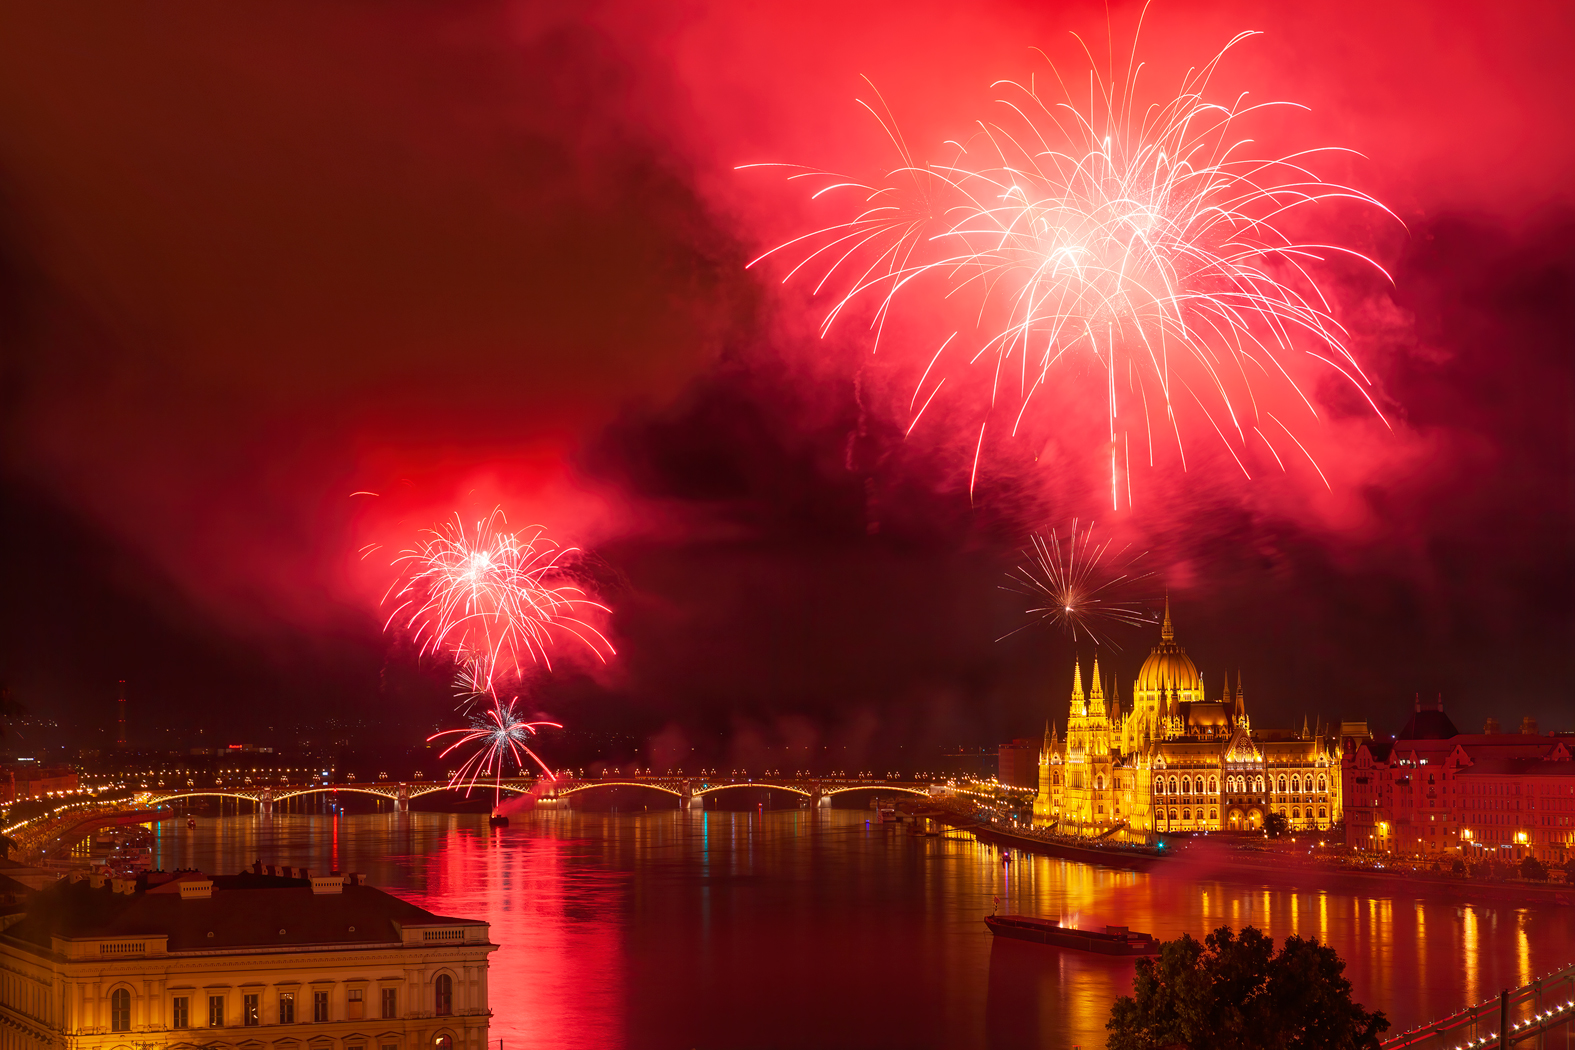
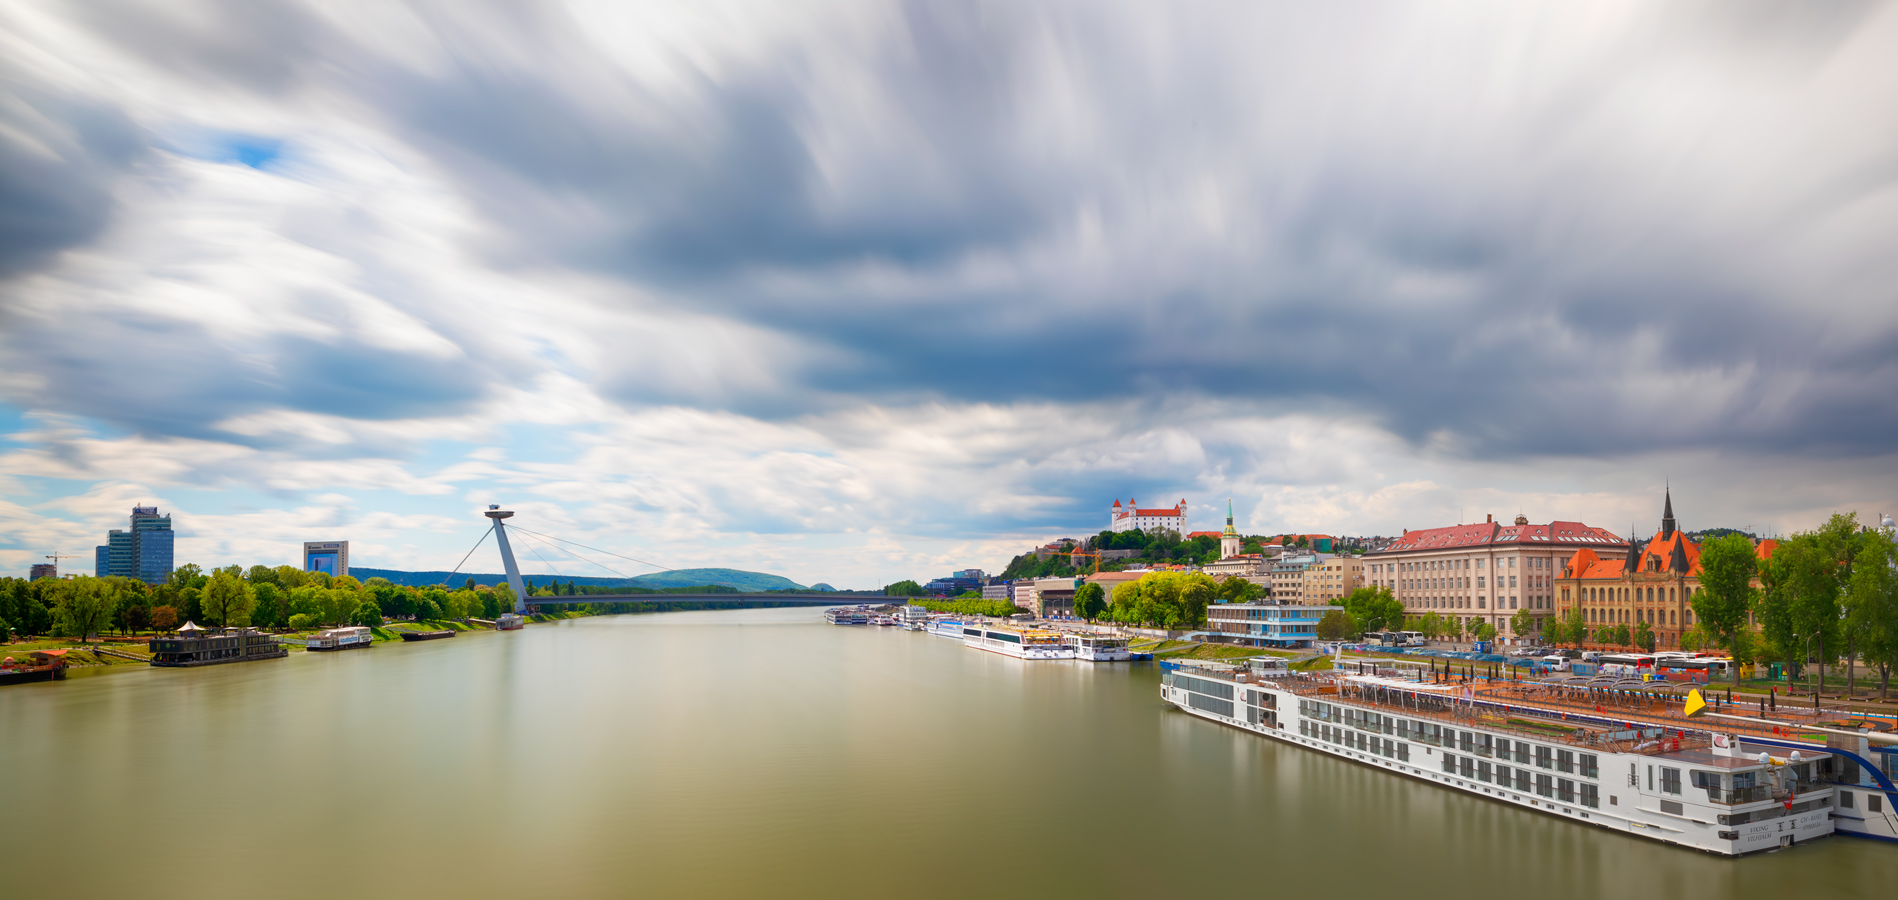
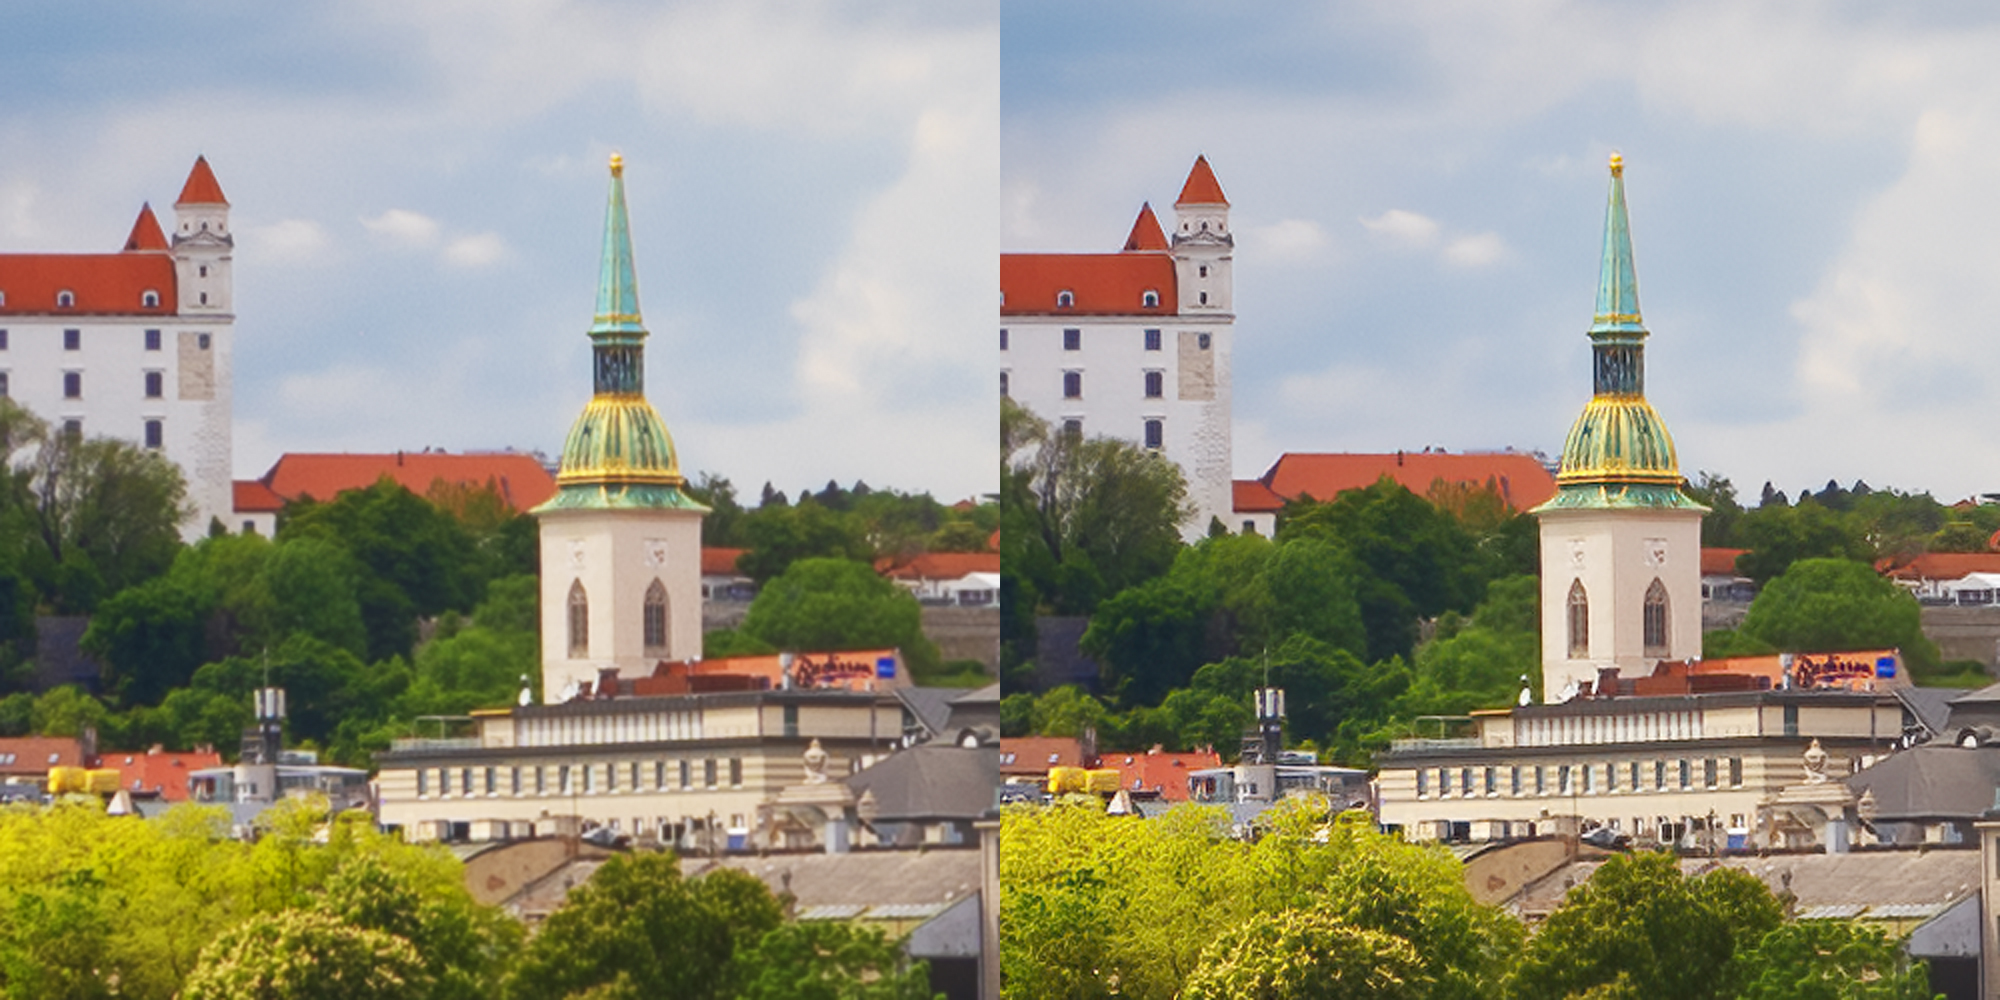
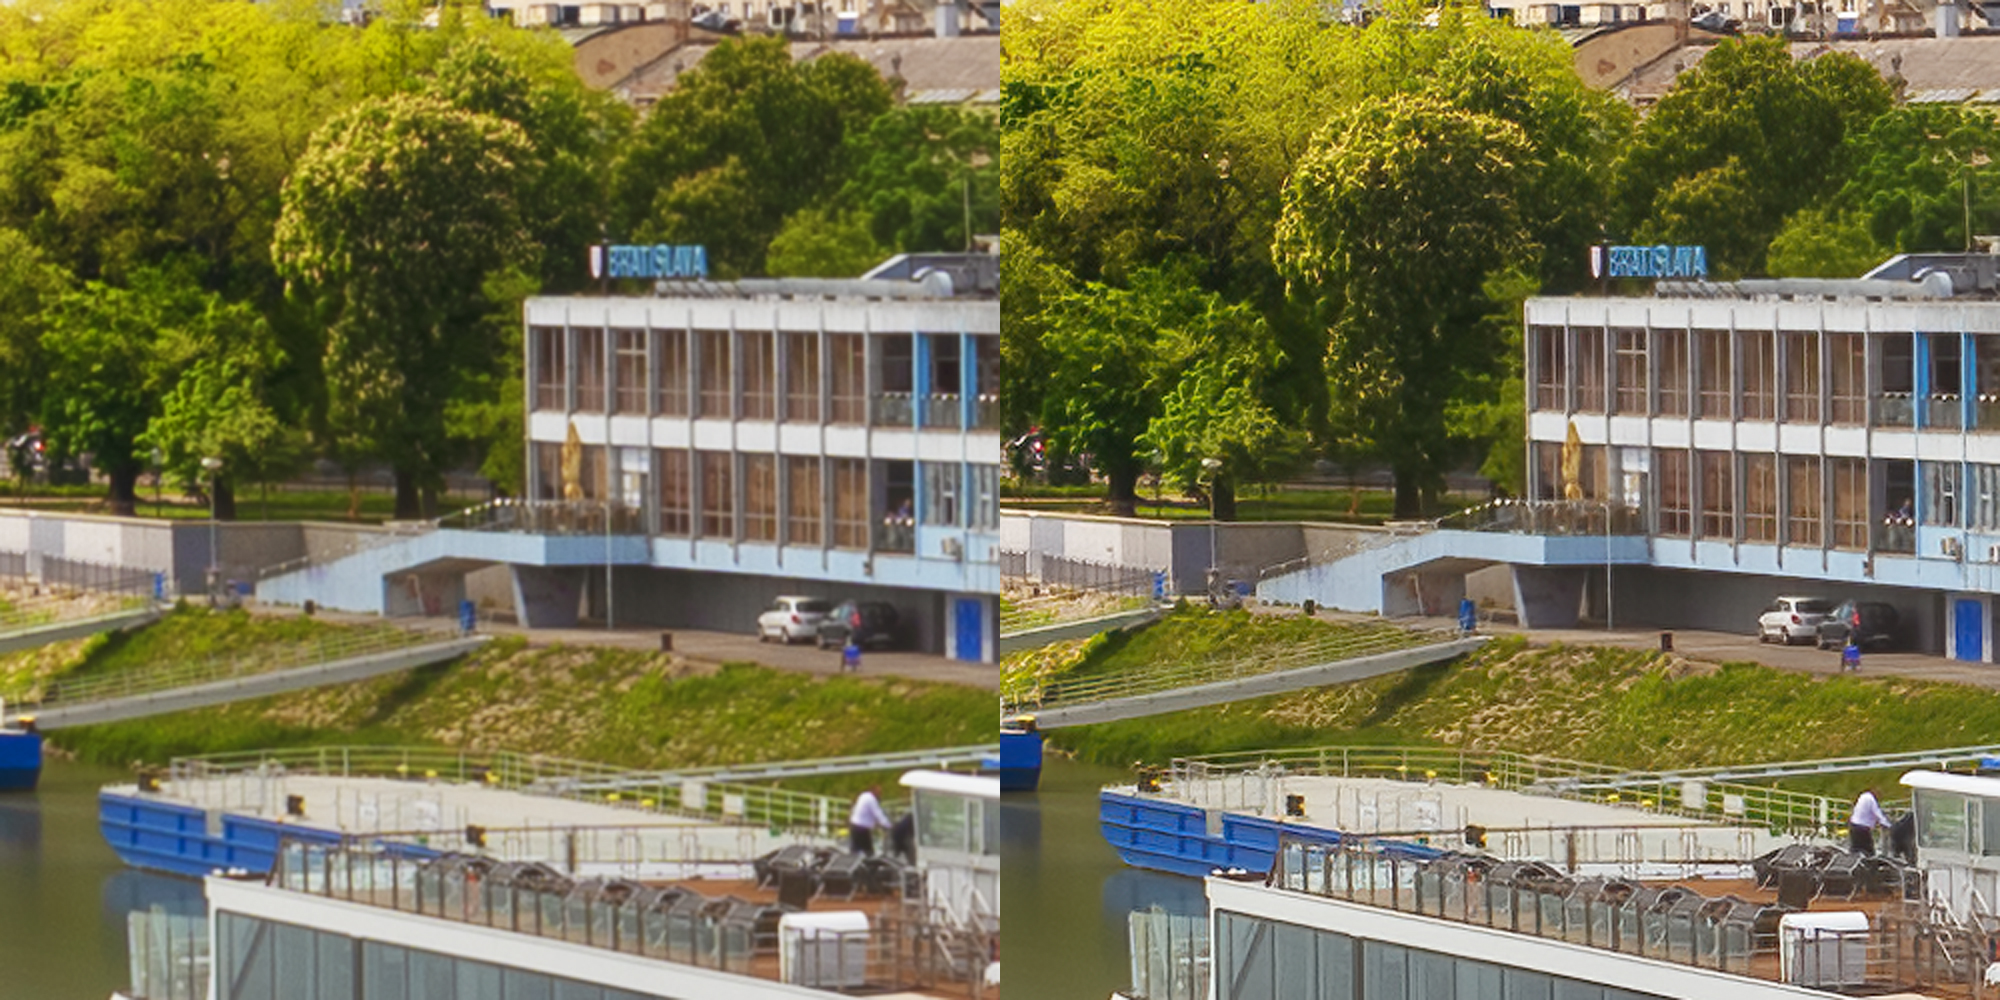
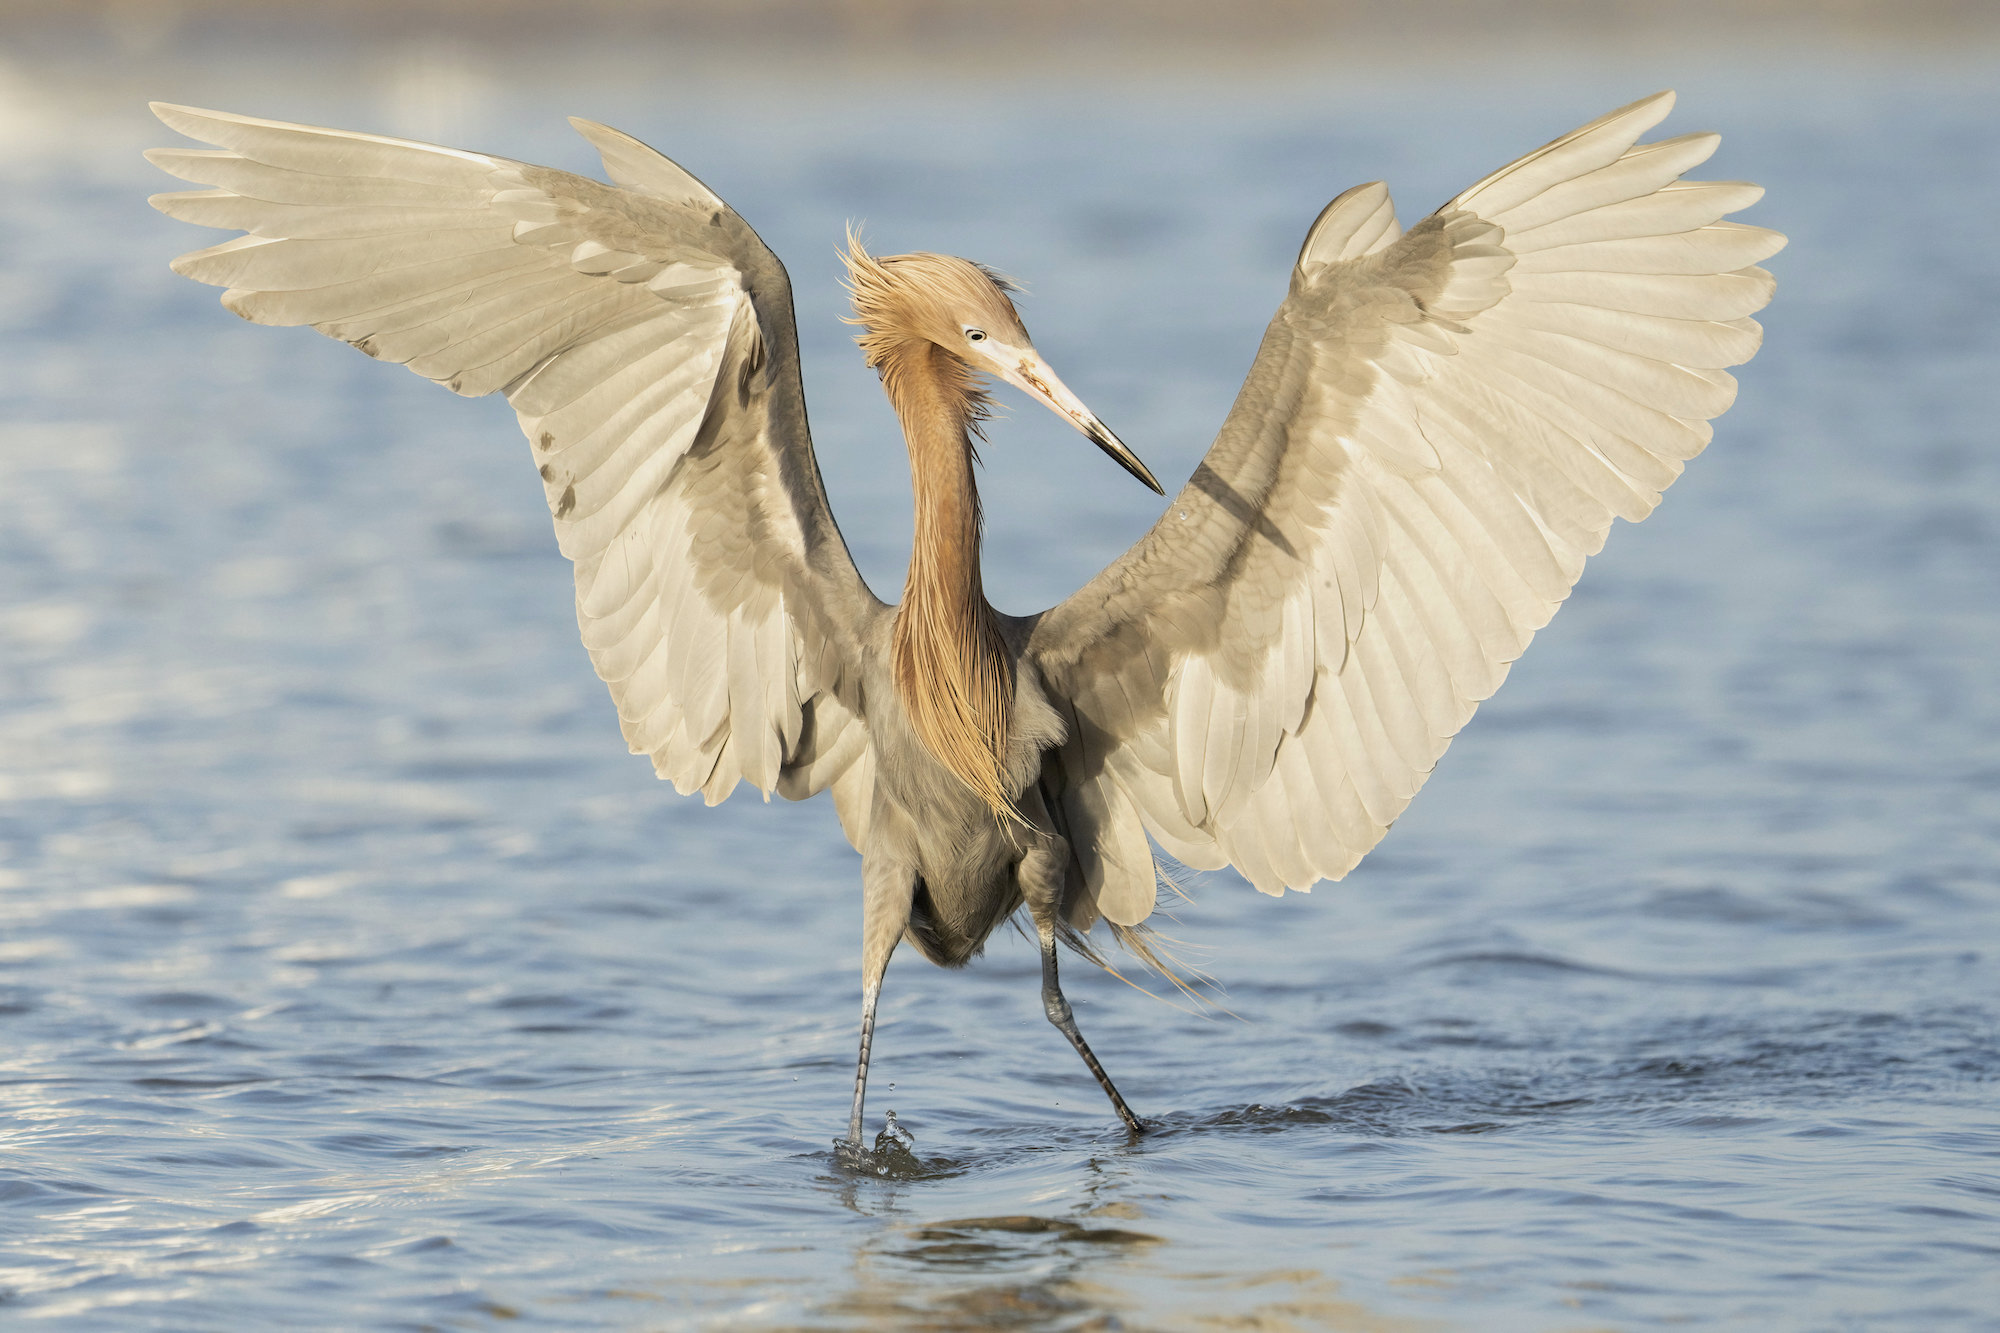
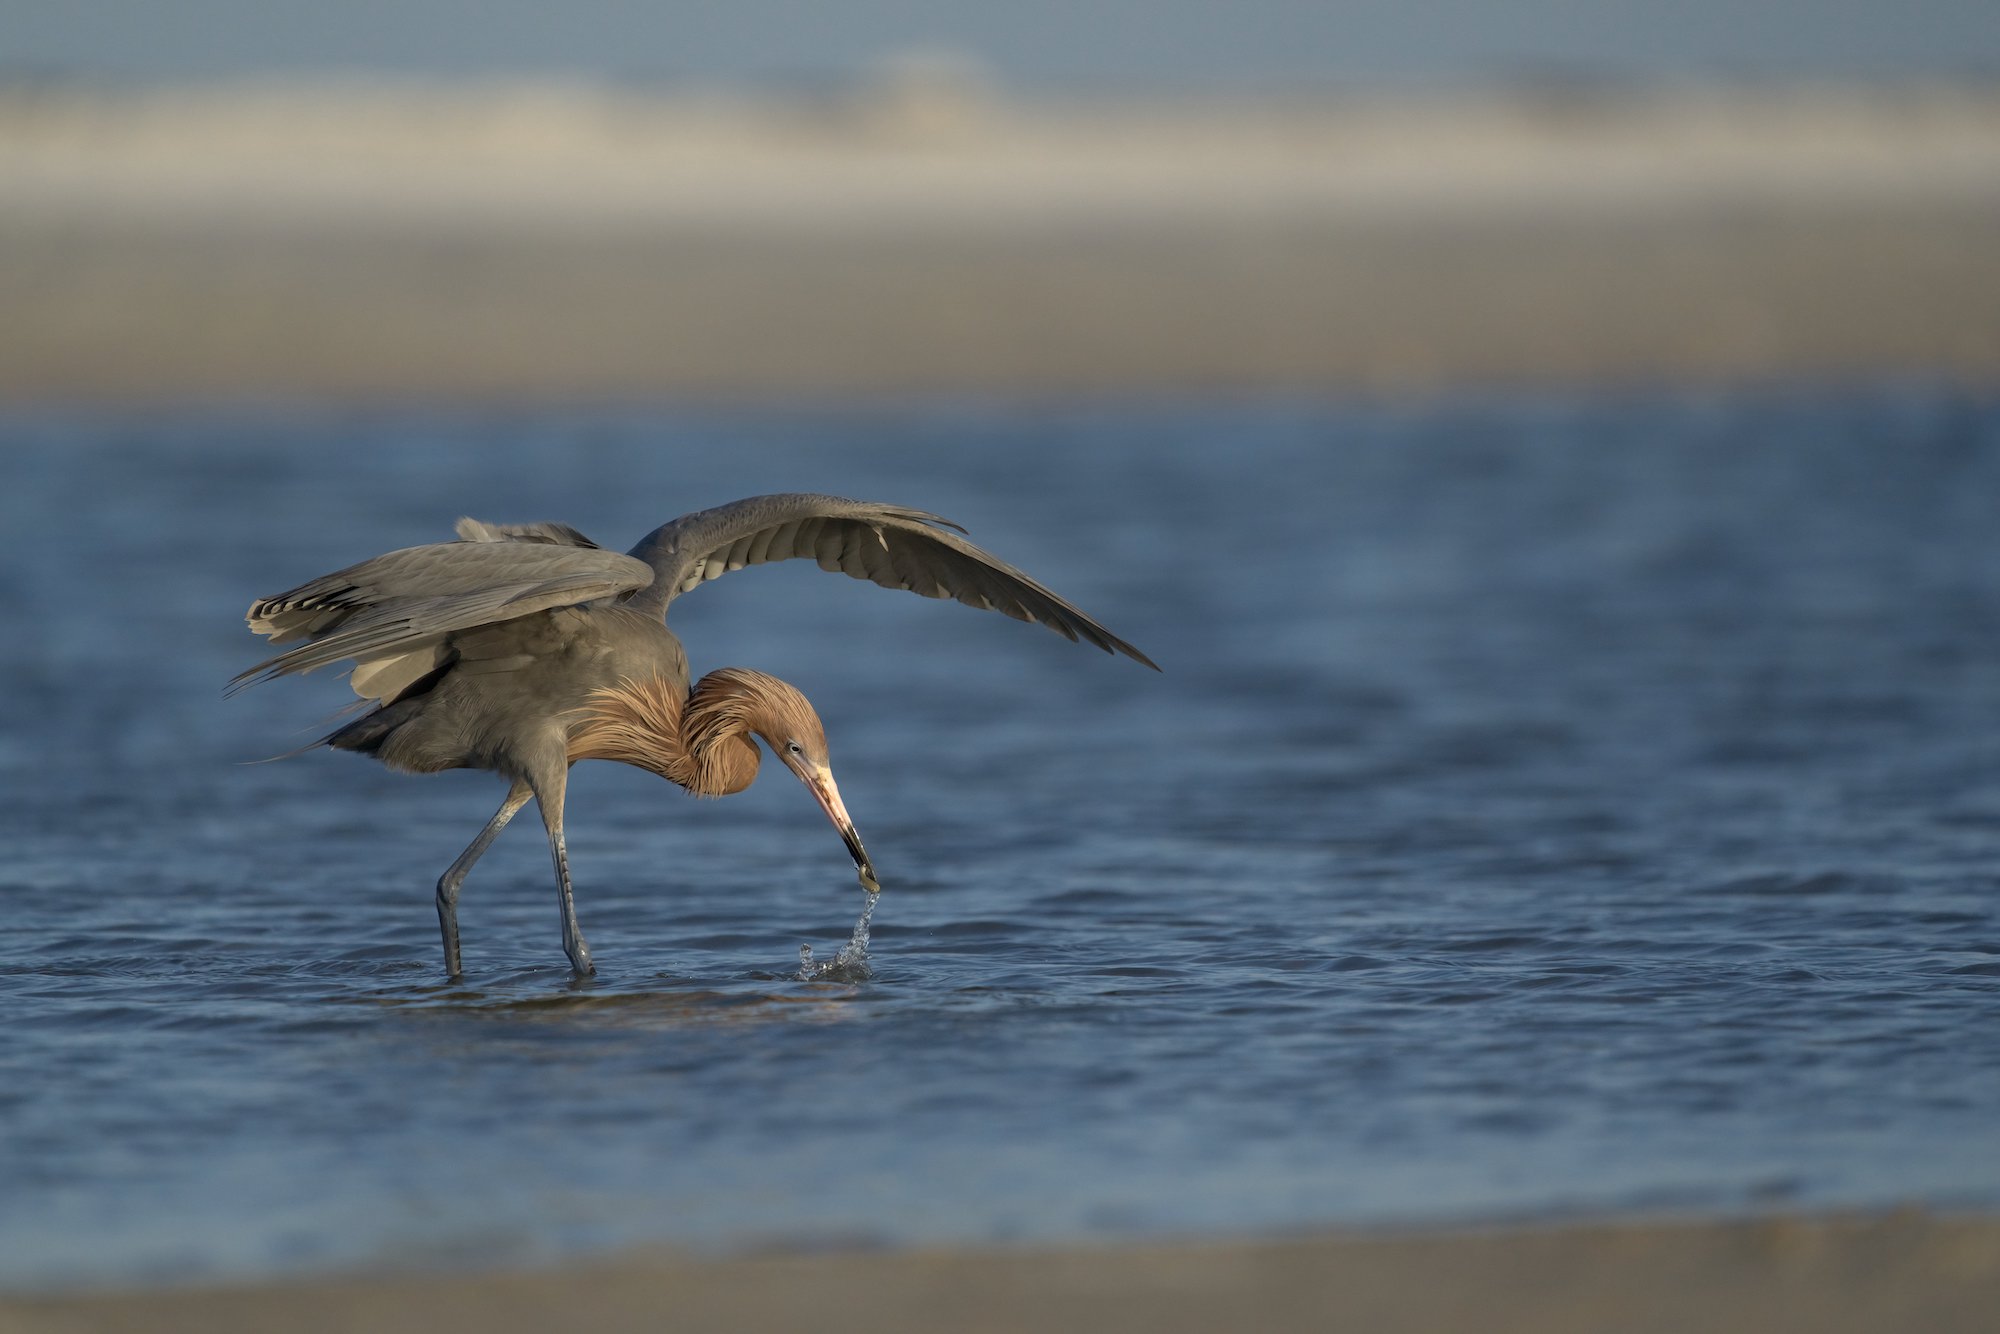
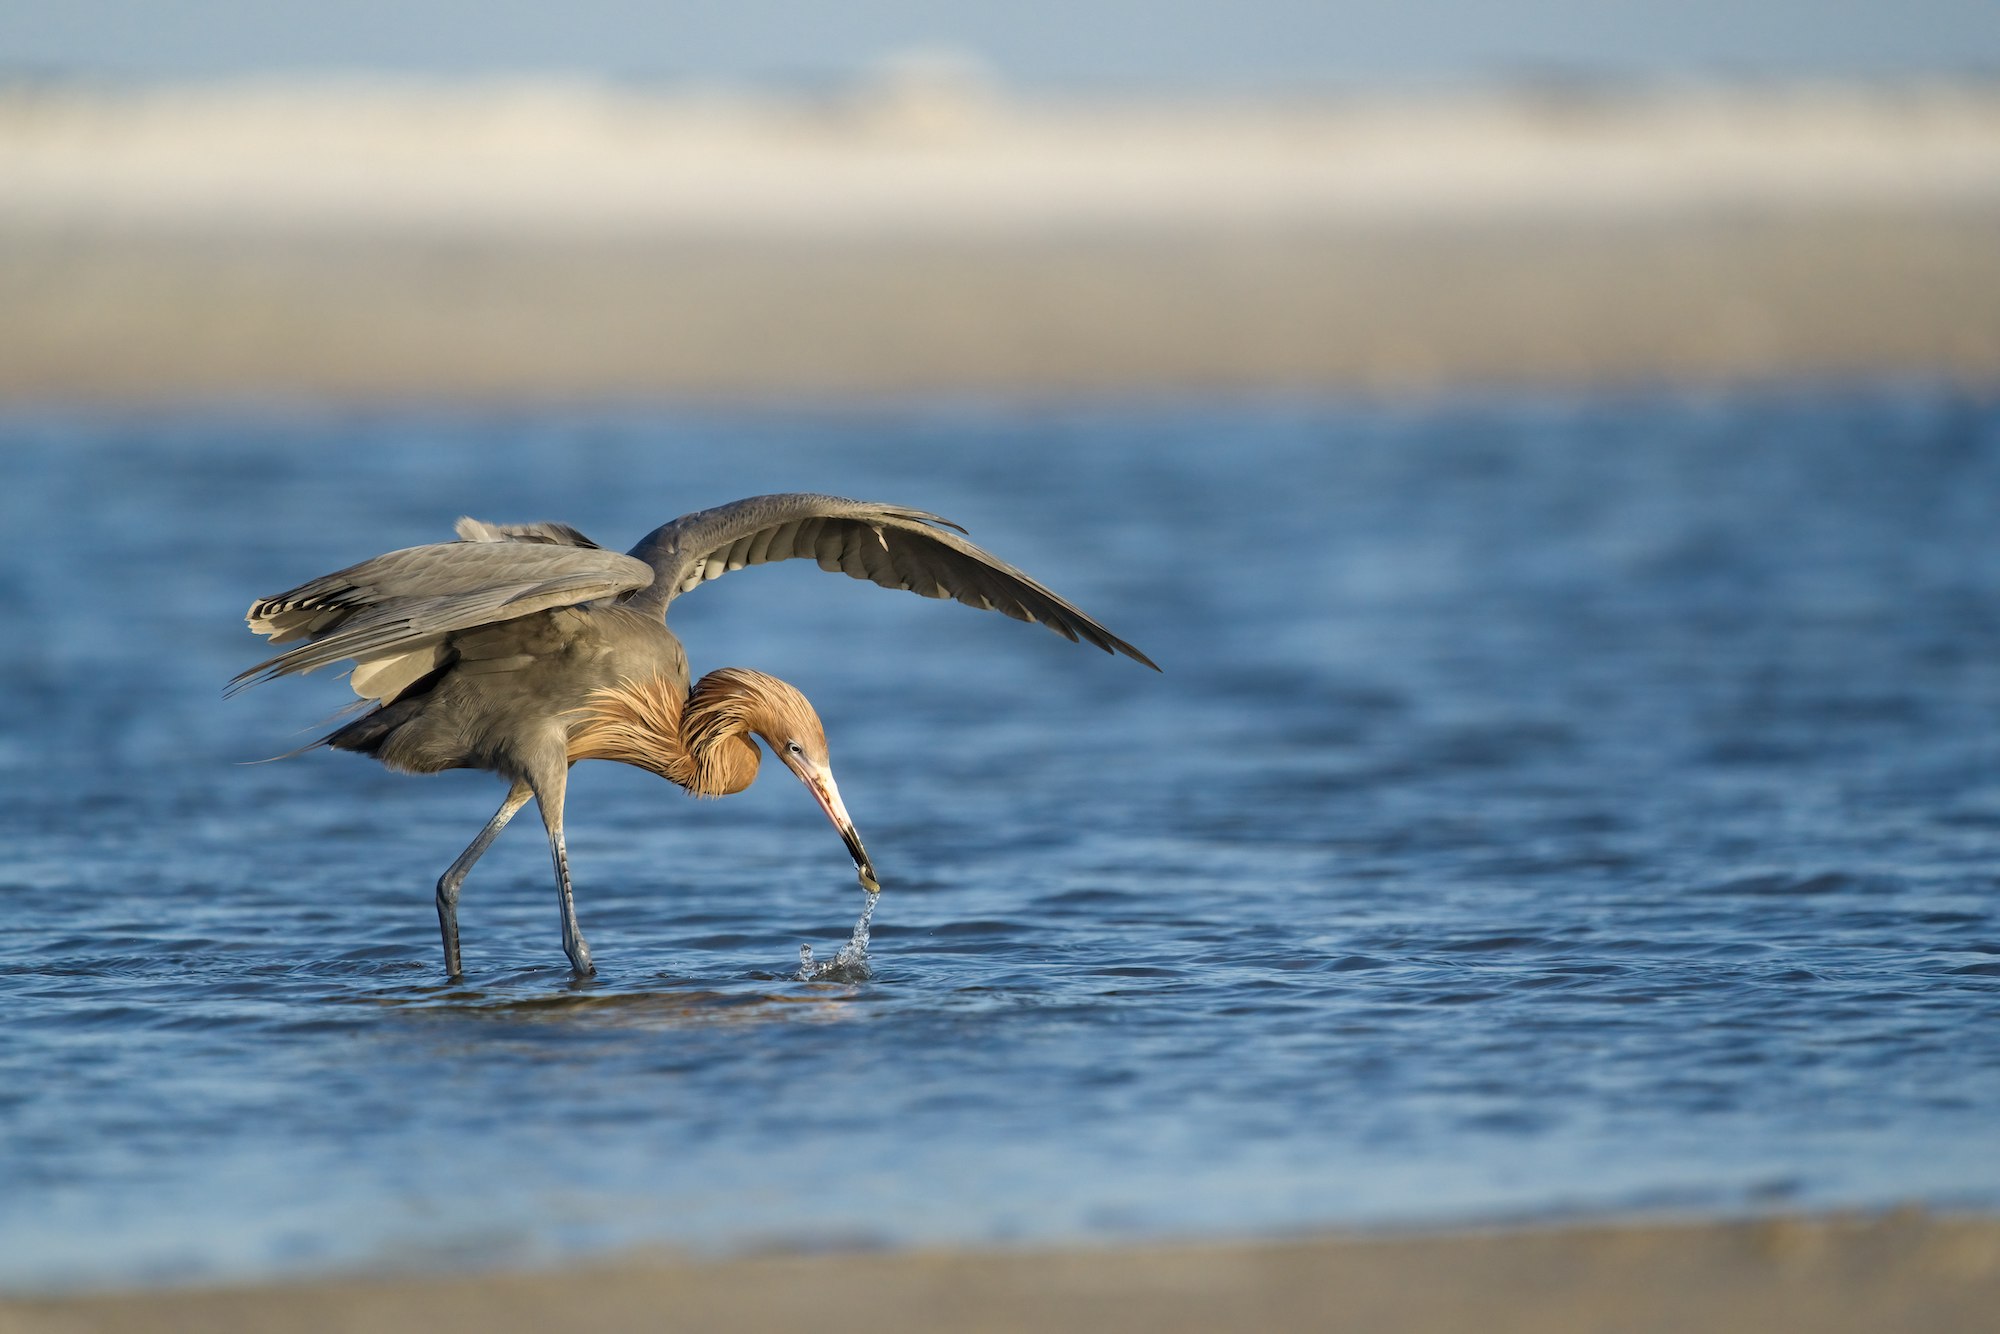
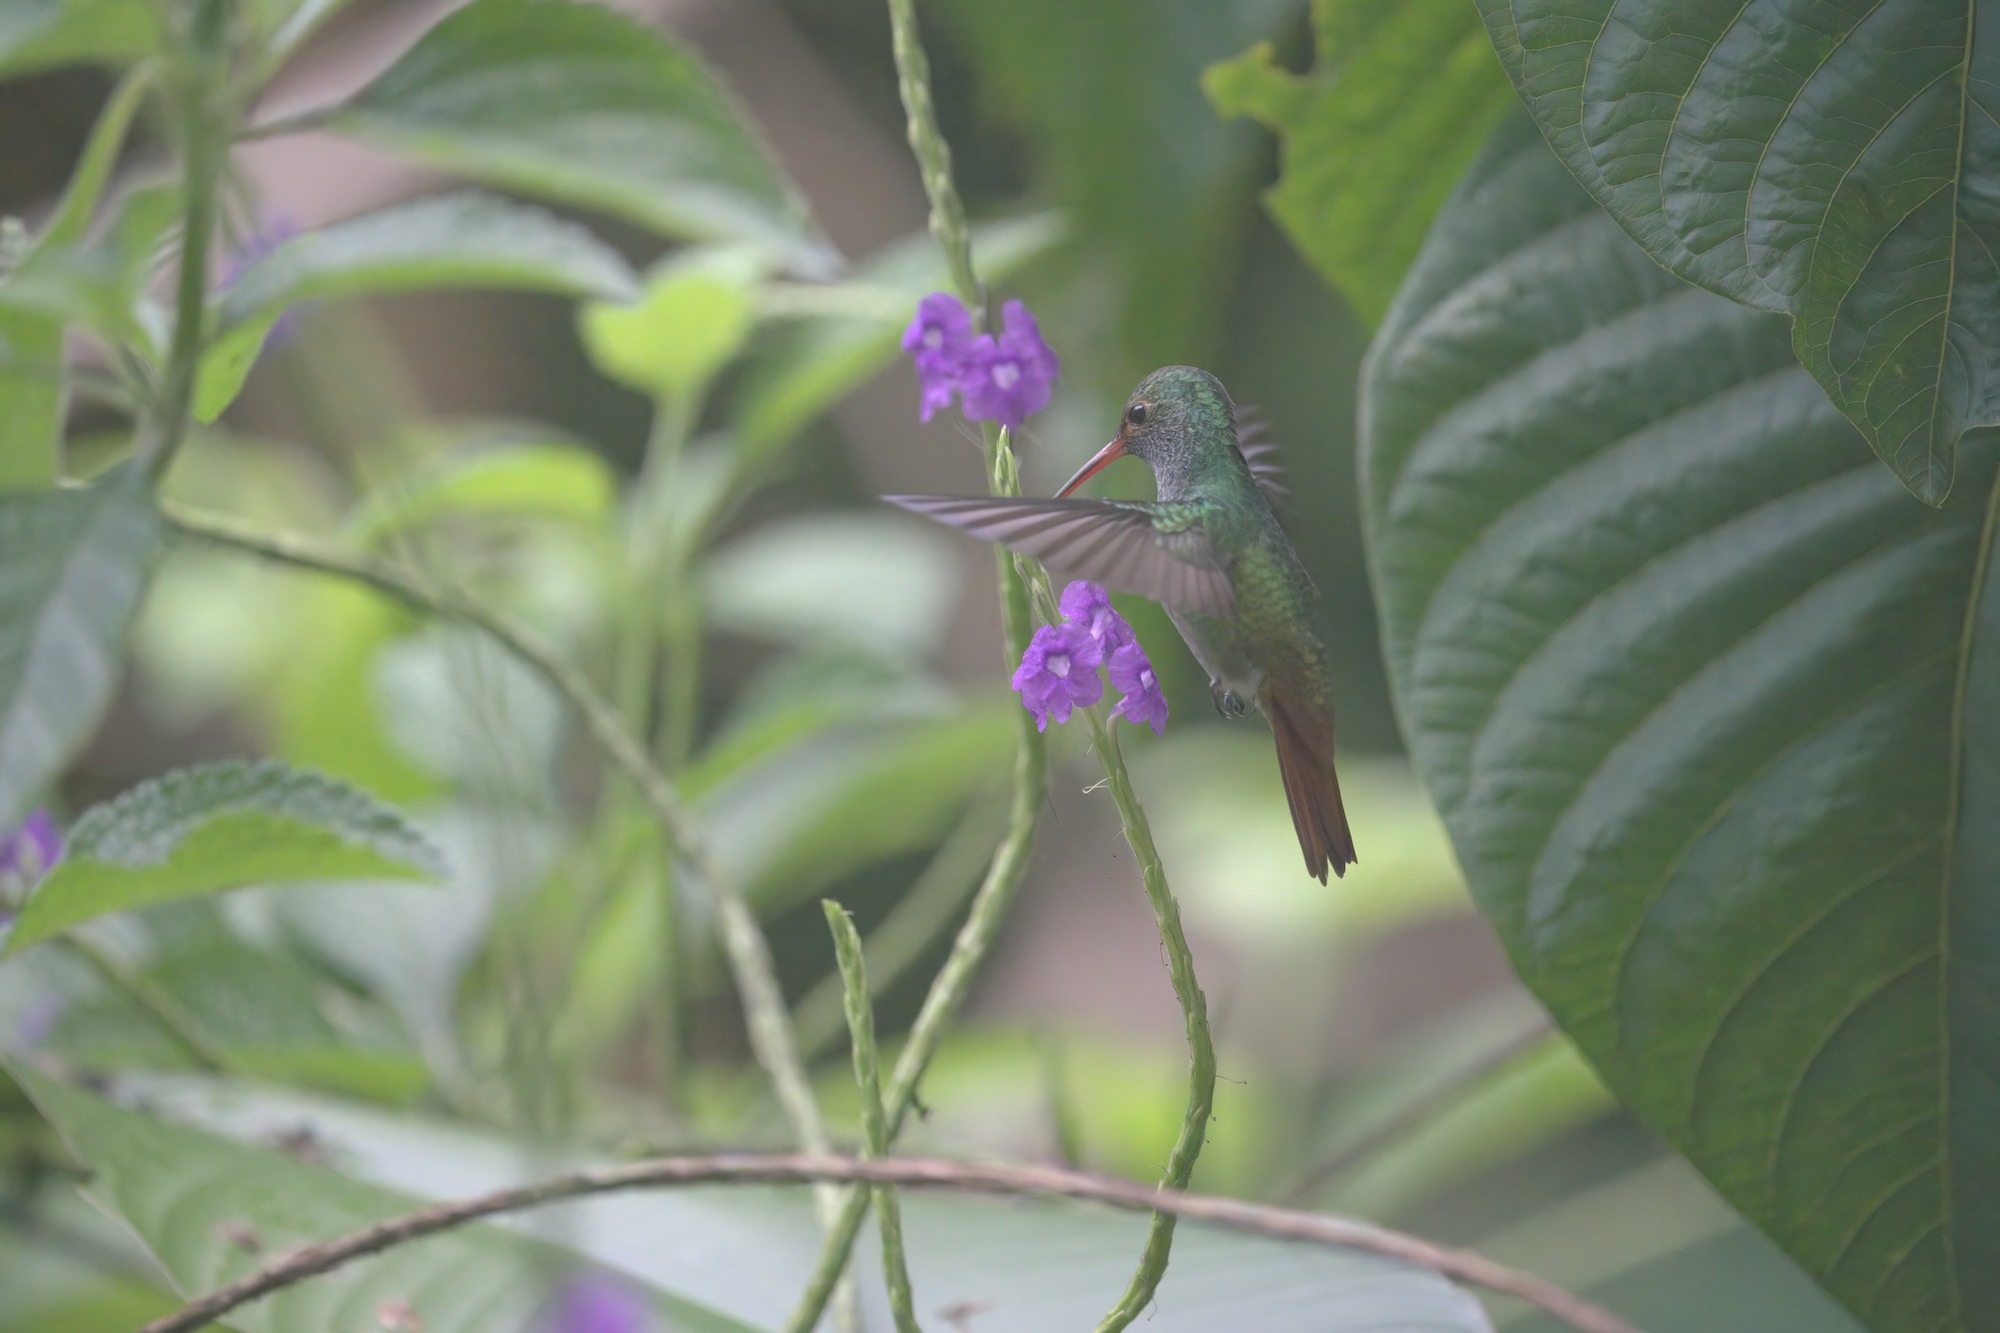
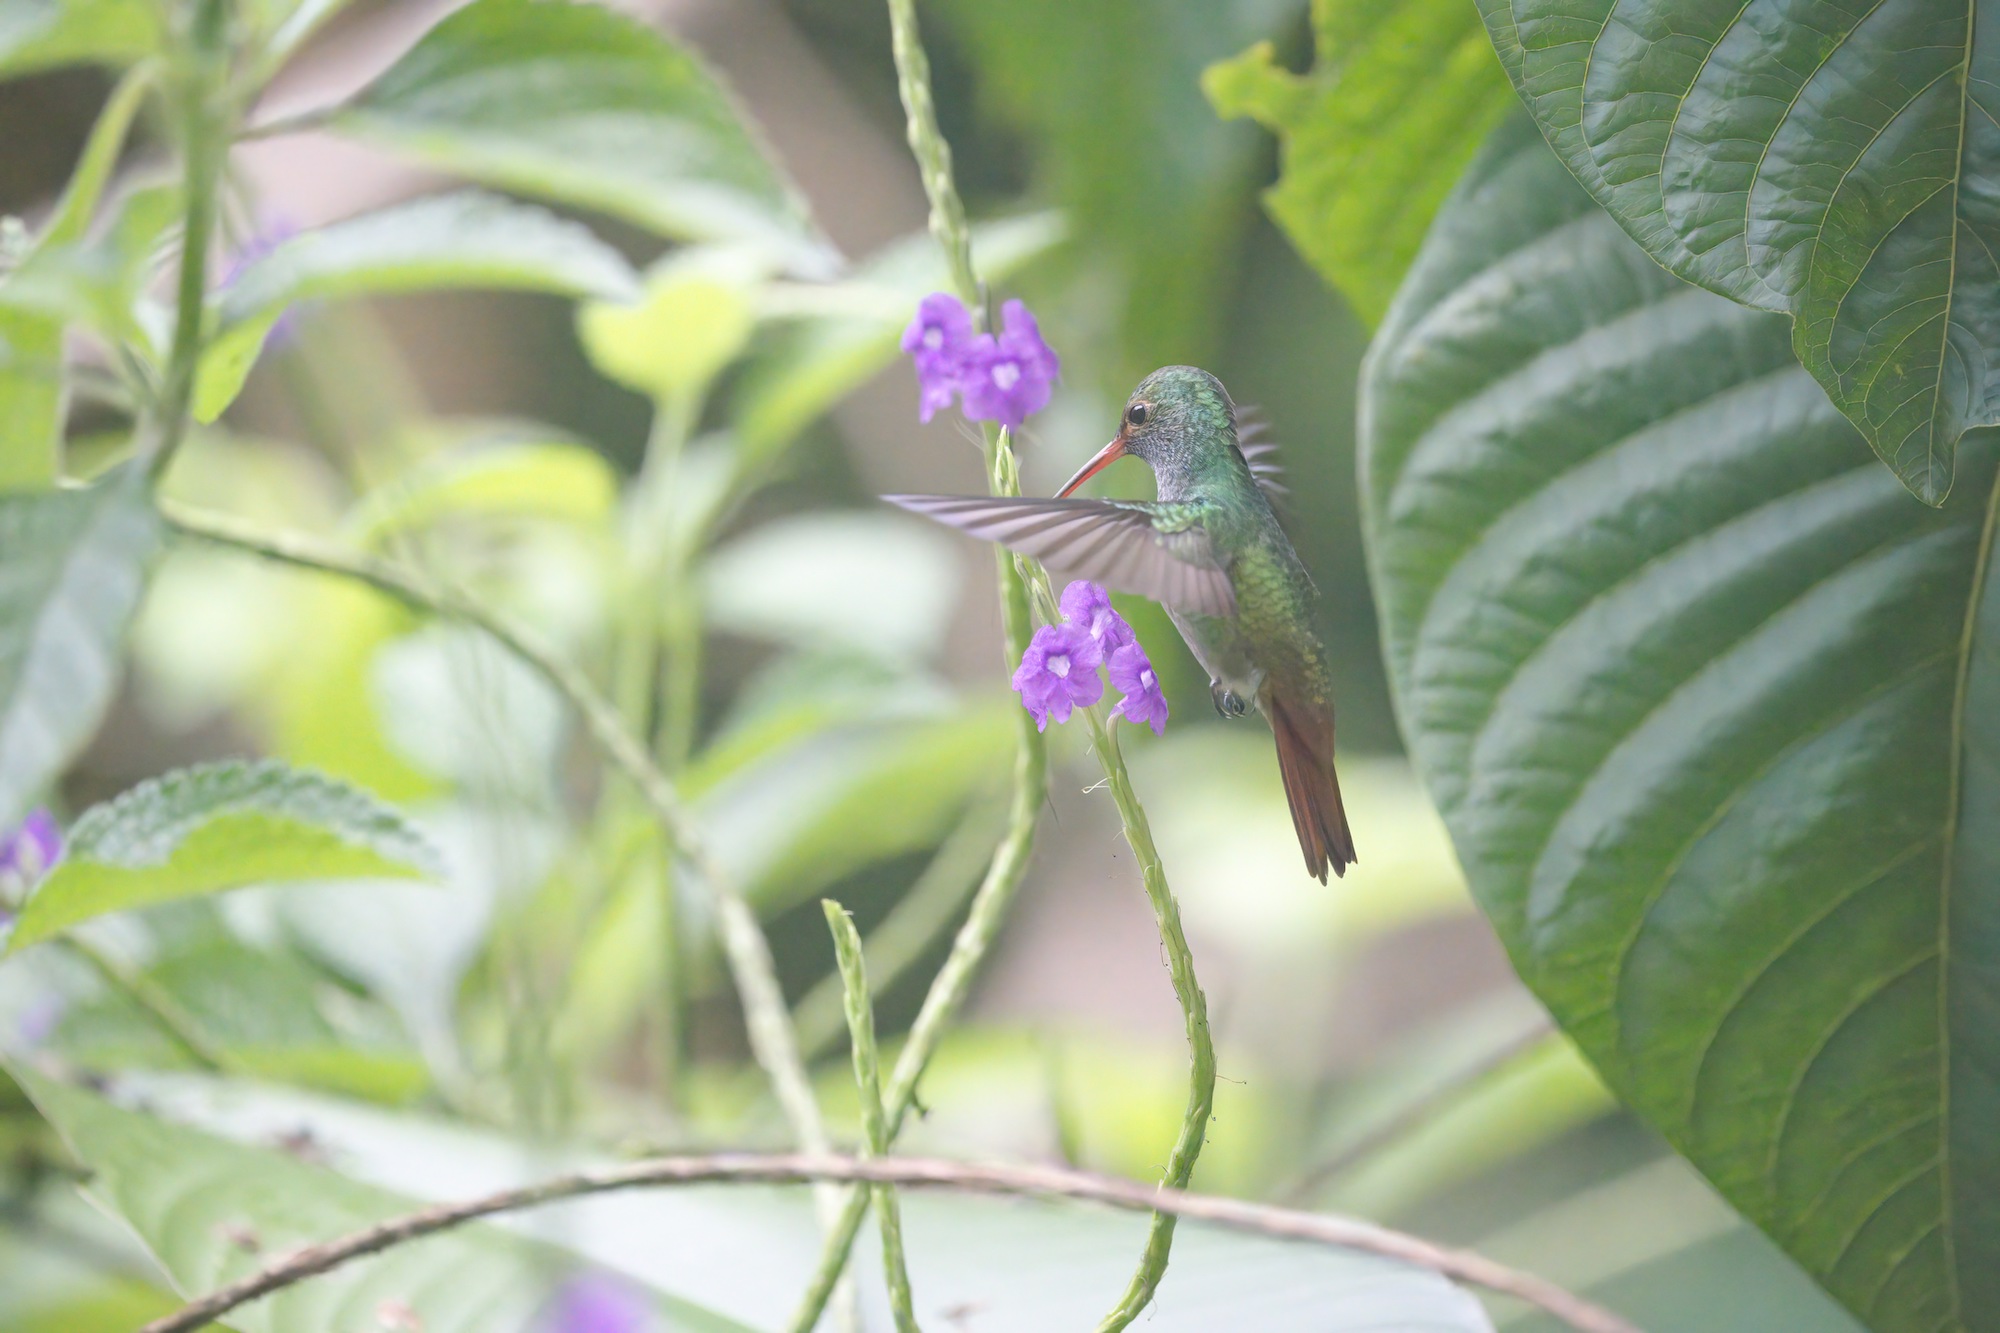
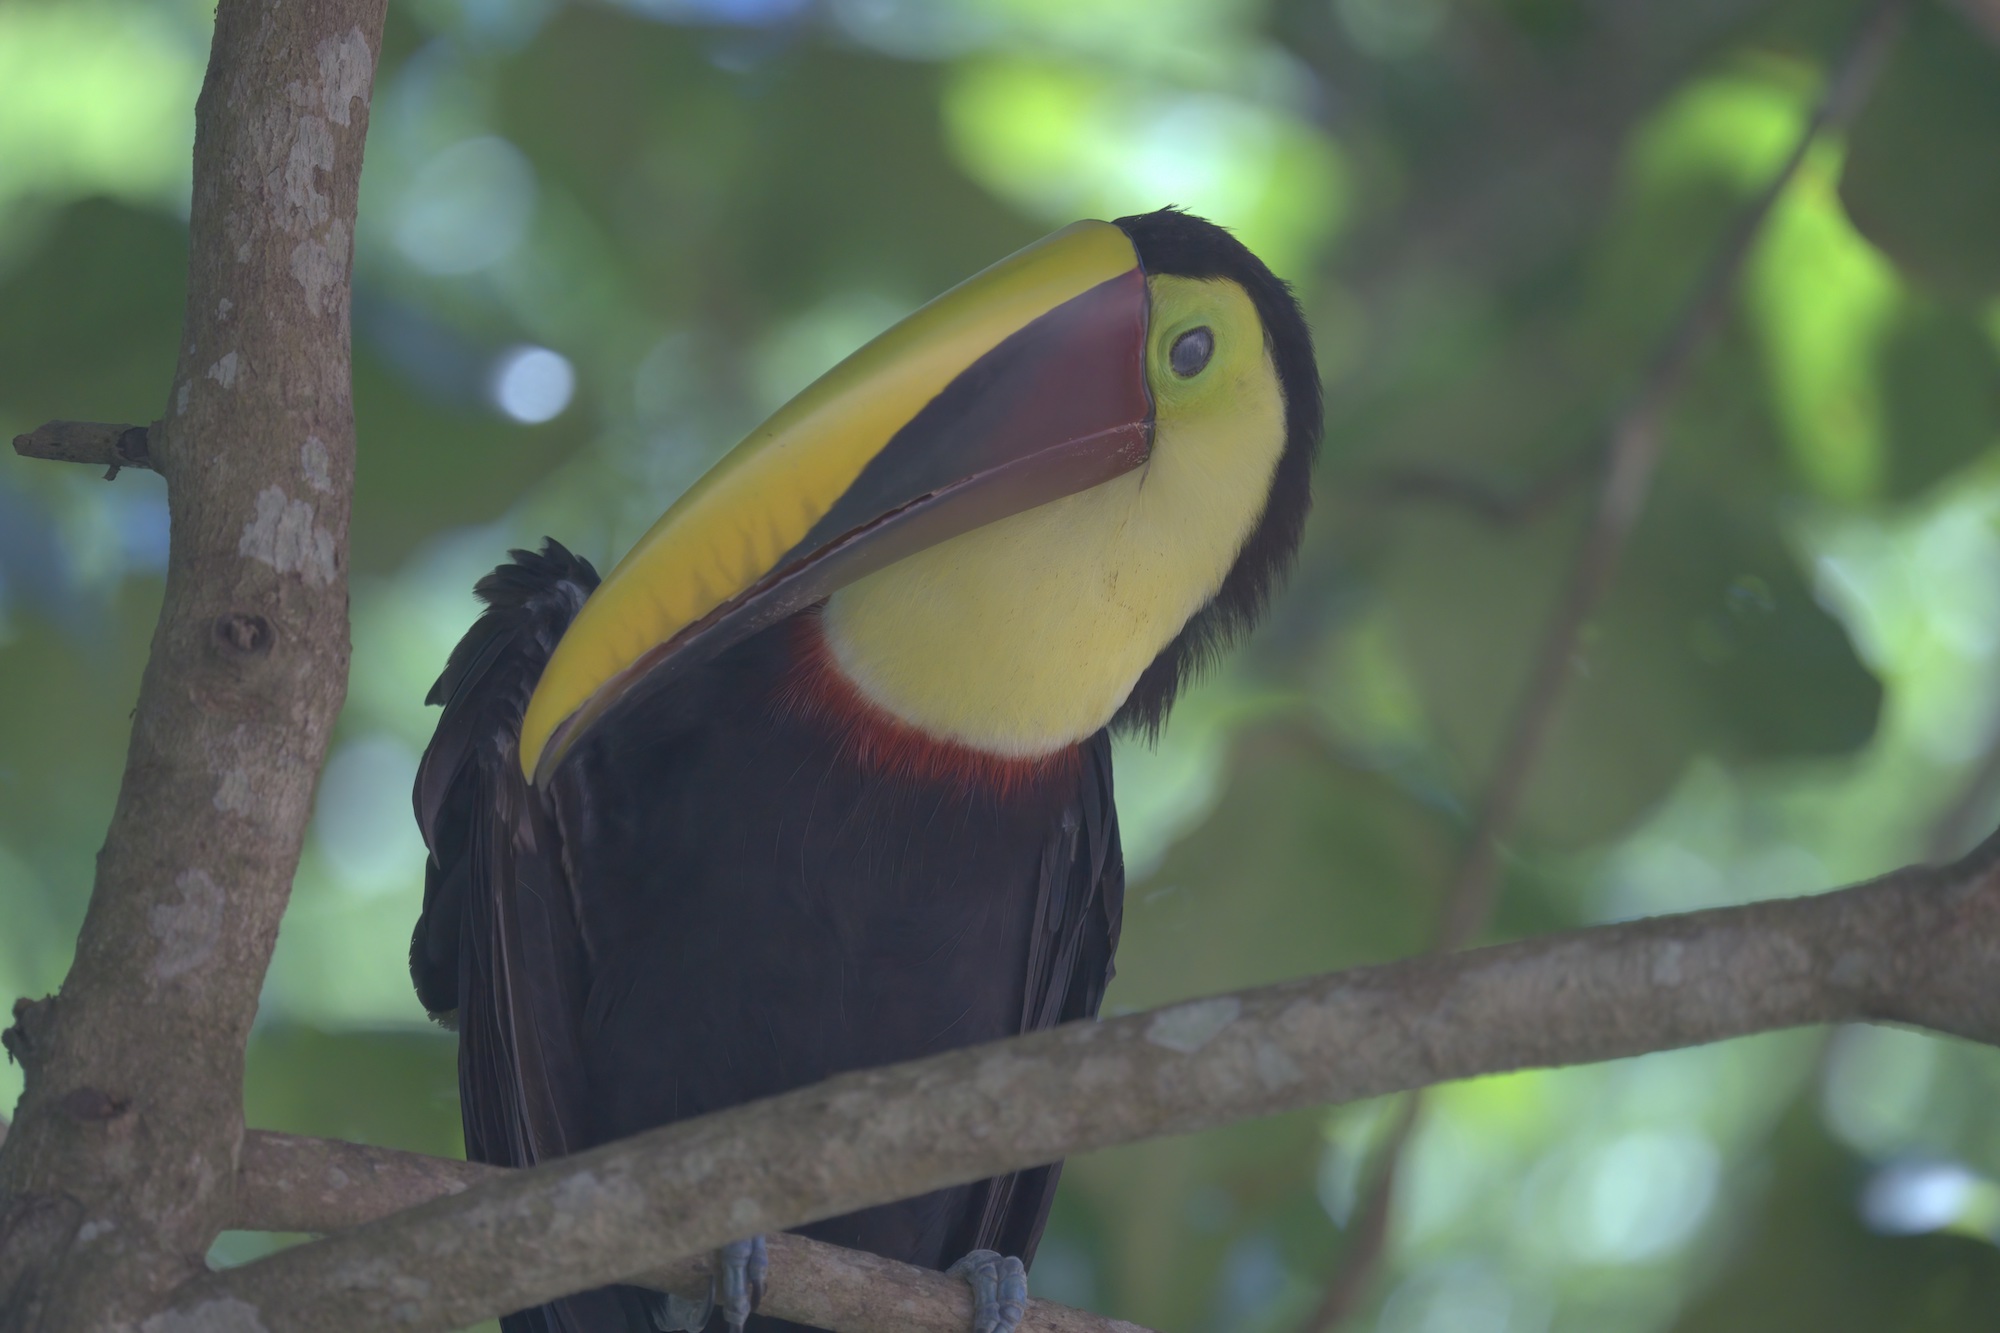
Here are some photos illustrating the color and tone improvements when opening RAW and DNG files in DeNoise AI v3.2 as a standalone app.

Improved file support and performance improvements

In addition to improving RAW color accuracy, we’ve also added support for reading Canon CR3 and HEIC metadata, making DeNoise AI even more versatile for a wider range of cameras. You’ll also get a better user experience thanks to several bugfixes and performance improvements.

If you’ve never tried DeNoise AI, download our free trial today and experience it for yourself!

Posted on 30 Comments

We Compared Popular Noise Reduction Tools and Denoise AI Came Out The Winner

We Went to Amsterdam to put Denoise to the Test

This month we hosted a photography workshop in Amsterdam to practice nighttime exposures in one of the world’s most photogenic cities. 

While our attendees were busy setting up tripods and shooting long-exposures along the canals, we photographed handheld DSLR scenes at high ISOs, capturing images with extreme noise to create the “worst case scenario” in photography. 

Because every photographer has been there: Whether you’re shooting a wedding in a venue with no flash photography allowed, or you’re photographing partygoers at a festival in near-darkness, or you encounter a photogenic scene while traveling at night, sometimes we have to shoot in extremely high ISO.

We built Denoise AI to correct noise in any image while preserving sharpness. Let’s take a closer look at noise and some of the leading noise reduction technology available to photographers.

What's Wrong with Shooting High ISO?

Shooting with a high ISO increases the light sensitivity of your camera’s sensor, allowing you to shoot faster and sharper in dark environments. 

The downside is a higher ISO creates unsightly artifacts known as noise, which reduce the sharpness and detail of your image. While it’s ideal to shoot in the lowest ISO possible, sometimes we have no other option.

Here’s what noise looks like in this 100% crop shooting at night at 12,600 ISO:

100% crop of an image at ISO 12,800 resulting in high noise

Ouch! A noisey image like this has limited use — would you deliver this to a client? The solution is to process the image with noise reduction software. Let’s compare the most popular options.

Our Test Image

The image we’ll be working with was a classic scene photographed along the Damrak in Amsterdam. It was captured at 25,600 ISO, f11, 1/13 sec.

The original image has very heavy overall noise, obscuring the sharpness and textures of the buildings. 

Want to test this image along with us? Download the full-res JPG below.

Noise Reduction in Adobe Lightroom

We tested our image in Adobe Lightroom and pushed the limits of their noise reduction tool. We had to max out the noise reduction slider to remove noise in the sky, while the buildings started to become muddled and lost sharpness.

Lightroom Results

After noise reduction in Lightroom the details were fuzzy. You can see blur around the window frames, and an overall loss of texture.

Noise Reduction in Phase One Capture One

Capture One didn’t even begin to touch the noise in our photo, even at maximum power. There was still obvious noise in the sky despite pushing the slider to 100.

Capture One Results

Even at maximum noise reduction, Capture One still left noise in the sky.

Noise Reduction in DxO PhotoLab

DxO managed to remove the noise from the sky… by burning the whole image. Shadows are darker and blacker than before, and detail is lost.

DxO PhotoLab Results

DxO overbaked the image to downplay the noise, resulting in a burned image.

Noise Reduction in Topaz Labs Denoise AI

Finally, we took our image into Topaz Labs Denoise AI and were able to achieve the perfect balance of noise reduction and detail. Denoise AI uses machine learning technology, comparing your photo against millions of images to calculate the most intelligent improvements. The results are superior to all other noise reduction tools.

Denoise AI Results

The sky is cleared of all noise while texture and sharpness are restored with Denoise AI.

Try Denoise AI free for 30 Days

The results are clear, and that’s why Denoise AI is the industry-standard noise reduction tool used by the pros. Download Denoise AI and try it free for 30 days.

Posted on

Topaz Tutorial: Editing Cityscapes with Miroslav Petrasko

When editing cityscape photos, Topaz software can be a big help. There are many sharp edges and details in cityscapes you’ll want to preserve. To achieve this, you can get a lot of help from Topaz DeNoise AI and Topaz Gigapixel AI. Both are useful with reducing noise while preserving sharpness and adding clarity. And today I will show you how.

Cityscape Fireworks

Let’s look at one of my cityscape photos with fireworks. When I capture photos, I prefer to do multiple exposures, so I can blend them later in post-processing. Unfortunately, this does not work that well with fireworks. So, there are two ways I can approach it: I either take separate photos of the scenery before the fireworks and blend them in, or I just work with a single exposure and try to make the best of it. Over the years, I’ve settled on the second option.

Working with only one exposure creates some other issues though, namely noise. Since you can’t predict the brightness an explosion will create in a scene, you will end up with a lot of underexposed photos. You don’t want to overexpose, since you can’t easily fix overexposed areas. What I like to do is double-process the photo: I create a copy of its RAW file and process it once for the highlights and once for the shadows. Then, I put them back together in Photoshop.

Let’s look at a photo to understand it better.

Fireworks in Budapest

Base RAW Image (Click to view at 100%)

This fireworks photo was taken in Budapest, Hungary, during the St. Stephens celebrations there. It’s the biggest holiday in the country and always ends with huge fireworks over the Danube River.

This is the base RAW image I captured. As you can see, while the fireworks look a bit overexposed, the foreground feels dark. So, let’s break it into two files and edit them both.

(Click to view at 100%)

The photo above is edited for highlights, where I toned down the bright areas a bit.

The photo below is edited for shadows, where I opened the dark areas a lot. 

(Click to view at 100%)

Now I can put them into layers in Photoshop and using luminosity selections, I select the shadow areas and paint in the brighter version.

(Click to view at 100%)

While I won’t focus on this technique here, you can find a detailed description on my blog.

I also did a few tweaks to open the shadows even more. One thing I like to do in photos like this one is to brighten the lightest areas of the fireworks, to make them stand out even more.

Now it’s time to fix a few issues that were introduced with this post-processing. Since we had to brighten the shadow areas, they now have much more noise than the rest of the photo. This can be fixed by using Topaz DeNoise AI. We can either use it on the whole photo or just on the parts where it’s mostly visible.

Noise Reduction with Topaz DeNoise AI (Click to view at 100%)

Let’s open the image in the Topaz DeNoise AI plug-in. The automatic processing worked quite well here, but let’s also manually move the Remove Noise slider to 0.25 to get rid of a bit more. I like it when the clouds and smoke in the sky feel soft, so I want to remove the graininess that was created during editing.

Below is a comparison of the results of DeNoise AI in multiple areas of the photo. All examples are at 200% zoom. It looks good, so I will keep it for the whole photo as it is.

(Click to view at 100%)

We need to save the photo in Photoshop before moving on to the next step. Let’s save it as a TIFF file, as a copy, and without layers.

Now, let’s add some clarity in the photo. While Topaz Gigapixel AI is an image enlargement solution, and not specifically designed for this task, it can be used in this way. What we want to do is use oversampling here. Basically, we’ll enlarge the photo using Topaz Gigapixel AI, and then scale it back down in Photoshop.

I open it in Gigapixel AI and enlarge it by the 4x multiplier.

Photo enlarging in Topaz Gigapixel AI (Click to view at 100%)

The other settings can stay as they are since they will have little effect when we return the photo to its original size. But if your photo is a little out of focus, or the camera moved while you were taking it, you can try and use a higher setting for the Remove Blur option. Click “Start” to begin the image enlargement processing.

Once the process ends, I open the result back into Photoshop. The original photo’s width was 5,161 pixels. The new one is 22,000 pixels (that’s the limit for a TIFF file). This can now be resized in Photoshop back to the original 5,161 pixels to get our clearer result.

Resizing in Photoshop (Click to view at 100%)

Below are a few specific areas of the photo to see it before and after. All of these are at 200% zoom. As you can easily see, the details are much better, and the overall clarity has been greatly enhanced. Since Topaz DeNoise AI also adds a bit of clarity, you can see their cumulative effect. 

(Click to view at 100%)

We don’t need to use this on the whole photo, with areas where there are no details — we don’t need more clarity. If we just overlay the result with the original edit, we can use masking to apply it only to the areas where it is needed.

Clean Up in Photoshop (Click to view at 100%)

We are almost done here, except for a little cleanup. The trees in the top left and the light streaks in the bottom left have to be removed, together with few dust spots. Once it’s done, we have our final, enhanced and improved result below.

Final Result (Click to view at 100%)

You can drag the interactive, white slider bar across the image to see the improvements.

Editing Workflow

This way of post-processing works on most cityscape and similar photos. Usually, with cityscape photos, you have bright areas (e.g. artificial lights, windows, sky) and many dark shadow areas. Either by splitting one RAW into multiple images, or by having taken multiple exposures, you can properly expose both. By putting them together, you will create a nice, evenly-exposed photo that you can then reduce noise with Topaz DeNoise AI and add clarity with Topaz Gigapixel AI. I prefer my photos to look perfect at any size and this workflow allows me to achieve that.

Here is one more example below, where I used Topaz DeNoise AI and Topaz Gigapixel AI. You have here a full image and then a few before/after detail shots.

(Click to view at 100%)

About Miroslav Petrasko

While I started as a game designer, I switched to photography around 10 years ago. Since then I have been working with various luxury travel brands and almost daily and stubbornly updating my blog at hdrshooter.com with new photos, articles, and guides. It really is not an easy task.

Let’s end with a few more cityscapes. The first one is from my hometown of Bratislava in Slovakia. The other ones are: a sunset in Paris, France, looking up under the Burj Khalifa in Dubai, UAE, then one from Nur-Sultan in Kazakhstan and lastly, the Charles Bridge in Prague, Czech Republic.

Previous slide
Next slide

Get the Topaz Applications Featured

Topaz DeNoise AI

Shoot anywhere in any light with no reservations. Eliminate noise and recover crisp detail in your images with the first AI-powered noise reduction tool.
TRY IT NOW

Topaz Gigapixel AI

Enlarging your image without losing detail has always been impossible… until now. Upscale your photos by up to 600% while perfectly preserving image quality.
TRY IT NOW