Improved color and tone processing for RAW and DNG files – When available, DeNoise AI will apply a camera-specific color profile as well as provide improved overall color accuracy.
Improved metadata support – DeNoise AI now supports reading Canon CR3 and HEIC metadata
Performance and UI improvements – Several bug fixes and minor visual changes for a better user experience
Better RAW color and tone processing
We’re moving forward towards providing more accurate color and tones when loading your RAW and DNG files in DeNoise AI.
Now, when you open a RAW or DNG file in DeNoise AI v3.2 as a standalone app (as opposed to loading it as a plugin via Adobe Lightroom or Photoshop), we will apply the appropriate DCP camera profile if available as well as an improved tone curve, resulting in a more accurate version of your photo with better color accuracy. You also have the option to disable this setting.
And this is just the beginning. We’re working on even more ways to improve RAW handling and color accuracy in DeNoise AI.
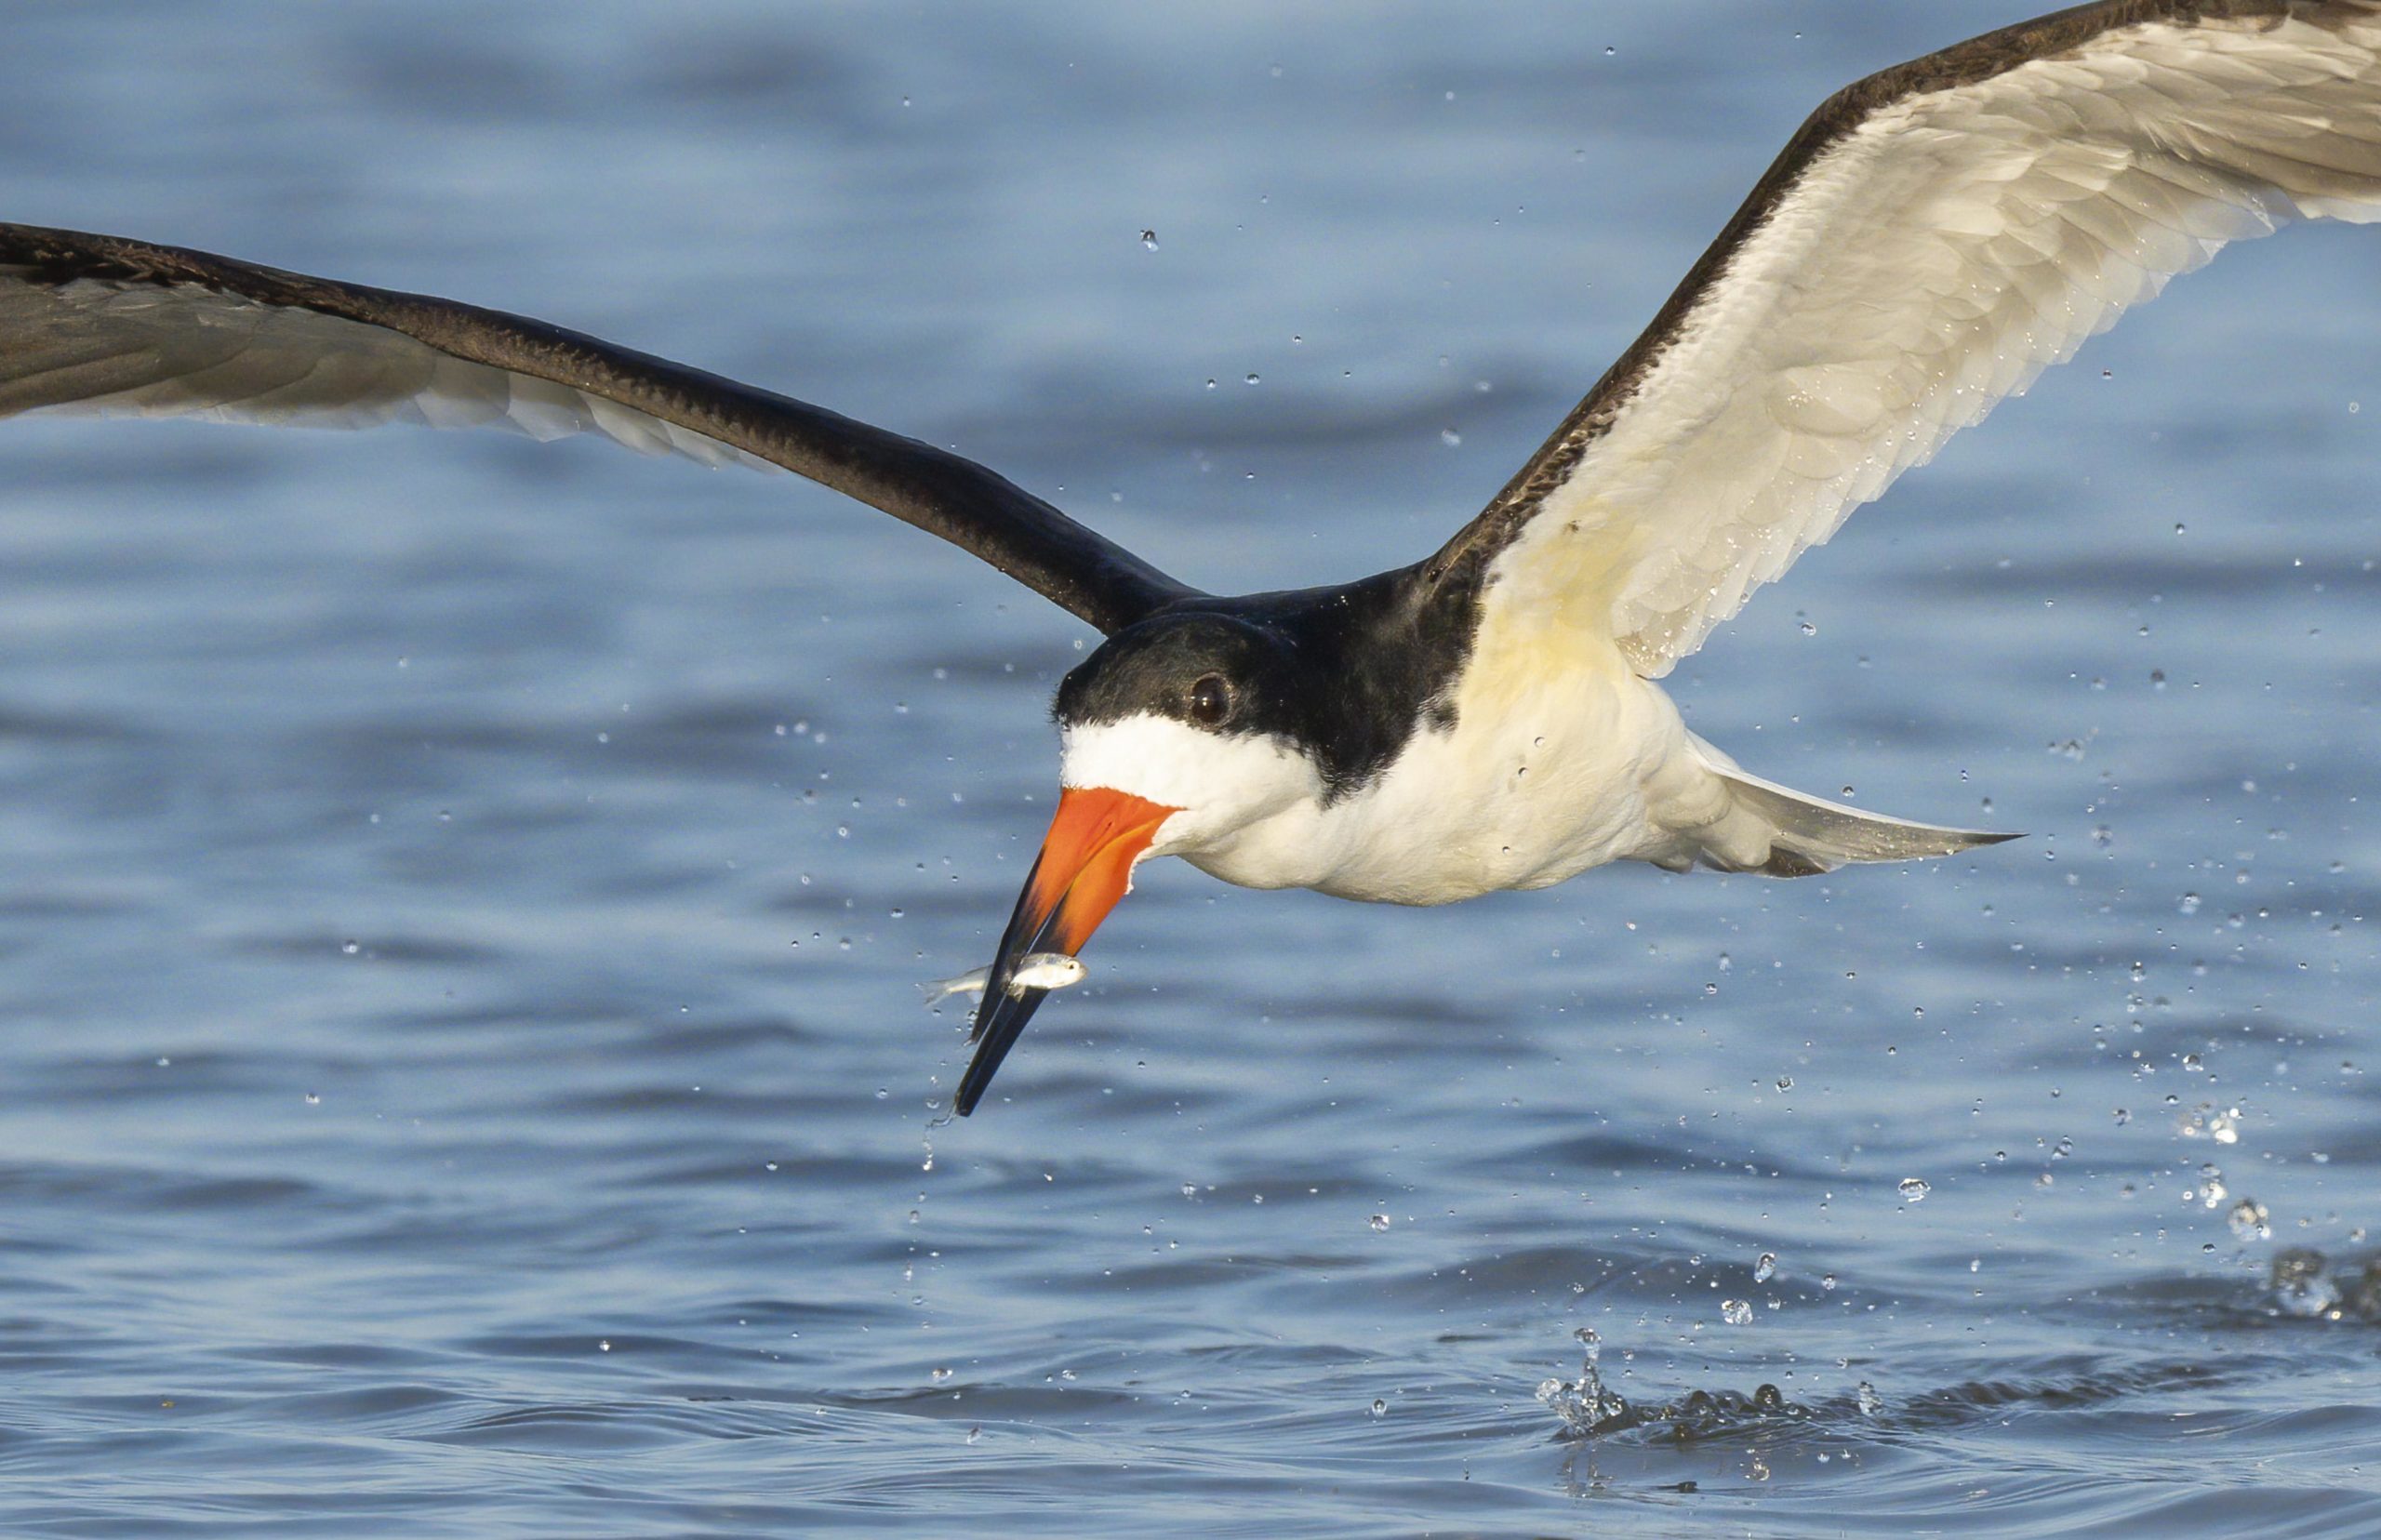
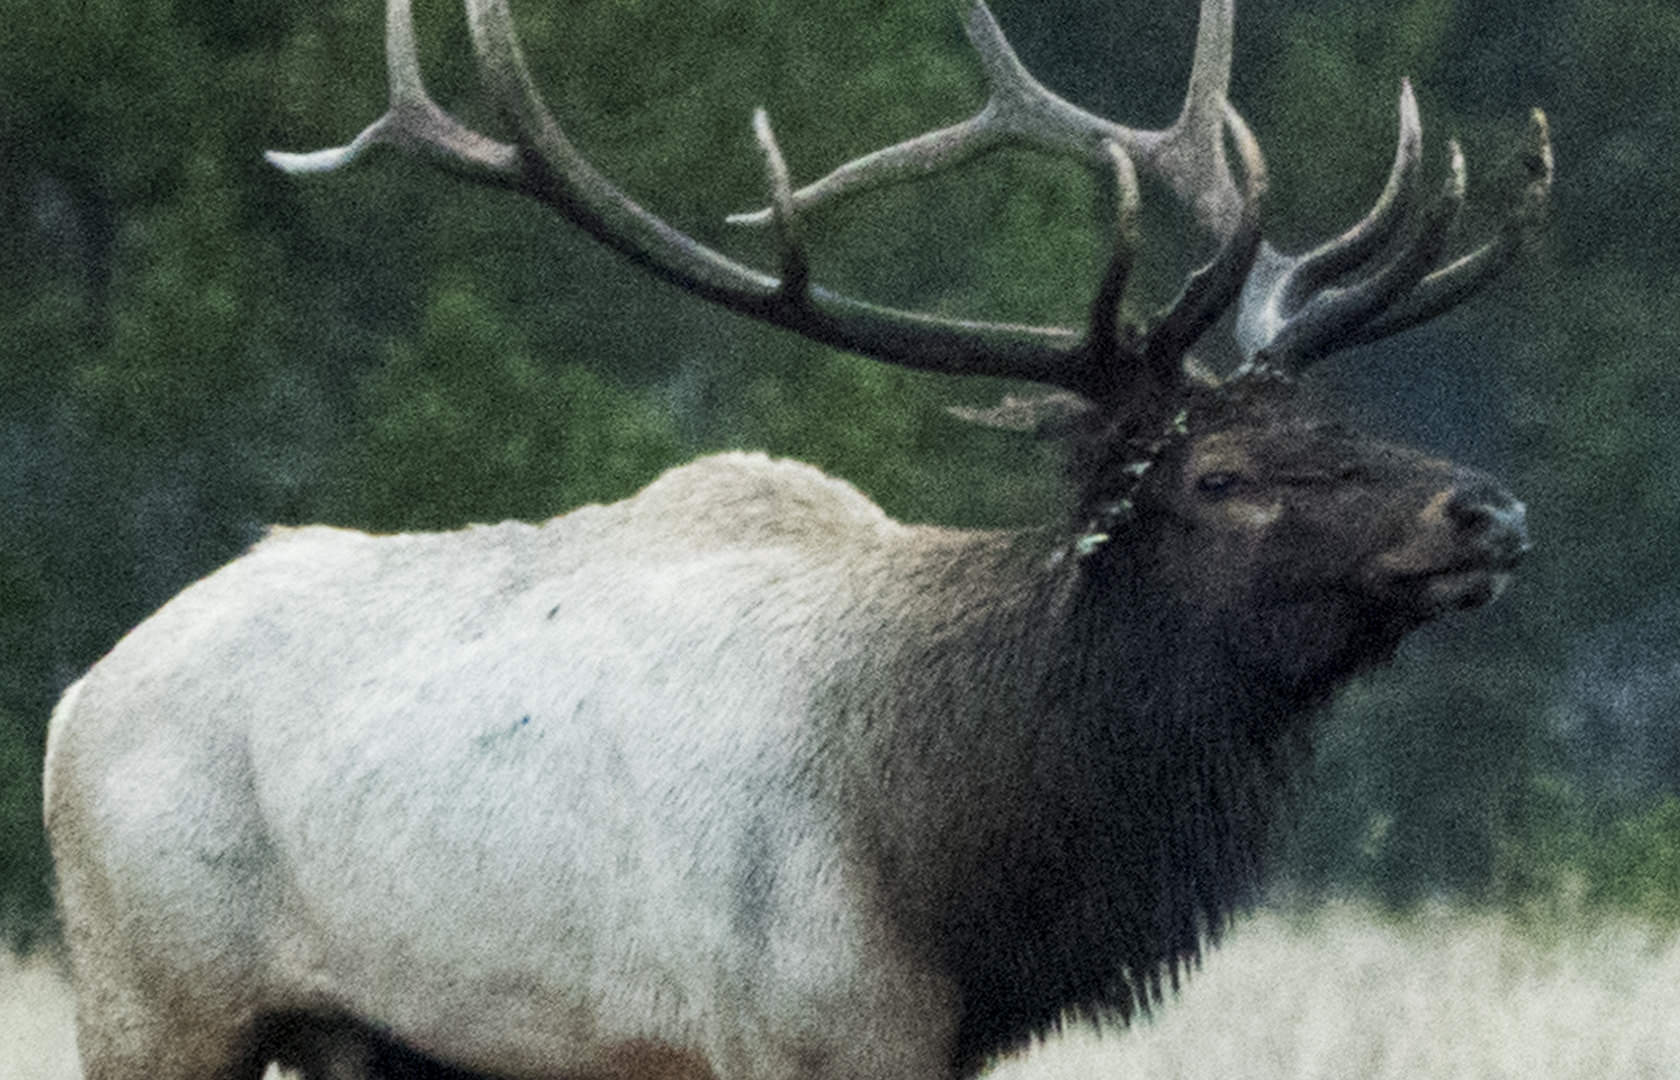
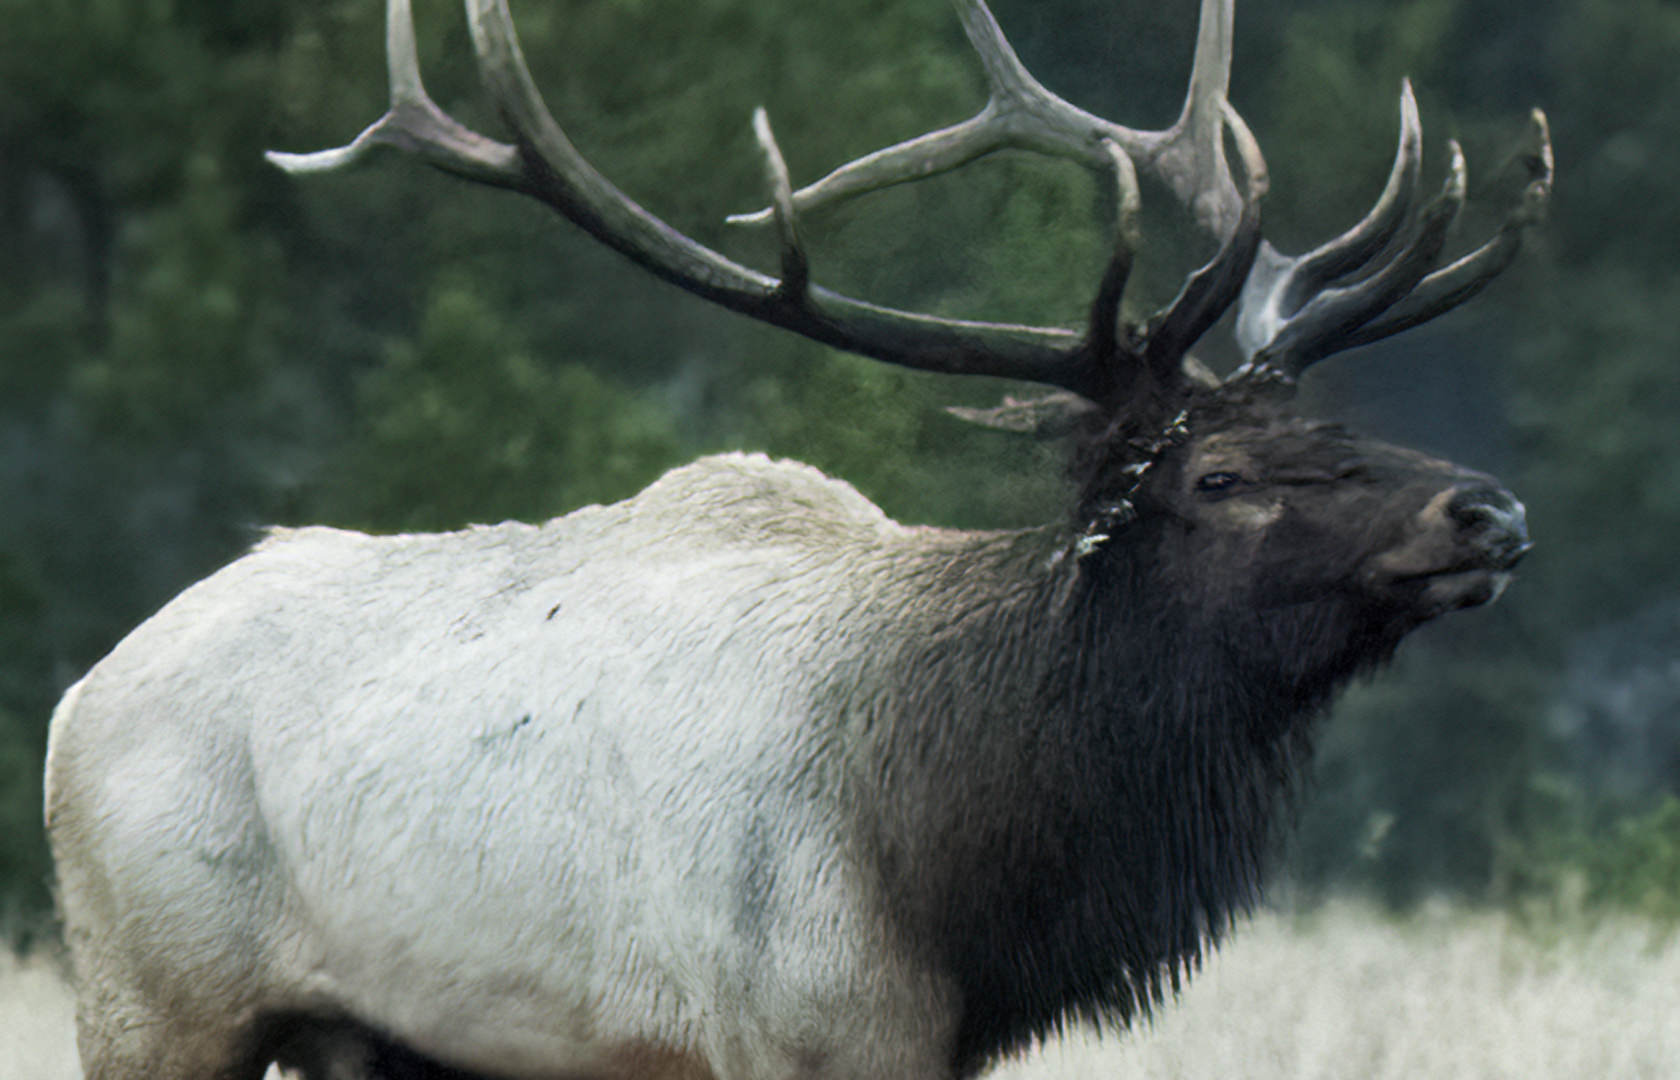
Here are some photos illustrating the color and tone improvements when opening RAW and DNG files in DeNoise AI v3.2 as a standalone app.
Improved file support and performance improvements
In addition to improving RAW color accuracy, we’ve also added support for reading Canon CR3 and HEIC metadata, making DeNoise AI even more versatile for a wider range of cameras. You’ll also get a better user experience thanks to several bugfixes and performance improvements.
If you’ve never tried DeNoise AI, download our free trial today and experience it for yourself!
New Chronos AI model for frame rate conversion – Easily adjust motion in your clips by slowing them down by up to 2000%. Convert the frame rate of your source footage to conform to your project requirements (e.g. 23.97 fps → 30 fps) or add even smoother motion by converting to higher frame rates (e.g. 60 fps or 120 fps)
New Proteus AI model for fine-tuned enhancement control – Get even more control over the output quality of your clips with six customizable sliders. New controls help reduce halos from over-sharpening, recover lost detail due to compression, and minimize aliasing that can result in less sharp footage.
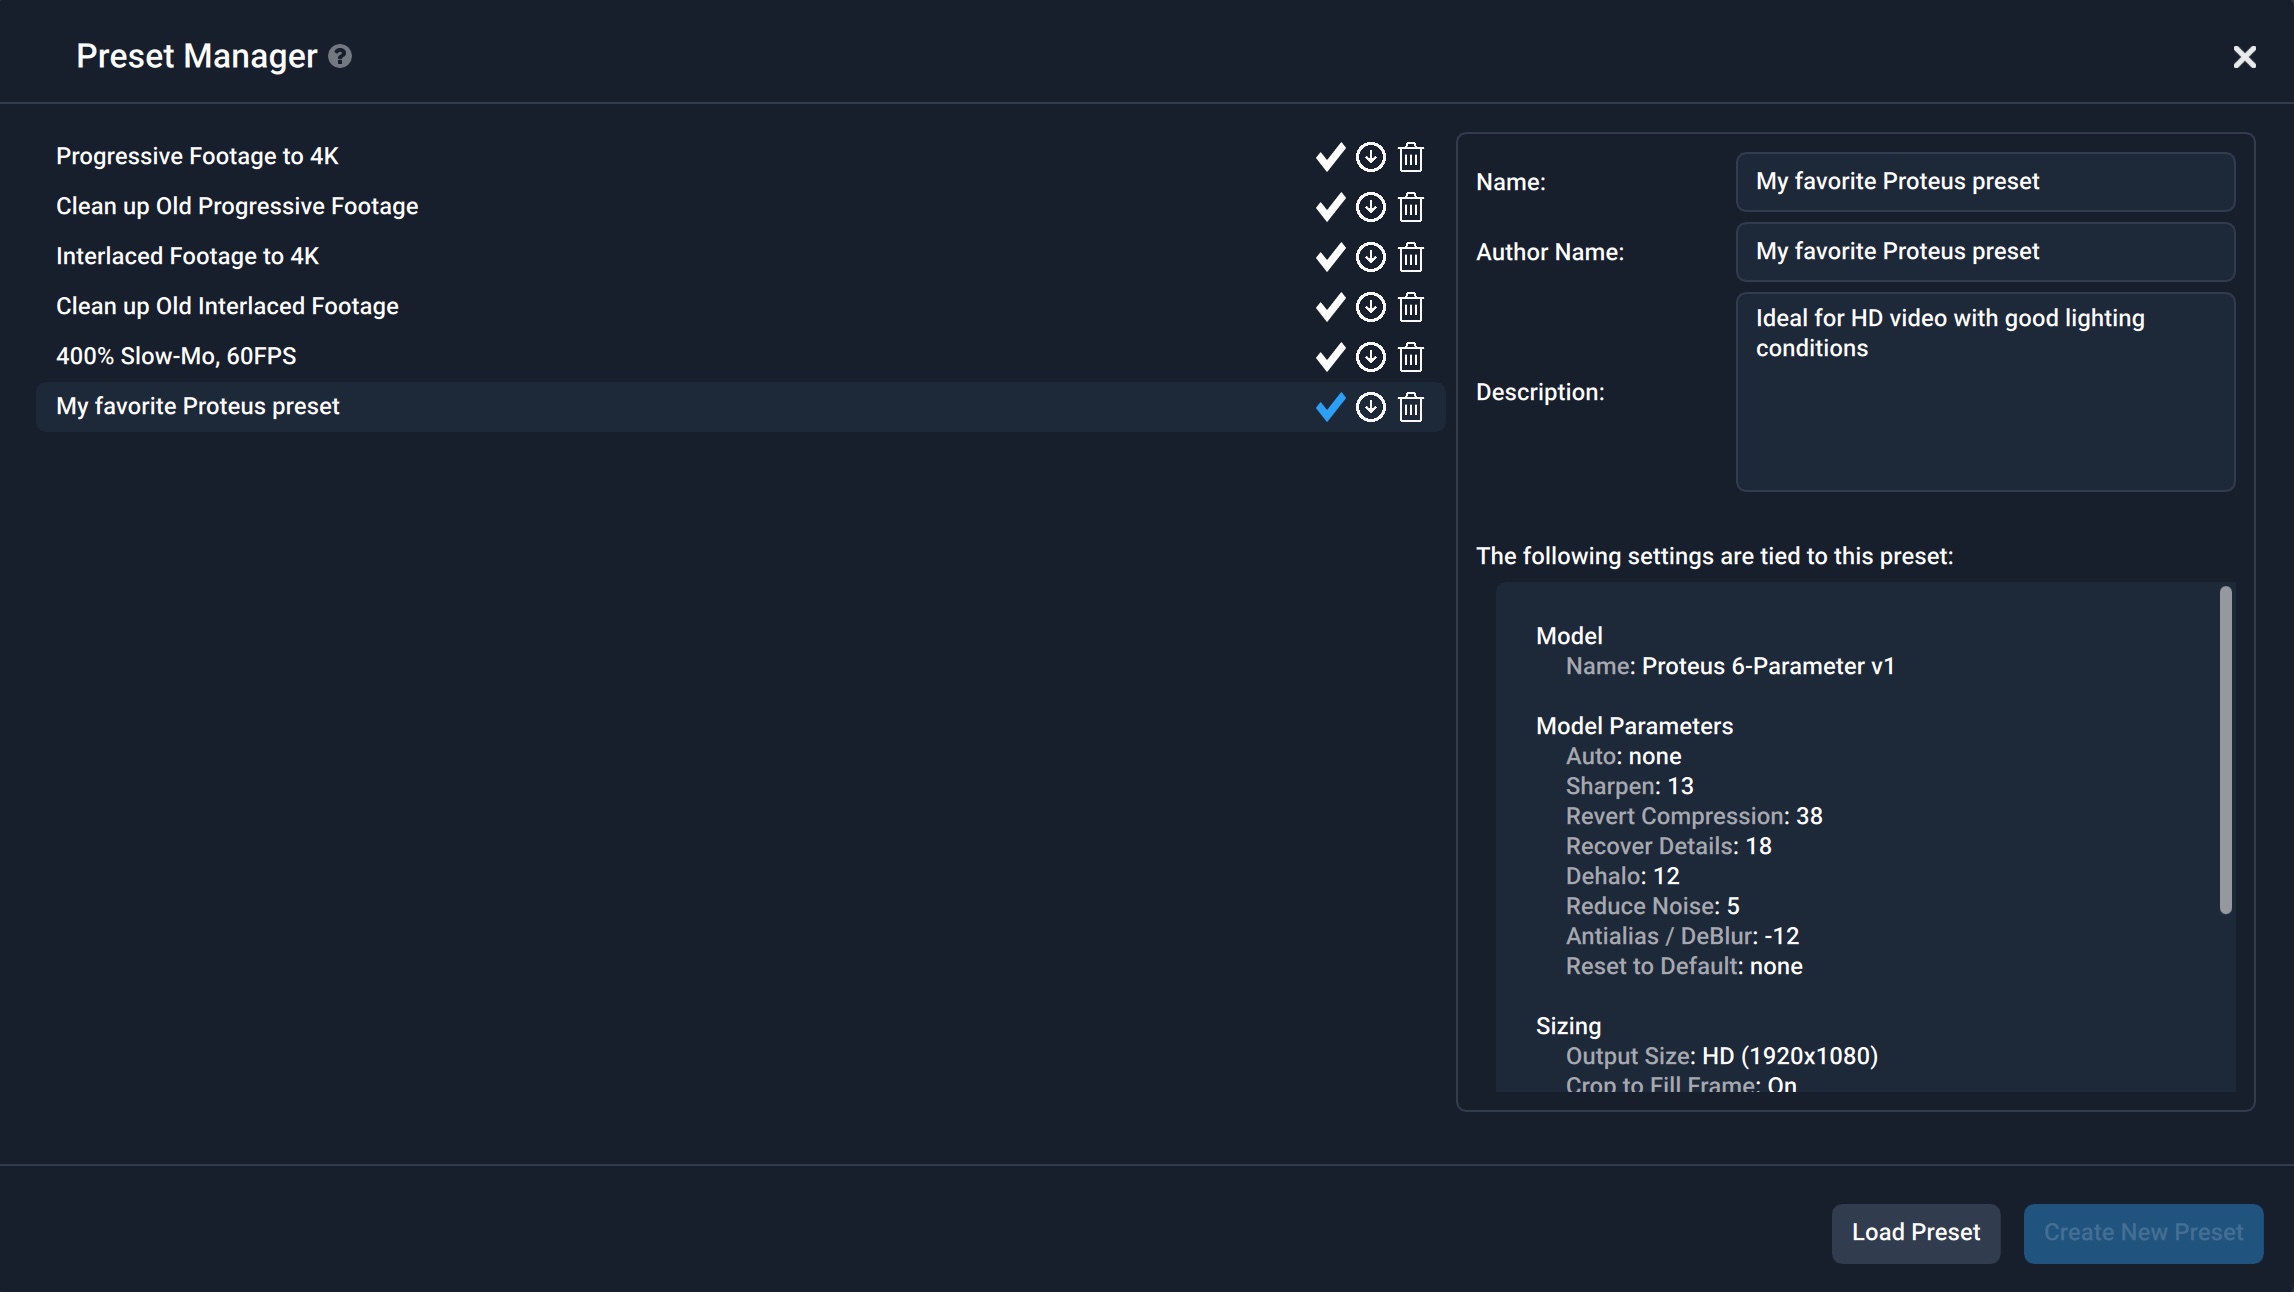
New presets manager – Save and load specific settings for the AI models you use most. Download, share, and import presets with other Video Enhance AI users.
AI model picker – Select the options that best represent your source clip and we’ll provide you with the AI models that can help enhance it.
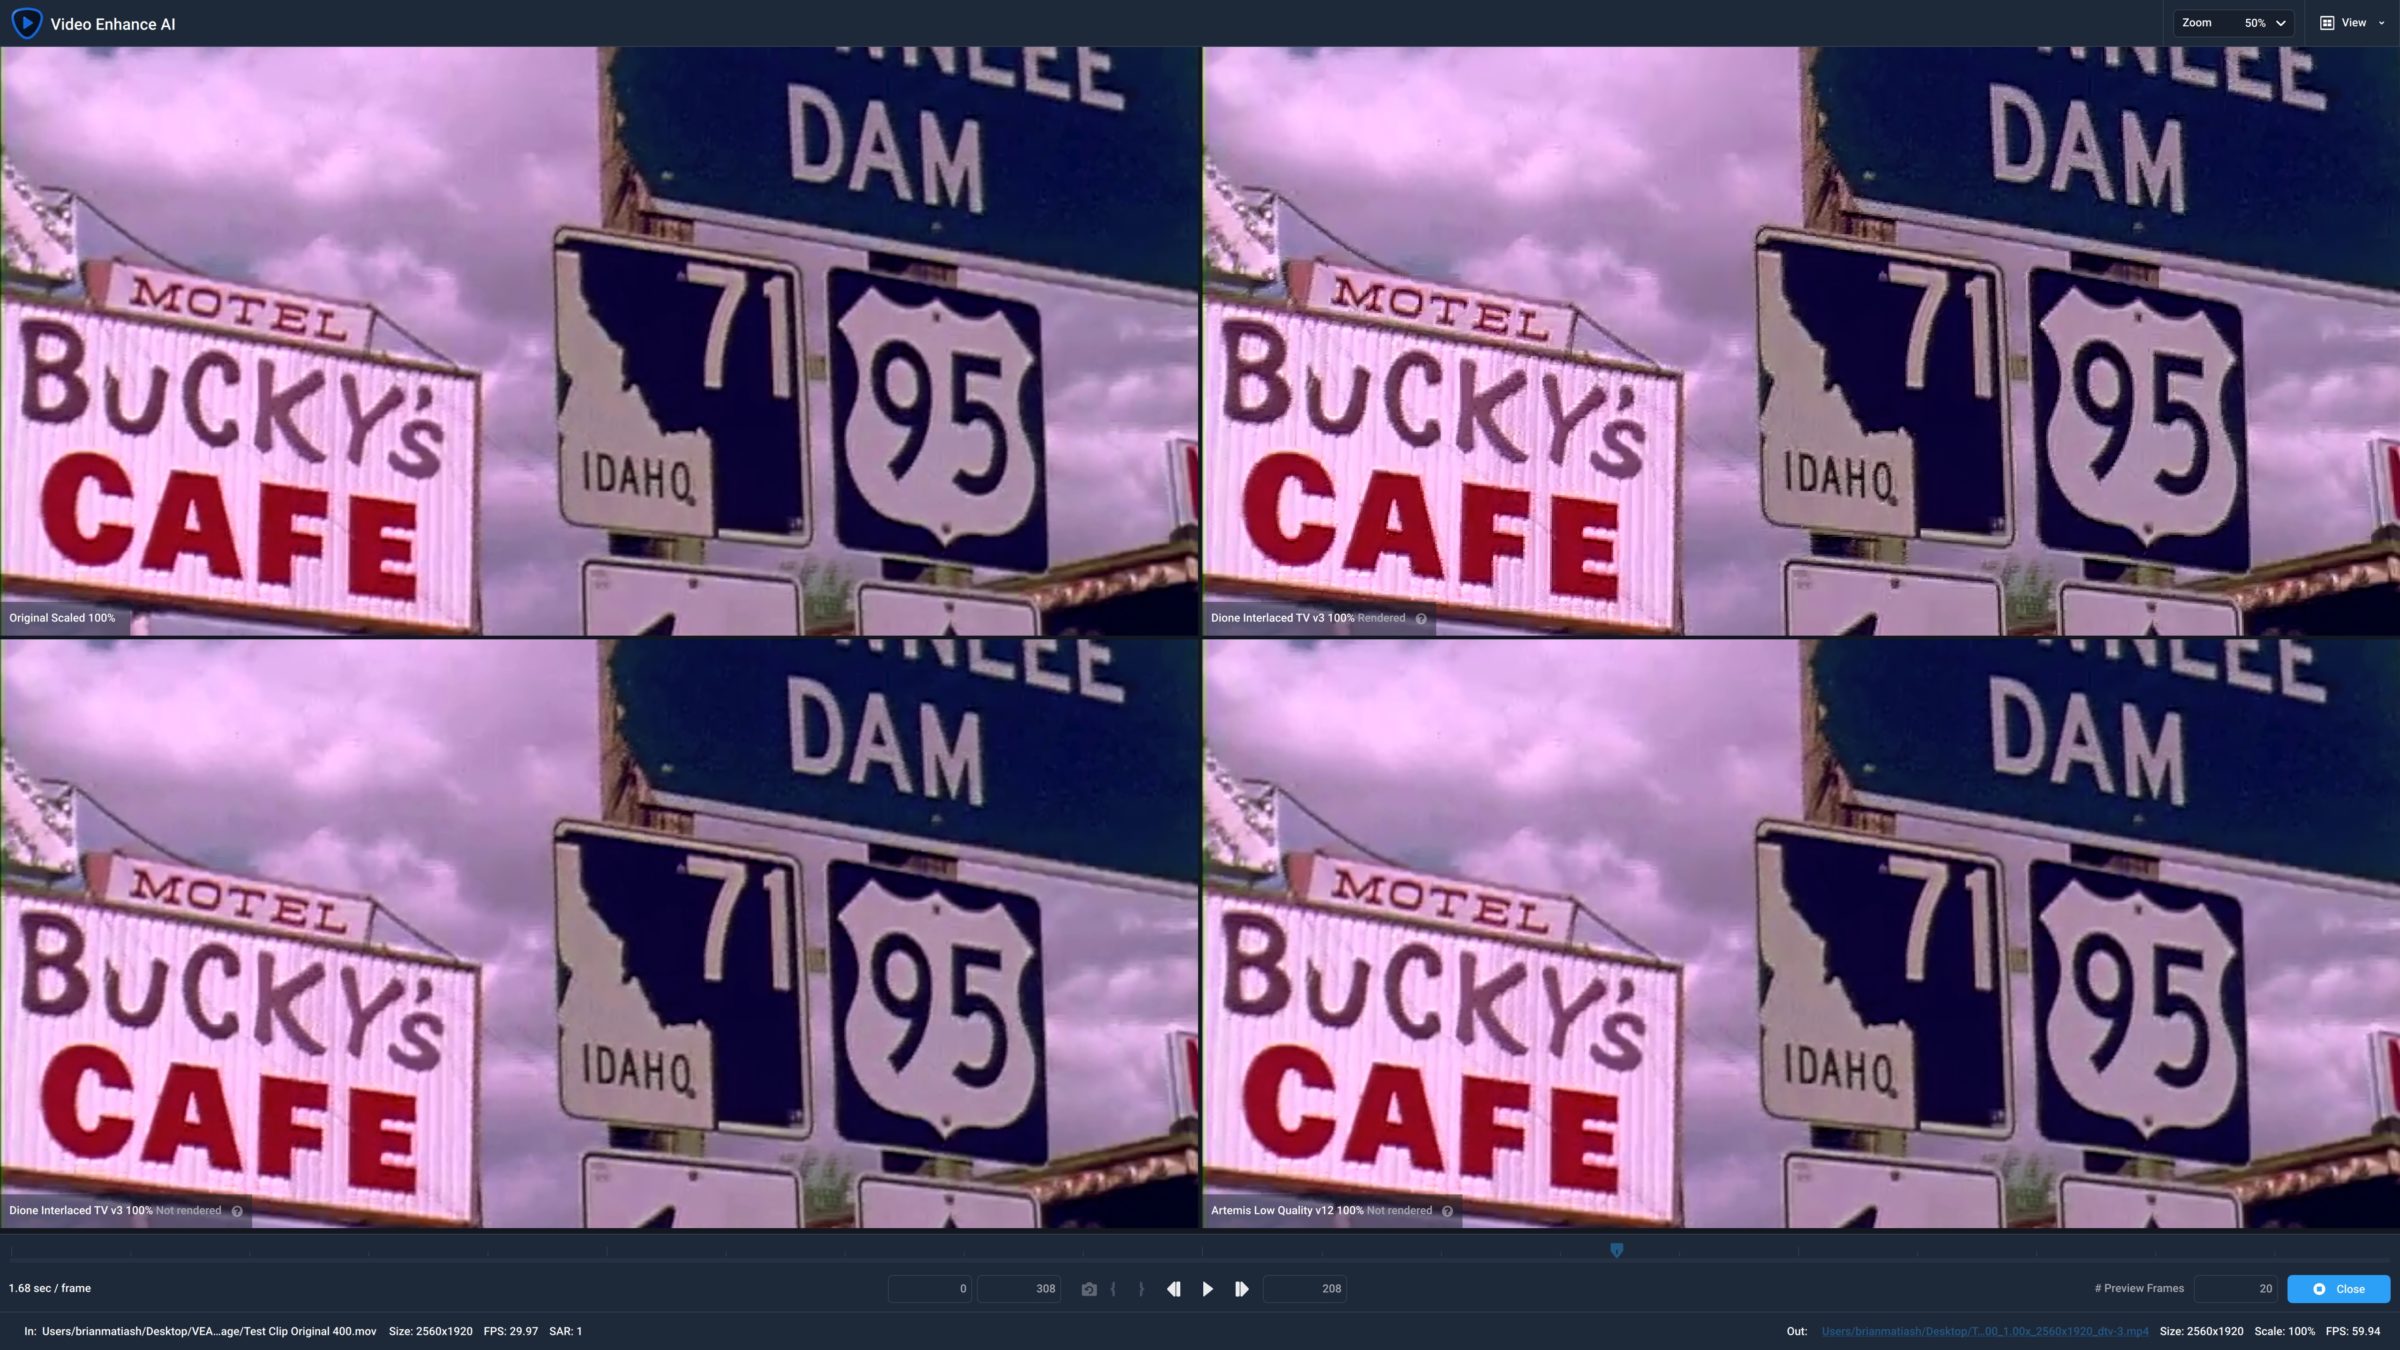
Comparison View – Compare the results of three AI models alongside your original clip in one convenient view. Then select the best one to apply to your footage without changing views.
Performance and usability improvements – We’ve made many improvements to our AI engine for better speed and stability on across a range of hardware, as well as included several helpful usability improvements.
New Chronos AI model for frame rate conversion
Realistic slow motion made easy
With most other video editing applications, slowing down footage from a 24 fps clip would result in distracting stutters and dropped frames. However, Chronos leverages the power of AI to create beautiful slow motion results regardless of the source frame rate.
Watch how to use Chronos to slow down your video, convert frame rate, and learn best practices to ensure you get great results:
Take the guesswork out of frame rate conversion
Working with clips that have varying frame rates is a reality in video editing and the process of conforming them to your project requirements used to be a daunting task. Now, Chronos will take care of the heavy lifting involved with realistically converting the frame rate of your source clips to conform to your project requirements. Adjust a clip’s frame rate to 60, 100, or 120 fps to get even smoother motion blur between frames.
Let’s take a look at how the new Chronos AI model handles frame rate conversion compared to another leading video editing application, Apple Final Cut Pro. The source video was filmed at 24 fps. On the left half of the video below, we let Final Cut Pro convert the original 24 fps clip to 60 fps. Notice the slight jitter, especially when the speed of the UAV increases. For the right half of the video, we used Chronos to perform the same 60 fps conversion. Notice how much smoother the motion is when using Chronos as opposed to Final Cut Pro.
New Proteus AI model for fine-tuned enhancement control
One of the most requested features we’ve received is to provide greater control over how to improve your video clips. The new Proteus AI model was built specifically to meet this request. Control six discrete sliders to fine-tune de-blocking, detail recovery, sharpening, noise reduction, de-haloing, and anti-aliasing. Select the most ideal frame in your clip and click the “Auto” button, letting our AI engine analyze the selected frame and provide recommended settings based on what’s displayed.
New presets manager
Quickly load your favorite AI model settings
If you’ve found yourself constantly having to select the same AI model and settings over and over, you’re going to love the new Preset Manager. Configure the settings of your favorite AI model, save that snapshot as a preset, and quickly load on subsequent projects. Share your favorite presets with other Video Enhance AI users and import presets shared with you.
New AI model picker and comparison view
Choose the right AI models with confidence
It can sometimes be challenging to decide which AI model would work best with your video clip. To make that task easier, we’ve built two helpful features: the AI model selector and the comparison view. With the AI model selector, choose the type of clip you want to enhance and which issue most affects it. We’ll suggest three AI models that are best suited for the task based on your selections. On top of that, a new comparison view conveniently displays those three recommended AI models simultaneously, giving you even more confidence when choosing the best one for your clip.
Performance and usability improvements
Thanks to improvements to our AI Engine pipeline, you’ll experience a 50% performance boost with NVIDIA GeForce GTX GPUs and up to 3x faster on Apple M1 silicon computers. We’ve also included a number of usability improvements directly based on user feedback including displaying the process completion time in “hours:minutes:seconds” instead of just seconds and adding the ability to switch between showing frames and timecodes in the UI.
We’re constantly striving to make Video Enhance AI smarter and more effective when improving the quality of your video footage, whether it’s bringing out details from your old family videos, upscaling a Zoom video recording, or adjusting the resolution, speed and frame rate of cinematic footage. Be sure to tag us on social media and use #TopazVEAI so that we can see your amazing work! If you don’t yet own Video Enhance AI, purchase a copy or download a free trial.
New Severe Noise AI model – tackle photos suffering from excessive noise due to very high ISO settings and low light conditions
Improved Comparison View – Select which AI models are displayed to quickly choose the one that best suits your image
Apple M1 plugin support in Adobe Photoshop – Access the DeNoise AI plugin from within Photoshop running natively on Apple M1 silicon without needing to use Rosetta emulation
Snappier performance – Up to 3x CPU and 12x GPU improvements on Windows and 4x improvements with Macs using discrete GPUs when compared to DeNoise AI 2.4.2
You know the feeling you get when you set your camera to ISO 8000 (or higher) and in the back of your mind, you’re sure that the shot you’re about to take is going to be a “throw-away” because of the crazy amount of noise it’ll undoubtedly have? But, you take the photo anyway and can already anticipate the disappointment when you try to get rid of all that noise. Still, you’re really digging the photo despite the excessive noise and, at this point, you’ll gladly try anything to salvage it.
If you can relate, then we think you’ll be very happy about the latest update to DeNoise AI v3.1. We want to help you turn photos that you never thought would see the light of day into something you’ll be excited to share with your family and friends. Let’s take a closer look at what we cooked up.
Making sense of the noise
This photo was taken at ISO 16000 and suffers from excessive noise. With the new Severe Noise AI model, we’re able to isolate and remove that distracting noise while also preserving important edge detail that would otherwise have been lost in other noise reduction apps.
The last thing we want is for you to throw away a photo you really love because it is riddled with excessive noise. It has happened too many times already and we wanted to do something about it. So, we built the Severe Noise AI model for those times when you’re looking for that one Hail Mary to save the day (or just your super-noisy photo).
The first challenge is learning which photos work best with Severe Noise. Unlike Low Light, our other high ISO AI model, Severe Noise works best on images that suffer from an extremely large amount of noise. Typically, photos taken at ISO 6400 and higher will have an excessive amount of noise that can negatively affect the end result.
Next, we had to figure out how to remove both the luminance and color noise that typically affects super high ISO photos without obliterating the natural edge details of your subjects. So, we fed our AI models with thousands of super noisy photos, letting it learn to identify the signal from the noise.
Our hope is that with this new AI model, you’ll be able to recover all sorts of photos previously overlooked due to excessive noise.
A new way to compare AI models
Sometimes, it can be hard to see the effects that each of the four AI models in DeNoise AI have on your photos when switching between them. That’s where Comparison View comes in. We built it to quickly show you the results of multiple AI models in one convenient view. When you can see multiple AI models at once, it’s that much easier to decide which one works best with your photo.
Remarkable intelligent noise reduction
We’re constantly striving to make DeNoise AI smarter and more effective in removing noise based on the specific need of your photos. Since 2018, we’ve made more than 100 new or substantially improved AI models for image quality and they’re only going to get better. We’re really excited to see how you use DeNoise AI to make your photos look their best. Be sure to tag us on social media and use #DeNoiseAI so that we can see your amazing work! If you don’t yet own DeNoise AI, purchase a copy or download a free trial.