Posted on

How to Use the Precision Contrast Adjustment

How to use the Precision Contrast Adjustment

What is Precision Contrast?

The Topaz Studio Precision Contrast Adjustment is very different than your typical contrast slider. Before I was introduced to this awesome contrast tool, I thought all contrast tools were the same (silly me). Before we get into what’s so awesome about the Precision Contrast Adjustment, let’s talk about the typical contrast tool.

Contrast tools make your darks darker and your lights lighter to create a higher contrast between shades in an image. The problem with most contrast tools is it is always a balancing act. You are either blowing out highlights or crushing shadows, since a contrast tool adjusts both your darks and lights of the overall image. So if areas become overdone, you have to do some complicated masking and multiple layers to get a satisfactory result. That’s also another problem, the results are never wow…just good enough.

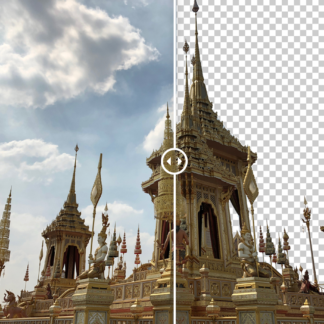
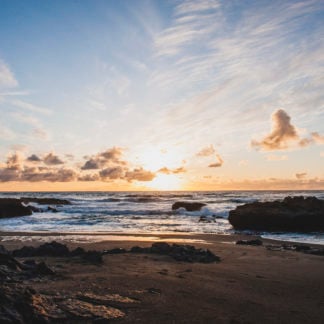
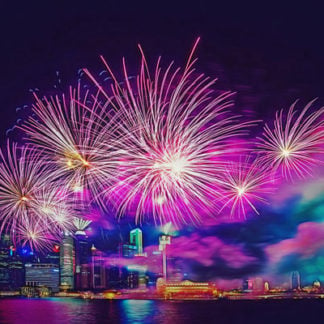
The Precision Contrast Adjustment features four unique contrast sliders that allow independent control of varying details in your image. The algorithm analyzes your image and categories details as either micro, low, medium, or high contrast. These four sliders then allow you to adjust each one independently of one another. I especially like this functionality because it allows me to bring out the details of clouds or water ripples without also amplifying background details. Another extremely unique quality of the Precision Contrast Adjustment is no matter how strong of an effect you add, there is zero artifacts or halo. It creates a completely natural effect. I think of Precision Contrast like the salt of cooking. It perfectly enhances what’s already there and you should always add at least a little bit to everything you are working on.[/vc_column_text][vc_row][vc_column][vc_empty_space][vc_column_text]

Free Download

[/vc_column_text][vc_empty_space height=”15px”][vc_column_text]The Precision Contrast Adjustment is available within Topaz Studio as a Pro Adjustment. While Pro Adjustments are not free, Topaz Studio is completely free and there are limited functionality within the Precision Contrast Adjustment that is completely free. You can also try all the unlocked functionality for 30 days, completely commitment free. If you’d like to follow along with the Precision Contrast Adjustment, you can click the links below to download Topaz Studio.[/vc_column_text][vc_empty_space height=”15px”][vc_row_inner][vc_column_inner width=”1/2″][vc_btn title=”Windows” shape=”square” color=”primary” align=”center” button_block=”true” link=”url:https%3A%2F%2Fopen_beta.s3.amazonaws.com%2Ftopazstudio_online_installer.exe|||”][/vc_column_inner][vc_column_inner width=”1/2″][vc_btn title=”Mac” shape=”square” color=”primary” align=”center” button_block=”true” link=”url:https%3A%2F%2Fopen_beta.s3.amazonaws.com%2Ftopazstudio_online_installer.dmg|||”][/vc_column_inner][/vc_row_inner][/vc_column][/vc_row][vc_row][vc_column][vc_empty_space][vc_column_text]

What We Will Cover in This Tutorial

[/vc_column_text][vc_empty_space height=”15px”][vc_column_text]1. About Precision Contrast

2. How to Apply an Adjustment

3. How to Apply and Tweak an Adjustment Level Preset

4. How to Create Your Own Effect

5. How to Mask an Effect

6. How to Save an Effect[/vc_column_text][/vc_column][/vc_row][vc_row][vc_column][vc_empty_space][vc_column_text]

Reading not your Thing? Watch the full Tutorial!

[/vc_column_text][vc_column_text]Feel free to watch me work through all the features the Precision Contrast Adjustment has to offer. Every step outlined in this blog post is demonstrated in this video as well as the gallery images at the end of this posting. Hope you enjoy it![/vc_column_text][vc_empty_space height=”15px”][vc_video link=”https://www.youtube.com/watch?v=D9ZnojcrFn0″ align=”center”][vc_empty_space][/vc_column][/vc_row][vc_row][vc_column][vc_column_text]

1. What Makes up the Precision Contrast Adjustment?

[/vc_column_text][vc_row_inner][vc_column_inner width=”2/3″][vc_empty_space height=”15px”][vc_single_image image=”46522″ img_size=”large” onclick=”link_image”][/vc_column_inner][vc_column_inner width=”1/3″][vc_empty_space][vc_empty_space][vc_empty_space][vc_column_text]We have wrapped all of our technology into easy to use sliders, so achieving the perfect contrast is so simple. After you apply the Precision Contrast Adjustment, you will see this 8 slider panel pop up in the adjustments panel (If you don’t, click the blue Try Pro link at the bottom of the panel). The first four sliders control the contrast of your image, the color slider affects the micro-contrast color, and the last three are traditional brightness, shadow and highlight sliders to ensure you have the perfect combination of lighting and contrast.[/vc_column_text][/vc_column_inner][/vc_row_inner][vc_empty_space][/vc_column][/vc_row][vc_row][vc_column][vc_column_text]

Breakdown of the Sliders

[/vc_column_text][vc_row_inner][vc_column_inner width=”1/4″][vc_empty_space height=”15px”][vc_single_image image=”46547″ img_size=”large”][/vc_column_inner][vc_column_inner width=”3/4″][vc_column_text]1. Micro:
This slider is great for enhancing very minute differences in contrast. Slight ripples, light clouds or smoke, and hair can be enhanced using this slider.

2. Low:
This slider enhances small differences in contrast, about twice the value of the Micro slider. The low detail slider works great for larger waves, storm clouds, trees, and textures.

3. Medium:
This slider enhances larger details. The Medium slider is great for adjusting images that feature natural elements like rocks, trees, or other organic material that have a heavier contrast.

4. High:
This slider enhances the highest of contrasts in images and is perfect for editing the darkest areas.

5. Color:
Sometimes, when adjusting contrast, color can be lost in small details. The Color slider selectively brings back those colors without affecting larger details of the image.

6. Brightness:
Easily update the overall image brightness by adjusting the Brightness slider.

7. Shadow:
Selectively manipulate shadows and dark tones within any image with the Shadow slider. Lighten all the shadows within an image by increasing the value of the slider or darken shadows and lowlights by decreasing the value. Any adjustment made will only affect the darker image tones and shadows.

8. Highlight:
Darken all the highlights within an image by decreasing the value of the slider or increase the brightness of highlights by increasing the value. The adjustment will only selectively affect the lightest areas of the image.[/vc_column_text][vc_empty_space][/vc_column_inner][/vc_row_inner][vc_empty_space][/vc_column][/vc_row][vc_row][vc_column][vc_column_text]

2. How to Apply the Precision Contrast Adjustment to an Image

[/vc_column_text][vc_empty_space height=”15px”][vc_row_inner][vc_column_inner width=”2/3″][vc_empty_space height=”15px”][vc_single_image image=”46509″ img_size=”full” alignment=”center”][/vc_column_inner][vc_column_inner width=”1/3″][vc_column_text]First things first, you’ll want to open an image. If this is your first time opening Topaz Studio, you’ll notice that there is a lot of empty fields. This is because you’ll need to open an image to get started! There is more than one way that you can open an image .

  1. Drag and drop an image from your computer into the program.
  2. Click Open (located in the Canvas) and navigate through your files. Select an image and click Open.
  3. Click Open in the menu bar. Select an image and click Open.
  4. Go to Menu > File > Open Image… and then select an image and click Open.
  5. Use your shortcut keys (such as Command O or Control O).

[/vc_column_text][/vc_column_inner][/vc_row_inner][vc_empty_space][/vc_column][/vc_row][vc_row][vc_column][vc_column_text]

Apply the Adjustment to Your Image

[/vc_column_text][vc_row_inner][vc_column_inner width=”2/3″][vc_empty_space height=”15px”][vc_single_image image=”46573″ img_size=”large” onclick=”link_image”][/vc_column_inner][vc_column_inner width=”1/3″][vc_empty_space][vc_empty_space][vc_column_text]After you have successfully opened an image, you will want to apply the Precision Contrast Adjustment. This can be done one of two ways:

  1. Clicking Adjustments > Precision Contrast from the top Menu Bar.
  2. Clicking More > Precision Contrast from the Adjustment tool bar located on the right-hand side of your workspace.

[/vc_column_text][/vc_column_inner][/vc_row_inner][vc_empty_space][/vc_column][/vc_row][vc_row][vc_column][vc_column_text]

Familiarize yourself with the Adjustment

[/vc_column_text][vc_column_text]Don’t be afraid to play around with all the sliders. I can tell you all day how awesome this adjustment is and what it can do, but you aren’t going to see the true power of the Precision Contrast Adjustment until you play with it for yourself. Move the sliders around and see how each one affects your image. There is unlimited undo and redo if you ever need to use it![/vc_column_text][vc_empty_space][/vc_column][/vc_row][vc_row][vc_column][vc_column_text]

Select a Preset

[/vc_column_text][vc_row_inner][vc_column_inner width=”2/3″][vc_empty_space height=”15px”][vc_single_image image=”46598″ img_size=”large” alignment=”center”][/vc_column_inner][vc_column_inner width=”1/3″][vc_empty_space][vc_column_text]When you click the preset dropdown, you will see 6 presets that were created just for you from Topaz Labs. Each will affect your image differently. For this beach image, I chose Contrast Boost as my starting point. For many images, the presets look great as is. If you feel it’s a little strong for your taste, don’t forget that you can always turn down the opacity of each adjustment to make more subtle edits.[/vc_column_text][/vc_column_inner][/vc_row_inner][vc_empty_space][/vc_column][/vc_row][vc_row][vc_column][vc_column_text]

Step 3: How to Apply and Tweak an Adjustment Level Preset

[/vc_column_text][vc_row_inner][vc_column_inner width=”1/4″][vc_empty_space height=”15px”][vc_single_image image=”46594″ img_size=”large”][/vc_column_inner][vc_column_inner width=”3/4″][vc_empty_space height=”15px”][vc_column_text]Whether you have full functionality or have limited functionality in the Precision Contrast Adjustment, you will always have access to adjustment level presets. You can access the presets by clicking the default menu from within the Precision Contrast Adjustment Panel. I have placed a blue box around the dropdown to the left if you’re having problems locating the dropdown menu. Select the preset that looks best on your image.[/vc_column_text][/vc_column_inner][/vc_row_inner][vc_empty_space][/vc_column][/vc_row][vc_row][vc_column][vc_column_text]

Tweak a Preset

[/vc_column_text][vc_row_inner][vc_column_inner width=”2/3″][vc_empty_space height=”15px”][vc_single_image image=”46598″ img_size=”large” alignment=”center”][/vc_column_inner][vc_column_inner width=”1/3″][vc_empty_space][vc_empty_space][vc_column_text]For being a one-click effect the Contrast Boost Preset does an awesome job, but I would like to customize this to my image. I like to use the presets as inspiration to get me started. I rarely ever just click and leave the adjustment as is. You can completely transform the effect with a little masking and tweaking. The best thing about this approach is I can create a great edit in under 5 minutes. There is no right or wrong way to go about this. Remember photo editing is an art and I strongly believe that art is in the eye of the beholder.[/vc_column_text][/vc_column_inner][/vc_row_inner][vc_empty_space][/vc_column][/vc_row][vc_row][vc_column][vc_column_text]

Perfecting a Preset

[/vc_column_text][vc_row_inner][vc_column_inner width=”1/4″][vc_empty_space height=”15px”][vc_single_image image=”46628″ img_size=”large”][/vc_column_inner][vc_column_inner width=”3/4″][vc_empty_space][vc_empty_space][vc_empty_space height=”15px”][vc_column_text]Here are the changes I made to the Contrast Boost Effect. I just played around with the sliders until I created a result that I liked. This is the technique I use if I’m just wanting to do some pretty simple quick edits. The Precision Contrast Adjustment works as a great cornerstone to add other adjustments on top of. Again, I can’t emphasize enough the importance of just diving in and familiarizing yourself with this adjustment. You’ll find yourself photographing images later and thinking, “the details in this flower is going to look awesome with a touch of micro-contrast from the Precision Contrast Adjustment.”[/vc_column_text][/vc_column_inner][/vc_row_inner][vc_empty_space][vc_column_text]

Here is the before and after:

[/vc_column_text][vc_empty_space height=”15px”][vc_row_inner][vc_column_inner width=”1/2″][vc_single_image image=”46639″ img_size=”large” alignment=”center” onclick=”link_image”][/vc_column_inner][vc_column_inner width=”1/2″][vc_single_image image=”46645″ img_size=”large” alignment=”center” onclick=”link_image”][/vc_column_inner][/vc_row_inner][vc_empty_space height=”15px”][vc_column_text]I love how Precision Contrast was able to really bring out the details in the water and in the shadow area of the landscape. I also like how it didn’t overpower the grassy foreground and take away from the water.[/vc_column_text][vc_empty_space][/vc_column][/vc_row][vc_row][vc_column][vc_column_text]

4. How to Create your Own Effect

[/vc_column_text][vc_empty_space height=”15px”][vc_column_text]For the next part of this tutorial, I’m going to use this cloud image. I love how the Precision Contrast Adjustment has the ability to bring out the details in clouds. If you ever have fog or clouds, I strongly suggest adding a little Precision Contrast. It does an awesome job bringing out details that you didn’t even know were there. It really does an amazing job transforming just ok images into really dramatic ones.[/vc_column_text][vc_empty_space height=”15px”][vc_single_image image=”46648″ img_size=”large” alignment=”center” onclick=”link_image”][vc_empty_space][vc_column_text]

Apply the Precision Contrast Adjustment

[/vc_column_text][vc_row_inner][vc_column_inner width=”2/3″][vc_empty_space height=”15px”][vc_single_image image=”46661″ img_size=”large” alignment=”center” onclick=”link_image”][/vc_column_inner][vc_column_inner width=”1/3″][vc_empty_space][vc_empty_space][vc_empty_space][vc_column_text]Like before, you are going to apply the Precision Contrast Adjustment to the image. This time, we aren’t going to choose a preset from the dropdown menu. We are going to create a custom effect from scratch.[/vc_column_text][/vc_column_inner][/vc_row_inner][vc_empty_space][vc_column_text]

Create a Custom Effect

[/vc_column_text][vc_row_inner][vc_column_inner width=”1/4″][vc_empty_space height=”15px”][vc_single_image image=”46789″ img_size=”large” alignment=”center” onclick=”link_image”][/vc_column_inner][vc_column_inner width=”3/4″][vc_empty_space][vc_empty_space][vc_column_text]I really wanted to bring out the texture in the clouds, so I really cranked up the strength of the adjustment. I don’t like how it looks on the subject of the photograph, but we will address that in the next step! The values I used for the cloud image are to the left.[/vc_column_text][/vc_column_inner][/vc_row_inner][vc_empty_space][/vc_column][/vc_row][vc_row][vc_column][vc_column_text]

5. Masking an Effect

[/vc_column_text][vc_row_inner][vc_column_inner width=”2/3″][vc_empty_space height=”15px”][vc_single_image image=”46803″ img_size=”large” alignment=”center”][/vc_column_inner][vc_column_inner width=”1/3″][vc_empty_space][vc_empty_space][vc_empty_space][vc_column_text]I really liked how dramatic the clouds are after applying the Precision Contrast Adjustment, but I don’t really like how it is impacting the subject of the photo. His skin looks a little weird and I really wanted the clouds to be the focal point. I don’t want as much detail brought out on the rocks, so I’m going to mask this effect out some.[/vc_column_text][/vc_column_inner][/vc_row_inner][vc_empty_space][/vc_column][/vc_row][vc_row][vc_column][vc_column_text]

Click on the Adjustment Level Masking Icon

[/vc_column_text][vc_row_inner][vc_column_inner width=”1/6″][vc_empty_space height=”15px”][vc_single_image image=”46805″ img_size=”medium” alignment=”center”][/vc_column_inner][vc_column_inner width=”5/6″][vc_column_text]Click on the adjustment level masking icon that’s located at the top of each adjustment panel. It is just to the right of the Adjustment name.[/vc_column_text][/vc_column_inner][/vc_row_inner][vc_empty_space][/vc_column][/vc_row][vc_row][vc_column][vc_column_text]

Select Brush Masking

[/vc_column_text][vc_row_inner][vc_column_inner width=”2/3″][vc_empty_space height=”15px”][vc_single_image image=”46806″ img_size=”large” alignment=”center”][/vc_column_inner][vc_column_inner width=”1/3″][vc_empty_space][vc_empty_space][vc_column_text]I didn’t want to completely mask out the Precision Contrast Adjustment on the rocks and subject, so I chose to have my mask density at 0.33. Also, the brush masking has this awesome functionality called edge aware. So there is no need to create the perfect mask, just keep the edge of your subject between the green and red circles and it will do all the heavy lifting for you! It’s so awesome and a great time saver. While I won’t go into depth about our masking, you can read more about Topaz Studio Masking here. Once you are satisfied with your mask, just click done! If you need to tweak the mask at all, you can adjust the density as needed.[/vc_column_text][/vc_column_inner][/vc_row_inner][vc_empty_space height=”15px”][vc_column_text]

Here is the before and after:

[/vc_column_text][vc_empty_space height=”15px”][vc_row_inner][vc_column_inner width=”1/2″][vc_single_image image=”46648″ img_size=”large” alignment=”center”][/vc_column_inner][vc_column_inner width=”1/2″][vc_single_image image=”46829″ img_size=”large” alignment=”center”][/vc_column_inner][/vc_row_inner][vc_empty_space][/vc_column][/vc_row][vc_row][vc_column][vc_column_text]

Saving Your Custom Effect

[/vc_column_text][vc_row_inner][vc_column_inner width=”1/6″][vc_empty_space height=”15px”][vc_single_image image=”46824″ img_size=”medium” alignment=”center”][vc_empty_space height=”15px”][vc_single_image image=”46825″ img_size=”medium” alignment=”center”][/vc_column_inner][vc_column_inner width=”5/6″][vc_column_text]Save and Share Your Effects. I really liked how this effect ended up, so I’m going to save this effect for future use! You can either save the effect as a preset level (top icon) or global effect (bottom icon). Global presets allow you to share your creation with others by selecting ‘Yes’ in the Public field. Your effect will be shared to the entire Topaz Community instantly![/vc_column_text][/vc_column_inner][/vc_row_inner][vc_empty_space][/vc_column][/vc_row][vc_row][vc_column][vc_column_text]

Gallery

[/vc_column_text][vc_column_text]You can apply the same effect quickly and effortlessly by adding your new custom preset level effect to many images and then tweaking it to each individual image. This can be great if you took multiple images in similar light or are wanting to create a series of images that resemble one another. Here are some more before and after images I edited. Thanks for reading and hope you’ve gained a little more understanding of the Precision Contrast Adjustment![/vc_column_text][vc_row_inner][vc_column_inner width=”1/2″][vc_empty_space height=”15px”][vc_column_text]

Before

[/vc_column_text][vc_empty_space height=”15px”][vc_single_image image=”46831″ img_size=”large” alignment=”center”][vc_empty_space height=”15px”][vc_single_image image=”46833″ img_size=”large” alignment=”center”][vc_empty_space height=”15px”][vc_single_image image=”46834″ img_size=”large” alignment=”center”][vc_empty_space height=”15px”][vc_single_image image=”46853″ img_size=”large” alignment=”center”][/vc_column_inner][vc_column_inner width=”1/2″][vc_empty_space height=”15px”][vc_column_text]

After

[/vc_column_text][vc_empty_space height=”15px”][vc_single_image image=”46835″ img_size=”large” alignment=”center”][vc_empty_space height=”15px”][vc_single_image image=”46836″ img_size=”large” alignment=”center”][vc_empty_space height=”15px”][vc_single_image image=”46837″ img_size=”large” alignment=”center”][vc_empty_space height=”15px”][vc_single_image image=”46854″ img_size=”large” alignment=”center”][/vc_column_inner][/vc_row_inner][vc_empty_space][/vc_column][/vc_row][vc_row][vc_column][vc_column_text]

Thanks for Reading!

[/vc_column_text][vc_column_text]That’s all I have for today! That’s all the basic functionality that is contained in the Precision Contrast Adjustment. From using pre-made effects to creating your effects, the Precision Contrast gives you the freedom to edit in the way that works best for you.

We’ll be adding more tutorials and videos so be sure to give us a follow to learn more!

If you’d like to share your images with us, tag us on Instagram with @topazlabs and Twitter with @topazlabs. We’re also on Facebook and YouTube![/vc_column_text][vc_empty_space][/vc_column][/vc_row][vc_row][vc_column][vc_empty_space][vc_column_text]

Free Download

[/vc_column_text][vc_empty_space height=”15px”][vc_row_inner][vc_column_inner width=”1/2″][vc_btn title=”Windows” shape=”square” color=”primary” align=”center” button_block=”true” link=”url:https%3A%2F%2Fopen_beta.s3.amazonaws.com%2Ftopazstudio_online_installer.exe|||”][/vc_column_inner][vc_column_inner width=”1/2″][vc_btn title=”Mac” shape=”square” color=”primary” align=”center” button_block=”true” link=”url:https%3A%2F%2Fopen_beta.s3.amazonaws.com%2Ftopazstudio_online_installer.dmg|||”][/vc_column_inner][/vc_row_inner][/vc_column][/vc_row][vc_row][vc_column][vc_empty_space height=”15px”][vc_separator border_width=”3″][vc_empty_space height=”15px”][vc_column_text]

About Taylor L. Seaton

[/vc_column_text][vc_empty_space height=”15px”][vc_row_inner][vc_column_inner width=”1/6″][vc_single_image image=”8720″ img_size=”medium” alignment=”center” style=”vc_box_circle_2″][/vc_column_inner][vc_column_inner width=”5/6″][vc_empty_space][vc_column_text]Taylor Seaton is a 2016 graduate from Angelo State University. While attending ASU, she obtained her Bachelor of Fine Arts with a concentration in Graphic Design and an area of emphasis in Business Management and Marketing. She also played volleyball at the collegiate level. She is currently the Social Media Manager at Topaz Labs.[/vc_column_text][/vc_column_inner][/vc_row_inner][vc_empty_space height=”15px”][vc_separator border_width=”3″][vc_empty_space height=”15px”][/vc_column][/vc_row]

Posted on 83 Comments

What’s Free in Topaz Studio

[vc_row][vc_column][vc_column_text]

What is Topaz Studio?

Topaz Studio is a fast, flexible, powerful creative toolbox and it’s the next level image editor for photographers.

Topaz Studio is a simple to use editing platform with Topaz Labs’ acclaimed photo enhancement technology. It works as both a standalone editor, a plugin within Lightroom and Photoshop, and a host application for other Topaz plugins which means it works exactly how you want it to. Now there’s no more cumbersome workflows that require you to open multiple plugins to achieve your look!

If you’d like to learn more about Topaz Studio, please check out this Announcement and Overview.


[/vc_column_text][/vc_column][/vc_row][vc_row][vc_column][vc_empty_space][vc_empty_space height=”15px”][vc_column_text]Topaz Studio is an easy to use editing solution built with the photographer in mind and we’re giving it away! Yep, you read that right. You’ll get complete freedom to use Topaz Studio as a plugin, a host editor for all Topaz Labs existing products, 10 free adjustments, comprehensive masking, opacity slider, and blending modes functionality all for free.

And today I’ll be going over everything that comes free with Topaz Studio. Be sure to download it now to follow along and to give it a try to see what it can do![/vc_column_text][/vc_column][/vc_row][vc_row][vc_column][vc_empty_space][vc_column_text]

Free Download

[/vc_column_text][vc_empty_space height=”15px”][vc_row_inner content_aligment=”center” animation_in_type=”transition.slideUpIn” animation_in_offset=”100″ animation_in_duration=”800″ animation_in_delay=”0″][vc_column_inner width=”1/6″ alignment=”center”][vc_empty_space height=”20px”][/vc_column_inner][vc_column_inner width=”1/3″ alignment=”center”][ucaddon_uc_icon_hover_effect_button text=”Macintosh” icon=”fa fa-apple” link=”http://d2xkriaa67cpt4.cloudfront.net/topazstudio_online_installer.dmg” background_color=”#0f9af8″ uc_fonts_data=”JTdCJTdE”][/vc_column_inner][vc_column_inner width=”1/3″][ucaddon_uc_icon_hover_effect_button text=”Windows” icon=”fa fa-windows” link=”http://d2xkriaa67cpt4.cloudfront.net/topazstudio_online_installer.exe” background_color=”#0f9af8″ uc_fonts_data=”JTdCJTdE”][/vc_column_inner][vc_column_inner width=”1/6″][vc_empty_space height=”20px”][/vc_column_inner][/vc_row_inner][/vc_column][/vc_row][vc_row][vc_column][vc_empty_space][vc_column_text]

Before We Get Started…

[/vc_column_text][vc_empty_space height=”15px”][vc_column_text]1. If you’d like to follow along, please download and open up Topaz Studio! You can use the buttons above to download the program for Windows or Mac. You can also head over to the Topaz Studio Website to download or to learn more about the program.

2. Before getting started, please make sure that you have registered an account and are logged in! You may register a new account hereIf you need further assistance, please see this help article.[/vc_column_text][/vc_column][/vc_row][vc_row][vc_column][vc_empty_space][vc_column_text]

Open an Image

[/vc_column_text][vc_empty_space height=”15px”][vc_column_text]When opening Topaz Studio, you’ll notice that a lot of the sections are empty and a lot of options are unavailable. This is because you’ll need to open an image to get started! There are a few various ways to open up an image.

  1. Drag and drop an image from your computer into the program.
  2. Click Open (located in the Canvas) and navigate through your files. Select an image and click Open.
  3. Click Open in the menu bar. Select an image and click Open.
  4. Go to Menu > File > Open Image… and then select an image and click Open.
  5. Use your shortcut keys (such as Command O or Control O).

[/vc_column_text][vc_empty_space height=”15px”][vc_single_image image=”8541″ img_size=”full” alignment=”center”][vc_empty_space height=”15px”][vc_column_text]

Work Sections

[/vc_column_text][vc_column_text]Now that you have an opened image, you’ll immediately see some changes to the sections.

The Effect Panel populates with Featured Effects (left column), the Image Browser now shows opened images (bottom row), and the Scopes Panel (upper right) contains information, which by default will be set to RGB.[/vc_column_text][vc_empty_space height=”15px”][vc_single_image image=”8543″ img_size=”full” alignment=”center”][vc_empty_space height=”15px”][vc_column_text]

Additional Information: Product Tour

[/vc_column_text][vc_row_inner][vc_column_inner width=”1/2″][vc_empty_space height=”15px”][vc_single_image image=”8685″ img_size=”full” alignment=”center” onclick=”link_image”][/vc_column_inner][vc_column_inner width=”1/2″][vc_column_text]If you need a better understanding of the program and the different sections, go to Menu > Help > Product Tour in Topaz Studio. The Product Tour will also appear automatically the first time you launch Topaz Studio.

The Product Tour gives an overview of Sections, Adjustments, Effects, Image Browser, and Masking. If you ever need in this information you can quickly access it within the Topaz Studio.[/vc_column_text][/vc_column_inner][/vc_row_inner][/vc_column][/vc_row][vc_row][vc_column][vc_empty_space][/vc_column][/vc_row][vc_row][vc_column][vc_column_text]

One Click Effects

[/vc_column_text][vc_empty_space height=”15px”][vc_column_text]Effects are always free with Topaz Studio. There are a variety of effects available from Featured and Trending to Darkroom and Portrait. Effects are created by Topaz Studio, photography professionals, and users just like you! There are a variety of ways to search through effects.[/vc_column_text][/vc_column][/vc_row][vc_row][vc_column][vc_empty_space height=”15px”][vc_column_text]

1. Effect Buttons

[/vc_column_text][vc_column_text]The Effect Buttons give you access to a list of Categories and Tags to search for effects quickly and easily. Featured showcases a curated and popular list of Topaz created effects. You can also see everything available by selecting All. This will show you every effect available within Topaz Studio. Browse the effects you’ve made by selecting Mine or your Favorite Effects and Liked Effects by selecting Fav or Like. Trending Effects showcase what’s hot while New Effects shows what’s new. Recent Effects show effects you’ve recently used.[/vc_column_text][vc_empty_space height=”15px”][vc_single_image image=”8555″ img_size=”large” alignment=”center”][vc_empty_space][vc_column_text]

The Program that Grows with You

[/vc_column_text][vc_column_text]A few of the tags change and grow as you use the application. The more effects you create and save, the more that show up under the tag Mine. When you like and favorite effects, they are added to those tag category. All your recently used effects can be found under Recent. These sections change and update with your useage.[/vc_column_text][vc_empty_space][vc_row_inner][vc_column_inner width=”1/4″][vc_single_image image=”8562″ img_size=””][/vc_column_inner][vc_column_inner width=”3/4″][vc_column_text]

Mine

[/vc_column_text][vc_column_text]All the effects you create will be stored under Mine. The more you create, the more that will be shown here! (Shown in Grid View.)[/vc_column_text][/vc_column_inner][/vc_row_inner][vc_empty_space height=”15px”][vc_row_inner][vc_column_inner width=”1/4″][vc_single_image image=”8545″ img_size=””][/vc_column_inner][vc_column_inner width=”3/4″][vc_column_text]

Favorite

[/vc_column_text][vc_column_text]To add effects to Favorite Effects, simply click the heart icon on the preview. When an effect is a favorite of yours, the heart is blue. To unfavorite an effect, simply click the heart icon again.[/vc_column_text][/vc_column_inner][/vc_row_inner][vc_empty_space height=”15px”][vc_row_inner][vc_column_inner width=”1/4″][vc_single_image image=”8546″ img_size=””][/vc_column_inner][vc_column_inner width=”3/4″][vc_column_text]

Liked

[/vc_column_text][vc_column_text]To add effects to Liked Effects, simply click the thumbs up icon on the preview. When an effect is liked by you, the thumbs up icon is opaque. To unlike an effect, simply click the icon again.[/vc_column_text][/vc_column_inner][/vc_row_inner][vc_empty_space height=”15px”][vc_row_inner][vc_column_inner width=”1/4″][vc_single_image image=”8563″ img_size=””][/vc_column_inner][vc_column_inner width=”3/4″][vc_column_text]

Recent

[/vc_column_text][vc_column_text]Recently selected or used effects are stored under the Recent tag. If you ever forget which effect you last used you can locate it here.[/vc_column_text][/vc_column_inner][/vc_row_inner][/vc_column][/vc_row][vc_row][vc_column][vc_empty_space][vc_column_text]

2. More Button

[/vc_column_text][vc_column_text]The More Button, located at the bottom of the Effect Button List, shows a complete list of all available tags. Simply click the More Button to see a full list of all available categories and tags. You can select a style to see all the effects available.[/vc_column_text][vc_empty_space height=”15px”][vc_single_image image=”8570″ img_size=”large” alignment=”center”][vc_empty_space][/vc_column][/vc_row][vc_row][vc_column width=”1/4″][vc_column_text]

3. Search

[/vc_column_text][vc_empty_space height=”15px”][vc_single_image image=”8574″ img_size=”large” onclick=”link_image”][/vc_column][vc_column width=”3/4″][vc_empty_space][vc_column_text]The search bar allows you to search by effect name, tags, and creator name. Type in a keyword and hit the Enter Key to show results.[/vc_column_text][/vc_column][/vc_row][vc_row][vc_column][vc_empty_space][vc_column_text]

View Options

[/vc_column_text][vc_row_inner][vc_column_inner width=”1/6″][vc_empty_space height=”15px”][vc_single_image image=”8485″ img_size=”full” alignment=”center”][/vc_column_inner][vc_column_inner width=”5/6″][vc_column_text]All of the Adjustments are displayed in List View by default. To see more effects at a time, click the Grid View Button. To go back to List View, click the button again.[/vc_column_text][/vc_column_inner][/vc_row_inner][vc_empty_space][/vc_column][/vc_row][vc_row][vc_column][vc_column_text]

Apply the Effect

[/vc_column_text][vc_empty_space height=”15px”][vc_single_image image=”8578″ img_size=”large” alignment=”center”][vc_empty_space height=”15px”][vc_column_text]Once you find an effect that you like, simply click the effect to apply it to your image. The selected effect will have a blue border to indicate that it is active.[/vc_column_text][/vc_column][/vc_row][vc_row][vc_column][vc_empty_space][/vc_column][/vc_row][vc_row][vc_column width=”1/4″][vc_column_text]

Adjustment Stacks

[/vc_column_text][vc_empty_space height=”15px”][vc_single_image image=”8579″ img_size=”large”][/vc_column][vc_column width=”3/4″][vc_empty_space][vc_column_text]Once an effect has been applied to an image, the Adjustment Panel will update to show the Adjustments used to create the effect.[/vc_column_text][/vc_column][/vc_row][vc_row][vc_column][vc_empty_space][/vc_column][/vc_row][vc_row][vc_column width=”1/4″][vc_column_text]

Free Adjustments

[/vc_column_text][vc_empty_space height=”15px”][vc_single_image image=”8590″ img_size=”large”][/vc_column][vc_column width=”3/4″][vc_empty_space][vc_column_text]A free Adjustment will display all the options available for use. You can use a new Adjustment Level Preset, change the sliders to create customized looks, change the Blending Mode, Change the Opacity of the effect, and add adjustment level Masking.[/vc_column_text][/vc_column][/vc_row][vc_row][vc_column][vc_empty_space][/vc_column][/vc_row][vc_row][vc_column width=”1/4″][vc_column_text]

Pro Adjustments

[/vc_column_text][vc_empty_space height=”15px”][vc_single_image image=”8591″ img_size=”large”][/vc_column][vc_column width=”3/4″][vc_empty_space][vc_column_text]A Pro Adjustment also has a variety of free tools. You can use the included Adjustment Level Presets, change the Blending Mode, change the Opacity of the effect, and add adjustment level Masking.[/vc_column_text][/vc_column][/vc_row][vc_row][vc_column][vc_empty_space][vc_column_text]

Try Pro

[/vc_column_text][vc_column_text]You can also try any Pro Adjustment by clicking the Try Pro button. You will be able to use the Adjustment for 30 days, completely free of charge. [/vc_column_text][/vc_column][/vc_row][vc_row][vc_column][vc_empty_space][vc_column_text]

“Can I Use All the Effects… Even the Ones with Pro Adjustments?”

[/vc_column_text][vc_column_text]Of course you can! The Effect is available for you to use. You can update and change any of the Free Adjustments used in the Effect. If there is a Pro Adjustment you can update the Opacity, Blend Mode, Masking, and order of the Adjustments.[/vc_column_text][/vc_column][/vc_row][vc_row][vc_column][vc_empty_space][/vc_column][/vc_row][vc_row][vc_column][vc_column_text]

Adding Adjustments

[/vc_column_text][vc_column_text]The Adjustments Buttons gives you easy access to a list of commonly used Tools and Adjustments.

Tools: Crop, Lens Correction, and Global Masking are all free to use!

Free Adjustments: Basic Adjustment, Brightness Contrast, Blurs, Color Overlay, Dual Tone, Film Grain, Image Layer, Posterize, Tone Curves, and Vignette are all free to use as well!

Pro Adjustments:  Abstraction, Black & White, Bloom, Color Theme, DeHaze,  Edge Exposure, Focal Blur, HSL Color Tuning, Precision Contrast, Reduce Noise, Radiance, Sharpen, Smudge, and Texture.

The More Button shows a list of all possible Adjustments, including the 10 free Adjustments and Pro Adjustments.[/vc_column_text][vc_empty_space height=”15px”][vc_single_image image=”8597″ img_size=”large” alignment=”center”][vc_empty_space][vc_column_text]

Adjustment Level Presets

[/vc_column_text][vc_row_inner][vc_column_inner width=”1/4″][vc_empty_space height=”15px”][vc_single_image image=”8669″ img_size=”large” alignment=”center”][/vc_column_inner][vc_column_inner width=”3/4″][vc_column_text]The fastest place to get inspiration from is the Adjustment Level Preset list. Use the drop down menu and roll over preset names to see them on your image. To commit, click on the Preset. You can always use the Undo Button to undo the change or use the Reset Option in the Adjustment Menu (pictured to the left).[/vc_column_text][/vc_column_inner][/vc_row_inner][/vc_column][/vc_row][vc_row][vc_column][vc_empty_space][vc_column_text]

Making Your Own Effects

[/vc_column_text][vc_row_inner][vc_column_inner width=”1/4″][vc_empty_space height=”15px”][vc_single_image image=”8636″ img_size=”large” alignment=”center”][/vc_column_inner][vc_column_inner width=”3/4″][vc_column_text]It’s fast and fun to make your own custom effects. Simply start out with an effect from the Effect Panel or start adding Adjustments with the Adjustment Buttons or More Button. You can add as many or as few Adjustments as you like, reorder them by dragging and dropping them, make as many changes as you like, and more. It’s easy to save the effect and the image once you find the perfect combo.[/vc_column_text][/vc_column_inner][/vc_row_inner][/vc_column][/vc_row][vc_row][vc_column][vc_empty_space][vc_column_text]

Saving Your Custom Effect

[/vc_column_text][vc_row_inner][vc_column_inner width=”1/6″][vc_empty_space height=”15px”][vc_single_image image=”8430″ img_size=”medium” alignment=”center”][/vc_column_inner][vc_column_inner width=”5/6″][vc_column_text]Save and Share Your Effects. Save your new effect by clicking the Save button and share your creation with others by selecting ‘Yes’ in the Public field. Your effect will be shared to the entire Topaz Community instantly![/vc_column_text][/vc_column_inner][/vc_row_inner][vc_empty_space][/vc_column][/vc_row][vc_row][vc_column][vc_column_text]

Versatile Masking

[/vc_column_text][/vc_column][/vc_row][vc_row][vc_column][vc_column_text]The Topaz Studio Integrated Masking tool is unlike anything you have seen before. There are 5 masking types: Brush, Spot, Gradient, Color, and Luminosity, which can be combined and used at the Adjustment or Overall level. After making an adjustment with one type of mask, you can click apply or switch to another mask type and build upon that mask. There are also 4 different tools to use. Adjust, Reset, Invert, and Hide. Masking and all of these tools are available for free within Topaz Studio.[/vc_column_text][vc_empty_space height=”15px”][vc_column_text]

Overall Masking

[/vc_column_text][vc_empty_space height=”15px”][vc_single_image image=”8664″ img_size=”large” alignment=”center”][vc_empty_space height=”15px”][vc_column_text]Mask out the full effect and reveal the original image. Masking out the full effect is easy! Use the Masking Button, located in the Tools Section of the Adjustments Buttons. The Masking Panel will open and you can add Brush Masking, Spot Masking, a Gradient Mask, a Color Mask, a Luminosity Lask, or a variety of combined masks. The 4 Masking Tools make editing fast. Use Adjust to customize the mask, Reset to reset changes, Invert to invert the mask, and Hide to turn the mask on and off.[/vc_column_text][vc_empty_space height=”15px”][vc_column_text]

Adjustment Masking

[/vc_column_text][vc_empty_space height=”15px”][vc_single_image image=”8666″ img_size=”large” alignment=”center”][vc_empty_space height=”15px”][vc_column_text]Mask out an Adjustment. Masking out an Adjustment is easy! It’s very similar to the Overall Masking but only affects one Adjustment at a time. Use the Masking Button, located in the Tools Section of the Adjustments Buttons. The Masking Panel will open and you can add Brush Masking, Spot Masking, a Gradient Mask, a Color Mask, a Luminosity Lask, or a variety of combined masks. The 4 Masking Tools make editing fast. Use Adjust to customize the mask, Reset to reset changes, Invert to invert the mask, and Hide to turn the mask on and off.[/vc_column_text][vc_empty_space height=”15px”][vc_column_text]Learn more about Topaz Studio Masking in this indepth tutorial.[/vc_column_text][/vc_column][/vc_row][vc_row][vc_column][vc_empty_space][vc_column_text]

Saving Your Image

[/vc_column_text][vc_row_inner][vc_column_inner width=”1/6″][vc_empty_space height=”15px”][vc_single_image image=”8429″ img_size=”medium” alignment=”center”][/vc_column_inner][vc_column_inner width=”5/6″][vc_column_text]Save and Save As Your Image. Save your new image and overwrite the original file by using the Save button. To save a new copy with a new name, use Save As.[/vc_column_text][/vc_column_inner][/vc_row_inner][vc_empty_space][/vc_column][/vc_row][vc_row disable_element=”yes”][vc_column][vc_empty_space][vc_column_text]

Download Now

[/vc_column_text][vc_empty_space height=”15px”][vc_row_inner][vc_column_inner width=”1/2″][vc_btn title=”Windows” shape=”square” color=”primary” align=”center” button_block=”true” link=”url:https%3A%2F%2Fopen_beta.s3.amazonaws.com%2Ftopazstudio_online_installer.exe|||”][/vc_column_inner][vc_column_inner width=”1/2″][vc_btn title=”Mac” shape=”square” color=”primary” align=”center” button_block=”true” link=”url:https%3A%2F%2Fopen_beta.s3.amazonaws.com%2Ftopazstudio_online_installer.dmg|||”][/vc_column_inner][/vc_row_inner][/vc_column][/vc_row][vc_row][vc_column][vc_column_text]

Until Next Time…

[/vc_column_text][vc_column_text]There you have it, folks! That’s everything you can accomplish in Topaz Studio. From using pre-made effects to creating your own to editing with tools, it’s all free!

We’ll be adding more tutorials and videos so be sure to give us a follow to learn more!

If you’d like to share your images with us, tag us on Instagram with @topazlabs and Twitter with @topazlabs. We’re also on Facebook and YouTube!

[/vc_column_text][vc_empty_space][/vc_column][/vc_row][vc_row][vc_column][vc_empty_space height=”15px”][vc_empty_space height=”15px”][vc_column_text]

About Jodi L. Robbins

[/vc_column_text][vc_empty_space height=”15px”][vc_row_inner][vc_column_inner width=”1/4″][vc_single_image image=”8523″ img_size=”” alignment=”center” style=”vc_box_circle_2″][/vc_column_inner][vc_column_inner width=”3/4″][vc_column_text]Jodi is currently the Art Director of Topaz Labs. She has been an artist and photographer for over 15 years, starting with black and white film photography and alternative processing. After completing her BFA in Studio Art from Southern Methodist University and her Masters in Photography from Savannah College of Art and Design, she worked in product photography for companies such as Heritage Auctions, Neiman Marcus, and the Dallas Cowboys.[/vc_column_text][/vc_column_inner][/vc_row_inner][vc_empty_space height=”15px”][vc_empty_space height=”15px”][/vc_column][/vc_row]

Posted on 131 Comments

Introducing Topaz Studio

[vc_row][vc_column][vc_column_text]

What is Topaz Studio?

Topaz Studio is a fast, flexible, powerful creative toolbox and it’s the next level image editor for photographers. Topaz Studio gives you lightning fast results with Topaz’s exclusive image processing technology, in an intuitive, affordable, easy to use application.

Topaz Studio a simple to use editing platform with Topaz Labs’ acclaimed photo enhancement technology. It works as both a standalone editor, a plugin within Lightroom and Photoshop, and a host application for other Topaz plugins which means it works exactly how you want it to. Now there’s no more cumbersome workflows that require you to open multiple plugins to achieve your look!

“This is all your Topaz products wrapped into one program.”

Topaz Studio is an easy to use editing solution built with the photographer in mind. This all new editing platform features professionally created 1-click effects, 24 flexible drag and drop Adjustments, and powerful image processing.

And We’re Giving it Away! Yep, you read that right. You’ll get complete freedom to use Topaz Studio as a plugin, a host editor for all Topaz Labs existing products, 10 free adjustments, comprehensive masking, opacity slider, and blending modes functionality all for free. [/vc_column_text][/vc_column][/vc_row][vc_row][vc_column][vc_column_text] [/vc_column_text][/vc_column][/vc_row][vc_row][vc_column][vc_empty_space][vc_column_text]

Download Now

[/vc_column_text][vc_empty_space height=”15px”][vc_row_inner content_aligment=”center” animation_in_type=”transition.slideUpIn” animation_in_offset=”100″ animation_in_duration=”800″ animation_in_delay=”0″][vc_column_inner width=”1/6″ alignment=”center”][vc_empty_space height=”20px”][/vc_column_inner][vc_column_inner width=”1/3″ alignment=”center”][ucaddon_uc_icon_hover_effect_button text=”Macintosh” icon=”fa fa-apple” link=”http://d2xkriaa67cpt4.cloudfront.net/topazstudio_online_installer.dmg” background_color=”#0f9af8″ uc_fonts_data=”JTdCJTdE”][/vc_column_inner][vc_column_inner width=”1/3″][ucaddon_uc_icon_hover_effect_button text=”Windows” icon=”fa fa-windows” link=”http://d2xkriaa67cpt4.cloudfront.net/topazstudio_online_installer.exe” background_color=”#0f9af8″ uc_fonts_data=”JTdCJTdE”][/vc_column_inner][vc_column_inner width=”1/6″][vc_empty_space height=”20px”][/vc_column_inner][/vc_row_inner][/vc_column][/vc_row][vc_row][vc_column][vc_column_text] [/vc_column_text][/vc_column][/vc_row][vc_row][vc_column][vc_empty_space][vc_column_text]

Working in Topaz Studio

Working in Topaz Studio is easy! Topaz Studio is set up with the photographer in mind. Whether you’re just getting started with photography or a tried and true professional, Topaz Studio has exactly what you need. With an ever growing library of expertly crafted pre-made effects to professionally crafted assets to artistic and technical tools alike, Topaz Studio is the perfect photographer toolbox, no matter what level of expertise!

[/vc_column_text][/vc_column][/vc_row][vc_row][vc_column][vc_column_text] [/vc_column_text][/vc_column][/vc_row][vc_row][vc_column][vc_empty_space][vc_column_text]

All About the Workspace

[/vc_column_text][vc_empty_space height=”15px”][vc_single_image image=”8352″ img_size=”full” alignment=”center”][vc_column_text]Topaz Studio features an easy to use Toolbar, a fast and fun Effect Panel with search buttons and features, the workspace, an Image Browser, the Scopes panel, and the Adjustment Panel, complete with Adjustment Buttons. [/vc_column_text][/vc_column][/vc_row][vc_row][vc_column][vc_column_text] [/vc_column_text][/vc_column][/vc_row][vc_row][vc_column][vc_empty_space][/vc_column][/vc_row][vc_row][vc_column][vc_column_text] [/vc_column_text][/vc_column][/vc_row][vc_row][vc_column width=”2/3″][vc_column_text]

1. Main Toolbar

[/vc_column_text][vc_empty_space height=”15px”][vc_single_image image=”8360″ img_size=”large” onclick=”link_image”][/vc_column][vc_column width=”1/3″][vc_empty_space][vc_column_text]The Main Toolbar gives you options to open and save images, an option for comparing the before image and after image, zooming, and split views. You can also click the Open Button to open additional images and save images with the Save Button and Save As Button. [/vc_column_text][/vc_column][/vc_row][vc_row][vc_column][vc_column_text] [/vc_column_text][/vc_column][/vc_row][vc_row][vc_column][vc_empty_space][vc_column_text]

Saving Your Image

[/vc_column_text][vc_row_inner][vc_column_inner width=”1/6″][vc_empty_space height=”15px”][vc_single_image image=”8429″ img_size=”medium” alignment=”center”][/vc_column_inner][vc_column_inner width=”5/6″][vc_column_text]
Save or Save As Images. Save edited images as PNG, JPG, or TIFF files with easy to locate buttons in the Main Toolbar, by using shortcut keys (Command S or Command Shift S), or by going to Menu > File > Save or Save As. [/vc_column_text][/vc_column_inner][/vc_row_inner][vc_empty_space][/vc_column][/vc_row][vc_row][vc_column][vc_column_text] [/vc_column_text][/vc_column][/vc_row][vc_row][vc_column width=”2/3″][vc_column_text]

2. Effect Panel

[/vc_column_text][vc_empty_space height=”15px”][vc_single_image image=”8357″ img_size=”large” onclick=”link_image”][/vc_column][vc_column width=”1/3″][vc_empty_space][vc_column_text]When you first load an image, you’ll see Featured Effects in the Effect Panel. Here you can search for effects by typing an author name, an effect name, tags, or categories. [/vc_column_text][/vc_column][/vc_row][vc_row][vc_column][vc_column_text] [/vc_column_text][/vc_column][/vc_row][vc_row][vc_column][vc_empty_space][vc_column_text]

View Options

[/vc_column_text][vc_row_inner][vc_column_inner width=”1/6″][vc_empty_space height=”15px”][vc_single_image image=”8485″ img_size=”full” alignment=”center”][/vc_column_inner][vc_column_inner width=”5/6″][vc_column_text]Click the Grid Button to see more effects at a time. Once in Grid View, click the List Button to see a single column list of effects. [/vc_column_text][/vc_column_inner][/vc_row_inner][vc_empty_space][/vc_column][/vc_row][vc_row][vc_column][vc_column_text] [/vc_column_text][/vc_column][/vc_row][vc_row][vc_column width=”2/3″][vc_column_text]

3. Effect Buttons

[/vc_column_text][vc_empty_space height=”15px”][vc_single_image image=”8358″ img_size=”large” onclick=”link_image”][/vc_column][vc_column width=”1/3″][vc_empty_space][vc_column_text]The Effect Buttons give you access to a list of Categories and Tags to search for effects quickly and easily. Click the More Button to see a full list of all available categories and tags. [/vc_column_text][/vc_column][/vc_row][vc_row][vc_column][vc_column_text] [/vc_column_text][/vc_column][/vc_row][vc_row][vc_column][vc_empty_space][/vc_column][/vc_row][vc_row][vc_column][vc_column_text] [/vc_column_text][/vc_column][/vc_row][vc_row][vc_column width=”2/3″][vc_column_text]

4. Canvas

[/vc_column_text][vc_empty_space height=”15px”][vc_single_image image=”8356″ img_size=”large” onclick=”link_image”][/vc_column][vc_column width=”1/3″][vc_empty_space][vc_column_text]The Canvas area is where your active image will be displayed. Easily change the view options of the Canvas with the Main Toolbar, found in section 1 above. [/vc_column_text][/vc_column][/vc_row][vc_row][vc_column][vc_column_text] [/vc_column_text][/vc_column][/vc_row][vc_row][vc_column][vc_empty_space][/vc_column][/vc_row][vc_row][vc_column][vc_column_text] [/vc_column_text][/vc_column][/vc_row][vc_row][vc_column width=”2/3″][vc_column_text]

5. Image Browser

[/vc_column_text][vc_empty_space height=”15px”][vc_single_image image=”8359″ img_size=”large” onclick=”link_image”][/vc_column][vc_column width=”1/3″][vc_empty_space][vc_column_text]Use the Image Browser to view and adjust various edits of an image side by side or work on several images at once.

Select Show Options to access the menu.

Apply – Apply the adjustments to the image and use the result to start a new project.

Duplicate – Duplicate an entire project and then add it as a new project.

Copy / Paste – Copy the entire adjustment stack and paste them onto a different project. [/vc_column_text][/vc_column][/vc_row][vc_row][vc_column][vc_column_text] [/vc_column_text][/vc_column][/vc_row][vc_row][vc_column][vc_empty_space][/vc_column][/vc_row][vc_row][vc_column][vc_column_text] [/vc_column_text][/vc_column][/vc_row][vc_row][vc_column][vc_column_text]

6. The Scopes Panel

[/vc_column_text][vc_empty_space height=”15px”][vc_single_image image=”8361″ img_size=”large” alignment=”center”][vc_column_text]At the top right of the application is the Scopes Panel that features 4 separate views. The first allows you to view the Histogram of the image. The second displays the Hue, Saturation, and Luminance of the image, while the third button displays the amount of image Details. Finally, the fourth button helps you navigate your image while zoomed in. [/vc_column_text][/vc_column][/vc_row][vc_row][vc_column][vc_column_text] [/vc_column_text][/vc_column][/vc_row][vc_row][vc_column][vc_empty_space][/vc_column][/vc_row][vc_row][vc_column][vc_column_text] [/vc_column_text][/vc_column][/vc_row][vc_row][vc_column width=”2/3″][vc_column_text]

7. The Adjustment Panel

[/vc_column_text][vc_empty_space height=”15px”][vc_single_image image=”8355″ img_size=”large” onclick=”link_image”][/vc_column][vc_column width=”1/3″][vc_empty_space][vc_column_text]The Adjustment Panel is where you can modify effects or create your own. It gives you control over the large range of tools and adjustments located in the Adjustment Buttons. The Adjustment Buttons features some of the most commonly used adjustments, and you can see all available adjustments by clicking the “More” button at the bottom of the list. [/vc_column_text][/vc_column][/vc_row][vc_row][vc_column][vc_column_text] [/vc_column_text][/vc_column][/vc_row][vc_row][vc_column][vc_empty_space][vc_column_text]

Saving Your Custom Effect

[/vc_column_text][vc_row_inner][vc_column_inner width=”1/6″][vc_empty_space height=”15px”][vc_single_image image=”8430″ img_size=”medium” alignment=”center”][/vc_column_inner][vc_column_inner width=”5/6″][vc_column_text]
Save and Share Your Effects. Save your new effect by clicking the Save button and share your creation with others by selecting ‘Yes’ in the Public field. Your effect will be shared to the entire Topaz Community instantly! [/vc_column_text][/vc_column_inner][/vc_row_inner][vc_empty_space][/vc_column][/vc_row][vc_row][vc_column][vc_column_text] [/vc_column_text][/vc_column][/vc_row][vc_row][vc_column width=”2/3″][vc_column_text]

8. Adjustment Buttons

[/vc_column_text][vc_empty_space height=”15px”][vc_single_image image=”8354″ img_size=”large” onclick=”link_image”][/vc_column][vc_column width=”1/3″][vc_empty_space][vc_column_text]The Adjustment Buttons gives you access to a list of commonly used Adjustments like Crop, Lens Correction, Basic Adjustment, and more. Click the More Button to see a full list of all available Adjustments. [/vc_column_text][/vc_column][/vc_row][vc_row][vc_column][vc_column_text] [/vc_column_text][/vc_column][/vc_row][vc_row][vc_column][vc_empty_space height=”15px”][vc_column_text]

Tools

[/vc_column_text][/vc_column][/vc_row][vc_row][vc_column][vc_column_text] [/vc_column_text][/vc_column][/vc_row][vc_row][vc_column width=”1/4″][vc_empty_space height=”15px”][vc_single_image image=”8503″ img_size=”” alignment=”center”][/vc_column][vc_column width=”3/4″][vc_column_text]We’ve also included a tools section. You’ll find lens correction, global masking (with 5 styles and 4 different tools to customize the overall effect), and crop and rotate. Everything is located in a simple to use toolbar with easy-to-use sliders and functionality. [/vc_column_text][/vc_column][/vc_row][vc_row][vc_column][vc_column_text] [/vc_column_text][/vc_column][/vc_row][vc_row][vc_column][vc_empty_space][vc_column_text]

Change Up the Workspace

[/vc_column_text][vc_column_text]
Customize your workspace windows with just the click of a button. The Effect Panel, Scopes Panel, Adjustment Panel, and Image Browser can each be collapsed by clicking the arrow on the bar on the inside edge of the panel. The Effect Buttons and Adjustment Buttons can also be collapsed and expanded by clicking at the top of the toolbar. [/vc_column_text][vc_empty_space][/vc_column][/vc_row][vc_row][vc_column][vc_column_text] [/vc_column_text][/vc_column][/vc_row][vc_row][vc_column][vc_column_text]

Wait… What are Adjustments?

[/vc_column_text][/vc_column][/vc_row][vc_row][vc_column][vc_column_text] [/vc_column_text][/vc_column][/vc_row][vc_row][vc_column width=”1/4″][vc_empty_space height=”15px”][vc_single_image image=”8501″ img_size=”large”][/vc_column][vc_column width=”3/4″][vc_column_text]Adjustments are the core of Topaz Studio, they are built with very focused functionality in mind. Adjustments may be used independently or combined to create extremely unique looks and custom effects. Currently, there are 24 Adjustments available covering everything from simple Film Grain, to advanced color control with Color Theme. Adjustments are grouped according to complexity, with Common Adjustments appearing at the top, Advanced Adjustments in the next section, Artistic Effect Adjustments below that, and Compositing Adjustments appearing last.

While many of these adjustments are free, some must be purchased to allow you to fully customize the sliders they contain. However, each paid adjustment also comes with a 30 day free trial. To activate the trial, just click the Try Pro Button to activate it or use the Buy Now Button to be taken to the Topaz Studio website to complete your purchase. Whether you purchase adjustments or not, you’ll always have access to Blending Modes, Masking, Opacity, and the included Adjustment Level Presets… all for free. You can always use effects that contain paid adjustments you don’t own as well.

With Topaz Studio Adjustments, you can add, customize, mask, rearrange, and delete Adjustments until you have exactly the look you want.

Free Adjustments: Basic Adjustment, Brightness Contrast, Blurs, Color Overlay, Dual Tone, Film Grain, Image Layer, Posterize, Tone Curves, and Vignette.

Pro Adjustments:  Abstraction, Black & White, Bloom, Color Theme, DeHaze,  Edge Exposure, Focal Blur, HSL Color Tuning, Precision Contrast, Reduce Noise, Radiance, Sharpen, Smudge, and Texture.

To learn about the Adjustments, check out our short videos on YouTube. [/vc_column_text][/vc_column][/vc_row][vc_row][vc_column][vc_column_text] [/vc_column_text][/vc_column][/vc_row][vc_row][vc_column][vc_empty_space][vc_column_text]

Versatile Masking

[/vc_column_text][/vc_column][/vc_row][vc_row][vc_column][vc_column_text] [/vc_column_text][/vc_column][/vc_row][vc_row][vc_column][vc_empty_space height=”15px”][vc_single_image image=”8497″ img_size=”large”][vc_empty_space height=”15px”][vc_column_text]The Topaz Studio Integrated Masking is unlike anything you have seen before. We have included 5 masking types: Brush, Spot, Gradient, Color, and Luminosity, as well as a mask adjustments panel and an option to invert or completely reset your mask. Our brush masking includes intuitive, content-aware technology that was developed in house. I’ve gotten the chance to play with it quite a bit –  it’s awesome and a complete time saver to say the least. Not only are the new masking features amazing, but you can now combine masking types. After making adjustment with one type of mask, click apply or switch to another mask type and build upon that mask. It’s never been so easy! [/vc_column_text][/vc_column][/vc_row][vc_row][vc_column][vc_column_text] [/vc_column_text][/vc_column][/vc_row][vc_row disable_element=”yes”][vc_column width=”1/2″][vc_column_text]

3. Share Your Effects

[/vc_column_text][vc_empty_space height=”15px”][vc_single_image image=”8443″ img_size=”large” onclick=”link_image”][/vc_column][vc_column width=”1/2″][vc_empty_space][vc_column_text]Topaz Studio also has the community! You can share effects that have multiple adjustments or that include just a single adjustment. We have given you complete control. But what happens if someone shares a preset that contains an adjustment that you don’t own? Well, don’t worry! You’ll still be able to use that preset. Adjustments that you don’t own will be locked within that preset and will not allow you to make changes to that particular adjustment. [/vc_column_text][/vc_column][/vc_row][vc_row][vc_column][vc_column_text] [/vc_column_text][/vc_column][/vc_row][vc_row][vc_column][vc_empty_space][vc_column_text]

Technical Information

All you need is a Topaz Studio account to access your software. Existing users use their same login info, while new users can create an account. You will only have to have an internet connection every 60 days to authenticate your account.

[/vc_column_text][vc_empty_space][vc_row_inner][vc_column_inner width=”1/2″][vc_column_text]

Compatibility:

Photoshop CS4+, Photoshop CC, Photoshop Elements 12+, Paintshop Pro X 6+, Serif PhotoPlus X5+, Lightroom 4+, Lightroom CC, and photoFXlab

*Not compatible with Fusion Express

[/vc_column_text][/vc_column_inner][vc_column_inner width=”1/2″][vc_column_text]

System Requirements:

Mac OSX 10.9+

Windows 7/8/10 x 64bit + OpenGL 3.3

RAM: ≥4GB

GPU VRAM: ≥1GB

*Does not support Windows 32bit

[/vc_column_text][/vc_column_inner][/vc_row_inner][/vc_column][/vc_row][vc_row][vc_column][vc_column_text] [/vc_column_text][/vc_column][/vc_row][vc_row][vc_column][vc_empty_space][vc_column_text]

Download Now

[/vc_column_text][vc_empty_space height=”15px”][vc_row_inner content_aligment=”center” animation_in_type=”transition.slideUpIn” animation_in_offset=”100″ animation_in_duration=”800″ animation_in_delay=”0″][vc_column_inner width=”1/6″ alignment=”center”][vc_empty_space height=”20px”][/vc_column_inner][vc_column_inner width=”1/3″ alignment=”center”][ucaddon_uc_icon_hover_effect_button text=”Macintosh” icon=”fa fa-apple” link=”http://d2xkriaa67cpt4.cloudfront.net/topazstudio_online_installer.dmg” background_color=”#0f9af8″ uc_fonts_data=”JTdCJTdE”][/vc_column_inner][vc_column_inner width=”1/3″][ucaddon_uc_icon_hover_effect_button text=”Windows” icon=”fa fa-windows” link=”http://d2xkriaa67cpt4.cloudfront.net/topazstudio_online_installer.exe” background_color=”#0f9af8″ uc_fonts_data=”JTdCJTdE”][/vc_column_inner][vc_column_inner width=”1/6″][vc_empty_space height=”20px”][/vc_column_inner][/vc_row_inner][/vc_column][/vc_row][vc_row][vc_column][vc_column_text] [/vc_column_text][/vc_column][/vc_row][vc_row][vc_column][vc_empty_space][vc_column_text]

It’s Easy to Update

Topaz Studio is designed to be easy to update, by prompting you when updates are available and allowing you to update your application without having to go through an entirely new installation through the new update manager application included with Topaz Studio. [/vc_column_text][/vc_column][/vc_row][vc_row][vc_column][vc_column_text] [/vc_column_text][/vc_column][/vc_row][vc_row][vc_column][vc_column_text]
That’s all for now but keep an eye out for additional updates and new features in the application, online on our social media sites and always on the Topaz Studio Website at topazlabs.com! [/vc_column_text][/vc_column][/vc_row][vc_row][vc_column][vc_column_text] [/vc_column_text][/vc_column][/vc_row][vc_row][vc_column][vc_empty_space height=”15px”][vc_empty_space height=”15px”][vc_column_text]

About Jodi L. Robbins

[/vc_column_text][vc_empty_space height=”15px”][vc_row_inner][vc_column_inner width=”1/4″][vc_single_image image=”8523″ img_size=”” alignment=”center” style=”vc_box_circle_2″][/vc_column_inner][vc_column_inner width=”3/4″][vc_column_text]Jodi is currently the Art Director of Topaz Labs. She has been an artist and photographer for over 15 years, starting with black and white film photography and alternative processing. After completing her BFA in Studio Art from Southern Methodist University and her Masters in Photography from Savannah College of Art and Design, she worked in product photography for companies such as Heritage Auctions, Neiman Marcus, and the Dallas Cowboys. [/vc_column_text][/vc_column_inner][/vc_row_inner][vc_empty_space height=”15px”][vc_empty_space height=”15px”][/vc_column][/vc_row]