[vc_row css=”.vc_custom_1499750369090{padding-top: 20px !important;padding-bottom: 20px !important;}”][vc_column][vc_column_text]
Created with: Topaz Studio version 1.0.8
[/vc_column_text][vc_empty_space][vc_column_text]
Introducing Healing
Hello, all you avid Topaz fans! Today we’re excited to walk you through the latest feature in Topaz Studio, our new healing brush. The Healing tool, now available within Topaz Studio as of version 1.0.6, is our most highly requested Topaz Studio feature, and is available to all users of Topaz Studio absolutely free. The healing brush allows for intelligent removal of blemishes, distracting secondary subjects, or background cleanup of your image. Using this new tool is simple, just select the tool, change the radius of your brush to fit what you’d like to remove, brush it out and let Topaz Studio do the rest.[/vc_column_text][/vc_column][/vc_row][vc_row][vc_column][vc_empty_space][vc_separator][vc_empty_space height=”15px”][vc_column_text]
Watch The Video Instead?
If you don’t feel like following along in a tutorial you can watch me try the tool out on a few images in the following video.
[/vc_column_text][vc_empty_space height=”15px”][vc_video link=”https://youtu.be/Z43XcSCsJZ0″][vc_empty_space height=”15px”][vc_separator][vc_empty_space height=”15px”][/vc_column][/vc_row][vc_row css=”.vc_custom_1499750369090{padding-top: 20px !important;padding-bottom: 20px !important;}”][vc_column][vc_column_text css=”.vc_custom_1499781447156{padding-top: 20px !important;}”]
Example 1: Blemish Removal
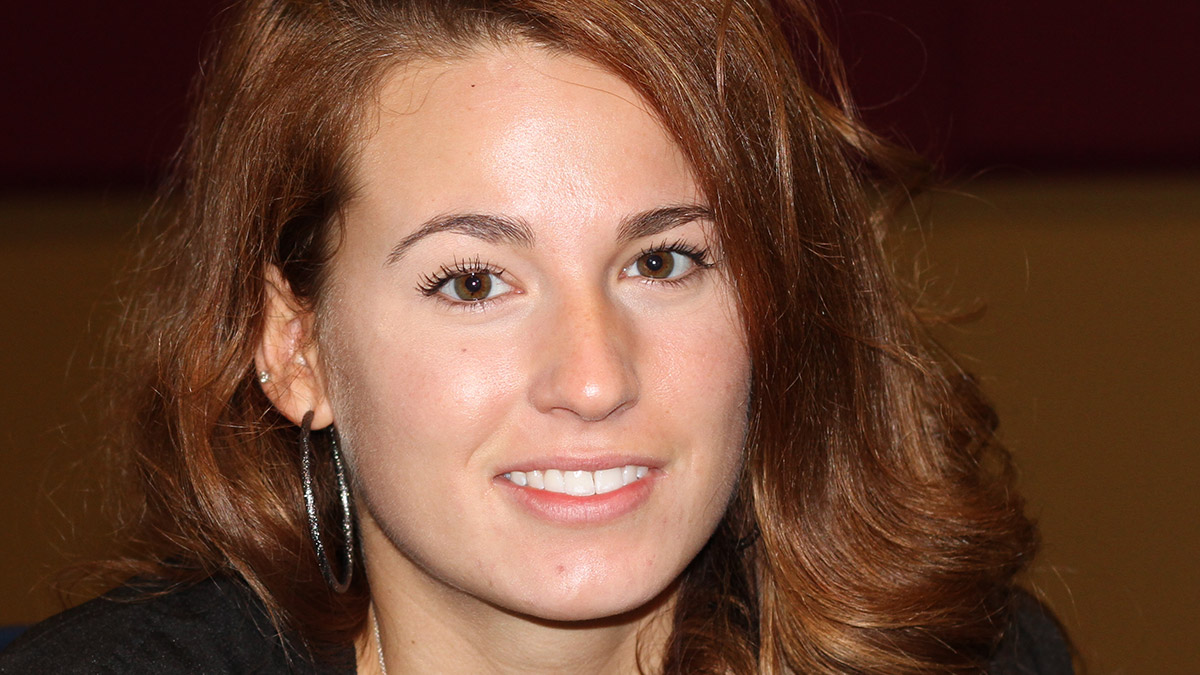
So let’s go ahead and get started. If you’ve used healing before in Photoshop or Lightroom you’ll be familiar with this workflow. have here an image of my family member. I took this photo years ago and haven’t done anything with it. She’s very pretty, of course, being related to me, but there are some things I’d like to clean up on the skin on her face. This will get rid of a few distracting blemishes and draw the focus more towards features of her face that I want to emphasize like her eyes, lips, and hair.[/vc_column_text][vc_empty_space][vc_single_image image=”55594″ img_size=”full” alignment=”center” onclick=”link_image”][vc_empty_space][vc_row_inner][vc_column_inner width=”1/2″][vc_column_text css=”.vc_custom_1499781744430{padding-top: 20px !important;}”]First off, I want to clean up my workspace so I have a little bit more room to work. Since I know that I’m working on the image and not going to start with an effect, I’ll close the effect window by clicking on the bar directly to the right of that window.
Also since I don’t want to change images, I’m going to go ahead and collapse the image browser by clicking on the thin bar at the top of the image browser. This gives me a much cleaner workspace to use as I focus on cleaning up this image. You can always open those panels again by clicking on the bars to toggle expanding or collapsing them.[/vc_column_text][/vc_column_inner][vc_column_inner width=”1/2″][vc_single_image image=”55595″ img_size=”full” onclick=”link_image”][/vc_column_inner][/vc_row_inner][vc_empty_space][vc_row_inner][vc_column_inner width=”1/2″][vc_single_image image=”55596″ img_size=”large” onclick=”link_image”][/vc_column_inner][vc_column_inner width=”1/2″][vc_column_text css=”.vc_custom_1499781783873{padding-top: 20px !important;}”]I’ll go ahead and zoom in on my image, so we can see the blemishes that were wanting to remove and get a little bit more detail on the skin.
See you can see on this image I’ve marked some of the blemishes that I’d like to remove. You can see a few blemishes on her chin a freckle below her eye, and some other general cleanup I’d like to do. That’s going to be really easy to do with a healing tool.[/vc_column_text][/vc_column_inner][/vc_row_inner][/vc_column][/vc_row][vc_row css=”.vc_custom_1499750369090{padding-top: 20px !important;padding-bottom: 20px !important;}”][vc_column width=”2/3″][vc_column_text]In order to find the healing tool you’ll go to the toolbar that pops up on the right side of your screen and you’ll see a little bandage icon in the image below that says “heal” Just click that, and the healing brush size slider will appear. It’s really easy to see the size brush you want, with a nice preview on your image of your brush size. However, since we’re working on light blemishes, I’ll work with a small brush. [/vc_column_text][/vc_column][vc_column width=”1/3″][vc_single_image image=”54837″ img_size=”medium” onclick=”link_image”][/vc_column][/vc_row][vc_row css=”.vc_custom_1499750369090{padding-top: 20px !important;padding-bottom: 20px !important;}”][vc_column width=”1/3″][vc_single_image image=”55598″ img_size=”large” onclick=”link_image”][/vc_column][vc_column width=”2/3″][vc_column_text css=”.vc_custom_1499782717877{padding-top: 20px !important;}”]The healing tool makes it really easy to remove blemishes with just a click. s you can see in this image, just paint over your image with the brush, release your mouse, and the blemishes will disappear. So i’ll we’ll do is paint over each point that i’ve highlighted in the image above with the healing tool and very quickly we’re able to clean up some of the small blemishes that could distract from the main features of my subject.
Below you can see the before, the area’s I’ve painted in, and the after.
If you’d like to see the before and after in your image, it’s very simple to do. You just need to make sure you have the healing tool selected, then you can press the spacebar to show your before image, and release to show your image after healing.[/vc_column_text][/vc_column][/vc_row][vc_row css=”.vc_custom_1499750369090{padding-top: 20px !important;padding-bottom: 20px !important;}”][vc_column][vc_row_inner disable_element=”yes”][vc_column_inner width=”1/2″][vc_single_image image=”55599″ img_size=”large” add_caption=”yes” onclick=”link_image”][/vc_column_inner][vc_column_inner width=”1/2″][vc_single_image image=”55600″ img_size=”large” add_caption=”yes” onclick=”link_image”][/vc_column_inner][/vc_row_inner][vc_column_text]
 Original[/caption]
[caption id="attachment_55600" align="alignnone" width="1200"]
 After Heal Tool[/caption]
So how does it work?
Healing tools tend to all work the same way. Once you paint out a section of your image, it effectively creates a hole within that image, which the software has to try to figure out how to fill with the correct content.
Tools like Photoshop use a system called “patch match” which analyzes your image and looks for the best patch to copy from another section of the image based on the content around the hole you’ve created with your brush. It then fills the hole you’ve created with the healing brush with the best patch it can determine will fit that spot.
The Healing Tool within Topaz Studio uses a method called Statistical Measure, which analyzes the image and compares dozens of different patches that could fit to find the most reasonable result on a per pixel basis. So instead of finding one patch to fill in the hole we’ve created, we’re comparing dozens of different areas and finding the best statistical fit for each pixel within the selected healing area. It ads a bit of processing time to the tool, but results in a much more natural and accurate heal in most cases. [/vc_column_text][vc_empty_space height=”15″][vc_separator][/vc_column][/vc_row][vc_row css=”.vc_custom_1499750369090{padding-top: 20px !important;padding-bottom: 20px !important;}”][vc_column][vc_single_image image=”55604″ img_size=”full” onclick=”link_image”][vc_empty_space][vc_column_text css=”.vc_custom_1499783208304{padding-top: 20px !important;}”]
Example 2: Removing distracting secondary subjects and distracting background items
For my next image, I have a photo I took of some geese in my yard most definitely not tearing it up. I don’t really like geese, they’re kind of the jerks of the bird world. But as with most jerks, they definitely want to be the center of attention in this image. Like they say, if you can’t beat em, then join em. We’re going to work to get all the other distractions out of this image, so they can have the spotlight for a moment before I shoo them away. You can see with this image there’s a lot of distractions big and small. [/vc_column_text][vc_row_inner][vc_column_inner width=”1/3″][vc_empty_space][vc_single_image image=”55605″ img_size=”medium” alignment=”center” onclick=”link_image”][vc_column_text]
For big distractions we have these large swaths of bare ground, and also the baby goose.
[/vc_column_text][/vc_column_inner][vc_column_inner width=”1/3″][vc_empty_space][vc_single_image image=”55606″ img_size=”medium” alignment=”center” onclick=”link_image”][vc_column_text]
There’s also some medium sized distracting objects in the background like those pillars.
[/vc_column_text][/vc_column_inner][vc_column_inner width=”1/3″][vc_empty_space][vc_single_image image=”55607″ img_size=”medium” alignment=”center” onclick=”link_image”][vc_column_text]
And then there’s small areas that draw your eye like these orange spots, and feathers laying in the grass.
[/vc_column_text][/vc_column_inner][/vc_row_inner][/vc_column][/vc_row][vc_row css=”.vc_custom_1499750369090{padding-top: 20px !important;padding-bottom: 20px !important;}”][vc_column][vc_column_text css=”.vc_custom_1499783450090{padding-top: 20px !important;}”]Whatever the size distraction the process is the same. We’ll use the healing brush to cover up the spots we’d like to remove in red, then release the mouse to let Topaz Studio do the rest.
Even with the larger areas it’s not too terribly important that you be precise with your masking. You don’t have to just select the goose or the dirt, it’s ok to go a little outside the lines.[/vc_column_text][vc_row_inner][vc_column_inner][vc_column_text]


And that’s the Topaz Studio Healing Tool. It may seem pretty simple, but don’t let it fool you it’s also quite powerful. Let me mention again that it’s available within Topaz Studio completely free. So if you haven’t yet, give it a whirl, we’d love to hear your thoughts about this awesome new tool.[/vc_column_text][/vc_column][/vc_row][vc_row][vc_column][vc_empty_space][vc_column_text]
Download Topaz Studio Free
[/vc_column_text][vc_column_text]The healing tool is one of many free features available within Topaz Studio!
Don’t have Topaz Studio? Topaz Studio is free to download! You can get it now by using the links below. If you need more information about Topaz Studio, check out this overview: Introducing Topaz Studio
Topaz Studio is a simple to use editing platform with Topaz Labs’ powerful acclaimed photo enhancement technology. It works as a standalone editor, a plugin within Lightroom and Photoshop, as well as a host application for your other Topaz plugins. It is free to use the program, all 1-click effects, and 10 Adjustments.[/vc_column_text][vc_empty_space height=”15px”][vc_row_inner][vc_column_inner width=”1/2″][vc_btn title=”Windows” shape=”square” color=”primary” align=”center” button_block=”true” link=”url:https%3A%2F%2Ftopazlabs.s3.amazonaws.com%2Ftopazstudio_online_installer.exe|||”][/vc_column_inner][vc_column_inner width=”1/2″][vc_btn title=”Mac” shape=”square” color=”primary” align=”center” button_block=”true” link=”url:https%3A%2F%2Ftopazlabs.s3.amazonaws.com%2Ftopazstudio_online_installer.dmg|||”][/vc_column_inner][/vc_row_inner][/vc_column][/vc_row]


