Posted on 1 Comment

How to Use the Sharpen Adjustment

How to use the Sharpen Adjustment

[vc_row][vc_column][vc_empty_space][vc_column_text]Tutorial created Topaz Studio V1.0.8[/vc_column_text][vc_empty_space height=”15px”][vc_column_text]

What is the Sharpen Adjustment?

[/vc_column_text][vc_empty_space height=”15px”][vc_column_text]The Topaz Studio Sharpen Adjustment is an awesome tool that allows you to emphasize details and bring all your photos into perfect focus. Even images that you feel are in focus become crisp after this adjustment.

About the Sharpen Adjustment. The Topaz Studio Sharpen Adjustment is really two for the price of one. You can use the unsharp mask option to sharpen images or reverse the affect of lens blur on an image using the Lens DeBlur option.

How they work. Each sharpening option contains unique technology to ensure you have perfectly sharpened images. The Unsharp Mask works by utilizing an unsharpening mask to enhance details. The Lens DeBlur option is one of my favorites. It has some really unique technology behind it. It does an amazing job of removing lens blur, but keeping your image looking natural. Lens DeBlur uses the blind deconvolution process to mathematically recover image sharpness. This technology has the ability to analyze your image, and based upon the output image, can make an educated guess on the intended input image. The result is restored image quality, but it isn’t a cookie cutter filter. It is specifically tailored sharpening effect applied to each of your images and it truly works wonders.[/vc_column_text][/vc_column][/vc_row][vc_row][vc_column][vc_empty_space][vc_column_text]

Free Download

[/vc_column_text][vc_empty_space height=”15px”][vc_column_text]The Sharpen Adjustment is available within Topaz Studio as a Pro Adjustment. While Pro Adjustments are not free, Topaz Studio is completely free and there are limited functionality within the Sharpen Adjustment that is completely free. You can also try all the unlocked functionality for 30 days, completely commitment free. If you’d like to follow along with the Sharpen Adjustment, you can click the links below to download Topaz Studio.[/vc_column_text][vc_empty_space height=”15px”][vc_row_inner][vc_column_inner width=”1/2″][vc_btn title=”Windows” shape=”square” color=”primary” align=”center” button_block=”true” link=”url:https%3A%2F%2Fopen_beta.s3.amazonaws.com%2Ftopazstudio_online_installer.exe|||”][/vc_column_inner][vc_column_inner width=”1/2″][vc_btn title=”Mac” shape=”square” color=”primary” align=”center” button_block=”true” link=”url:https%3A%2F%2Fopen_beta.s3.amazonaws.com%2Ftopazstudio_online_installer.dmg|||”][/vc_column_inner][/vc_row_inner][/vc_column][/vc_row][vc_row][vc_column][vc_empty_space][vc_column_text]

What We Will Cover in This Tutorial

[/vc_column_text][vc_empty_space height=”15px”][vc_column_text]1. About the Sharpen Adjustment

2. How to use the Unsharp Mask

3. How to use Lens DeBlur[/vc_column_text][/vc_column][/vc_row][vc_row][vc_column][vc_empty_space][vc_column_text]

Reading not your Thing? Watch the Full Tutorial!

[/vc_column_text][vc_column_text]Feel free to watch me work through all the features the Sharpen Adjustment has to offer. Every step outlined in this blog post is demonstrated in this video as well as the gallery images at the end of this posting. Hope you enjoy it![/vc_column_text][vc_empty_space height=”15px”][vc_video link=”https://youtu.be/S_dPhDWvfWc” el_width=”80″ align=”center”][vc_empty_space][/vc_column][/vc_row][vc_row][vc_column][vc_column_text]

1. What is the Sharpen Adjustment?

[/vc_column_text][vc_row_inner][vc_column_inner width=”2/3″][vc_empty_space height=”15px”][vc_single_image image=”50874″ img_size=”large”][/vc_column_inner][vc_column_inner width=”1/3″][vc_empty_space][vc_empty_space][vc_empty_space][vc_column_text]Here at Topaz, we wanted to make it effortless to sharpen images, so we kept this adjustment nice and simple. The Unsharp Mask option features 3 sliders and the Lens DeBlur option has only two sliders. After you apply the Sharpen Adjustment to your image, you will see a 3 slider panel pop up in the adjustments panel (If you don’t, click the blue Try Pro link at the bottom of the panel).[/vc_column_text][/vc_column_inner][/vc_row_inner][vc_empty_space][/vc_column][/vc_row][vc_row][vc_column][vc_column_text]

Breakdown of the Sliders

[/vc_column_text][vc_row_inner][vc_column_inner width=”1/4″][vc_empty_space height=”15px”][vc_single_image image=”50882″ img_size=”large”][vc_empty_space height=”15px”][vc_single_image image=”50884″ img_size=”large”][/vc_column_inner][vc_column_inner width=”3/4″][vc_empty_space][vc_empty_space][vc_column_text]

Select Sharpen Type:

1. Unsharp Mask:
Select the Unsharp mask to create a clearer, sharper image. The Unsharp Mask utilizes unsharpening mask technology to create naturally looking, sharper images by using the image to get the base layer instead of just cookie cutter contrast sharpening.

2. Lens DeBlur:
Use Lens DeBlur to correct image blur. This type of sharpening utilizes the blind deconvolution process to mathematically correct images. The technology in Lens DeBlur analyzes the output image and has the ability to make educated guesses on the intended input to correct blurred images.

The sliders and what they do:

1. Strength:
Increasing the value of this slider increases the the overall strength of the selected sharpen type within the Sharpen Adjustment.

2. Radius:
This slider is only available for the Unsharp Mask. Increasing this slider will increase how strong the contrast of the edge of the Sharpening Mask is.

3. Threshold:
Increasing the value of this slider will increase the amount of details that are untouched by the Sharpen Adjustment. Utilizing this slider will allow for sharper images, but block out distracting image noise and artifacts.[/vc_column_text][vc_empty_space][/vc_column_inner][/vc_row_inner][vc_empty_space][/vc_column][/vc_row][vc_row][vc_column][vc_column_text]

Apply the Sharpen Adjustment to Your Image

[/vc_column_text][vc_empty_space height=”15px”][vc_row_inner][vc_column_inner width=”2/3″][vc_empty_space height=”15px”][vc_single_image image=”50919″ img_size=”full” alignment=”center”][/vc_column_inner][vc_column_inner width=”1/3″][vc_empty_space][vc_column_text]Before we get started, you’ll want to open an image. If this is your first time opening Topaz Studio, you’ll notice that there is a lot of empty fields. This is because you’ll need to open an image to get started! There is more than one way that you can open an image .

  1. Drag and drop an image from your computer into the program.
  2. Click Open (located in the Canvas) and navigate through your files. Select an image and click Open.
  3. Click Open in the menu bar. Select an image and click Open.
  4. Go to Menu > File > Open Image… and then select an image and click Open.
  5. Use your shortcut keys (such as Command O or Control O).

[/vc_column_text][/vc_column_inner][/vc_row_inner][vc_empty_space][/vc_column][/vc_row][vc_row][vc_column][vc_column_text]

Apply the Adjustment to Your Image

[/vc_column_text][vc_row_inner][vc_column_inner width=”2/3″][vc_empty_space height=”15px”][vc_single_image image=”50931″ img_size=”large”][/vc_column_inner][vc_column_inner width=”1/3″][vc_empty_space][vc_empty_space][vc_column_text]After you have successfully opened an image, you will want to apply the Sharpen Adjustment. This can be done one of two ways:

  1. Clicking Adjustments > Sharpen  from the top Menu Bar.
  2. Clicking More > Sharpen from the Adjustment tool bar located on the right-hand side of your workspace.

By default, the Unsharp Mask option will be selected. You can switch to the Lens DeBlur option by moving the toggle to the right.[/vc_column_text][/vc_column_inner][/vc_row_inner][vc_empty_space][/vc_column][/vc_row][vc_row][vc_column][vc_column_text]

2. Unsharp Mask

[/vc_column_text][vc_row_inner][vc_column_inner width=”2/3″][vc_empty_space height=”15px”][vc_single_image image=”50986″ img_size=”large” alignment=”center”][/vc_column_inner][vc_column_inner width=”1/3″][vc_empty_space][vc_empty_space][vc_column_text]The Unsharp Mask works great to amplify small details. I love using it on macro and plant photography. Even on images that I think are in perfect focus, can benefit from an added touch of the Unsharp Mask. When you are focusing on the small details, I suggest zooming in so you can really see how it is affecting your image. We organized the sliders to reflect the most logical workflow, so start with the Strength slider and work your way down. Also, remember it’s ok if there is some artifacts and image noise introduced by the Strength and Radius slider. The Threshold slider does an amazing job of blocking all of it out.[/vc_column_text][/vc_column_inner][/vc_row_inner][vc_empty_space][/vc_column][/vc_row][vc_row][vc_column][vc_column_text]

The Settings

[/vc_column_text][vc_row_inner][vc_column_inner width=”1/4″][vc_empty_space height=”15px”][vc_single_image image=”50964″ img_size=”large”][/vc_column_inner][vc_column_inner width=”3/4″][vc_empty_space][vc_empty_space][vc_column_text]Here are the settings I used for the Unsharp Mask. You can make these edits as subtle or extreme as you would like. Another thing I love to do with the Sharpen Adjustment is to use the integrated masking to mask out the effect in some areas to create a very strong focal area.[/vc_column_text][/vc_column_inner][/vc_row_inner][vc_empty_space][vc_column_text]

Here is the before, after, and magnified comparison:

[/vc_column_text][vc_empty_space height=”15px”][vc_row_inner][vc_column_inner width=”1/3″][vc_single_image image=”51170″ img_size=”large” alignment=”center” onclick=”link_image”][vc_empty_space height=”15px”][vc_column_text]

Before

[/vc_column_text][/vc_column_inner][vc_column_inner width=”1/3″][vc_single_image image=”51174″ img_size=”large” alignment=”center” onclick=”link_image”][vc_empty_space height=”15px”][vc_column_text]

After

[/vc_column_text][/vc_column_inner][vc_column_inner width=”1/3″][vc_single_image image=”51186″ img_size=”large” alignment=”center” onclick=”link_image”][vc_empty_space height=”15px”][vc_column_text]

Magnified

[/vc_column_text][/vc_column_inner][/vc_row_inner][vc_empty_space height=”15px”][vc_column_text]I love how the Unsharp Mask is able to bring out the small details of the leaves without magnifying the image noise or creating artifacts. The result is a perfectly natural looking, sharpened image.[/vc_column_text][vc_empty_space][/vc_column][/vc_row][vc_row][vc_column][vc_column_text]

3. Lens DeBlur

[/vc_column_text][vc_empty_space height=”15px”][vc_column_text]For the next part of this tutorial, I’m going to be demonstrating how to use Lens DeBlur. Feel free to save the image and follow along to test out Lens DeBlur for yourself.

Blurry photos can be a result of multiple things such as impurities in the air or due to lower end lenses. Lens DeBlur works wonders on photos. This simple, but effective tool turns photos that were shot with a $200 lens look like they were shot with a $3000 lens.

The algorithm behind Lens DeBlur analyses your photo and using the blind deconvolution process, mathematically reverse lens blur. It creates a tailored filter for each image. This yields much better results because you aren’t getting a cookie cutter filter for every image. I find myself being surprised at the results I get from images I didn’t even feel were blurry.[/vc_column_text][vc_empty_space height=”15px”][vc_single_image image=”51207″ img_size=”large” alignment=”center” onclick=”link_image”][vc_empty_space][vc_column_text]

Apply the Sharpen Adjustment and Switch to Lens DeBlur

[/vc_column_text][vc_row_inner][vc_column_inner width=”2/3″][vc_empty_space height=”15px”][vc_single_image image=”51220″ img_size=”large” alignment=”center” onclick=”link_image”][/vc_column_inner][vc_column_inner width=”1/3″][vc_empty_space][vc_empty_space][vc_empty_space][vc_column_text]Like before, you are going to apply the Sharpen Adjustment to the image, but this time switch the toggle to the Lens DeBlur option.[/vc_column_text][/vc_column_inner][/vc_row_inner][vc_empty_space][vc_row_inner][vc_column_inner width=”2/3″][vc_empty_space height=”15px”][vc_single_image image=”51241″ img_size=”large” alignment=”center”][/vc_column_inner][vc_column_inner width=”1/3″][vc_empty_space][vc_empty_space][vc_empty_space][vc_column_text]When you first see this image, I personally wouldn’t categorize this as a blurry image. Once you start adding Lens DeBlur, it is extremely evident just how crips this image could be! I always zoom way in when I’m working with the Sharpen Adjustment, so I can really see how it is affecting my image. My goal for this image was to make the trees more distinct and the mountain more prominent against the cloudy sky.[/vc_column_text][/vc_column_inner][/vc_row_inner][vc_empty_space][vc_column_text]

The Settings

[/vc_column_text][vc_row_inner][vc_column_inner width=”1/4″][vc_empty_space height=”15px”][vc_single_image image=”51246″ img_size=”large” alignment=”center” onclick=”link_image”][/vc_column_inner][vc_column_inner width=”3/4″][vc_empty_space][vc_empty_space][vc_column_text]If you would like to duplicate the settings here are what I used for the mountain image. Like the Unsharp Mask, the Threshold slider in the Lens DeBlur option will block out artifacts and image noise. With these two sliders, you can bring focus back to images in seconds.[/vc_column_text][/vc_column_inner][/vc_row_inner][vc_empty_space][/vc_column][/vc_row][vc_row][vc_column][vc_column_text]

Here is the before, after, and magnified comparison:

[/vc_column_text][vc_empty_space height=”15px”][vc_row_inner][vc_column_inner width=”1/3″][vc_single_image image=”51319″ img_size=”large” alignment=”center” onclick=”link_image”][vc_empty_space height=”15px”][vc_column_text]

Before

[/vc_column_text][/vc_column_inner][vc_column_inner width=”1/3″][vc_single_image image=”51320″ img_size=”large” alignment=”center” onclick=”link_image”][vc_empty_space height=”15px”][vc_column_text]

After

[/vc_column_text][/vc_column_inner][vc_column_inner width=”1/3″][vc_single_image image=”51324″ img_size=”large” alignment=”center” onclick=”link_image”][vc_empty_space height=”15px”][vc_column_text]

Magnified

[/vc_column_text][/vc_column_inner][/vc_row_inner][vc_empty_space height=”15px”][vc_column_text]You can see that Lens DeBlur brought a lot of the detail back in the mountain and the trees. The best part is that it looks completely natural. The result isn’t one of those images that have obviously been post-processed.[/vc_column_text][vc_empty_space][/vc_column][/vc_row][vc_row][vc_column][vc_column_text]

Bonus: Don’t Forget all the Other Functionality

[/vc_column_text][vc_empty_space height=”15px”][vc_row_inner][vc_column_inner width=”1/4″][vc_empty_space height=”15px”][vc_single_image image=”51251″ img_size=”large”][/vc_column_inner][vc_column_inner width=”3/4″][vc_column_text]Don’t forget that Topaz Studio has a lot of built in functionality that allows you to perfect how each adjustment affects your image. Each adjustment has the functionality built right into the header next to its name. You will find adjustment level masking, an opacity slider, 28 blending modes, and the ability to duplicate the adjustment! Also, don’t forget that if you are ever curious if you own a Pro Adjustment, the blue box around the icon in the adjustment stack indicates you have complete, unlocked functionality of that adjustment.[/vc_column_text][/vc_column_inner][/vc_row_inner][vc_empty_space][/vc_column][/vc_row][vc_row][vc_column][vc_column_text]

Adjustment Level Masking

[/vc_column_text][vc_row_inner][vc_column_inner width=”1/6″][vc_empty_space height=”15px”][vc_single_image image=”46805″ img_size=”medium” alignment=”center”][/vc_column_inner][vc_column_inner width=”5/6″][vc_column_text]One of the tools I use the most is the adjustment level masking. Combine the Sharpen Adjustment with the adjustment level masking to make interesting focal areas. While I won’t go in depth about it here, I wanted to make sure you knew it existed and is amazing! The brush masking has this awesome functionality called edge aware. So there is no need to create the perfect mask, just keep the edge of your subject between the green and red circles and it will do all the heavy lifting for you! If you’d like an in-depth tutorial about Masking, you can learn about Topaz Studio Masking here.[/vc_column_text][/vc_column_inner][/vc_row_inner][vc_empty_space][/vc_column][/vc_row][vc_row][vc_column][vc_column_text]

Saving Your Custom Effect

[/vc_column_text][vc_row_inner][vc_column_inner width=”1/6″][vc_empty_space height=”15px”][vc_single_image image=”46824″ img_size=”medium” alignment=”center”][vc_empty_space height=”15px”][vc_single_image image=”46825″ img_size=”medium” alignment=”center”][/vc_column_inner][vc_column_inner width=”5/6″][vc_column_text]Save and Share Your Effects. If you end up really liking an effect, you can save it to quickly apply in next time!  You can either save the effect as a preset level (top icon) or global effect (bottom icon). Global presets allow you to share your creation with others by selecting ‘Yes’ in the Public field. Your effect will be shared to the entire Topaz Community instantly![/vc_column_text][/vc_column_inner][/vc_row_inner][vc_empty_space][/vc_column][/vc_row][vc_row][vc_column][vc_column_text]

Gallery

[/vc_column_text][vc_column_text]You can apply the same effect quickly and effortlessly by adding your new custom preset level effect to many images and then tweaking it to each individual image. This can be great if you took multiple images with similar camera settings and you want all of them to be a little sharper. Here are some more before and after images I edited. Thanks for reading and hope you’ve gained a little more understanding of the Sharpen Adjustment![/vc_column_text][vc_column_text]

Unsharp Mask

[/vc_column_text][vc_row_inner][vc_column_inner width=”1/2″][vc_empty_space height=”15px”][vc_column_text]

Before

[/vc_column_text][vc_empty_space height=”15px”][vc_single_image image=”51405″ img_size=”large” alignment=”center” onclick=”link_image”][vc_empty_space height=”15px”][vc_single_image image=”51409″ img_size=”large” alignment=”center” onclick=”link_image”][/vc_column_inner][vc_column_inner width=”1/2″][vc_empty_space height=”15px”][vc_column_text]

After

[/vc_column_text][vc_empty_space height=”15px”][vc_single_image image=”51401″ img_size=”large” alignment=”center” onclick=”link_image”][vc_empty_space height=”15px”][vc_single_image image=”51413″ img_size=”large” alignment=”center” onclick=”link_image”][/vc_column_inner][/vc_row_inner][vc_empty_space][vc_column_text]

Lens DeBlur

[/vc_column_text][vc_row_inner][vc_column_inner width=”1/2″][vc_empty_space height=”15px”][vc_column_text]

Before

[/vc_column_text][vc_empty_space height=”15px”][vc_single_image image=”51392″ img_size=”large” alignment=”center” onclick=”link_image”][vc_empty_space height=”15px”][vc_single_image image=”51399″ img_size=”large” alignment=”center” onclick=”link_image”][/vc_column_inner][vc_column_inner width=”1/2″][vc_empty_space height=”15px”][vc_column_text]

After

[/vc_column_text][vc_empty_space height=”15px”][vc_single_image image=”51393″ img_size=”large” alignment=”center” onclick=”link_image”][vc_empty_space height=”15px”][vc_single_image image=”51400″ img_size=”large” alignment=”center” onclick=”link_image”][/vc_column_inner][/vc_row_inner][vc_empty_space][/vc_column][/vc_row][vc_row][vc_column][vc_column_text]

Thanks for Reading!

[/vc_column_text][vc_column_text]That’s all I have for today! That’s all the basic functionality that is contained in the Sharpen Adjustment. I wanted to keep this tutorial short and sweet, so I encourage you to play with all the functionality such as masking and the pre-made effects.

We’ll be adding more tutorials and videos so be sure to give us a follow to learn more!

If you’d like to share your images with us, tag us on Instagram with @topazlabs and Twitter with @topazlabs. We’re also on Facebook and YouTube![/vc_column_text][vc_empty_space][/vc_column][/vc_row][vc_row][vc_column][vc_empty_space][vc_column_text]

Free Download

[/vc_column_text][vc_empty_space height=”15px”][vc_row_inner][vc_column_inner width=”1/2″][vc_btn title=”Windows” shape=”square” color=”primary” align=”center” button_block=”true” link=”url:https%3A%2F%2Fopen_beta.s3.amazonaws.com%2Ftopazstudio_online_installer.exe|||”][/vc_column_inner][vc_column_inner width=”1/2″][vc_btn title=”Mac” shape=”square” color=”primary” align=”center” button_block=”true” link=”url:https%3A%2F%2Fopen_beta.s3.amazonaws.com%2Ftopazstudio_online_installer.dmg|||”][/vc_column_inner][/vc_row_inner][/vc_column][/vc_row][vc_row][vc_column][vc_empty_space height=”15px”][vc_separator border_width=”3″][vc_empty_space height=”15px”][vc_column_text]

About Taylor L. Seaton

[/vc_column_text][vc_empty_space height=”15px”][vc_row_inner][vc_column_inner width=”1/6″][vc_single_image image=”8720″ img_size=”medium” alignment=”center” style=”vc_box_circle_2″][/vc_column_inner][vc_column_inner width=”5/6″][vc_empty_space][vc_column_text]Taylor Seaton is a 2016 graduate from Angelo State University. While attending ASU, she obtained her Bachelor of Fine Arts with a concentration in Graphic Design and an area of emphasis in Business Management and Marketing. She also played volleyball at the collegiate level. She is currently the Social Media Manager at Topaz Labs.[/vc_column_text][/vc_column_inner][/vc_row_inner][vc_empty_space height=”15px”][vc_separator border_width=”3″][vc_empty_space height=”15px”][/vc_column][/vc_row]

Posted on

How to Use the Brightness Contrast Adjustment

Hi everyone! Today we’ll be going over the Brightness Contrast Adjustment in Topaz Studio. This Adjustment is very versatile and allows you to make subtle changes and extreme changes. I’ll be showing how both styles can work in a single image. It’s pretty amazing how a touch of this adjustment can dramatically change your image. So lets get started.

[vc_row][vc_column][vc_empty_space][vc_column_text]

Overview of the Brightness Contrast Adjustment

[/vc_column_text][vc_empty_space height=”15px”][vc_column_text]Topaz Studio is a simple to use editing platform with Topaz Labs’ powerful acclaimed photo enhancement technology. It works as a standalone editor, a plugin within Lightroom and Photoshop, as well as a host application for your other Topaz plugins. It is free to use the program, all 1-click effects, and 10 Adjustments.

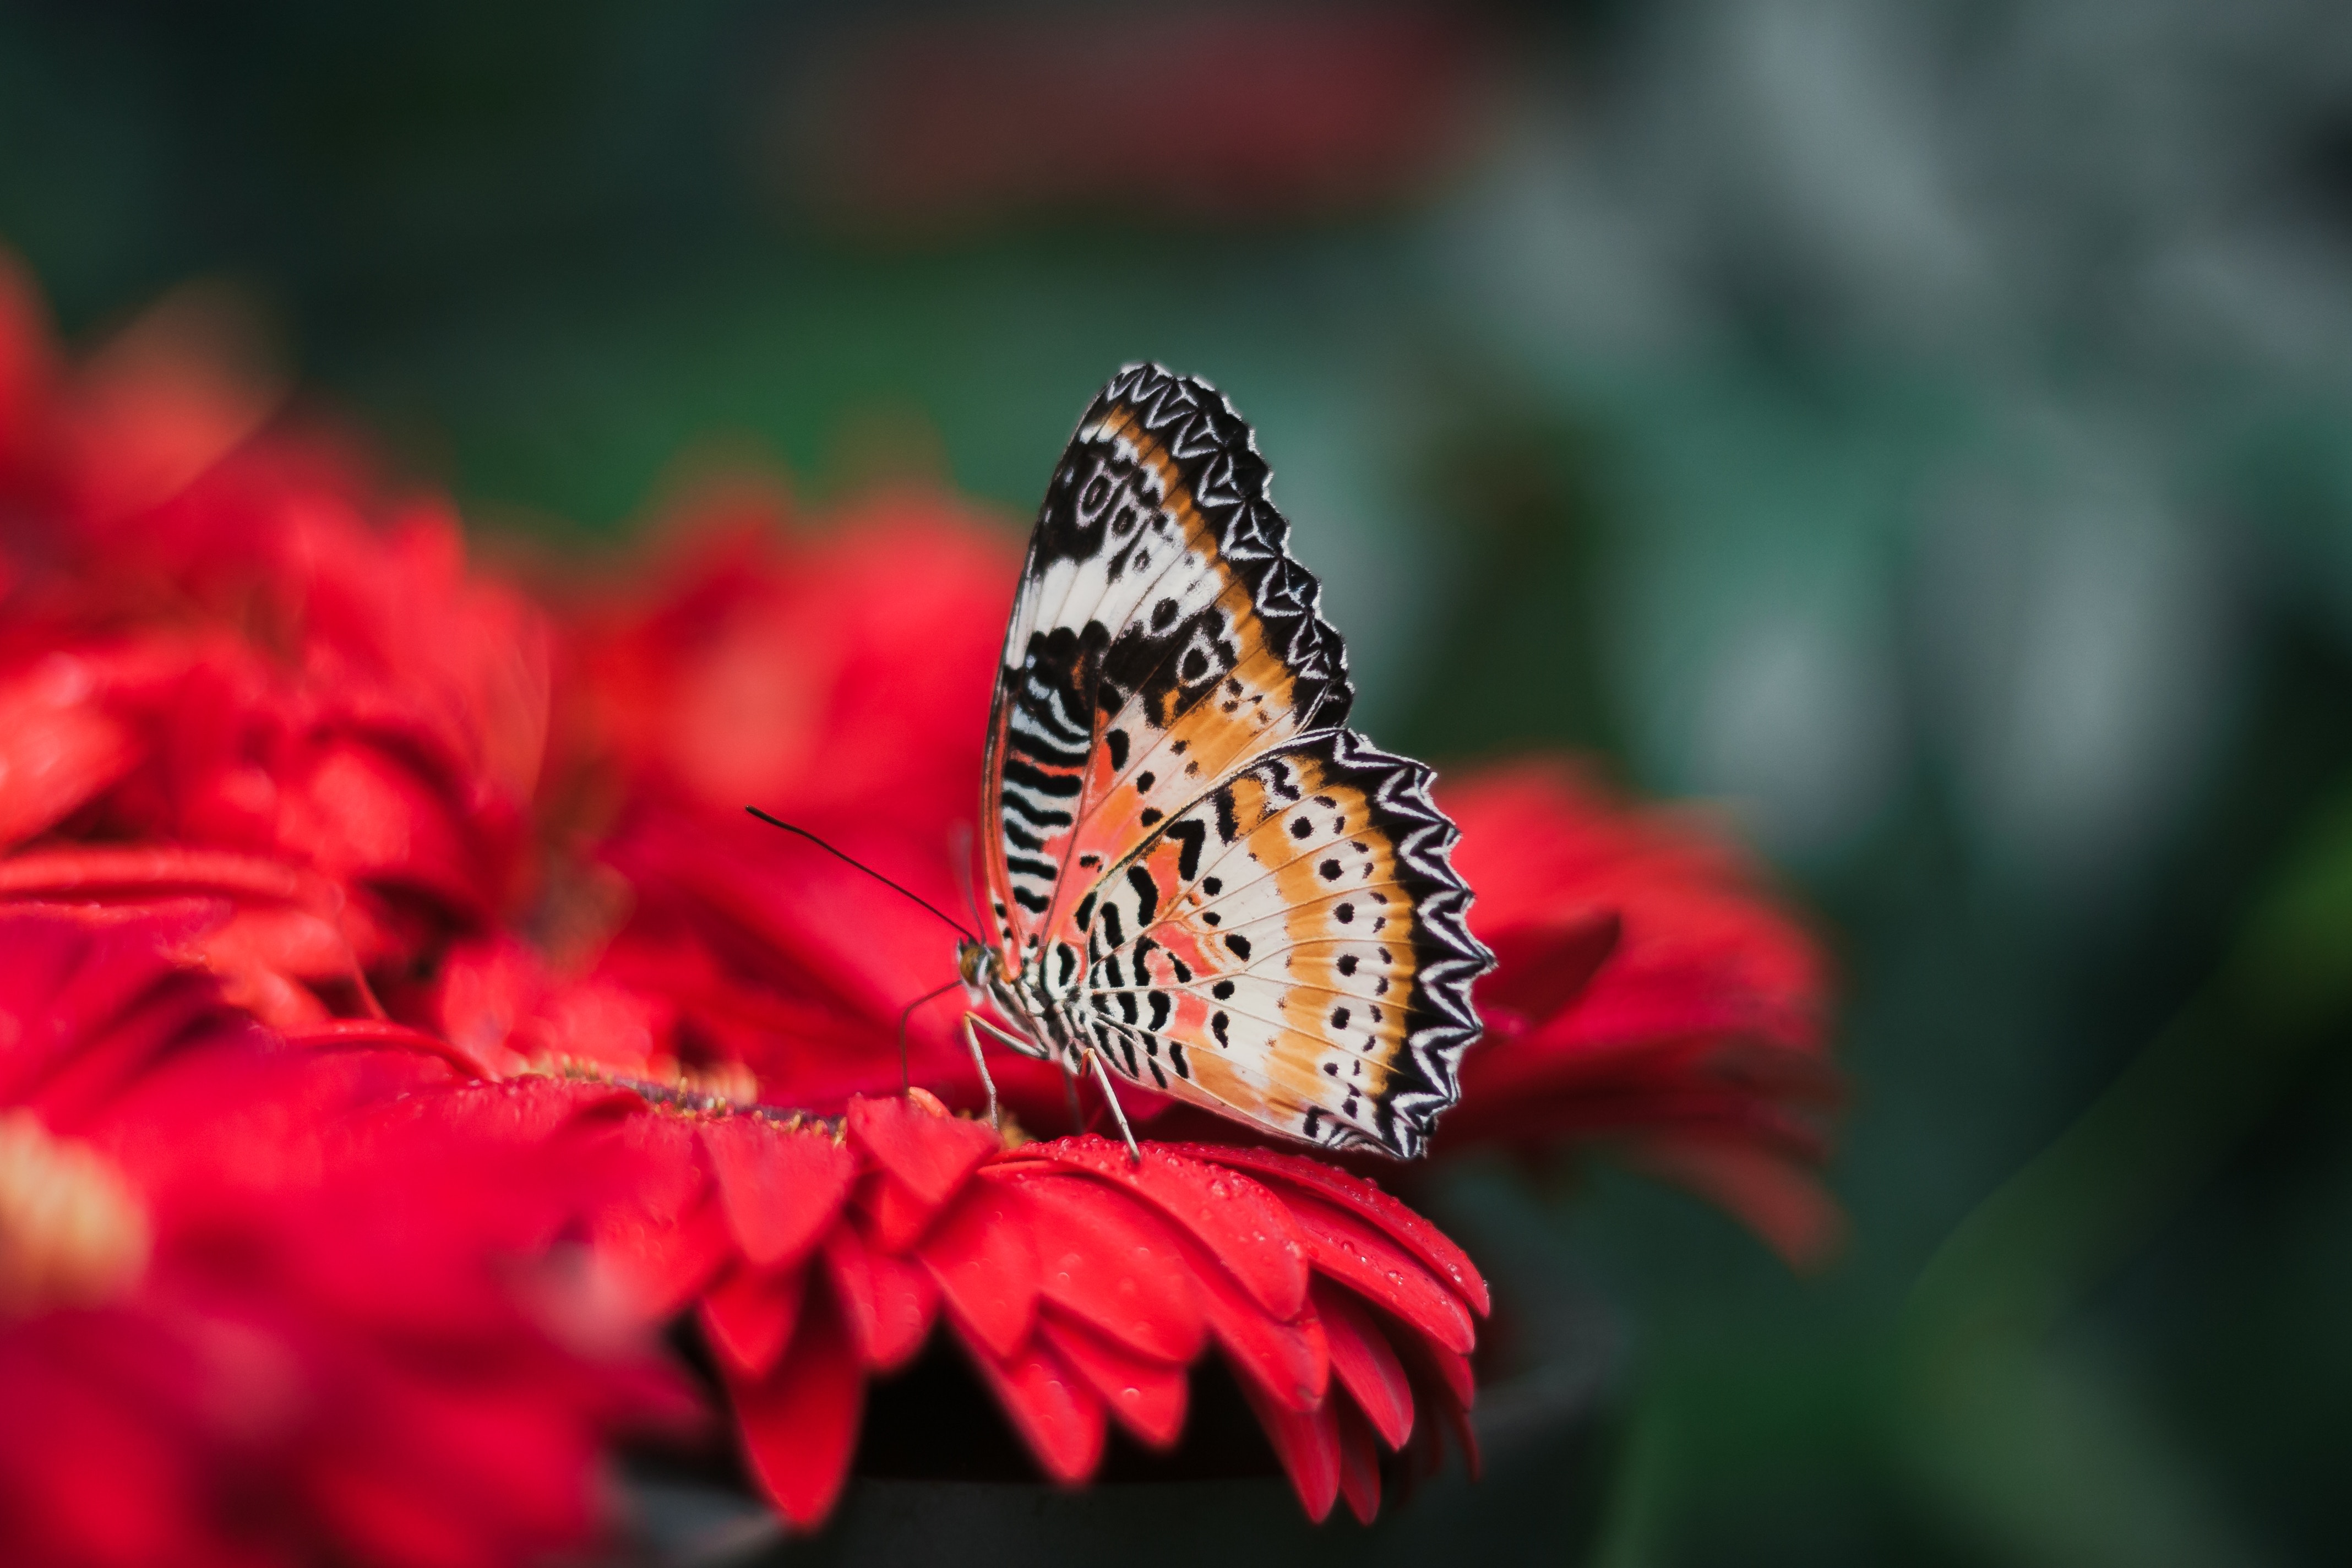
The Brightness Contrast Adjustment is one of 10 free Adjustments within Topaz Studio! Brightness Contrast lets users correct and update images with absolute control over the brightness, contrast, and saturation of an image. This easy to use, extremely versatile tool provides users with an array of possibilities. From inverted colors to bold contrast to soft and dreamy, Brightness Contrast gives you the ability to make your images come alive. Want to follow along as I show you how you can correct images in this beginner level tutorial? Grab this image and open it in Topaz Studio to begin!

butterfly[/vc_column_text][vc_empty_space height=”15px”][vc_column_text]Don’t have Topaz Studio? Topaz Studio is free to download! You can get it now by using the links below. If you need more information about Topaz Studio, check out this overview: Introducing Topaz Studio[/vc_column_text][/vc_column][/vc_row][vc_row][vc_column][vc_empty_space][vc_column_text]

Free Topaz Studio Download

[/vc_column_text][vc_empty_space height=”15px”][vc_row_inner][vc_column_inner width=”1/2″][vc_btn title=”Windows” shape=”square” color=”primary” align=”center” button_block=”true” link=”url:https%3A%2F%2Ftopazlabs.s3.amazonaws.com%2Ftopazstudio_online_installer.exe|||”][/vc_column_inner][vc_column_inner width=”1/2″][vc_btn title=”Mac” shape=”square” color=”primary” align=”center” button_block=”true” link=”url:https%3A%2F%2Ftopazlabs.s3.amazonaws.com%2Ftopazstudio_online_installer.dmg|||”][/vc_column_inner][/vc_row_inner][/vc_column][/vc_row][vc_row][vc_column][vc_empty_space][vc_column_text]

What You’ll Need

[/vc_column_text][vc_empty_space height=”15px”][vc_column_text]This introduction tutorial is really easy to follow along with but you will need just a few things if you’d like to follow along with me:

1. Topaz Studio. You’ll need Topaz Studio on your computer if you’d like to follow along during this tutorial.

2. An Image. Grab the butterfly image above to follow along and try it out for yourself.

3. About 15 minutes. This beginner’s level tutorial will only take about 15 minutes to complete.

I’m going to teach you about each slider and what it does. Ready to try it out? Let’s get started![/vc_column_text][vc_empty_space height=”15px”][vc_single_image image=”47932″ img_size=”large” alignment=”center”][vc_column_text]

An open image in Topaz Studio. The Effects Panel, Scopes Panel, and Workspace Panel are all minimized for this tutorial.

[/vc_column_text][vc_empty_space][/vc_column][/vc_row][vc_row][vc_column][vc_column_text]

Adjustment Overview

[/vc_column_text][vc_empty_space height=”15px”][vc_row_inner][vc_column_inner width=”1/4″][vc_single_image image=”47934″ img_size=”full” alignment=”center”][/vc_column_inner][vc_column_inner width=”3/4″][vc_column_text]The Brightness Contrast Adjustment looks simple with only 3 sliders. Don’t let the simplicity fool you! This little Adjustment is very powerful and can completely change the look of an image!

The Sliders and What They Do:

Brightness: Correct images or add artistic flare by changing the brightness of the image from pure white to solid black and anywhere in between.

Contrast: From intense contrast to dreamy and soft contrast to completely inverted, Brightness Contrast offers a variety of editing possibilities.

Saturation: From bold to subtle, desaturated to inverted, choose any saturation you like! The full spectrum of choices allows for bold colors, delicate hues, and artistic combinations.[/vc_column_text][/vc_column_inner][/vc_row_inner][vc_empty_space][/vc_column][/vc_row][vc_row][vc_column][vc_empty_space][vc_column_text]

Step 1: Add the Brightness Contrast Adjustment

[/vc_column_text][vc_empty_space height=”15px”][vc_column_text]NOTE: We will not be using 1-click effects, the workspace, or the scopes panel. I have minimized these areas to make my canvas bigger. You can do this by clicking on the border edge arrow. To open them back up, click again.

There are a few different ways to add the Brightness Contrast Adjustment in Topaz Studio.

  1. Click the Brightness Contrast Adjustment icon in the Adjustment Buttons (pictured here). All 10 free adjustments are located here.
  2. Click the More Button in the Adjustment Buttons to show a list for all Adjustments. Click Brightness Contrast Adjustment to add it to your Adjustment Stack.
  3. Go to Menu > Adjustment >Brightness Contrast Adjustment to add the Brightness Contrast Adjustment.

We will be making changes to the subject matter (butterfly) once you have added the Brightness Contrast Adjustment.

Try it out: Slide each slider back and forth between -1.00 and 3.00 (1.00 for the Brightness Slider) and observe how the image is affected! To reset the slider just click the Slider Name or click Undo (bottom right hand corner of the program).

To make the butterfly bright and blue, simply make the following adjustments:
Brightness: 0.10
Contrast: 1.75
Saturation: -1.00[/vc_column_text][vc_empty_space height=”15px”][vc_single_image image=”47940″ img_size=”large” alignment=”center”][vc_column_text]

An extreme change with the Brightness Contrast Adjustment in Topaz Studio.

[/vc_column_text][vc_empty_space height=”15px”][vc_column_text]Once you have made the changes, go to the Blending Mode drop down and rollover the various names to see how the image is affected. Select Color.[/vc_column_text][vc_empty_space height=”15px”][vc_single_image image=”47945″ img_size=”large” alignment=”center”][vc_column_text]

Use the Blending Mode to change the way the image is affected by the Adjustment.

[/vc_column_text][vc_empty_space height=”15px”][vc_column_text]

Masking

[/vc_column_text][vc_empty_space height=”15px”][vc_row_inner][vc_column_inner width=”1/4″][vc_single_image image=”47947″ img_size=”large” alignment=”center”][/vc_column_inner][vc_column_inner width=”3/4″][vc_column_text]We will need to mask to make the subject matter the only affected area. Click the Add Mask Button next to the Adjustment name to add an Adjustment Level Mask. When you add masking it will default to white. Select Invert to make the mask black. Then select Brush. Since the mask is black we will need to brush in white. Change the Mask Density to white. Paint the subject matter white. You can change the Radius and Edge Softness to make the brush bigger or sharper. When you are finished, click Done.[/vc_column_text][/vc_column_inner][/vc_row_inner][vc_empty_space height=”15px”][vc_column_text]When you are done with the first Brightness Contrast Adjustment, select the Eye Icon to turn the Adjustment OFF.[/vc_column_text][vc_empty_space][/vc_column][/vc_row][vc_row][vc_column][vc_empty_space][vc_column_text]

Step 2: Add the Second Brightness Contrast Adjustment

[/vc_column_text][vc_empty_space height=”15px”][vc_column_text]Go ahead and add a second Brightness Contrast Adjustment.

Try it out: Slide each slider back and forth between -1.00 and 3.00 (1.00 for the Brightness Slider) and observe how the background changes.

You can put the slider where you like them or use the same settings I used:
Brightness: -0.45
Contrast: 1.00
Saturation: 1.30[/vc_column_text][vc_empty_space height=”15px”][vc_single_image image=”47950″ img_size=”large” alignment=”center”][vc_column_text]

A subtle change with the Brightness Contrast Adjustment in Topaz Studio is easy to accomplish.

[/vc_column_text][vc_empty_space height=”15px”][vc_column_text]

Masking

[/vc_column_text][vc_empty_space height=”15px”][vc_row_inner][vc_column_inner][vc_single_image image=”47951″ img_size=”large” alignment=”center”][vc_empty_space height=”15px”][vc_column_text]Now we’ll need to mask to make the background the only affected area. Click the Add Mask Button next to the Adjustment name to add an Adjustment Level Mask. When you add masking it will default to white. Then select Brush. Make sure the Mask Density is black. Paint the subject matter black. You can change the Radius and Edge Softness to make the brush bigger or sharper. When you are finished, click Done.[/vc_column_text][/vc_column_inner][/vc_row_inner][vc_empty_space height=”15px”][vc_column_text]When you are done with the second Brightness Contrast Adjustment, select the Eye Icon on the first Adjustment to turn the Adjustment ON.[/vc_column_text][vc_empty_space height=”15px”][vc_single_image image=”47958″ img_size=”large” alignment=”center”][vc_column_text]

The completed image: a subtle, yet dramatic background and a vibrant and bright butterfly.

[/vc_column_text][vc_empty_space][/vc_column][/vc_row][vc_row][vc_column][vc_column_text]

That’s It!

[/vc_column_text][vc_column_text]From bold and colorful to subtle and realistic, that’s everything you can accomplish with the Brightness Contrast Adjustment in Topaz Studio and how you can do it! I hope you tried out a few new things today and learned a little about the endless possibilities within Topaz Studio.

We’ll also be adding more tutorials and videos so be sure to give us a follow to learn more!

If you’d like to share your images with us, tag us on Instagram with @topazlabs and Twitter with @topazlabs. We’re also on Facebook and YouTube![/vc_column_text][vc_empty_space][/vc_column][/vc_row][vc_row][vc_column][vc_empty_space height=”15px”][vc_separator border_width=”3″][vc_empty_space height=”15px”][vc_column_text]

About Jodi L. Robbins

[/vc_column_text][vc_empty_space height=”15px”][vc_row_inner][vc_column_inner width=”1/4″][vc_single_image image=”8523″ img_size=”” alignment=”center” style=”vc_box_circle_2″][/vc_column_inner][vc_column_inner width=”3/4″][vc_column_text]Jodi is currently the Art Director of Topaz Labs. She has been an artist and photographer for over 15 years, starting with black and white film photography and alternative processing. After completing her BFA in Studio Art from Southern Methodist University and her Masters in Photography from Savannah College of Art and Design, she worked in product photography for companies such as Heritage Auctions, Neiman Marcus, and the Dallas Cowboys.[/vc_column_text][/vc_column_inner][/vc_row_inner][vc_empty_space height=”15px”][vc_separator border_width=”3″][vc_empty_space height=”15px”][/vc_column][/vc_row]

Posted on 3 Comments

How to Use the Basic Adjustment

Hi everyone! There’s been a few questions popping up about how to use the all new Topaz Studio like “What are Adjustments?” and “How do I add an Adjustment and what should I do with it?”

To help get you started, I’ll be going over the most useful and popular Adjustment in Topaz Studio, the Basic Adjustment! This Adjustment is a great starting point for correcting exposure and color in images. You can learn more about the Basic Adjustment on the Basic Adjustment Information Page but, if you’re ready to get started now, you can follow along with this entry level introduction to learn more and to start working immediately on your own images.[vc_row][vc_column][vc_empty_space][vc_column_text]

Overview of the Basic Adjustment

[/vc_column_text][vc_empty_space height=”15px”][vc_column_text]Topaz Studio is a simple to use editing platform with Topaz Labs’ powerful acclaimed photo enhancement technology. It works as a standalone editor, a plugin within Lightroom and Photoshop, as well as a host application for your other Topaz plugins. It is free to use the program, all 1-click effects, and 10 Adjustments.

The Basic Adjustment is one of 10 free Adjustments within Topaz Studio! You can get access to all the common tools you need to balance your exposure, correct color, and control image detail. Feel free to follow along as I show you how you can correct images in this beginner level tutorial.

Don’t have Topaz Studio? Topaz Studio is free to download! You can get it now by using the links below. If you need more information about Topaz Studio, check out this overview: Introducing Topaz Studio[/vc_column_text][/vc_column][/vc_row][vc_row][vc_column][vc_empty_space][vc_column_text]

Free Topaz Studio Download

[/vc_column_text][vc_empty_space height=”15px”][vc_row_inner][vc_column_inner width=”1/2″][vc_btn title=”Windows” shape=”square” color=”primary” align=”center” button_block=”true” link=”url:https%3A%2F%2Ftopazlabs.s3.amazonaws.com%2Ftopazstudio_online_installer.exe|||”][/vc_column_inner][vc_column_inner width=”1/2″][vc_btn title=”Mac” shape=”square” color=”primary” align=”center” button_block=”true” link=”url:https%3A%2F%2Ftopazlabs.s3.amazonaws.com%2Ftopazstudio_online_installer.dmg|||”][/vc_column_inner][/vc_row_inner][/vc_column][/vc_row][vc_row][vc_column][vc_empty_space][vc_column_text]

What You’ll Need

[/vc_column_text][vc_empty_space height=”15px”][vc_column_text]This introduction tutorial is really easy to follow along with but you will need just a few things if you’d like to follow along with me:

1. Topaz Studio. You’ll need Topaz Studio on your computer if you’d like to follow along during this tutorial.

2. An Image. Grab an image to follow along and try it out for yourself.

3. About 10 minutes. This beginner’s level tutorial will only take about 10 minutes to complete.

I’m going to teach you about each slider and what it does but it’s up to you to decide what looks good on your image! Ready to go? Let’s get started![/vc_column_text][/vc_column][/vc_row][vc_row disable_element=”yes”][vc_column][vc_empty_space][vc_column_text]

Open an Image

[/vc_column_text][vc_empty_space height=”15px”][vc_column_text]Once you open Topaz Studio, you’ll notice that a lot of the sections are empty and a lot of options are unavailable. This is because you’ll need to open an image to get started! There are a few various ways to open up an image.

  1. Drag and drop an image from your computer into the program.
  2. Click Open (located in the Canvas) and navigate through your files. Select an image and click Open.
  3. Click Open in the menu bar. Select an image and click Open.
  4. Go to Menu > File > Open Image… and then select an image and click Open.
  5. Use your shortcut keys (such as Command O or Control O).

[/vc_column_text][vc_empty_space height=”15px”][vc_single_image image=”11108″ img_size=”full” alignment=”center”][vc_column_text]

Drag and drop an image from your computer.

[/vc_column_text][vc_empty_space][vc_single_image image=”11116″ img_size=”full” alignment=”center”][vc_column_text]

An opened image in Topaz Studio.

[/vc_column_text][vc_empty_space][/vc_column][/vc_row][vc_row disable_element=”yes”][vc_column][vc_column_text]

Customize the Sections

[/vc_column_text][vc_column_text]We won’t be using the Effects Panel (left hand side) or the Image Browser (bottom of the program). Close these sections by clicking on the collapse bar. You can always reopen them by clicking again.[/vc_column_text][vc_empty_space height=”15px”][vc_single_image image=”11120″ img_size=”large” alignment=”center”][vc_column_text]

Where to click to close sections in Topaz Studio.

[/vc_column_text][vc_empty_space][/vc_column][/vc_row][vc_row][vc_column][vc_empty_space][vc_column_text]

Step 1: Add the Basic Adjustment

[/vc_column_text][vc_empty_space height=”15px”][vc_column_text]There are a few different ways to add the Basic Adjustment in Topaz Studio.

  1. Click the Basic Adjustment icon in the Adjustment Buttons (pictured here). All 10 free adjustments are located here.
  2. Click the More Button in the Adjustment Buttons to show a list for all Adjustments. Click Basic Adjustment to add it to your Adjustment Stack.
  3. Go to Menu > Adjustment > Basic Adjustment to add the Basic Adjustment.

[/vc_column_text][vc_empty_space height=”15px”][vc_single_image image=”11124″ img_size=”large” alignment=”center”][vc_column_text]

Click the Basic Adjustment icon in the Adjustment Buttons.

[/vc_column_text][vc_empty_space height=”15px”][vc_single_image image=”11126″ img_size=”large” alignment=”center”][vc_column_text]

The Basic Adjustment in Topaz Studio.

[/vc_column_text][vc_empty_space height=”15px”][/vc_column][/vc_row][vc_row][vc_column][vc_column_text]

Adjustment Overview

[/vc_column_text][vc_empty_space height=”15px”][vc_row_inner][vc_column_inner width=”1/4″][vc_single_image image=”46270″ img_size=”full” alignment=”center”][/vc_column_inner][vc_column_inner width=”3/4″][vc_column_text]The Basic Adjustment might look intimidating because there’s a lot going on but it’s very simple to use! The Basic Adjustment features Integrated Masking, Blending Modes, an Opacity Slider, Adjustment Level Presets, and sliders. The sliders are Exposure, Clarity, Shadow, and Highlight. There’s also Saturation, Temperature, and Tint. Usually, sliding to the left is “less” while sliding to the right is “more”. I’ll be going into each slider’s function in depth so read on to learn more![/vc_column_text][/vc_column_inner][/vc_row_inner][vc_empty_space][/vc_column][/vc_row][vc_row][vc_column][vc_column_text]

Adjustment Level Presets

[/vc_column_text][vc_column_text]Every Adjustment in Topaz Studio has Adjustment Level Presets. These Presets are a great place to start when editing an image. You can see each slider change when you roll over a different Preset. To commit a Preset, simply Click the Preset Name that you like.

Try it Out: Click on the Adjustment Level Presets and see how they affect your image! Once you see how the Presets change your image, Reset the Adjustment. To completely Reset your image, which deletes all Adjustments used, click Reset in the bottom right corner of the program.[/vc_column_text][vc_empty_space height=”15px”][vc_single_image image=”11128″ img_size=”large” alignment=”center”][vc_column_text]

Basic Adjustment Presets.

[/vc_column_text][vc_empty_space][/vc_column][/vc_row][vc_row][vc_column][vc_column_text]

Make Custom Changes

[/vc_column_text][vc_column_text]The Topaz Studio Basic Adjustment is a great starting point to adjust and correct image tone and color. Postproduction is made easy with 4 exposure related value sliders and 3 color effect related sliders. Making custom changes to any Adjustment is fast and easy. Simply click and drag a slider to make a change.

Let’s take an in depth look at what the sliders do in the Basic Adjustment. Now that you know how to Reset your image (remember, bottom right hand corner!) you can make changes without any fear of commitment. You can also use the Undo/Redo buttons in the bottom right of the program.[/vc_column_text][vc_empty_space][/vc_column][/vc_row][vc_row][vc_column][vc_column_text]

Exposure Related Sliders

[/vc_column_text][vc_empty_space height=”15px”][vc_single_image image=”11131″ img_size=”large” alignment=”center”][vc_column_text]

Basic Adjustment Exposure Related Sliders.

[/vc_column_text][vc_empty_space][/vc_column][/vc_row][vc_row][vc_column][vc_row_inner][vc_column_inner width=”2/3″][vc_column_text]

Exposure Slider

[/vc_column_text][vc_empty_space height=”15px”][vc_single_image image=”11132″ img_size=”large”][/vc_column_inner][vc_column_inner width=”1/3″][vc_empty_space][vc_column_text]You can easily update the overall exposure of the image by adjusting the Exposure slider. Simply increase the value of the Exposure slider and the image will become lighter. By decreasing the value, the overall image will become darker. No matter what you do, you’ll never lose color or image integrity, even with extreme adjustments.

Try it Out: Click on the handle (the white dot) and slide it around to see how your image is affected. You can also manually type in values from -1.00 to 1.00, use your arrow key to change the value .01 at a time, or click on the slider to move the handle there instantly. To reset the slider, put it on 0.00. You can also click the Slider Title to reset it.[/vc_column_text][/vc_column_inner][/vc_row_inner][vc_empty_space][/vc_column][/vc_row][vc_row][vc_column][vc_row_inner][vc_column_inner width=”2/3″][vc_column_text]

Clarity Slider

[/vc_column_text][vc_empty_space height=”15px”][vc_single_image image=”11133″ img_size=”large” onclick=”link_image”][/vc_column_inner][vc_column_inner width=”1/3″][vc_empty_space][vc_column_text]The Clarity Slider is one of my personal favorites! You can make your image soft and smooth or detailed or even HDR-like! Clarity’s microcontrast technology emulates a skilled retoucher’s method of selectively brightening and darkening parts of your image. Bring out details in images by increasing the value of the slider. To soften image details simply decrease the Clarity slider.

Try it Out: Move the handle all the way to -1.00 to see how smooth and clean your image can look. Then, move the slider to 1.00 and you’ll see how detailed your image can become.[/vc_column_text][/vc_column_inner][/vc_row_inner][vc_empty_space][/vc_column][/vc_row][vc_row][vc_column][vc_row_inner][vc_column_inner width=”2/3″][vc_column_text]

Shadow Slider

[/vc_column_text][vc_empty_space height=”15px”][vc_single_image image=”11135″ img_size=”large” onclick=”link_image”][/vc_column_inner][vc_column_inner width=”1/3″][vc_empty_space][vc_column_text]Selectively manipulate shadows and dark tones within any image with the Shadow slider. Lighten all the shadows within an image by increasing the value of the slider or darken shadows and lowlights by decreasing the value. Any adjustment made will only affect the darker image tones and shadows.

Try it Out: Click on the handle (the white dot) and slide it around to see how your image is affected. You’ll notice that the dark areas of the image change. Try out a couple different settings and see which one you like best![/vc_column_text][/vc_column_inner][/vc_row_inner][vc_empty_space][/vc_column][/vc_row][vc_row][vc_column][vc_row_inner][vc_column_inner width=”2/3″][vc_column_text]

Highlight Slider

[/vc_column_text][vc_empty_space height=”15px”][vc_single_image image=”11136″ img_size=”large” onclick=”link_image”][/vc_column_inner][vc_column_inner width=”1/3″][vc_empty_space][vc_column_text]The highlights in the image are where the image has whites or very light areas. You can effortlessly control image highlights within any image with the Highlight slider. Lighten all the highlights within an image by decreasing the value of the slider or increase the brightness of highlights by increasing the value. The adjustment will selectively affect the lightest areas of the image.

Try it Out: Click on the handle (the white dot) and slide it towards the right. See how bright your image becomes in specific areas? This is where your highlights are and they are changing because of the Highlight Slider changes! If you slide the Handle to the left the image highlights will become darker. Change around the slider to see how your image is affected. You can also manually type in values from -1.00 to 1.00, use your arrow key to change the value .01 at a time, or click on the slider to move the handle there instantly.[/vc_column_text][/vc_column_inner][/vc_row_inner][vc_empty_space][/vc_column][/vc_row][vc_row][vc_column][vc_column_text]

Color Related Sliders

[/vc_column_text][vc_empty_space height=”15px”][vc_single_image image=”11141″ img_size=”large” alignment=”center”][vc_column_text]

Basic Adjustment Color Related Sliders.

[/vc_column_text][vc_empty_space][/vc_column][/vc_row][vc_row][vc_column][vc_row_inner][vc_column_inner width=”2/3″][vc_column_text]

Saturation Slider

[/vc_column_text][vc_empty_space height=”15px”][vc_single_image image=”11142″ img_size=”large” onclick=”link_image”][/vc_column_inner][vc_column_inner width=”1/3″][vc_empty_space][vc_column_text]The Saturation slider in the Basic Adjustment is one of my favorite sliders! It easily adds and removes color from images. Increase or decrease overall image saturation by changing the value of the slider.

Try it Out: Click on the handle and slide it around to see how your image is affected. Try desaturating your image by sliding all the way to the left and trying oversaturating your image by going all the way to the right.[/vc_column_text][/vc_column_inner][/vc_row_inner][vc_empty_space][/vc_column][/vc_row][vc_row][vc_column][vc_row_inner][vc_column_inner width=”2/3″][vc_column_text]

Temperature Slider

[/vc_column_text][vc_empty_space height=”15px”][vc_single_image image=”11143″ img_size=”large” onclick=”link_image”][/vc_column_inner][vc_column_inner width=”1/3″][vc_empty_space][vc_column_text]The Temperature slider allows you to effortlessly make images warmer or cooler. Increase the slider to add more yellow to warm up an image or decrease the slider to add more blue to make an image appear cooler.

Try it Out: Use the handle to change the Temperature. The slider is more blue to the left (-1.00) and more yellow to the right (1.00). This comes in handy if you have a color cast from shade or sunlight.[/vc_column_text][/vc_column_inner][/vc_row_inner][vc_empty_space][/vc_column][/vc_row][vc_row][vc_column][vc_row_inner][vc_column_inner width=”2/3″][vc_column_text]

Tint Slider

[/vc_column_text][vc_empty_space height=”15px”][vc_single_image image=”11144″ img_size=”large” onclick=”link_image”][/vc_column_inner][vc_column_inner width=”1/3″][vc_empty_space][vc_column_text]Update an image’s overall color cast with the Tint slider. Decreasing the tint value will increase the green tint to an image while increasing the value will create a magenta tint.

Try it Out: Use the handle to change the Tint. The slider is more green to the left (-1.00) and more magenta to the right (1.00). This slider is great for balancing colors.[/vc_column_text][/vc_column_inner][/vc_row_inner][vc_empty_space][/vc_column][/vc_row][vc_row][vc_column][vc_column_text]

Adjustment Level Tools

[/vc_column_text][vc_empty_space height=”15px”][vc_row_inner][vc_column_inner width=”1/3″][vc_single_image image=”46291″ img_size=”full” alignment=”center”][/vc_column_inner][vc_column_inner width=”2/3″][vc_column_text]Every Adjustment has tools. You’ll find adjustment level masking, an opacity slider, 28 blending modes, and more in the adjustment header. You can also turn the adjustment on and off, use advanced tools in the menu, and delete the adjustment.[/vc_column_text][/vc_column_inner][/vc_row_inner][vc_empty_space height=”15px”][vc_column_text]Adjustment level tools make it easy to customize the Adjustment.

1. Masking. You can mask out (or in) pieces of your Adjustment with the Adjustment Level Masking Tool. There are 5 options including Spot, Brush, Gradient, Color, and Luminosity. You can invert the mask, make adjustments to it, stack different types, and much more!

2. Disable Adjustment. Turn the Adjustment on and off.

3. Menu. The Menu allows you to Copy, Paste, and Duplicate Adjustments. You can also Copy and Paste Masks or head over to the webpage by selecting Learn More…

4. Delete. Use the trashcan icon to delete the Adjustment.

5. Opacity. Use the Opacity slider to make the Adjustment lighter or stronger.

6. Blending Mode. Choose a Blending Mode to blend an Adjustment with only parts of your image.

Give these a try and see what they do! You can always use the Undo and Redo buttons in the bottom right hand side of the program. Topaz Studio features unlimited Undo / Redo so experiment as much as you like![/vc_column_text][vc_empty_space][/vc_column][/vc_row][vc_row][vc_column][vc_column_text]

That’s It!

[/vc_column_text][vc_column_text]And that’s everything you can accomplish with the Basic Adjustment in Topaz Studio and how you can do it! I hope you tried out a few new things today and learned a little about the endless possibilities within Topaz Studio.

We’ll also be adding more tutorials and videos so be sure to give us a follow to learn more!

If you’d like to share your images with us, tag us on Instagram with @topazlabs and Twitter with @topazlabs. We’re also on Facebook and YouTube![/vc_column_text][vc_empty_space][/vc_column][/vc_row][vc_row][vc_column][vc_column_text]

Gallery

[/vc_column_text][vc_empty_space height=”15px”][vc_row_inner][vc_column_inner width=”1/2″][vc_single_image image=”47187″ img_size=”full” alignment=”center” onclick=”link_image”][vc_column_text]

Before

[/vc_column_text][vc_empty_space height=”15px”][vc_single_image image=”47183″ img_size=”full” alignment=”center” onclick=”link_image”][vc_column_text]

Before

[/vc_column_text][vc_empty_space height=”15px”][vc_single_image image=”47185″ img_size=”full” alignment=”center” onclick=”link_image”][vc_column_text]

Before

[/vc_column_text][/vc_column_inner][vc_column_inner width=”1/2″][vc_single_image image=”47186″ img_size=”full” alignment=”center” onclick=”link_image”][vc_column_text]

After

[/vc_column_text][vc_empty_space height=”15px”][vc_single_image image=”47182″ img_size=”full” alignment=”center” onclick=”link_image”][vc_column_text]

After

[/vc_column_text][vc_empty_space height=”15px”][vc_single_image image=”47184″ img_size=”full” alignment=”center” onclick=”link_image”][vc_column_text]

After

[/vc_column_text][/vc_column_inner][/vc_row_inner][vc_empty_space][/vc_column][/vc_row][vc_row][vc_column][vc_empty_space height=”15px”][vc_separator border_width=”3″][vc_empty_space height=”15px”][vc_column_text]

About Jodi L. Robbins

[/vc_column_text][vc_empty_space height=”15px”][vc_row_inner][vc_column_inner width=”1/4″][vc_single_image image=”8523″ img_size=”” alignment=”center” style=”vc_box_circle_2″][/vc_column_inner][vc_column_inner width=”3/4″][vc_column_text]Jodi is currently the Art Director of Topaz Labs. She has been an artist and photographer for over 15 years, starting with black and white film photography and alternative processing. After completing her BFA in Studio Art from Southern Methodist University and her Masters in Photography from Savannah College of Art and Design, she worked in product photography for companies such as Heritage Auctions, Neiman Marcus, and the Dallas Cowboys.[/vc_column_text][/vc_column_inner][/vc_row_inner][vc_empty_space height=”15px”][vc_separator border_width=”3″][vc_empty_space height=”15px”][/vc_column][/vc_row]