[vc_row][vc_column][vc_column_text]Tutorial created with Topaz Studio V1.0.8[/vc_column_text][vc_column_text]Hi everyone! Today I’ll be going over the Tone Curves Adjustment in Topaz Studio. This Adjustment is very versatile and allows you to make technical corrections and artistic changes alike. I’ll be showing how you can achieve both styles today. It’s pretty amazing how a touch of this adjustment can dramatically change your image.[/vc_column_text][/vc_column][/vc_row][vc_row][vc_column][vc_empty_space][vc_column_text]
Overview of the Tone Curves Adjustment
[/vc_column_text][vc_empty_space height=”15px”][vc_column_text]In photo editing, a curve is a remapping of image tonality. Curves can affect the overall tonality of an image, or individual channels. Applying Tone Curves to all channels will affect the brightness, shadows, and contrast while applying Tone Curves to individual channels will affect the image color.[/vc_column_text][vc_empty_space height=”15px”][vc_column_text]
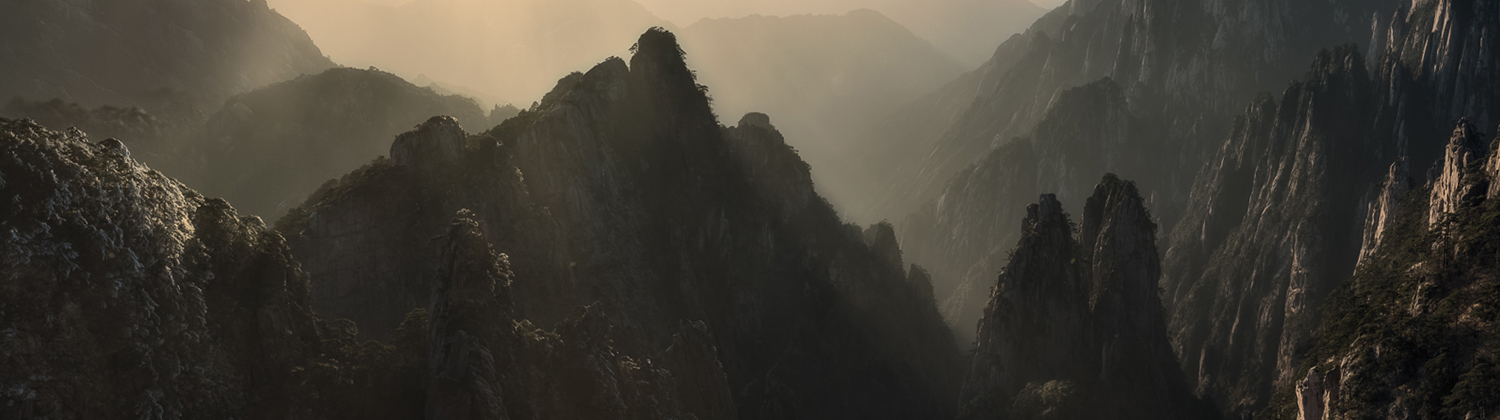
[caption id="attachment_55769" align="alignnone" width="1200"]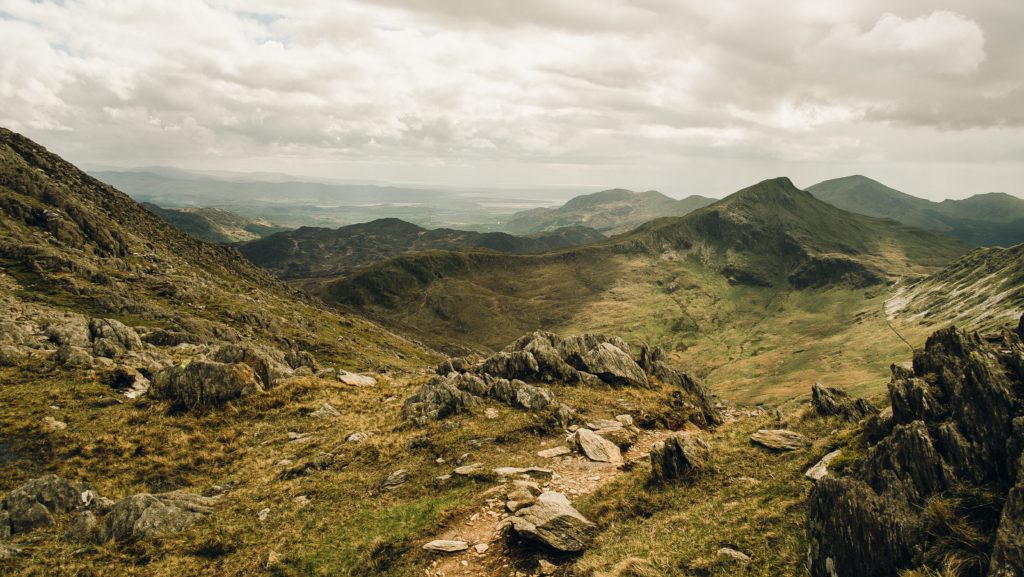 Original[/caption] [caption id="attachment_55772" align="alignnone" width="1200"]
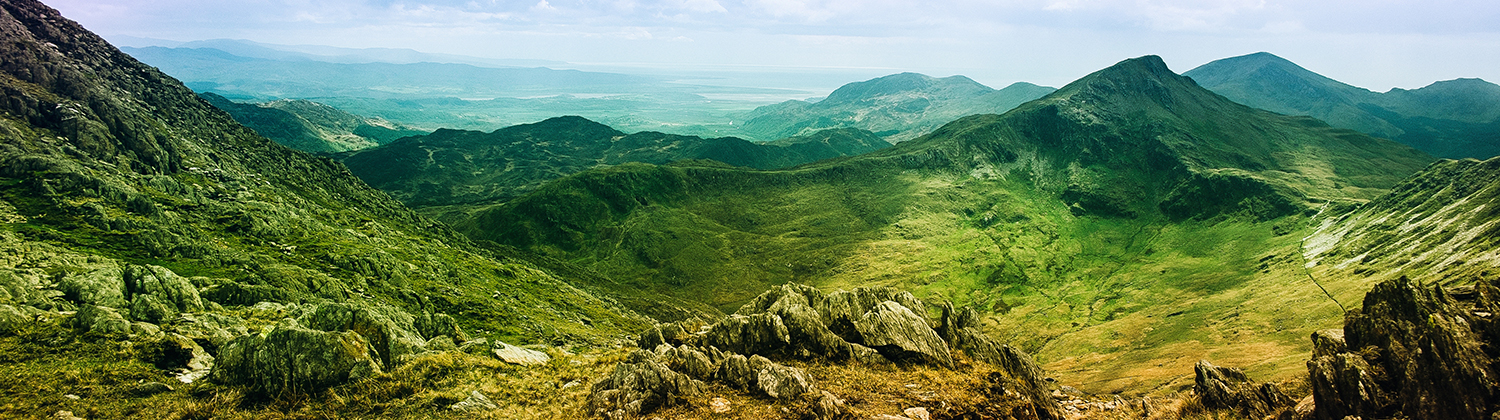
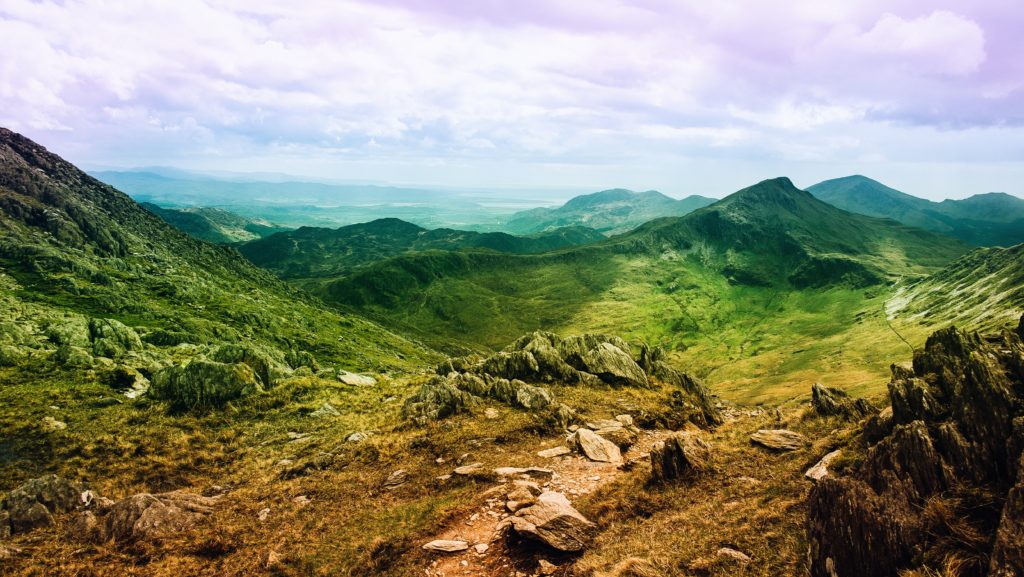 After Tone Curves[/caption]
What You’ll Need
[/vc_column_text][vc_empty_space height=”15px”][vc_column_text]This introductory level walkthrough is really easy to follow along with but you will need just a few things if you’d like to follow along with me:
1. Topaz Studio. You’ll need Topaz Studio on your computer if you’d like to follow along during this tutorial. It’s free to download and Tone Curves is always free to use.
2. An Image. Grab any image to follow along and try it out for yourself.
3. About 10 minutes. This beginner’s level tutorial will only take about 10 minutes to complete.[/vc_column_text][vc_empty_space height=”15px”][vc_column_text]Don’t have Topaz Studio? Topaz Studio is free to download! You can get it now by using the links below. If you need more information about Topaz Studio, check out this overview: Introducing Topaz Studio[/vc_column_text][/vc_column][/vc_row][vc_row][vc_column][vc_empty_space][vc_row_inner][vc_column_inner][vc_text_separator title=”Download Topaz Studio” color=”custom” css_animation=”none” accent_color=”#7c7c7c”][vc_empty_space][/vc_column_inner][/vc_row_inner][vc_row_inner content_aligment=”center” animation_in_type=”transition.slideUpIn” animation_in_offset=”100″ animation_in_duration=”800″ animation_in_delay=”0″][vc_column_inner width=”1/2″ alignment=”center”][ucaddon_uc_icon_hover_effect_button text=”Macintosh” icon=”fa fa-apple” link=”http://d2xkriaa67cpt4.cloudfront.net/topazstudio_online_installer.dmg” background_color=”#0f9af8″ uc_fonts_data=”JTdCJTdE”][vc_empty_space height=”20px”][/vc_column_inner][vc_column_inner width=”1/2″ alignment=”center”][ucaddon_uc_icon_hover_effect_button text=”Windows” icon=”fa fa-windows” link=”http://d2xkriaa67cpt4.cloudfront.net/topazstudio_online_installer.exe” background_color=”#0f9af8″ uc_fonts_data=”JTdCJTdE”][vc_empty_space height=”20px”][/vc_column_inner][/vc_row_inner][/vc_column][/vc_row][vc_row][vc_column][vc_empty_space][vc_single_image image=”55776″ img_size=”large” alignment=”center”][vc_column_text]
An open image in Topaz Studio, edited with 4 different Tone Curves Adjustments. The Effects Panel, Scopes Panel, and Workspace Panel are all minimized for this tutorial.
[/vc_column_text][vc_empty_space][/vc_column][/vc_row][vc_row][vc_column][vc_column_text]
Adjustment Overview
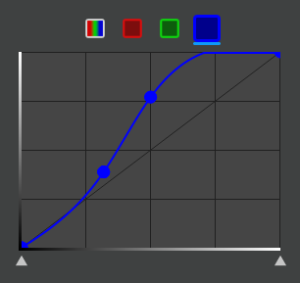
[/vc_column_text][vc_empty_space height=”15px”][vc_row_inner][vc_column_inner width=”1/4″][vc_empty_space height=”15px”][vc_single_image image=”55778″ img_size=”full” alignment=”center”][/vc_column_inner][vc_column_inner width=”3/4″][vc_column_text]The Tone Curves Adjustment looks a lot different than other Adjustments within Topaz Studio. Instead of sliders, the Tone Curves Adjustment features a grid and 4 different channels: All, Red, Green, and Blue.
The Channels and What They Do:
All: Technically manipulate and change aspects of the image’s exposure. Add contrast, increase shadows, and increase highlights.
Red: Increase Red or Cyan in an image.
Green: Increase Green or Magenta in an image.
Blue: Increase Blue or Yellow in an image.[/vc_column_text][/vc_column_inner][/vc_row_inner][vc_empty_space][/vc_column][/vc_row][vc_row][vc_column][vc_column_text]
Add the Tone Curves Adjustment
[/vc_column_text][vc_empty_space height=”15px”][vc_column_text]NOTE: We will not be using 1-click effects, the workspace, or the scopes panel. I have minimized these areas to make my canvas bigger. You can do this by clicking on the border edge arrow. To open them back up, click again.
There are a few different ways to add the Tone Curves Adjustment in Topaz Studio.
- Click the Tone Curves Adjustment icon in the Adjustment Buttons. All 10 free adjustments are located here.
- Click the More Button in the Adjustment Buttons to show a list for all Adjustments. Click Tone Curves Adjustment to add it to your Adjustment Stack.
- Go to Menu > Adjustment >Tone Curves Adjustment to add the Tone Curves Adjustment.
[/vc_column_text][vc_empty_space][/vc_column][/vc_row][vc_row][vc_column][vc_column_text]
Adjust RGB Tonality
[/vc_column_text][vc_empty_space][vc_column_text][/vc_column_text][vc_empty_space height=”15px”][vc_column_text]Changing the RGB Channel will affect the lightness and darkness in an image.
Tip: Most people add an S-Curve. This is where one point is above the Curve Line and one point is below to create a subtle S Shape.
Try It: Use your mouse or stylus to click and drag points to change the Curve Line. You will see how your image and histogram change. You can add as few or as many points as you like to change your image. The shadows, highlights, and contrast will be affected when you update the RGB Channel.
 [/vc_column_text][vc_empty_space][vc_column_text]
Before and After
[/vc_column_text][vc_empty_space height=”15px”][vc_column_text]
[caption id="attachment_55769" align="alignnone" width="1200"] Original[/caption] [caption id="attachment_55860" align="alignnone" width="1200"]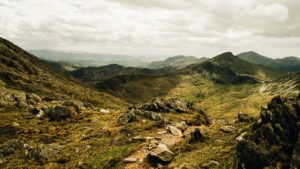 After RGB Adjustment[/caption]
Here you can see how a slight S Curve can affect the image contrast.
[/vc_column_text][vc_empty_space][/vc_column][/vc_row][vc_row][vc_column][vc_column_text]
Adjust the Red Channel
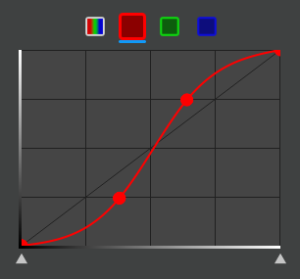
[/vc_column_text][vc_empty_space][vc_column_text][/vc_column_text][vc_empty_space height=”15px”][vc_column_text]Changing the Red Channel will add Red when the points are above the Curve Line and Cyan when the points are below. If a point is above and one is below, you will start to notice a slight dual tone effect.
Try It: Use your mouse or stylus to click and drag points to change the Red Channel Curve Line. You will see how your image and histogram change. You can add as few or as many points as you like to change your image (while I prefer one point you may prefer more). Experiment with the Red Channel and see how your image is affected.
 [/vc_column_text][vc_empty_space][vc_column_text]
Before and After
[/vc_column_text][vc_empty_space height=”15px”][vc_column_text]
[caption id="attachment_55769" align="alignnone" width="1200"] Original[/caption] [caption id="attachment_55970" align="alignnone" width="1200"]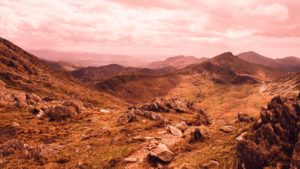 After Red Channel Adjustment[/caption]
The Red Channel affects reds in an image.
[/vc_column_text][vc_empty_space][/vc_column][/vc_row][vc_row][vc_column][vc_column_text]
Adjust the Green Channel
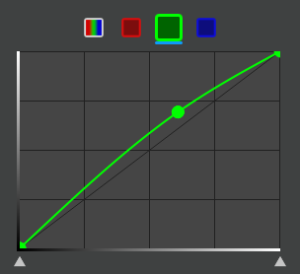
[/vc_column_text][vc_empty_space][vc_column_text][/vc_column_text][vc_empty_space height=”15px”][vc_column_text]Changing the Green Channel will add Green when the points are above the Curve Line and Magenta when the points are below. If a point is above and one is below, you will start to notice a slight dual tone effect.
Try It: Use your mouse or stylus to click and drag points to change the Green Channel Curve Line. You will see how your image and histogram change. You can add as few or as many points as you like to change your image. Experiment with the Green Channel and see how your image is affected. You may like to add green or to add magenta.
 [/vc_column_text][vc_empty_space][vc_column_text]
Before and After
[/vc_column_text][vc_empty_space height=”15px”][vc_column_text]
[caption id="attachment_55769" align="alignnone" width="1200"] Original[/caption] [caption id="attachment_56003" align="alignnone" width="1200"]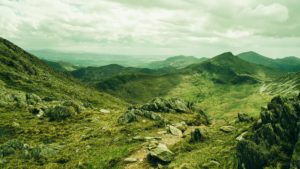 After Green Channel Adjustment[/caption]
The Green Channel affects green in an image.
[/vc_column_text][vc_empty_space][/vc_column][/vc_row][vc_row][vc_column][vc_column_text]
Adjust the Blue Channel
[/vc_column_text][vc_empty_space][vc_column_text][/vc_column_text][vc_empty_space height=”15px”][vc_column_text]Changing the Blue Channel will add Blue when the points are above the Curve Line and Yellow when the points are below. If a point is above and one is below, you will start to notice a slight dual tone effect.
Try It: Use your mouse or stylus to click and drag points to change the Blue Channel Curve Line. Experiment and see how your image is affected with more blue or more yellow.
 [/vc_column_text][vc_empty_space][vc_column_text]
Before and After
[/vc_column_text][vc_empty_space height=”15px”][vc_column_text]
[caption id="attachment_55769" align="alignnone" width="1200"] Original[/caption] [caption id="attachment_56021" align="alignnone" width="1200"] After Blue Channel Adjustment[/caption]
The Blue Channel affects blues in an image.
[/vc_column_text][vc_empty_space][/vc_column][/vc_row][vc_row][vc_column][vc_column_text]
Combine Tone Curves and Masking Tutorial
[/vc_column_text][vc_empty_space][vc_video link=”https://youtu.be/T9j3qvujcWY”][vc_empty_space][/vc_column][/vc_row][vc_row][vc_column][vc_column_text]
That’s It!
[/vc_column_text][vc_column_text]From bold and colorful to subtle and realistic, that’s everything you can accomplish with the Tone Curves Adjustment in Topaz Studio and how you can do it! I hope you tried out a few new things today and learned a little about the endless possibilities within Topaz Studio.
We’ll also be adding more tutorials and videos so be sure to give us a follow to learn more!
If you’d like to share your images with us, tag us on Instagram with @topazlabs and Twitter with @topazlabs. We’re also on Facebook and YouTube![/vc_column_text][vc_empty_space][/vc_column][/vc_row][vc_row][vc_column][vc_empty_space height=”15px”][vc_empty_space height=”15px”][vc_column_text]
About Jodi L. Robbins
[/vc_column_text][vc_empty_space height=”15px”][vc_row_inner][vc_column_inner width=”1/4″][vc_single_image image=”8523″ img_size=”” alignment=”center” style=”vc_box_circle_2″][/vc_column_inner][vc_column_inner width=”3/4″][vc_column_text]Jodi is currently the Art Director of Topaz Labs. She has been an artist and photographer for over 15 years, starting with black and white film photography and alternative processing. After completing her BFA in Studio Art from Southern Methodist University and her Masters in Photography from Savannah College of Art and Design, she worked in product photography for companies such as Heritage Auctions, Neiman Marcus, and the Dallas Cowboys.[/vc_column_text][/vc_column_inner][/vc_row_inner][vc_empty_space height=”15px”][vc_empty_space height=”15px”][/vc_column][/vc_row]