Posted on 1 Comment

A Photographer’s Year by Alister Benn

Alister Benn a Year in Review

[vc_row][vc_column][vc_column_text]

Meet Alister Benn

[/vc_column_text][vc_empty_space height=”15px”][vc_column_text]I’ve been making photographs since I was a teenager, with growing aptitude and confidence. At the end of each year I reflect on the past 12 months and usually conclude that I like my most recent work the most. Why should this be? It is not always the case that I have been to the most dramatic landscape in the world, or had the best light, or upgraded to the latest camera. Instead, I have concluded that my preference for my most recent work is because it represents the best version of me, as I am today.

As we entered 2017, I made a commitment to diarize my personal and creative development and summarize it in a quarterly article. Here is my opportunity to share the little and the large revelations I feel are contributing to my own creative growth, along with some of my most recent images.

[/vc_column_text][vc_empty_space height=”15px”][qodef_blockquote text=”At the end of each year I reflect on the past 12 months and usually conclude that I like my most recent work the most. Why should this be?” title_tag=”h3″][vc_empty_space][/vc_column][/vc_row][vc_row][vc_column][vc_row_inner][vc_column_inner][vc_single_image image=”56824″ img_size=”large” alignment=”center” onclick=”link_image”][vc_column_text]

Winterscape

[/vc_column_text][vc_empty_space][/vc_column_inner][/vc_row_inner][vc_column_text]

December

[/vc_column_text][vc_empty_space height=”15px”][vc_column_text]

In the middle of the month, at the end of our workshop season, the weather here on the Isle of Skye was foul; storm after storm battered the island and I was stuck in the house for days. Occasional hikes in gales only darkened my melancholy and I was frustrated, troubled with how my increasingly introspective images would fit into a contemporary social media context. Christmas came and went and as I entered the New Year I did so with my usual bird count around the local bay. As I hiked in the mid winter gloom, I knew I had to take some drastic action, and when I got home mentioned to my wife that perhaps we should take a trip to Western China to check out the deserts of the Silk Road.

[/vc_column_text][/vc_column][/vc_row][vc_row][vc_column][vc_empty_space][vc_row_inner][vc_column_inner][vc_single_image image=”56838″ img_size=”large” alignment=”center” onclick=”link_image”][vc_column_text]

Harmonic III

[/vc_column_text][vc_empty_space][/vc_column_inner][/vc_row_inner][vc_column_text]

January

[/vc_column_text][vc_empty_space height=”15px”][vc_column_text]

On the 3rd of January we drove over to Inverness and flew to Urumqi in Xinjiang Province for three weeks exploring some areas we’d never been to. We’ve always been a spontaneous couple, but this was quick, even for us! I’ve had an adventurous life, but I wasn’t prepared for this place: The tallest static sand dunes in the world, rising to over 1700 feet covering an area half the size of Scotland. The driver, plus my wife and I were the only people within thousands of square miles, apart from a very few isolated farmsteads, which are home to the hardy camel/goat herders. Each day we would drive the Land cruiser for miles, up and over these monster dunes, vista after vista of unbelievable scale and majesty. Oh, and it was -20C!

On day two I had an epiphany – a true eureka moment. In a landscape where everything is sand, with no traditional subjects, I had to recalibrate the way I see!

For some time I have been interested in our innate ability to appreciate the aesthetic, and in the desert I started to allow my mind to wander unconstrained over the landscape – subconscious, experiential seeing, the feeling of seeing, what I now call The Chi of Seeing. I would simply stare unfocussed on the flow of the landscape and make photographs at the moments when I was compelled to do so by the feel of the relationships I subconsciously responded to!

[/vc_column_text][vc_empty_space height=”15px”][qodef_blockquote text=”What I was responding to was how the underlying geometry of the landscape made me feel. ” title_tag=”h3″][vc_empty_space height=”15px”][vc_column_text]

In one metaphorical CTR-ALT-DEL moment, I had rebooted my brain from a traditional western cultural upbringing, to one that was unconstrained and free to make personal judgements on what I found aesthetic, regardless of their adherence or not to concepts of correctness.

[/vc_column_text][/vc_column][/vc_row][vc_row][vc_column][vc_empty_space][vc_row_inner][vc_column_inner][vc_single_image image=”56835″ img_size=”large” alignment=”center” onclick=”link_image”][vc_column_text]

In the Labyrinth

[/vc_column_text][vc_empty_space][/vc_column_inner][/vc_row_inner][vc_column_text]

February

[/vc_column_text][vc_empty_space height=”15px”][vc_column_text]

Returning home from China, I had some significant writing commitments to take care of, but I did manage to start looking at the images I had made in the desert. Putting the shots that just showed where we had been to one side, I quickly identified the images I had made based on feel. I graded them 4’s and 5’s in Lightroom and got back to my writing.

Each day, when I was taking a break, I’d take a look at these images and would often find that one in particular would leap out at me and almost demand to be worked, as if it was again clearly communicating directly to my subconscious and articulating a creative direction it wanted me to go in. I’ve spent a lot of time over the years on my processing techniques, and have developed a very innate way of getting the creativity out of my head and into the image with as little thought as possible. All I care about is the WHY, not the HOW.

Through this innate way of seeing and processing, I began to make images that really excited me – to me they were simple, yet profound and each day I was anticipating strengthening that relationship with my work.

The second epiphany of the year came when I realized that the images I responded to each day were different. I am not the same every day; some days I am more energetic, more thoughtful, calmer, optimistic etc. The innate relationships I responded to on each day and how I approached the processing somehow represented a harmony between how I was feeling and the geometry that I found to be aesthetic!

[/vc_column_text][vc_empty_space height=”15px”][qodef_blockquote text=”What I consider to be aesthetic is not constant, it changes with my moods and perspectives.” title_tag=”h3″][vc_empty_space height=”15px”][vc_column_text]

As we started out workshop season again, and traveled up to Iceland for 3 weeks, I was excited to see how this new direction would translate to somewhere I had been to dozens of times, and a completely different environment. And sure enough, I made new images and approached places quite differently from before. There was surely some meat on these bones of development.

[/vc_column_text][/vc_column][/vc_row][vc_row][vc_column][vc_empty_space][vc_row_inner][vc_column_inner][vc_single_image image=”56840″ img_size=”large” alignment=”center” onclick=”link_image”][vc_empty_space][/vc_column_inner][/vc_row_inner][vc_column_text]

March

[/vc_column_text][vc_empty_space height=”15px”][vc_column_text]

From Iceland we went straight to Florida for some large speaking engagements; I spoke on The Psychology of Visual Design and the Complete Creativity, and during both started easing in to my teaching the revelations I was having.

[/vc_column_text][vc_empty_space height=”15px”][qodef_blockquote text=”Creativity is born on a foundation of Technical Excellence.” title_tag=”h3″][vc_empty_space height=”15px”][vc_column_text]

When not working on my art and craft, I like to play guitar, and I’ll admit, I’m not as good as I would like. But I find the more I practice on my craft; left/right hand techniques, accuracy, strength, picking, scales, tone etc, the more creative I can be; allowing my innate sense of the aural aesthetic to come through in my playing.

This sits equally well with photography; the more we have to focus on the HOW, the more suppressed the WHY gets. If you want the innate creativity in you to flow, you have to become technically adept enough in the field and in front of the computer to remove any HOW barriers from getting in the way of your articulation.

I finished the month by running a workshop in Scotland and I’m currently fully engaged in the question of personal taste.

As I write this I am listening to Cello Concertos played by the brilliant Yo Yo Ma – the music creates a harmonic resonance in my office conducive to creative writing and a suitably calm, yet inspirational ambience!

Yesterday, when I was working an image from China, I was listening to guitar virtuoso Bucket head, whose harmonic mastery has changed how I feel images. These two choices of music could not be more dissimilar, but I love both.

[/vc_column_text][vc_empty_space height=”15px”][qodef_blockquote text=”Taste is not constant, and evolves as we become more open to making innate judgements rather than comparing what we like to acceptable benchmarks of societal approval.” title_tag=”h3″][vc_empty_space height=”15px”][vc_column_text]

I am a constantly changing and evolving human, I have no desire to stay the same, otherwise I’ll always think the same and do the same. I want to change, I want to be the best possible version of me. As I age, my physical capability is in decline, but I still have a good brain! Today, I don’t look outward for answers on how to improve me, I look inward. My work is growing as I further understand what it is in me that appreciates beauty, how that judgement of the aesthetic can change on a daily, or even hourly basis, and taking my work onward.

I began this article in retrospective melancholy, and answer my own question of how my increasingly introspective images would fit into a contemporary social media context, with this answer:

[/vc_column_text][vc_empty_space height=”15px”][qodef_blockquote text=”I make images for me, as they represent me. They help me understand me and have value to me.” title_tag=”h3″][/vc_column][/vc_row][vc_row][vc_column][vc_empty_space][vc_column_text]

Gallery

[/vc_column_text][vc_column_text]More images from Alister Benn from his travels in Western China.[/vc_column_text][vc_empty_space][vc_row_inner][vc_column_inner width=”1/3″][vc_single_image image=”56841″ img_size=”large” alignment=”center” onclick=”link_image”][vc_empty_space height=”15px”][vc_single_image image=”56843″ img_size=”large” alignment=”center” onclick=”link_image”][/vc_column_inner][vc_column_inner width=”1/3″][vc_single_image image=”56845″ img_size=”large” alignment=”center” onclick=”link_image”][vc_empty_space height=”15px”][vc_single_image image=”56831″ img_size=”large” alignment=”center” onclick=”link_image”][vc_empty_space height=”15px”][vc_single_image image=”56846″ img_size=”large” alignment=”center” onclick=”link_image”][vc_empty_space height=”15px”][vc_single_image image=”56842″ img_size=”large” alignment=”center” onclick=”link_image”][/vc_column_inner][vc_column_inner width=”1/3″][vc_single_image image=”56847″ img_size=”large” alignment=”center” onclick=”link_image”][vc_empty_space height=”15px”][vc_single_image image=”56839″ img_size=”large” alignment=”center” onclick=”link_image”][/vc_column_inner][/vc_row_inner][/vc_column][/vc_row][vc_row][vc_column][vc_empty_space][vc_separator border_width=”3″][vc_empty_space height=”15px”][vc_column_text]

About Alister Benn

[/vc_column_text][vc_empty_space height=”15px”][vc_row_inner][vc_column_inner width=”1/6″][vc_single_image image=”56813″ img_size=”medium” alignment=”center” style=”vc_box_circle_2″][/vc_column_inner][vc_column_inner width=”5/6″][vc_empty_space height=”15px”][vc_column_text]Alister Benn is an award winning Scottish landscape photographer, author, educator, and guide. He lives on the isle of Skye off the north west coast of Scotland with his wife Juanli Sun. Each year they lead small group workshops and tours to select locations around the Scottish Highlands, Southern Iceland, Northern Spain and of course Tibet and the Himalaya.

Tours & Workshops | Portfolio | Facebook PageNewsletter[/vc_column_text][/vc_column_inner][/vc_row_inner][vc_empty_space height=”15px”][vc_separator border_width=”3″][vc_empty_space height=”15px”][/vc_column][/vc_row][vc_row][vc_column][vc_empty_space][vc_column_text]

Thanks for Reading!

[/vc_column_text][vc_column_text]That’s all we have for today! If you’ve been inspired, feel free to comment on this post or share your own thoughts with us on one of our social media channels you can reach us on Instagram with @topazlabs and Twitter with @topazlabs. We’re also on Facebook and YouTube! We look forward to sharing the rest of Alister Benn’s year in the very near future, but until then![/vc_column_text][/vc_column][/vc_row][vc_row][vc_column][vc_empty_space][vc_column_text]

Free Download

[/vc_column_text][vc_column_text]Feel free to download our brand new product, Topaz Studio, the all-in-one photo editor. It works as a plugin, a host editor for your Topaz products, and a standalone editor. Best of all it’s completely free to use![/vc_column_text][vc_empty_space height=”15px”][vc_row_inner][vc_column_inner width=”1/2″][vc_btn title=”Windows” shape=”square” color=”primary” align=”center” button_block=”true” link=”url:https%3A%2F%2Fopen_beta.s3.amazonaws.com%2Ftopazstudio_online_installer.exe|||”][/vc_column_inner][vc_column_inner width=”1/2″][vc_btn title=”Mac” shape=”square” color=”primary” align=”center” button_block=”true” link=”url:https%3A%2F%2Fopen_beta.s3.amazonaws.com%2Ftopazstudio_online_installer.dmg|||”][/vc_column_inner][/vc_row_inner][/vc_column][/vc_row]

Posted on 6 Comments

Topaz Studio v 1.0.6 Introducing the New Healing Tool

[vc_row css=”.vc_custom_1499750369090{padding-top: 20px !important;padding-bottom: 20px !important;}”][vc_column][vc_column_text]

Created with: Topaz Studio version 1.0.8

[/vc_column_text][vc_empty_space][vc_column_text]

Introducing Healing

Hello, all you avid Topaz fans! Today we’re excited to walk you through the latest feature in Topaz Studio, our new healing brush. The Healing tool, now available within Topaz Studio as of version 1.0.6, is our most highly requested Topaz Studio feature, and is available to all users of Topaz Studio absolutely free. The healing brush allows for intelligent removal of blemishes, distracting secondary subjects, or background cleanup of your image. Using this new tool is simple, just select the tool, change the radius of your brush to fit what you’d like to remove, brush it out and let Topaz Studio do the rest.[/vc_column_text][/vc_column][/vc_row][vc_row][vc_column][vc_empty_space][vc_separator][vc_empty_space height=”15px”][vc_column_text]

Watch The Video Instead?

If you don’t feel like following along in a tutorial you can watch me try the tool out on a few images in the following video.
[/vc_column_text][vc_empty_space height=”15px”][vc_video link=”https://youtu.be/Z43XcSCsJZ0″][vc_empty_space height=”15px”][vc_separator][vc_empty_space height=”15px”][/vc_column][/vc_row][vc_row css=”.vc_custom_1499750369090{padding-top: 20px !important;padding-bottom: 20px !important;}”][vc_column][vc_column_text css=”.vc_custom_1499781447156{padding-top: 20px !important;}”]

Example 1: Blemish Removal

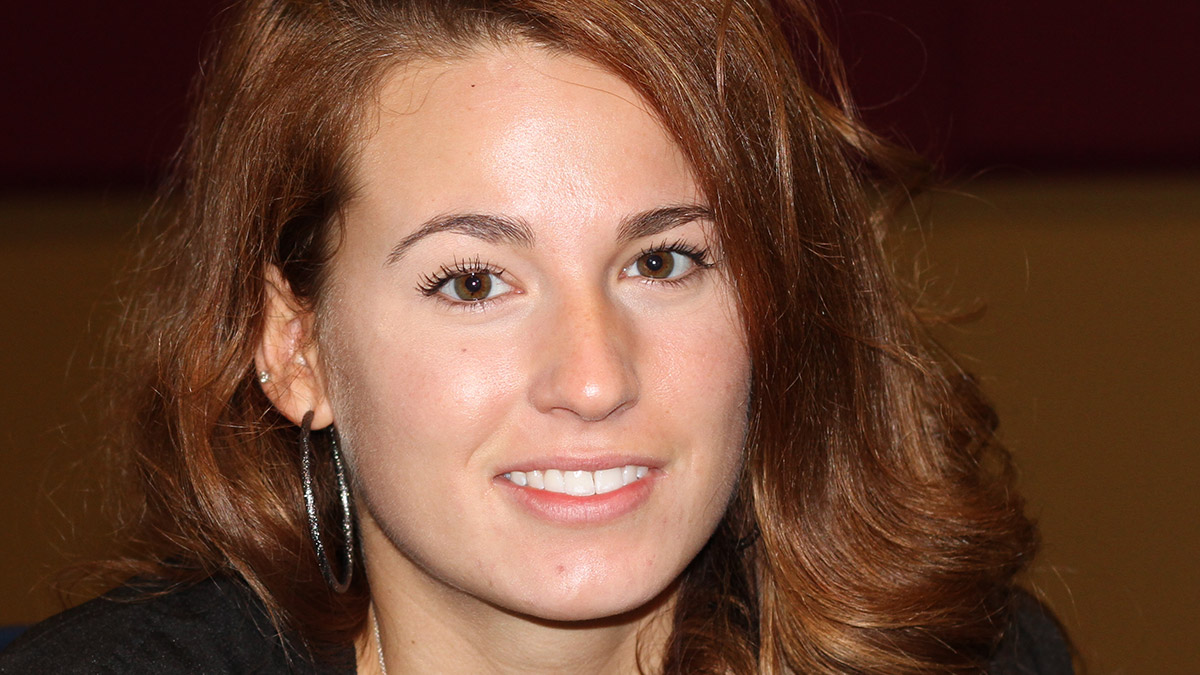
So let’s go ahead and get started. If you’ve used healing before in Photoshop or Lightroom you’ll be familiar with this workflow.  have here an image of my family member. I took this photo years ago and haven’t done anything with it. She’s very pretty, of course, being related to me, but there are some things I’d like to clean up on the skin on her face. This will get rid of a few distracting blemishes and draw the focus more towards features of her face that I want to emphasize like her eyes, lips, and hair.[/vc_column_text][vc_empty_space][vc_single_image image=”55594″ img_size=”full” alignment=”center” onclick=”link_image”][vc_empty_space][vc_row_inner][vc_column_inner width=”1/2″][vc_column_text css=”.vc_custom_1499781744430{padding-top: 20px !important;}”]First off, I want to clean up my workspace so I have a little bit more room to work. Since I know that I’m working on the image and not going to start with an effect, I’ll close the effect window by clicking on the bar directly to the right of that window.

Also since I don’t want to change images, I’m going to go ahead and collapse the image browser by clicking on the thin bar at the top of the image browser. This gives me a much cleaner workspace to use as I focus on cleaning up this image. You can always open those panels again by clicking on the bars to toggle expanding or collapsing them.[/vc_column_text][/vc_column_inner][vc_column_inner width=”1/2″][vc_single_image image=”55595″ img_size=”full” onclick=”link_image”][/vc_column_inner][/vc_row_inner][vc_empty_space][vc_row_inner][vc_column_inner width=”1/2″][vc_single_image image=”55596″ img_size=”large” onclick=”link_image”][/vc_column_inner][vc_column_inner width=”1/2″][vc_column_text css=”.vc_custom_1499781783873{padding-top: 20px !important;}”]I’ll go ahead and zoom in on my image, so we can see the blemishes that were wanting to remove and get a little bit more detail on the skin.

See you can see on this image I’ve marked some of the blemishes that I’d like to remove. You can see a few blemishes on her chin a freckle below her eye, and some other general cleanup I’d like to do. That’s going to be really easy to do with a healing tool.[/vc_column_text][/vc_column_inner][/vc_row_inner][/vc_column][/vc_row][vc_row css=”.vc_custom_1499750369090{padding-top: 20px !important;padding-bottom: 20px !important;}”][vc_column width=”2/3″][vc_column_text]In order to find the healing tool you’ll go to the toolbar that pops up on the right side of your screen and you’ll see a little bandage icon in the image below that says “heal” Just click that, and the healing brush size slider will appear. It’s really easy to see the size brush you want, with a nice preview on your image of your brush size. However, since we’re working on light blemishes, I’ll work with a small brush. [/vc_column_text][/vc_column][vc_column width=”1/3″][vc_single_image image=”54837″ img_size=”medium” onclick=”link_image”][/vc_column][/vc_row][vc_row css=”.vc_custom_1499750369090{padding-top: 20px !important;padding-bottom: 20px !important;}”][vc_column width=”1/3″][vc_single_image image=”55598″ img_size=”large” onclick=”link_image”][/vc_column][vc_column width=”2/3″][vc_column_text css=”.vc_custom_1499782717877{padding-top: 20px !important;}”]The healing tool makes it really easy to remove blemishes with just a click. s you can see in this image, just paint over your image with the brush, release your mouse, and the blemishes will disappear. So i’ll we’ll do is paint over each point that i’ve highlighted in the image above with the healing tool and very quickly we’re able to clean up some of the small blemishes that could distract from the main features of my subject.

Below you can see the before, the area’s I’ve painted in, and the after.

If you’d like to see the before and after in your image, it’s very simple to do. You just need to make sure you have the healing tool selected, then you can press the spacebar to show your before image, and release to show your image after healing.[/vc_column_text][/vc_column][/vc_row][vc_row css=”.vc_custom_1499750369090{padding-top: 20px !important;padding-bottom: 20px !important;}”][vc_column][vc_row_inner disable_element=”yes”][vc_column_inner width=”1/2″][vc_single_image image=”55599″ img_size=”large” add_caption=”yes” onclick=”link_image”][/vc_column_inner][vc_column_inner width=”1/2″][vc_single_image image=”55600″ img_size=”large” add_caption=”yes” onclick=”link_image”][/vc_column_inner][/vc_row_inner][vc_column_text]

[caption id="attachment_55599" align="alignnone" width="1200"] Original[/caption] [caption id="attachment_55600" align="alignnone" width="1200"] After Heal Tool[/caption]

[/vc_column_text][/vc_column][/vc_row][vc_row css=”.vc_custom_1499750369090{padding-top: 20px !important;padding-bottom: 20px !important;}”][vc_column][vc_separator][vc_empty_space height=”15″][vc_column_text]

So how does it work?

Healing tools tend to all work the same way. Once you paint out a section of your image, it effectively creates a hole within that image, which the software has to try to figure out how to fill with the correct content.

Tools like Photoshop use a system called “patch match” which analyzes your image and looks for the best patch to copy from another section of the image based on the content around the hole you’ve created with your brush. It then fills the hole you’ve created with the healing brush with the best patch it can determine will fit that spot.

The Healing Tool within Topaz Studio uses a method called Statistical Measure, which analyzes the image and compares dozens of different patches that could fit to find the most reasonable result on a per pixel basis. So instead of finding one patch to fill in the hole we’ve created, we’re comparing dozens of different areas and finding the best statistical fit for each pixel within the selected healing area. It ads a bit of processing time to the tool, but results in a much more natural and accurate heal in most cases. [/vc_column_text][vc_empty_space height=”15″][vc_separator][/vc_column][/vc_row][vc_row css=”.vc_custom_1499750369090{padding-top: 20px !important;padding-bottom: 20px !important;}”][vc_column][vc_single_image image=”55604″ img_size=”full” onclick=”link_image”][vc_empty_space][vc_column_text css=”.vc_custom_1499783208304{padding-top: 20px !important;}”]

Example 2: Removing distracting secondary subjects and distracting background items

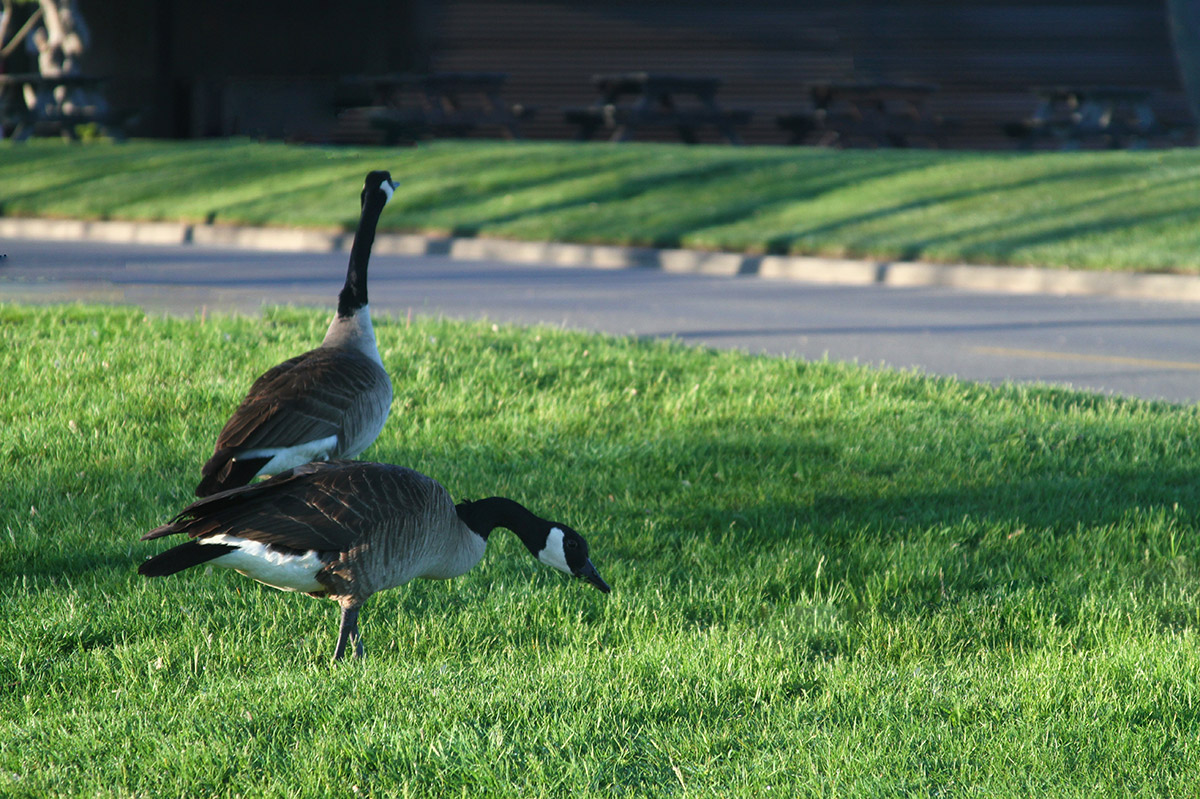
For my next image, I have a photo I took of some geese in my yard most definitely not tearing it up. I don’t really like geese, they’re kind of the jerks of the bird world. But as with most jerks, they definitely want to be the center of attention in this image. Like they say, if you can’t beat em, then join em. We’re going to work to get all the other distractions out of this image, so they can have the spotlight for a moment before I shoo them away. You can see with this image there’s a lot of distractions big and small. [/vc_column_text][vc_row_inner][vc_column_inner width=”1/3″][vc_empty_space][vc_single_image image=”55605″ img_size=”medium” alignment=”center” onclick=”link_image”][vc_column_text]

For big distractions we have these large swaths of bare ground, and also the baby goose.

[/vc_column_text][/vc_column_inner][vc_column_inner width=”1/3″][vc_empty_space][vc_single_image image=”55606″ img_size=”medium” alignment=”center” onclick=”link_image”][vc_column_text]

There’s also some medium sized  distracting objects in the background like those pillars.

[/vc_column_text][/vc_column_inner][vc_column_inner width=”1/3″][vc_empty_space][vc_single_image image=”55607″ img_size=”medium” alignment=”center” onclick=”link_image”][vc_column_text]

And then there’s small areas that draw your eye like these orange spots, and feathers laying in the grass.

[/vc_column_text][/vc_column_inner][/vc_row_inner][/vc_column][/vc_row][vc_row css=”.vc_custom_1499750369090{padding-top: 20px !important;padding-bottom: 20px !important;}”][vc_column][vc_column_text css=”.vc_custom_1499783450090{padding-top: 20px !important;}”]Whatever the size distraction the process is the same. We’ll use the healing brush to cover up the spots we’d like to remove in red, then release the mouse to let Topaz Studio do the rest.

Even with the larger areas it’s not too terribly important that you be precise with your masking. You don’t have to just select the goose or the dirt, it’s ok to go a little outside the lines.[/vc_column_text][vc_row_inner][vc_column_inner][vc_column_text]

[/vc_column_text][/vc_column_inner][/vc_row_inner][vc_column_text css=”.vc_custom_1499784540612{padding-top: 20px !important;}”]Here we can see our before and after. We were able to very quickly clean up the distracting parts of the image and get a much cleaner more professional looking composition without a lot of fuss.

And that’s the Topaz Studio Healing Tool. It may seem pretty simple, but don’t let it fool you it’s also quite powerful. Let me mention again that it’s available within Topaz Studio completely free. So if you haven’t yet, give it a whirl, we’d love to hear your thoughts about this awesome new tool.[/vc_column_text][/vc_column][/vc_row][vc_row][vc_column][vc_empty_space][vc_column_text]

Download Topaz Studio Free

[/vc_column_text][vc_column_text]The healing tool is one of many free features available within Topaz Studio!

Don’t have Topaz Studio? Topaz Studio is free to download! You can get it now by using the links below. If you need more information about Topaz Studio, check out this overview: Introducing Topaz Studio

Topaz Studio is a simple to use editing platform with Topaz Labs’ powerful acclaimed photo enhancement technology. It works as a standalone editor, a plugin within Lightroom and Photoshop, as well as a host application for your other Topaz plugins. It is free to use the program, all 1-click effects, and 10 Adjustments.[/vc_column_text][vc_empty_space height=”15px”][vc_row_inner][vc_column_inner width=”1/2″][vc_btn title=”Windows” shape=”square” color=”primary” align=”center” button_block=”true” link=”url:https%3A%2F%2Ftopazlabs.s3.amazonaws.com%2Ftopazstudio_online_installer.exe|||”][/vc_column_inner][vc_column_inner width=”1/2″][vc_btn title=”Mac” shape=”square” color=”primary” align=”center” button_block=”true” link=”url:https%3A%2F%2Ftopazlabs.s3.amazonaws.com%2Ftopazstudio_online_installer.dmg|||”][/vc_column_inner][/vc_row_inner][/vc_column][/vc_row]

Posted on 1 Comment

How to Use the Sharpen Adjustment

How to use the Sharpen Adjustment

[vc_row][vc_column][vc_empty_space][vc_column_text]Tutorial created Topaz Studio V1.0.8[/vc_column_text][vc_empty_space height=”15px”][vc_column_text]

What is the Sharpen Adjustment?

[/vc_column_text][vc_empty_space height=”15px”][vc_column_text]The Topaz Studio Sharpen Adjustment is an awesome tool that allows you to emphasize details and bring all your photos into perfect focus. Even images that you feel are in focus become crisp after this adjustment.

About the Sharpen Adjustment. The Topaz Studio Sharpen Adjustment is really two for the price of one. You can use the unsharp mask option to sharpen images or reverse the affect of lens blur on an image using the Lens DeBlur option.

How they work. Each sharpening option contains unique technology to ensure you have perfectly sharpened images. The Unsharp Mask works by utilizing an unsharpening mask to enhance details. The Lens DeBlur option is one of my favorites. It has some really unique technology behind it. It does an amazing job of removing lens blur, but keeping your image looking natural. Lens DeBlur uses the blind deconvolution process to mathematically recover image sharpness. This technology has the ability to analyze your image, and based upon the output image, can make an educated guess on the intended input image. The result is restored image quality, but it isn’t a cookie cutter filter. It is specifically tailored sharpening effect applied to each of your images and it truly works wonders.[/vc_column_text][/vc_column][/vc_row][vc_row][vc_column][vc_empty_space][vc_column_text]

Free Download

[/vc_column_text][vc_empty_space height=”15px”][vc_column_text]The Sharpen Adjustment is available within Topaz Studio as a Pro Adjustment. While Pro Adjustments are not free, Topaz Studio is completely free and there are limited functionality within the Sharpen Adjustment that is completely free. You can also try all the unlocked functionality for 30 days, completely commitment free. If you’d like to follow along with the Sharpen Adjustment, you can click the links below to download Topaz Studio.[/vc_column_text][vc_empty_space height=”15px”][vc_row_inner][vc_column_inner width=”1/2″][vc_btn title=”Windows” shape=”square” color=”primary” align=”center” button_block=”true” link=”url:https%3A%2F%2Fopen_beta.s3.amazonaws.com%2Ftopazstudio_online_installer.exe|||”][/vc_column_inner][vc_column_inner width=”1/2″][vc_btn title=”Mac” shape=”square” color=”primary” align=”center” button_block=”true” link=”url:https%3A%2F%2Fopen_beta.s3.amazonaws.com%2Ftopazstudio_online_installer.dmg|||”][/vc_column_inner][/vc_row_inner][/vc_column][/vc_row][vc_row][vc_column][vc_empty_space][vc_column_text]

What We Will Cover in This Tutorial

[/vc_column_text][vc_empty_space height=”15px”][vc_column_text]1. About the Sharpen Adjustment

2. How to use the Unsharp Mask

3. How to use Lens DeBlur[/vc_column_text][/vc_column][/vc_row][vc_row][vc_column][vc_empty_space][vc_column_text]

Reading not your Thing? Watch the Full Tutorial!

[/vc_column_text][vc_column_text]Feel free to watch me work through all the features the Sharpen Adjustment has to offer. Every step outlined in this blog post is demonstrated in this video as well as the gallery images at the end of this posting. Hope you enjoy it![/vc_column_text][vc_empty_space height=”15px”][vc_video link=”https://youtu.be/S_dPhDWvfWc” el_width=”80″ align=”center”][vc_empty_space][/vc_column][/vc_row][vc_row][vc_column][vc_column_text]

1. What is the Sharpen Adjustment?

[/vc_column_text][vc_row_inner][vc_column_inner width=”2/3″][vc_empty_space height=”15px”][vc_single_image image=”50874″ img_size=”large”][/vc_column_inner][vc_column_inner width=”1/3″][vc_empty_space][vc_empty_space][vc_empty_space][vc_column_text]Here at Topaz, we wanted to make it effortless to sharpen images, so we kept this adjustment nice and simple. The Unsharp Mask option features 3 sliders and the Lens DeBlur option has only two sliders. After you apply the Sharpen Adjustment to your image, you will see a 3 slider panel pop up in the adjustments panel (If you don’t, click the blue Try Pro link at the bottom of the panel).[/vc_column_text][/vc_column_inner][/vc_row_inner][vc_empty_space][/vc_column][/vc_row][vc_row][vc_column][vc_column_text]

Breakdown of the Sliders

[/vc_column_text][vc_row_inner][vc_column_inner width=”1/4″][vc_empty_space height=”15px”][vc_single_image image=”50882″ img_size=”large”][vc_empty_space height=”15px”][vc_single_image image=”50884″ img_size=”large”][/vc_column_inner][vc_column_inner width=”3/4″][vc_empty_space][vc_empty_space][vc_column_text]

Select Sharpen Type:

1. Unsharp Mask:
Select the Unsharp mask to create a clearer, sharper image. The Unsharp Mask utilizes unsharpening mask technology to create naturally looking, sharper images by using the image to get the base layer instead of just cookie cutter contrast sharpening.

2. Lens DeBlur:
Use Lens DeBlur to correct image blur. This type of sharpening utilizes the blind deconvolution process to mathematically correct images. The technology in Lens DeBlur analyzes the output image and has the ability to make educated guesses on the intended input to correct blurred images.

The sliders and what they do:

1. Strength:
Increasing the value of this slider increases the the overall strength of the selected sharpen type within the Sharpen Adjustment.

2. Radius:
This slider is only available for the Unsharp Mask. Increasing this slider will increase how strong the contrast of the edge of the Sharpening Mask is.

3. Threshold:
Increasing the value of this slider will increase the amount of details that are untouched by the Sharpen Adjustment. Utilizing this slider will allow for sharper images, but block out distracting image noise and artifacts.[/vc_column_text][vc_empty_space][/vc_column_inner][/vc_row_inner][vc_empty_space][/vc_column][/vc_row][vc_row][vc_column][vc_column_text]

Apply the Sharpen Adjustment to Your Image

[/vc_column_text][vc_empty_space height=”15px”][vc_row_inner][vc_column_inner width=”2/3″][vc_empty_space height=”15px”][vc_single_image image=”50919″ img_size=”full” alignment=”center”][/vc_column_inner][vc_column_inner width=”1/3″][vc_empty_space][vc_column_text]Before we get started, you’ll want to open an image. If this is your first time opening Topaz Studio, you’ll notice that there is a lot of empty fields. This is because you’ll need to open an image to get started! There is more than one way that you can open an image .

  1. Drag and drop an image from your computer into the program.
  2. Click Open (located in the Canvas) and navigate through your files. Select an image and click Open.
  3. Click Open in the menu bar. Select an image and click Open.
  4. Go to Menu > File > Open Image… and then select an image and click Open.
  5. Use your shortcut keys (such as Command O or Control O).

[/vc_column_text][/vc_column_inner][/vc_row_inner][vc_empty_space][/vc_column][/vc_row][vc_row][vc_column][vc_column_text]

Apply the Adjustment to Your Image

[/vc_column_text][vc_row_inner][vc_column_inner width=”2/3″][vc_empty_space height=”15px”][vc_single_image image=”50931″ img_size=”large”][/vc_column_inner][vc_column_inner width=”1/3″][vc_empty_space][vc_empty_space][vc_column_text]After you have successfully opened an image, you will want to apply the Sharpen Adjustment. This can be done one of two ways:

  1. Clicking Adjustments > Sharpen  from the top Menu Bar.
  2. Clicking More > Sharpen from the Adjustment tool bar located on the right-hand side of your workspace.

By default, the Unsharp Mask option will be selected. You can switch to the Lens DeBlur option by moving the toggle to the right.[/vc_column_text][/vc_column_inner][/vc_row_inner][vc_empty_space][/vc_column][/vc_row][vc_row][vc_column][vc_column_text]

2. Unsharp Mask

[/vc_column_text][vc_row_inner][vc_column_inner width=”2/3″][vc_empty_space height=”15px”][vc_single_image image=”50986″ img_size=”large” alignment=”center”][/vc_column_inner][vc_column_inner width=”1/3″][vc_empty_space][vc_empty_space][vc_column_text]The Unsharp Mask works great to amplify small details. I love using it on macro and plant photography. Even on images that I think are in perfect focus, can benefit from an added touch of the Unsharp Mask. When you are focusing on the small details, I suggest zooming in so you can really see how it is affecting your image. We organized the sliders to reflect the most logical workflow, so start with the Strength slider and work your way down. Also, remember it’s ok if there is some artifacts and image noise introduced by the Strength and Radius slider. The Threshold slider does an amazing job of blocking all of it out.[/vc_column_text][/vc_column_inner][/vc_row_inner][vc_empty_space][/vc_column][/vc_row][vc_row][vc_column][vc_column_text]

The Settings

[/vc_column_text][vc_row_inner][vc_column_inner width=”1/4″][vc_empty_space height=”15px”][vc_single_image image=”50964″ img_size=”large”][/vc_column_inner][vc_column_inner width=”3/4″][vc_empty_space][vc_empty_space][vc_column_text]Here are the settings I used for the Unsharp Mask. You can make these edits as subtle or extreme as you would like. Another thing I love to do with the Sharpen Adjustment is to use the integrated masking to mask out the effect in some areas to create a very strong focal area.[/vc_column_text][/vc_column_inner][/vc_row_inner][vc_empty_space][vc_column_text]

Here is the before, after, and magnified comparison:

[/vc_column_text][vc_empty_space height=”15px”][vc_row_inner][vc_column_inner width=”1/3″][vc_single_image image=”51170″ img_size=”large” alignment=”center” onclick=”link_image”][vc_empty_space height=”15px”][vc_column_text]

Before

[/vc_column_text][/vc_column_inner][vc_column_inner width=”1/3″][vc_single_image image=”51174″ img_size=”large” alignment=”center” onclick=”link_image”][vc_empty_space height=”15px”][vc_column_text]

After

[/vc_column_text][/vc_column_inner][vc_column_inner width=”1/3″][vc_single_image image=”51186″ img_size=”large” alignment=”center” onclick=”link_image”][vc_empty_space height=”15px”][vc_column_text]

Magnified

[/vc_column_text][/vc_column_inner][/vc_row_inner][vc_empty_space height=”15px”][vc_column_text]I love how the Unsharp Mask is able to bring out the small details of the leaves without magnifying the image noise or creating artifacts. The result is a perfectly natural looking, sharpened image.[/vc_column_text][vc_empty_space][/vc_column][/vc_row][vc_row][vc_column][vc_column_text]

3. Lens DeBlur

[/vc_column_text][vc_empty_space height=”15px”][vc_column_text]For the next part of this tutorial, I’m going to be demonstrating how to use Lens DeBlur. Feel free to save the image and follow along to test out Lens DeBlur for yourself.

Blurry photos can be a result of multiple things such as impurities in the air or due to lower end lenses. Lens DeBlur works wonders on photos. This simple, but effective tool turns photos that were shot with a $200 lens look like they were shot with a $3000 lens.

The algorithm behind Lens DeBlur analyses your photo and using the blind deconvolution process, mathematically reverse lens blur. It creates a tailored filter for each image. This yields much better results because you aren’t getting a cookie cutter filter for every image. I find myself being surprised at the results I get from images I didn’t even feel were blurry.[/vc_column_text][vc_empty_space height=”15px”][vc_single_image image=”51207″ img_size=”large” alignment=”center” onclick=”link_image”][vc_empty_space][vc_column_text]

Apply the Sharpen Adjustment and Switch to Lens DeBlur

[/vc_column_text][vc_row_inner][vc_column_inner width=”2/3″][vc_empty_space height=”15px”][vc_single_image image=”51220″ img_size=”large” alignment=”center” onclick=”link_image”][/vc_column_inner][vc_column_inner width=”1/3″][vc_empty_space][vc_empty_space][vc_empty_space][vc_column_text]Like before, you are going to apply the Sharpen Adjustment to the image, but this time switch the toggle to the Lens DeBlur option.[/vc_column_text][/vc_column_inner][/vc_row_inner][vc_empty_space][vc_row_inner][vc_column_inner width=”2/3″][vc_empty_space height=”15px”][vc_single_image image=”51241″ img_size=”large” alignment=”center”][/vc_column_inner][vc_column_inner width=”1/3″][vc_empty_space][vc_empty_space][vc_empty_space][vc_column_text]When you first see this image, I personally wouldn’t categorize this as a blurry image. Once you start adding Lens DeBlur, it is extremely evident just how crips this image could be! I always zoom way in when I’m working with the Sharpen Adjustment, so I can really see how it is affecting my image. My goal for this image was to make the trees more distinct and the mountain more prominent against the cloudy sky.[/vc_column_text][/vc_column_inner][/vc_row_inner][vc_empty_space][vc_column_text]

The Settings

[/vc_column_text][vc_row_inner][vc_column_inner width=”1/4″][vc_empty_space height=”15px”][vc_single_image image=”51246″ img_size=”large” alignment=”center” onclick=”link_image”][/vc_column_inner][vc_column_inner width=”3/4″][vc_empty_space][vc_empty_space][vc_column_text]If you would like to duplicate the settings here are what I used for the mountain image. Like the Unsharp Mask, the Threshold slider in the Lens DeBlur option will block out artifacts and image noise. With these two sliders, you can bring focus back to images in seconds.[/vc_column_text][/vc_column_inner][/vc_row_inner][vc_empty_space][/vc_column][/vc_row][vc_row][vc_column][vc_column_text]

Here is the before, after, and magnified comparison:

[/vc_column_text][vc_empty_space height=”15px”][vc_row_inner][vc_column_inner width=”1/3″][vc_single_image image=”51319″ img_size=”large” alignment=”center” onclick=”link_image”][vc_empty_space height=”15px”][vc_column_text]

Before

[/vc_column_text][/vc_column_inner][vc_column_inner width=”1/3″][vc_single_image image=”51320″ img_size=”large” alignment=”center” onclick=”link_image”][vc_empty_space height=”15px”][vc_column_text]

After

[/vc_column_text][/vc_column_inner][vc_column_inner width=”1/3″][vc_single_image image=”51324″ img_size=”large” alignment=”center” onclick=”link_image”][vc_empty_space height=”15px”][vc_column_text]

Magnified

[/vc_column_text][/vc_column_inner][/vc_row_inner][vc_empty_space height=”15px”][vc_column_text]You can see that Lens DeBlur brought a lot of the detail back in the mountain and the trees. The best part is that it looks completely natural. The result isn’t one of those images that have obviously been post-processed.[/vc_column_text][vc_empty_space][/vc_column][/vc_row][vc_row][vc_column][vc_column_text]

Bonus: Don’t Forget all the Other Functionality

[/vc_column_text][vc_empty_space height=”15px”][vc_row_inner][vc_column_inner width=”1/4″][vc_empty_space height=”15px”][vc_single_image image=”51251″ img_size=”large”][/vc_column_inner][vc_column_inner width=”3/4″][vc_column_text]Don’t forget that Topaz Studio has a lot of built in functionality that allows you to perfect how each adjustment affects your image. Each adjustment has the functionality built right into the header next to its name. You will find adjustment level masking, an opacity slider, 28 blending modes, and the ability to duplicate the adjustment! Also, don’t forget that if you are ever curious if you own a Pro Adjustment, the blue box around the icon in the adjustment stack indicates you have complete, unlocked functionality of that adjustment.[/vc_column_text][/vc_column_inner][/vc_row_inner][vc_empty_space][/vc_column][/vc_row][vc_row][vc_column][vc_column_text]

Adjustment Level Masking

[/vc_column_text][vc_row_inner][vc_column_inner width=”1/6″][vc_empty_space height=”15px”][vc_single_image image=”46805″ img_size=”medium” alignment=”center”][/vc_column_inner][vc_column_inner width=”5/6″][vc_column_text]One of the tools I use the most is the adjustment level masking. Combine the Sharpen Adjustment with the adjustment level masking to make interesting focal areas. While I won’t go in depth about it here, I wanted to make sure you knew it existed and is amazing! The brush masking has this awesome functionality called edge aware. So there is no need to create the perfect mask, just keep the edge of your subject between the green and red circles and it will do all the heavy lifting for you! If you’d like an in-depth tutorial about Masking, you can learn about Topaz Studio Masking here.[/vc_column_text][/vc_column_inner][/vc_row_inner][vc_empty_space][/vc_column][/vc_row][vc_row][vc_column][vc_column_text]

Saving Your Custom Effect

[/vc_column_text][vc_row_inner][vc_column_inner width=”1/6″][vc_empty_space height=”15px”][vc_single_image image=”46824″ img_size=”medium” alignment=”center”][vc_empty_space height=”15px”][vc_single_image image=”46825″ img_size=”medium” alignment=”center”][/vc_column_inner][vc_column_inner width=”5/6″][vc_column_text]Save and Share Your Effects. If you end up really liking an effect, you can save it to quickly apply in next time!  You can either save the effect as a preset level (top icon) or global effect (bottom icon). Global presets allow you to share your creation with others by selecting ‘Yes’ in the Public field. Your effect will be shared to the entire Topaz Community instantly![/vc_column_text][/vc_column_inner][/vc_row_inner][vc_empty_space][/vc_column][/vc_row][vc_row][vc_column][vc_column_text]

Gallery

[/vc_column_text][vc_column_text]You can apply the same effect quickly and effortlessly by adding your new custom preset level effect to many images and then tweaking it to each individual image. This can be great if you took multiple images with similar camera settings and you want all of them to be a little sharper. Here are some more before and after images I edited. Thanks for reading and hope you’ve gained a little more understanding of the Sharpen Adjustment![/vc_column_text][vc_column_text]

Unsharp Mask

[/vc_column_text][vc_row_inner][vc_column_inner width=”1/2″][vc_empty_space height=”15px”][vc_column_text]

Before

[/vc_column_text][vc_empty_space height=”15px”][vc_single_image image=”51405″ img_size=”large” alignment=”center” onclick=”link_image”][vc_empty_space height=”15px”][vc_single_image image=”51409″ img_size=”large” alignment=”center” onclick=”link_image”][/vc_column_inner][vc_column_inner width=”1/2″][vc_empty_space height=”15px”][vc_column_text]

After

[/vc_column_text][vc_empty_space height=”15px”][vc_single_image image=”51401″ img_size=”large” alignment=”center” onclick=”link_image”][vc_empty_space height=”15px”][vc_single_image image=”51413″ img_size=”large” alignment=”center” onclick=”link_image”][/vc_column_inner][/vc_row_inner][vc_empty_space][vc_column_text]

Lens DeBlur

[/vc_column_text][vc_row_inner][vc_column_inner width=”1/2″][vc_empty_space height=”15px”][vc_column_text]

Before

[/vc_column_text][vc_empty_space height=”15px”][vc_single_image image=”51392″ img_size=”large” alignment=”center” onclick=”link_image”][vc_empty_space height=”15px”][vc_single_image image=”51399″ img_size=”large” alignment=”center” onclick=”link_image”][/vc_column_inner][vc_column_inner width=”1/2″][vc_empty_space height=”15px”][vc_column_text]

After

[/vc_column_text][vc_empty_space height=”15px”][vc_single_image image=”51393″ img_size=”large” alignment=”center” onclick=”link_image”][vc_empty_space height=”15px”][vc_single_image image=”51400″ img_size=”large” alignment=”center” onclick=”link_image”][/vc_column_inner][/vc_row_inner][vc_empty_space][/vc_column][/vc_row][vc_row][vc_column][vc_column_text]

Thanks for Reading!

[/vc_column_text][vc_column_text]That’s all I have for today! That’s all the basic functionality that is contained in the Sharpen Adjustment. I wanted to keep this tutorial short and sweet, so I encourage you to play with all the functionality such as masking and the pre-made effects.

We’ll be adding more tutorials and videos so be sure to give us a follow to learn more!

If you’d like to share your images with us, tag us on Instagram with @topazlabs and Twitter with @topazlabs. We’re also on Facebook and YouTube![/vc_column_text][vc_empty_space][/vc_column][/vc_row][vc_row][vc_column][vc_empty_space][vc_column_text]

Free Download

[/vc_column_text][vc_empty_space height=”15px”][vc_row_inner][vc_column_inner width=”1/2″][vc_btn title=”Windows” shape=”square” color=”primary” align=”center” button_block=”true” link=”url:https%3A%2F%2Fopen_beta.s3.amazonaws.com%2Ftopazstudio_online_installer.exe|||”][/vc_column_inner][vc_column_inner width=”1/2″][vc_btn title=”Mac” shape=”square” color=”primary” align=”center” button_block=”true” link=”url:https%3A%2F%2Fopen_beta.s3.amazonaws.com%2Ftopazstudio_online_installer.dmg|||”][/vc_column_inner][/vc_row_inner][/vc_column][/vc_row][vc_row][vc_column][vc_empty_space height=”15px”][vc_separator border_width=”3″][vc_empty_space height=”15px”][vc_column_text]

About Taylor L. Seaton

[/vc_column_text][vc_empty_space height=”15px”][vc_row_inner][vc_column_inner width=”1/6″][vc_single_image image=”8720″ img_size=”medium” alignment=”center” style=”vc_box_circle_2″][/vc_column_inner][vc_column_inner width=”5/6″][vc_empty_space][vc_column_text]Taylor Seaton is a 2016 graduate from Angelo State University. While attending ASU, she obtained her Bachelor of Fine Arts with a concentration in Graphic Design and an area of emphasis in Business Management and Marketing. She also played volleyball at the collegiate level. She is currently the Social Media Manager at Topaz Labs.[/vc_column_text][/vc_column_inner][/vc_row_inner][vc_empty_space height=”15px”][vc_separator border_width=”3″][vc_empty_space height=”15px”][/vc_column][/vc_row]