User Interface
- Understanding the Effect Layers Panel
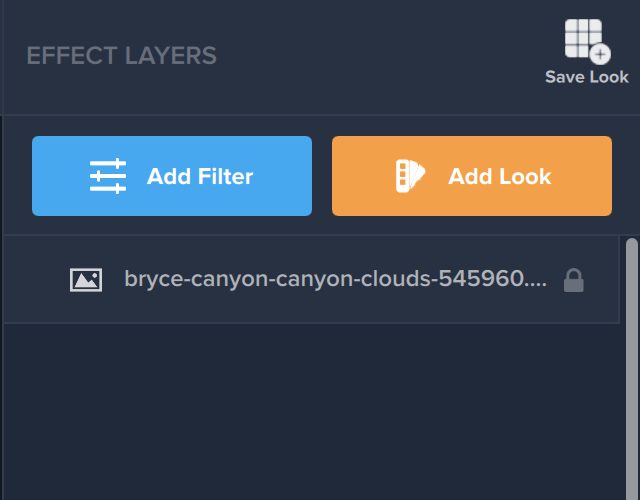
The Right Hand Menu, or the Effect Layers panel, on the Studio 2 User Interface is meant to assist the user easily navigate between filters, looks, and more. The Effect Layers panel is divided into a few sections. First, the two prominent options on the Effect Layers Panel are the Add Filter and Add Look button. The Add Filter Button lets you choose from over 30 unique filters with thousands of options and build the layers on your image yourself with full customizable options. The Add Look button takes you to our pre-made Looks panel, where you can select from over 200 curated looks for your image.
Below these two options is the Layers Panel, where you will be able to see everything that has been applied to your image. When you have either a Look or a Filter selected from the layers panel, a section will appear that will allow you to access all of the options for that look or filter. The same thing happens when you apply a mask to a filter or look.
The “Save Look” button allows you to save a look that includes all of the layers in your Layer Panel so you can access this look again later in the “My Looks” dropdown menu.
- “Add Filter” Menu
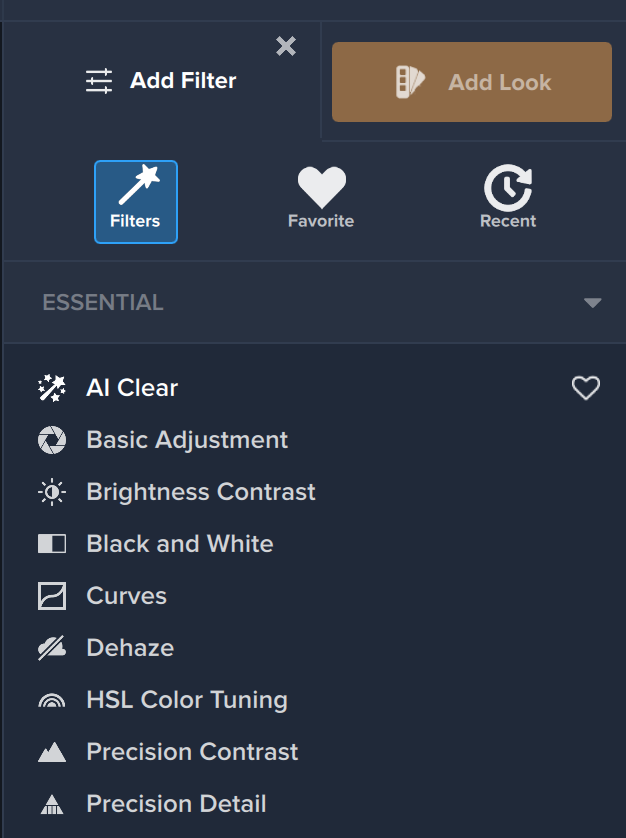
The “Add Filter” button allows you to access over 30 customizable filters divided into three unique sections: Essential, Creative, and Stylistic. Once you select this button, you will see all of the options available. Select a filter, and the filter will open in the right hand panel, allowing you full creative control on how the filter affects your image. You can save a favorite filter by highlighting the filter and clicking the heart of “Favorite” setting. These filters will be found in the “Favorite” menu at the top of the Add Filter screen. To see which filters you have recently used, select the “Recent” menu at the top of the Add Filter Screen.
- “Add Look” Menu
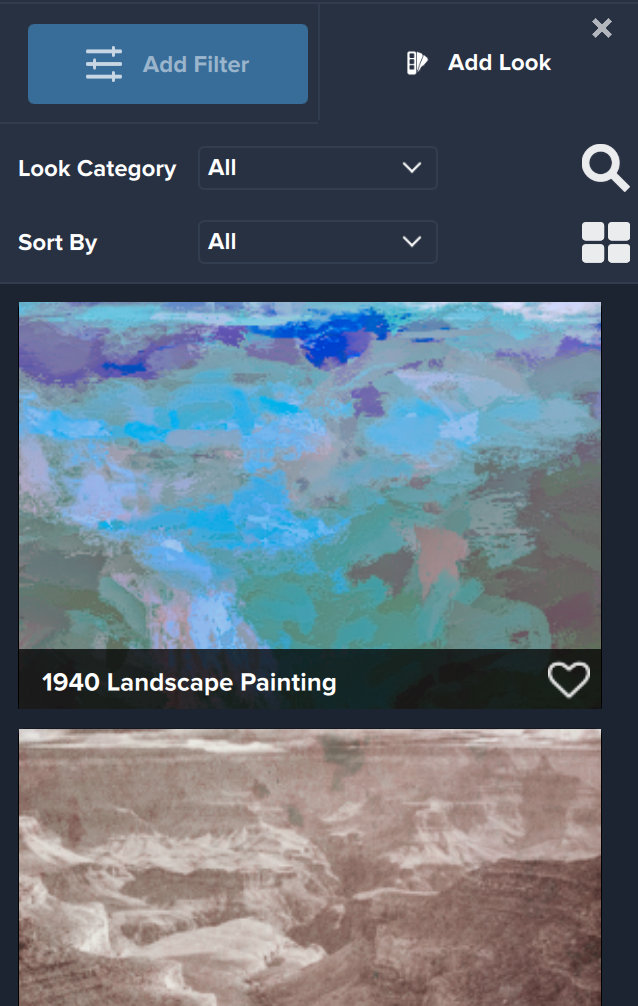
The “Add Look” button allows you to access over 200 customizable Looks. These are packs of filters that give a unique look to your image. You can scroll through the looks that appear or select a category from the Look Category dropdown menu. You are also able to sort by filters using the Sort By drop down menu (for instance, if you are only looking for Looks that include the Impression filter). You can change the size of how the filters appear on your screen using the icon with four squares on the right hand side above your looks. You can favorite a look by seleting the heart beside the name of each look. These favorites will appear in the Category menu as “My Favorites”. Lastly, if you know the name of a look you love, you can search for it with the search icon.
- Layers Panel
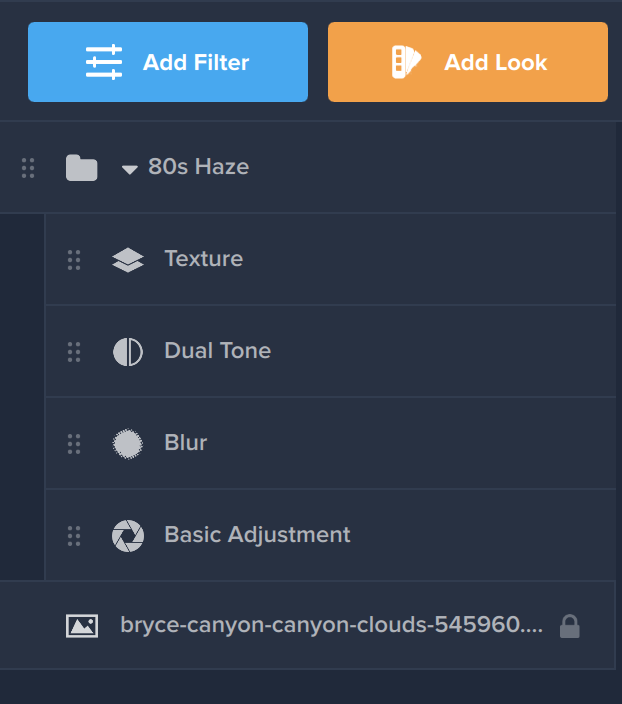
The Layers Panel shows you what has been applied to your image to achieve the look that appears on your image. The Layers Panel will show filters and looks that have been applied to your image. At the bottom will be the name of your image as the base layer. You are able to move filters and layers up or down in the layers pannel using the six dots to the left of each filter or look. Moving one filter above another may affect the overall appearance of your image.
Topaz Labs Blog
Find written and video tutorials to guide you through creative processes in Topaz software. Start creating a masterpiece today!
Topaz Help Center
Got a question? We’ve got answers. Find troubleshooting, tips, and more, or contact our Support Team.


