[vc_row css=”.vc_custom_1499750369090{padding-top: 20px !important;padding-bottom: 20px !important;}”][vc_column][vc_empty_space][vc_column_text]
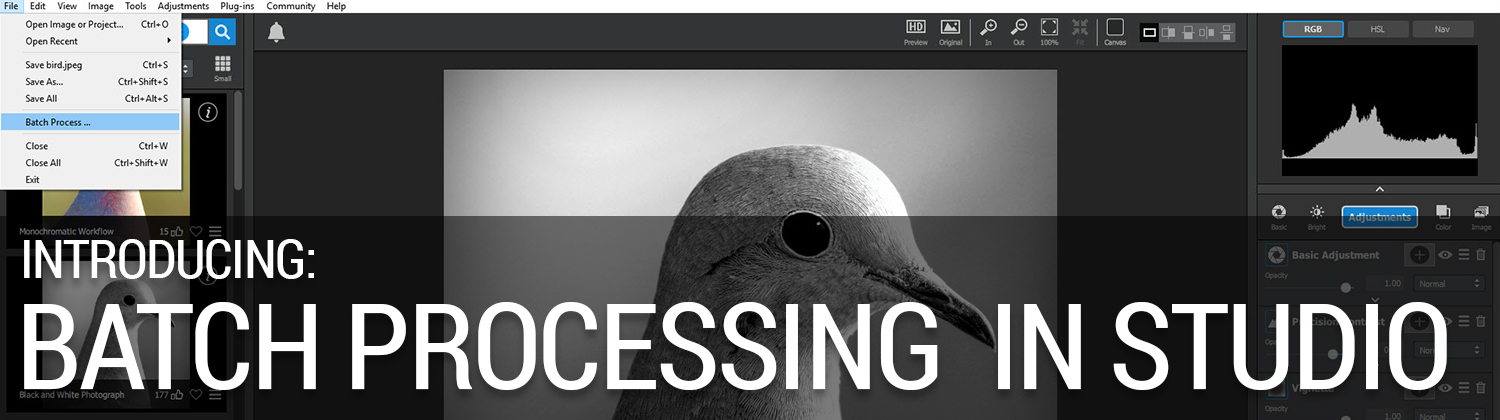
Introducing Batch Processing, now in Studio
[/vc_column_text][vc_empty_space][vc_column_text]
What is Batch Processing?
Batch Processing is a function that allows you to process multiple images at once and apply the same effect, adjustments, and settings to each image that you process. If you have a workflow or a few steps you find yourself repeating, it’s a great way to speed up your workflow and cut down on repetitive tasks while you’re editing.[/vc_column_text][vc_empty_space][mpc_divider preset=”mpc_preset_18″ content_type=”title” content_border_css=”border-width:1px;border-color:#e0e0e0;border-style:solid;” content_padding_divider=”true” content_padding_css=”padding-top:5px;padding-right:15px;padding-bottom:5px;padding-left:15px;” font_preset=”mpc_preset_1″ font_color=”#888888″ font_size=”16″ font_line_height=”1″ font_transform=”uppercase” font_align=”left” title=”Instructions” icon_type=”character” icon_character=”M” icon_color=”#76bdcc” icon_size=”30″ lines_color=”#e0e0e0″ padding_divider=”true”][/vc_column][/vc_row][vc_row css=”.vc_custom_1499750369090{padding-top: 20px !important;padding-bottom: 20px !important;}”][vc_column][vc_column_text]
Step 1: Choose your Batch Processing settings
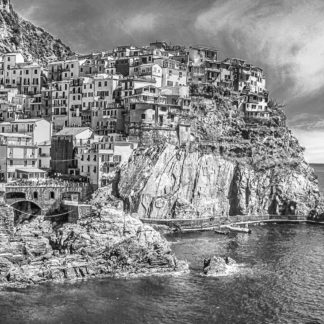
[/vc_column_text][vc_column_text]Before you actually begin batching, you’ll want to decide the settings you want to apply to your images, this can be a one-click effect or a custom adjustment stack, the possibilities are nearly endless.[/vc_column_text][vc_empty_space][vc_row_inner][vc_column_inner width=”1/3″][vc_column_text]For the sake of simplicity, I’m going to start with a premade effect, click into the Studio category, and select the monochrome subcategory, then click on the effect “Black and White Photograph”.[/vc_column_text][vc_empty_space][/vc_column_inner][vc_column_inner width=”2/3″][mpc_carousel_slider preset=”mpc_preset_0″ loop=”true” auto_slide=”true” delay=”1500″ images=”420475,420476″ height=”450″ gap=”10″ font_preset=”mpc_preset_1″ font_color=”#888888″ font_size=”20″ font_line_height=”1.5″ font_align=”center” second_font_color=”#555555″ background_color=”rgba(255,255,255,0.7)” counter_padding_css=”padding:15px;” image_size=”large” image_opacity=”100″ image_hover_opacity=”100″ mpc_navigation__preset=”mpc_preset_19″][/vc_column_inner][/vc_row_inner][/vc_column][/vc_row][vc_row css=”.vc_custom_1499750369090{padding-top: 20px !important;padding-bottom: 20px !important;}”][vc_column][vc_column_text][vc_empty_space][vc_column_text]
Step 2: Open Batch Processing
[/vc_column_text][vc_empty_space][vc_row_inner][vc_column_inner width=”1/2″][vc_column_text]Now that we have the settings we’d like to apply to our batch of images, we need to set up our batch processing, open the batch processing window by clicking the “File” menu and selecting the “Batch Process” option.[/vc_column_text][vc_empty_space][/vc_column_inner][vc_column_inner width=”1/2″][vc_single_image image=”420490″ img_size=”full” onclick=”link_image”][/vc_column_inner][/vc_row_inner][vc_empty_space][vc_row_inner][vc_column_inner width=”1/2″][vc_column_text]The Batch Processing menu has a lot of different options to give you control over the files you process and how they are handled:
- Source Folder Settings: This determines what images the program batches.
- Destination Folder Settings: This Determines where your processed images are saved.
- File Naming: This determines how processed images are named when they are saved.
- File Save Options: These settings set the types of files that you save once they are batched.
- File Sizing: These settings let you resize your batched images automatically
- Hide Application Checkbox: This lets you process images in the background so you can still use your machine while batching.
[/vc_column_text][vc_empty_space][/vc_column_inner][vc_column_inner width=”1/2″][vc_single_image image=”420502″ img_size=”full” onclick=”link_image”][/vc_column_inner][/vc_row_inner][vc_empty_space][/vc_column][/vc_row][vc_row css=”.vc_custom_1499750369090{padding-top: 20px !important;padding-bottom: 20px !important;}”][vc_column][vc_column_text][vc_empty_space][vc_column_text]
Step 3: Choose your Input Folder
[/vc_column_text][vc_column_text]So let’s get started by selecting the source folder that contains the images we want to process. It’s important to note that any images that are in this folder are going to be processed, so you likely don’t want to select your entire photo library.
Click the “Choose” button to select a source folder.[/vc_column_text][vc_single_image image=”420525″ img_size=”full” onclick=”link_image”][vc_empty_space][vc_row_inner][vc_column_inner width=”1/3″][vc_column_text]I’ve already set up a “batching in” folder with the images I want to process. So I’ll select the batching folder then click “select folder. You can navigate to the source folder of your choosing, just remember that you’re selecting the folder and not specific files.[/vc_column_text][vc_empty_space][/vc_column_inner][vc_column_inner width=”2/3″][vc_single_image image=”420526″ img_size=”full” onclick=”link_image”][/vc_column_inner][/vc_row_inner][vc_column_text]If your source folder contains other folders that you want to process as well, you can select the “Include subfolders” option. Just note that this will process all subfolders and image files in those folders.[/vc_column_text][vc_empty_space][/vc_column][/vc_row][vc_row css=”.vc_custom_1499750369090{padding-top: 20px !important;padding-bottom: 20px !important;}”][vc_column][vc_column_text][vc_empty_space][vc_column_text]
Step 4: Set your Output Folder
[/vc_column_text][vc_column_text]Now that we have the source folder set we want to set up the destination folder where we will save the processed images. Click the “Choose” button under the destination settings window to set your destination folder.[/vc_column_text][vc_single_image image=”420529″ img_size=”full” onclick=”link_image”][vc_empty_space][vc_row_inner][vc_column_inner width=”1/3″][vc_column_text]Just like you did with your source folder, you want to navigate to the folder where you’d like to save the images that you process. I’ve already set up a “batching out” folder so i’ll select that and click “Select Folder”.[/vc_column_text][vc_empty_space][/vc_column_inner][vc_column_inner width=”2/3″][vc_single_image image=”420531″ img_size=”full” onclick=”link_image”][/vc_column_inner][/vc_row_inner][vc_row_inner][vc_column_inner][vc_column_text]NOTE: If you select an output folder that contains files you’ll see the warning on the right letting you know that there is a potential for overwriting files, if you continue and you haven’t changed your batch settings to something new from the last time you batched, you will overwrite those files. This message serves as your only warning.[/vc_column_text][vc_empty_space height=”16px”][vc_single_image image=”420574″ img_size=”full” alignment=”center” onclick=”link_image”][vc_empty_space][/vc_column_inner][/vc_row_inner][vc_column_text]If you chose the “include subfolder” option in the source menu you can also select an option here to “keep source folder structure” to create the exact same subfolders and sort files into them as you have set up in your source folder.[/vc_column_text][vc_empty_space][/vc_column][/vc_row][vc_row css=”.vc_custom_1499750369090{padding-top: 20px !important;padding-bottom: 20px !important;}”][vc_column][vc_column_text][vc_empty_space][vc_column_text]
Step 5: Set Naming and File Options for Batched Files
[/vc_column_text][vc_empty_space][vc_row_inner][vc_column_inner width=”1/3″][vc_column_text]Topaz Studio contains a lot of different naming options that allows you to customize how your batching files are named. Choose from the drop-down options to string together the naming conventions you want including original filenames, dates, and serial numbers.[/vc_column_text][/vc_column_inner][vc_column_inner width=”2/3″][vc_single_image image=”420542″ img_size=”full” onclick=”link_image”][/vc_column_inner][/vc_row_inner][vc_column_text]You can preview how your output file name will look in the example above the dropdown.[/vc_column_text][vc_empty_space][/vc_column][/vc_row][vc_row css=”.vc_custom_1499750369090{padding-top: 20px !important;padding-bottom: 20px !important;}”][vc_column][vc_column_text][vc_empty_space][vc_column_text]
Step 6: Set File Save Options
[/vc_column_text][vc_column_text]By default, Topaz Studio will maintain your file formats and settings when you batch process, with the exception of RAW files (since you can’t save out a raw image.)[/vc_column_text][vc_empty_space][vc_row_inner][vc_column_inner width=”1/3″][vc_column_text]If you’d like to convert all the processed files to one format, simply uncheck the “Apply to RAW files only” option. THen select the settings you’d like all your files converted to. Conversion options include TIFF, JPEG, and PNG.[/vc_column_text][/vc_column_inner][vc_column_inner width=”2/3″][vc_single_image image=”420564″ img_size=”full” onclick=”link_image”][/vc_column_inner][/vc_row_inner][vc_column_text]You can also set image quality options and the color profile you’d like your images saved as. (Studio supports a wide variety of RGB colorspaces).[/vc_column_text][vc_empty_space][/vc_column][/vc_row][vc_row css=”.vc_custom_1499750369090{padding-top: 20px !important;padding-bottom: 20px !important;}”][vc_column][vc_column_text][vc_empty_space][vc_column_text]
Step 7: Set Resize Options (optional)
[/vc_column_text][vc_column_text]If you’d like to resize your image you can check the “Resize to fit” checkbox. Then click the drop-down to decide if you want the image to fit within a box defined by width and height, or by height or width alone. Then enter the values you’d like your image sized to. (If you choose height or width alone, your images will maintain their aspect ratio to the specified size.)[/vc_column_text][vc_empty_space][vc_row_inner][vc_column_inner width=”1/3″][vc_column_text]You can set your output to measure by pixels, inches, or centimeters. You can also set your image resolution or pixel density to pixels per inch or pixels per centimeter.[/vc_column_text][/vc_column_inner][vc_column_inner width=”2/3″][vc_single_image image=”420572″ img_size=”full” onclick=”link_image”][/vc_column_inner][/vc_row_inner][vc_empty_space][/vc_column][/vc_row][vc_row css=”.vc_custom_1499750369090{padding-top: 20px !important;padding-bottom: 20px !important;}”][vc_column][vc_column_text][vc_empty_space][vc_column_text]
Step 7: Start Batching!
[/vc_column_text][vc_empty_space][vc_row_inner][vc_column_inner width=”1/2″][vc_column_text]We’ll go ahead and check the “Hide application window while batching” option and click the “OK” button to start batching. Topaz Studio will minimize the interface and leave a progress window on the screen while the application batches your images.
If you’d like to leave the interface up during batching you can uncheck the box. Once batching is complete, this window will close and the interface will open again on your original image.[/vc_column_text][/vc_column_inner][vc_column_inner width=”1/2″][vc_single_image image=”420573″ img_size=”full” onclick=”link_image”][/vc_column_inner][/vc_row_inner][vc_empty_space][vc_column_text]And thats it! If you check your output folder you specified you’ll see all the images that Studio has processed for you, and any relevant subfolder structures you wanted to keep.
Thanks for reading and happy batching.[/vc_column_text][vc_empty_space][/vc_column][/vc_row][vc_row][vc_column][vc_column_text]
Further Questions and Notes About Batching
[/vc_column_text][vc_empty_space][mpc_icon_column preset=”mpc_preset_20″ layout=”style_3″ alignment=”left” background_color=”#f2f2f2″ border_css=”border-radius:0px;” padding_css=”padding:25px;” title_font_preset=”mpc_preset_1″ title_font_color=”#555555″ title_font_size=”17″ title_font_line_height=”1.4″ title_font_transform=”uppercase” title_font_align=”left” title=”Masking and Batching in Topaz Studio” title_margin_divider=”true” title_margin_css=”margin-bottom:8px;” content_font_preset=”mpc_preset_1″ content_font_color=”#a5a5a5″ content_font_size=”14″ content_font_line_height=”1.5″ content_font_align=”left” hover_border_css=”border-radius:0px;” mpc_icon__transition=”slide-down” mpc_icon__icon=”fa fa-paint-brush” mpc_icon__icon_color=”#ffffff” mpc_icon__icon_size=”36″ mpc_icon__background_color=”#75cdde” mpc_icon__border_css=”border-width:0px;border-color:#f3f3f3;border-style:solid;border-radius:50px;” mpc_icon__padding_css=”padding:10px;” mpc_icon__margin_divider=”true” mpc_icon__margin_css=”margin-top:-2px;margin-right:20px;margin-bottom:0px;margin-left:0px;” mpc_icon__hover_icon_color=”#ffffff” mpc_icon__hover_background_color=”#555555″ mpc_icon__hover_border_css=”border-color:#f3f3f3;” mpc_divider__disable=”true” mpc_divider__width=”10″ mpc_divider__align=”left” mpc_divider__content_padding_divider=”true” mpc_divider__content_padding_css=”padding-top:0px;padding-right:0px;padding-bottom:0px;padding-left:0px;” mpc_divider__lines_color=”#dddddd” mpc_divider__padding_divider=”true” mpc_divider__padding_css=”padding-top:3px;padding-bottom:3px;”]It’s important to note that any custom masks that you’ve applied to your adjustments or your overall effect when you’re setting up your first image for batching, will persist to all batched images.
- Brush, Spot, and Gradient masks will retain the same selected areas as your initial image.
- Luminosity and Color selections will use the same selections for applying the mask, but the selected area will adapt based on those settings. (e.g. if you select white as a reveal mask, all white areas in any processed image will have that area revealed as well)
It allows for some neat creative applications if prepared for but can give confusing results if you’re not expecting it.[/mpc_icon_column][vc_empty_space height=”16px”][mpc_icon_column preset=”mpc_preset_20″ layout=”style_3″ alignment=”left” background_color=”#f2f2f2″ border_css=”border-radius:0px;” padding_css=”padding:25px;” title_font_preset=”mpc_preset_1″ title_font_color=”#555555″ title_font_size=”17″ title_font_line_height=”1.4″ title_font_transform=”uppercase” title_font_align=”left” title=”Not seeing the Batch Process option in Topaz Studio?” title_margin_divider=”true” title_margin_css=”margin-bottom:8px;” content_font_preset=”mpc_preset_1″ content_font_color=”#a5a5a5″ content_font_size=”14″ content_font_line_height=”1.5″ content_font_align=”left” hover_border_css=”border-radius:0px;” mpc_icon__transition=”slide-down” mpc_icon__icon=”fa fa-search” mpc_icon__icon_color=”#ffffff” mpc_icon__icon_size=”36″ mpc_icon__background_color=”#75cdde” mpc_icon__border_css=”border-width:0px;border-color:#f3f3f3;border-style:solid;border-radius:50px;” mpc_icon__padding_css=”padding:10px;” mpc_icon__margin_divider=”true” mpc_icon__margin_css=”margin-top:-2px;margin-right:20px;margin-bottom:0px;margin-left:0px;” mpc_icon__hover_icon_color=”#ffffff” mpc_icon__hover_background_color=”#555555″ mpc_icon__hover_border_css=”border-color:#f3f3f3;” mpc_divider__disable=”true” mpc_divider__width=”10″ mpc_divider__align=”left” mpc_divider__content_padding_divider=”true” mpc_divider__content_padding_css=”padding-top:0px;padding-right:0px;padding-bottom:0px;padding-left:0px;” mpc_divider__lines_color=”#dddddd” mpc_divider__padding_divider=”true” mpc_divider__padding_css=”padding-top:3px;padding-bottom:3px;”]Batch processing is only available in version 1.11.5 or later. If you’re running an earlier version you can update to the latest on the downloads page.[/mpc_icon_column][vc_empty_space][/vc_column][/vc_row]