How to quickly mask and replace the background in your photos
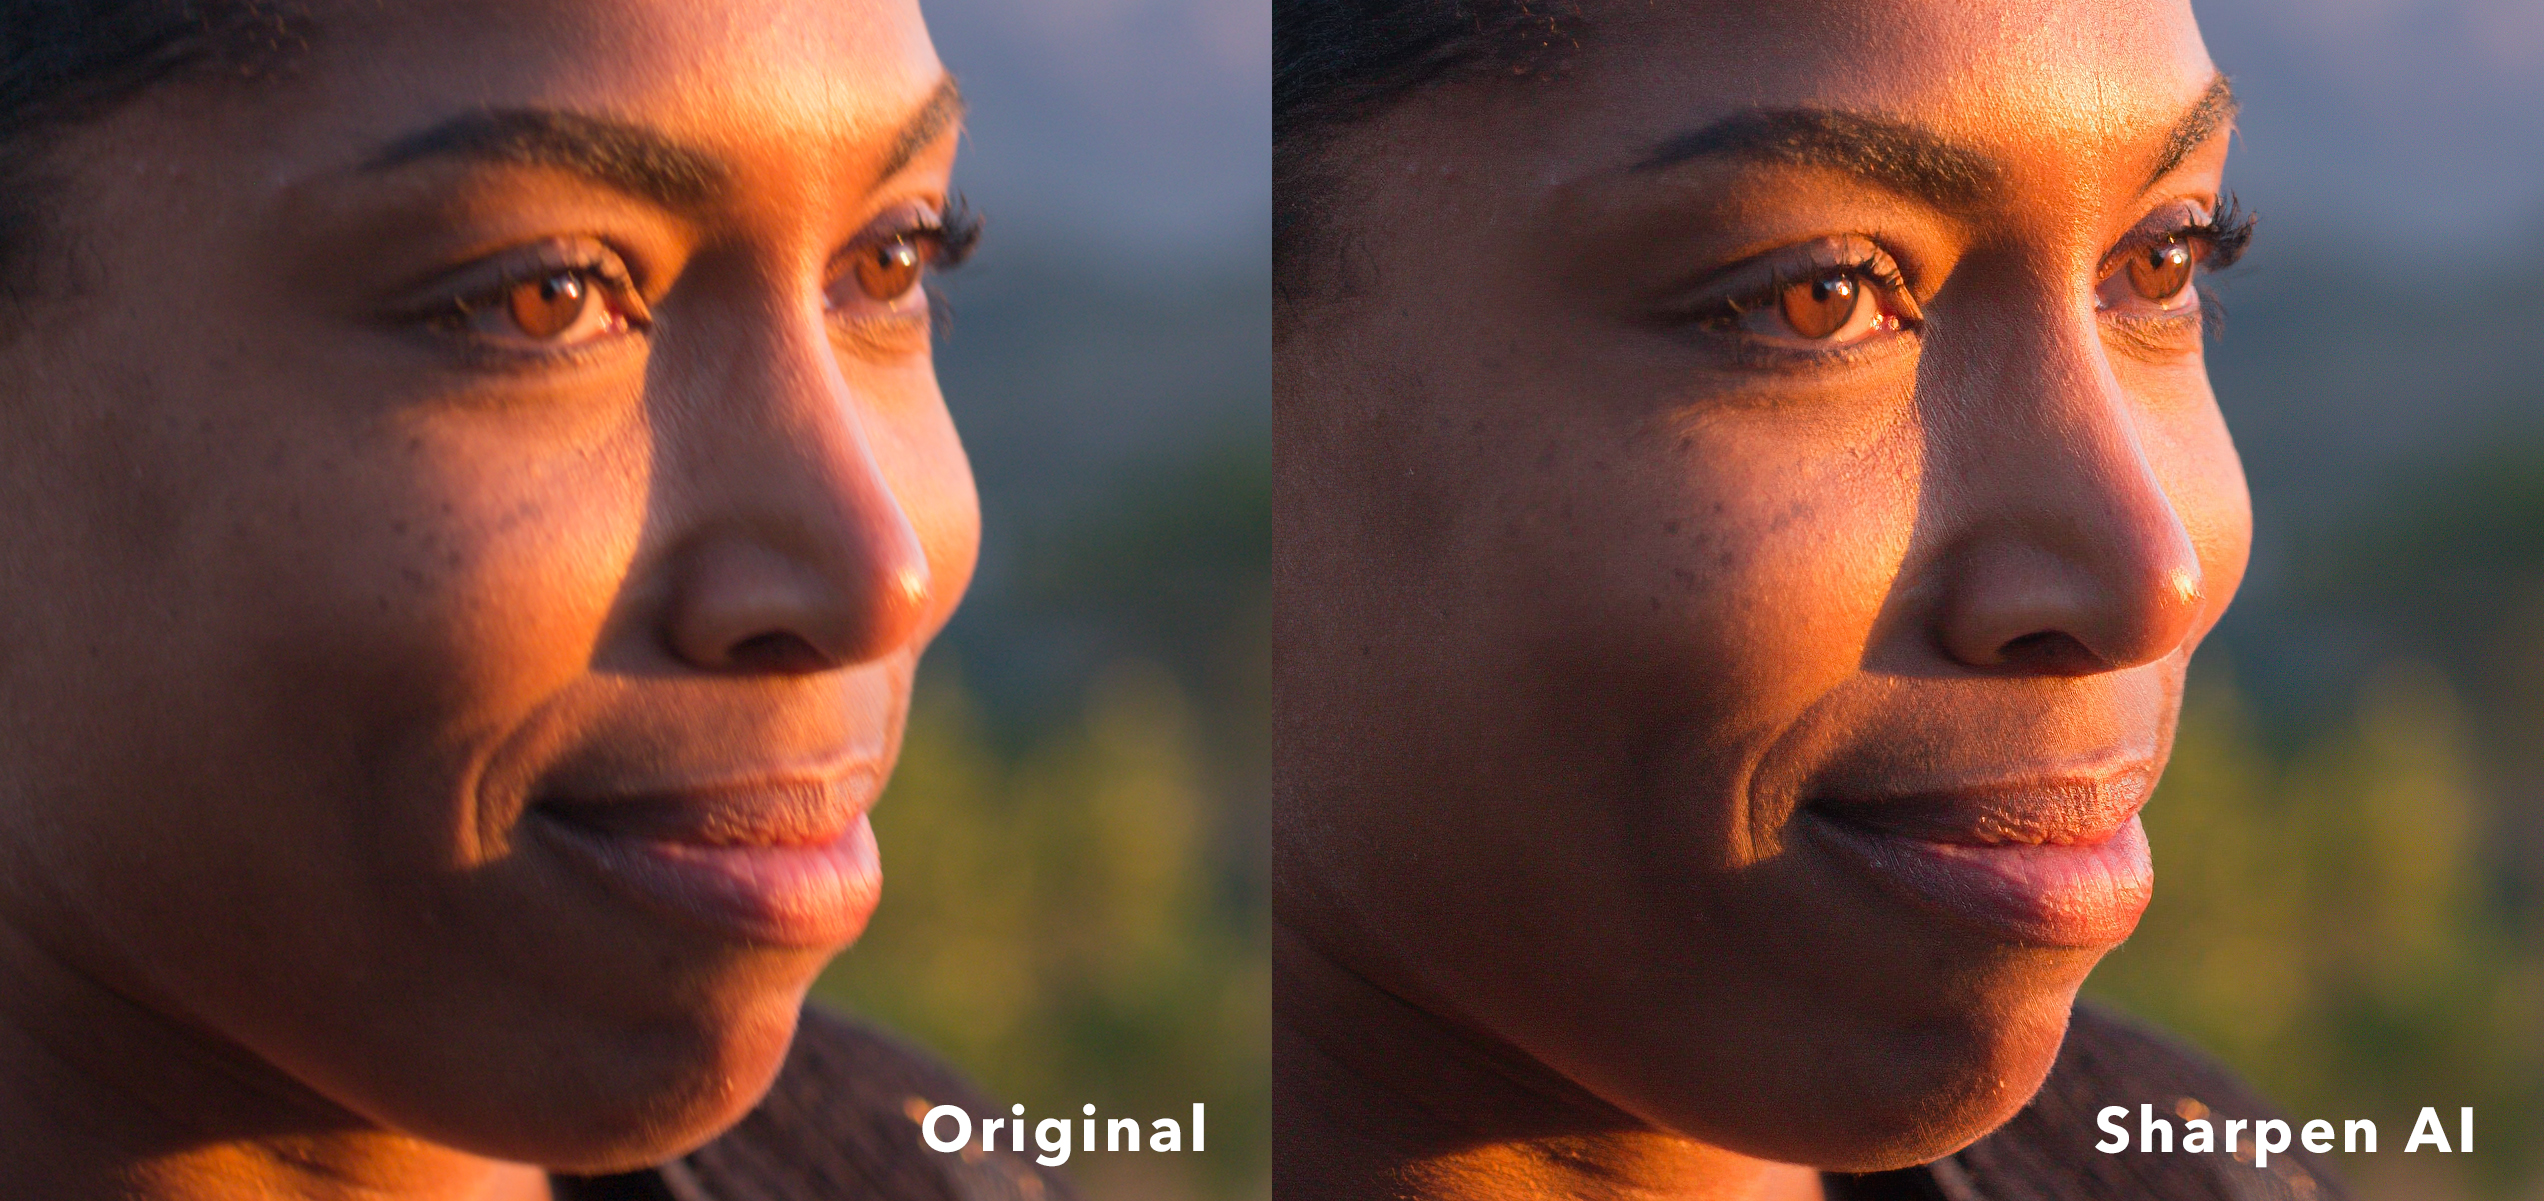
Here’s Proof that Topaz Sharpen AI can Sharpen Out-of-Focus Images
It’s a great feeling to find the perfect image for your project, but what if you only want to work with a portion of the photo? Cropping into an image reduces the overall resolution which limits your use—especially for print, where every pixel counts. Let’s take a look at how Gigapixel AI can help you upsize your cropped photos by up to 600% and restore full-size resolution.
Let’s start with a great image that would be made better with cropping. You can follow along yourself by downloading a totally free trial of Gigapixel AI, and downloading our free demo image.
The image we’re working with is 1920 x 1276 pixels, which is suitable for most uses but we want to crop tightly on the model’s face.
Launch the image in Gigapixel AI, and click on the crop tool to select your crop. Apply your selection. After cropping, our image is now only 484 x 294 pixels—not much to work with here! Let’s see how Gigapixel can improve this crop.
In the main Gigapixel AI interface, we see a preview of 4X upscaling, which gives us an output of 1936 x 1176 pixels. You’ll see that the compression artifacts are gone, the model’s skin is smooth, and the details are sharp. But can we go even further?
We bump up our photo enlargement to 6X, or 600% larger than the cropped resolution.
This gives us an output of 2904 x 1764 pixels — larger than our original uncropped image — and yet the output is still silky smooth with sharp detail in the right places.
Gigapixel AI proves yet again to be an incredible image upscaling tool. But how does it compare to Photoshop?
Let’s see whether Gigapixel can beat Photoshop, using the latest 2021 edition of Photoshop and its best image enlargement mode.
Using the same image and crop, we attempted 600% image upscaling in Photoshop 2021 using the Bicubic Smoother (enlargement) resampling mode.
The upscaling results in Photoshop were completely underwhelming. Compression artifacts are everywhere, and there is a lack of detail across the entire image.
A side-by-side comparison says it all. Gigapixel drastically outperforms Photoshop even up to 6X image upscaling.
Unlike older image editing algorithms, Gigapixel uses machine-learning technology to analyze your photo alongside millions of images to intelligently calculate the best output — this is why the results continue to shock and impress photographers all over the world. Try it totally free and see for yourself!

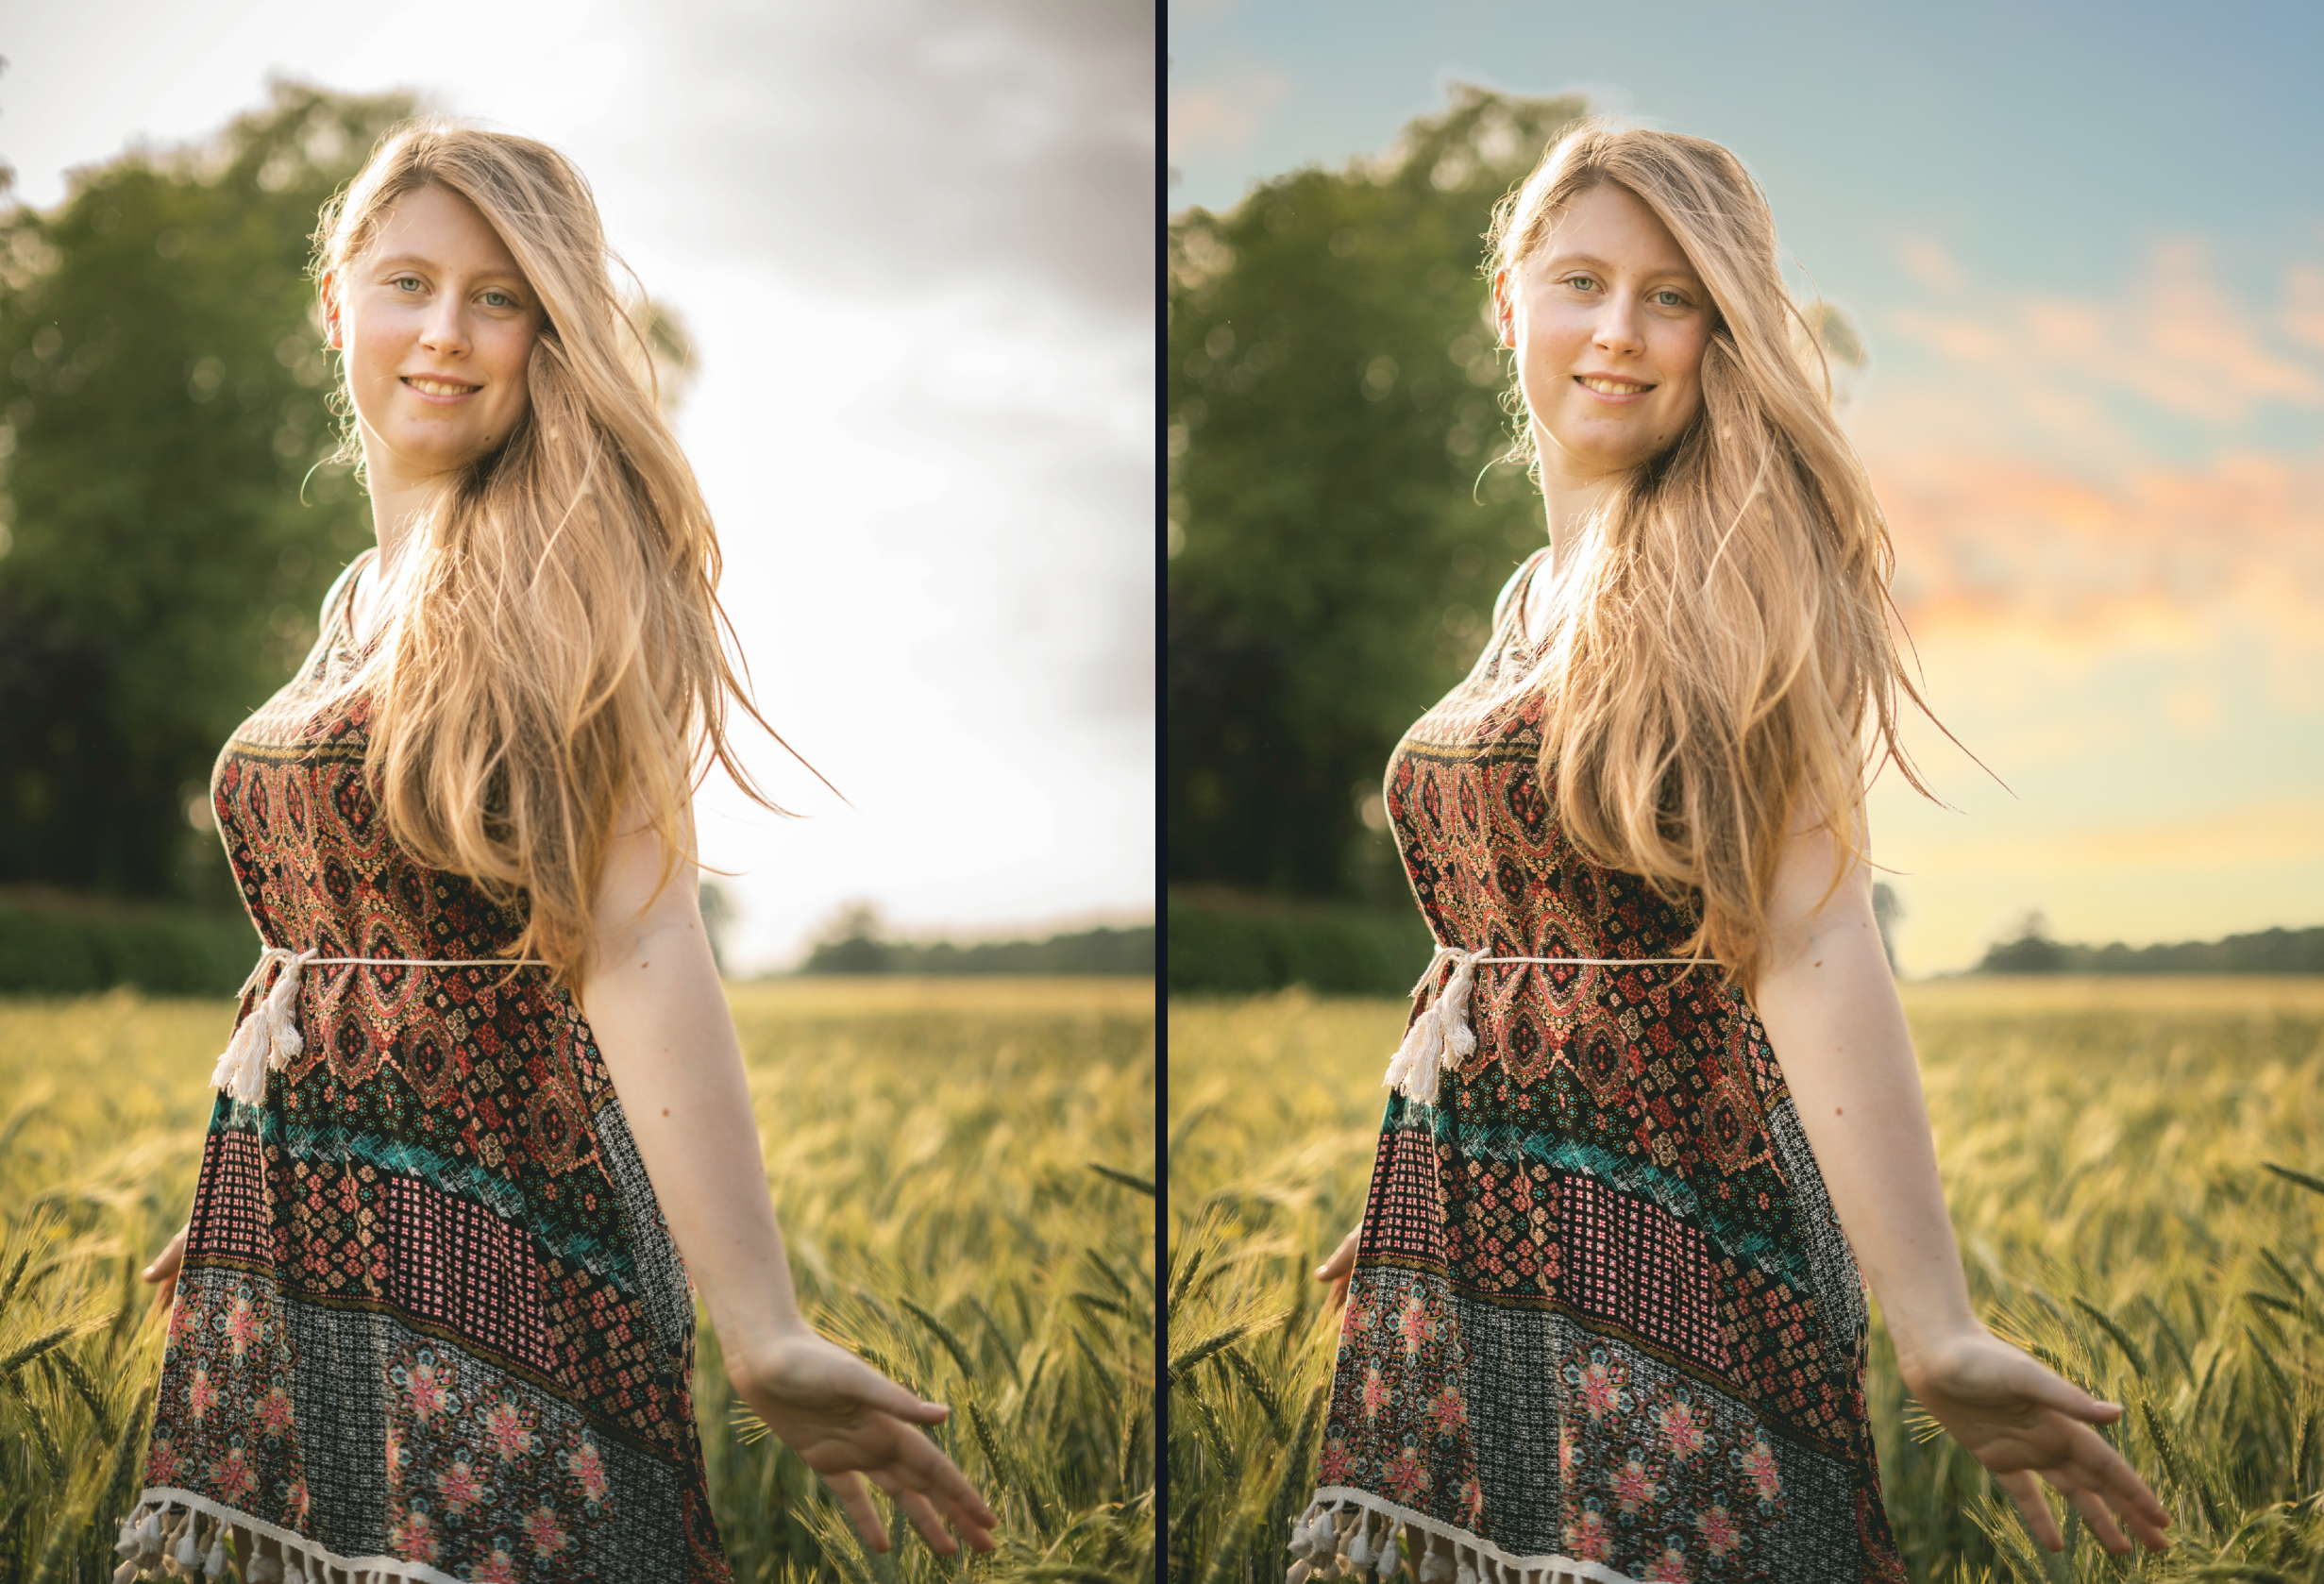
Replacing the background of an image to create a composite photograph can result in stunning, creative works of art. Whether you want to completely replace the sky to change the mood of your photo, or totally isolate objects for your graphic design projects, your first step will be to create a mask.
A mask simply helps you select a portion of your image. After masking your image, you can can easily change background colors, make transparent images, or replace portions of your image without ever deleting a pixel from your original photo. Masking can require a lot of precision skill and effort to carefully refine complicated selections, like hair and fur.
If you’ve ever tried to replace the background of an image in Photoshop, you know how tedious this process can be. Even with Photoshop’s magic wand and quick mask tools, you’ll still find yourself zooming in at 1200% and carefully clicking away pixel-by-pixel to get a perfect mask.
The problem with masking in Photoshop is that isolating fine objects is time-consuming. You’ll need to switch through a variety of brushes and ideally use a digital drawing tablet to perfectly fade your brush strokes.
In the image above, you can see what you have to work with when you mask an image in Photoshop. Attempting to isolate the background from the model’s individual strands of hair could take hours to get just right.
Mask AI solves the problem of complicated image masks. Using the power of sophisticated neural networks, Mask AI can identify the content of your photo and make the most accurate masks in mere seconds. Finally, you can let your computer do all the complicated masking work for you, so you can complete your project in less time.
All it takes is a quick application of the trimap to compute a mask. Paint a blue line where you’d like the application to “compute” the mask, and drop a red paint bucket on the area you’d like removed. It’s that simple.
It only takes a moment for Mask AI to compute your mask, and just like that, your background is removed and details are preserved.
If necessary, you can tidy up the brush strokes, or refine the mask using sliders like Edge Strength and Foreground Recovery to get your mask just how you want it.
Mask AI has background replacement built-in, so you can finish your project without ever leaving the app. You can easily apply a solid color background, blur the existing background, or import a new background altogether.
Try Mask AI totally free for 30-days, no credit card or commitment required. Mask AI works as a standalone application for Mac or PC, or as a Photoshop plugin to help keep your workflow running smoothly.
Buy Mask AI today and get 15% off with coupon code MASKBETTER

Every photographer has been there: you capture the perfect moment, in beautiful light, but somehow you didn’t quite get the shot. Maybe the light was a bit dim or your subject moved a little too quick, but your final, favorite shot ended up blurry. A fast-moving subject, camera shake, low light, and incorrect camera settings can all reduce the sharpness of your photo, leaving you with soft details, motion blur, and an imperfect photo. We’re here to fix it.
Using the power of machine learning technology, our cutting-edge software doesn’t simply “sharpen” your photo — it can actually help you recreate authentic details in your photo. With sophisticated artificial intelligence tech, Sharpen AI analyzes your image and compares it alongside a library of millions of photos to help you achieve the most stunningly accurate results. It’s your image, re-imagined the way it was supposed to be — with sharp lines and crisp detail.
The only way to believe in our technology is to see for yourself. That’s why we offer a totally free, full-version, 30-day trial of all of our applications.
Download your free trial of Sharpen AI along with the original TIFF photo used in this article.
Comment below with your results or tag us on Instagram with #TopazLabs. We’d love to see how Sharpen AI helped rescue your blurry photos!
 Adjust AI
 Gigapixel AI
 Cloud Credits, Monthly
From: $9.99 / month
 API Credits, Monthly
From: $39.00 / month
 Gigapixel Starter Pack
From: $0.00
© 2005 - 2024 Topaz Labs. All rights reserved.
Each license is valid for a single seat. Receive a volume discount for 10+ seats.


