Posted on 12 Comments

How we engineer cutting-edge AI applications

Here at Topaz Labs, we train modern AI models to “auto-magically” enhance images and video, and deliver them to our customers in desktop applications that run on their own hardware.   This provides a lot of value to our customers, but raises new challenges to our engineers in ensuring reliable software delivery.

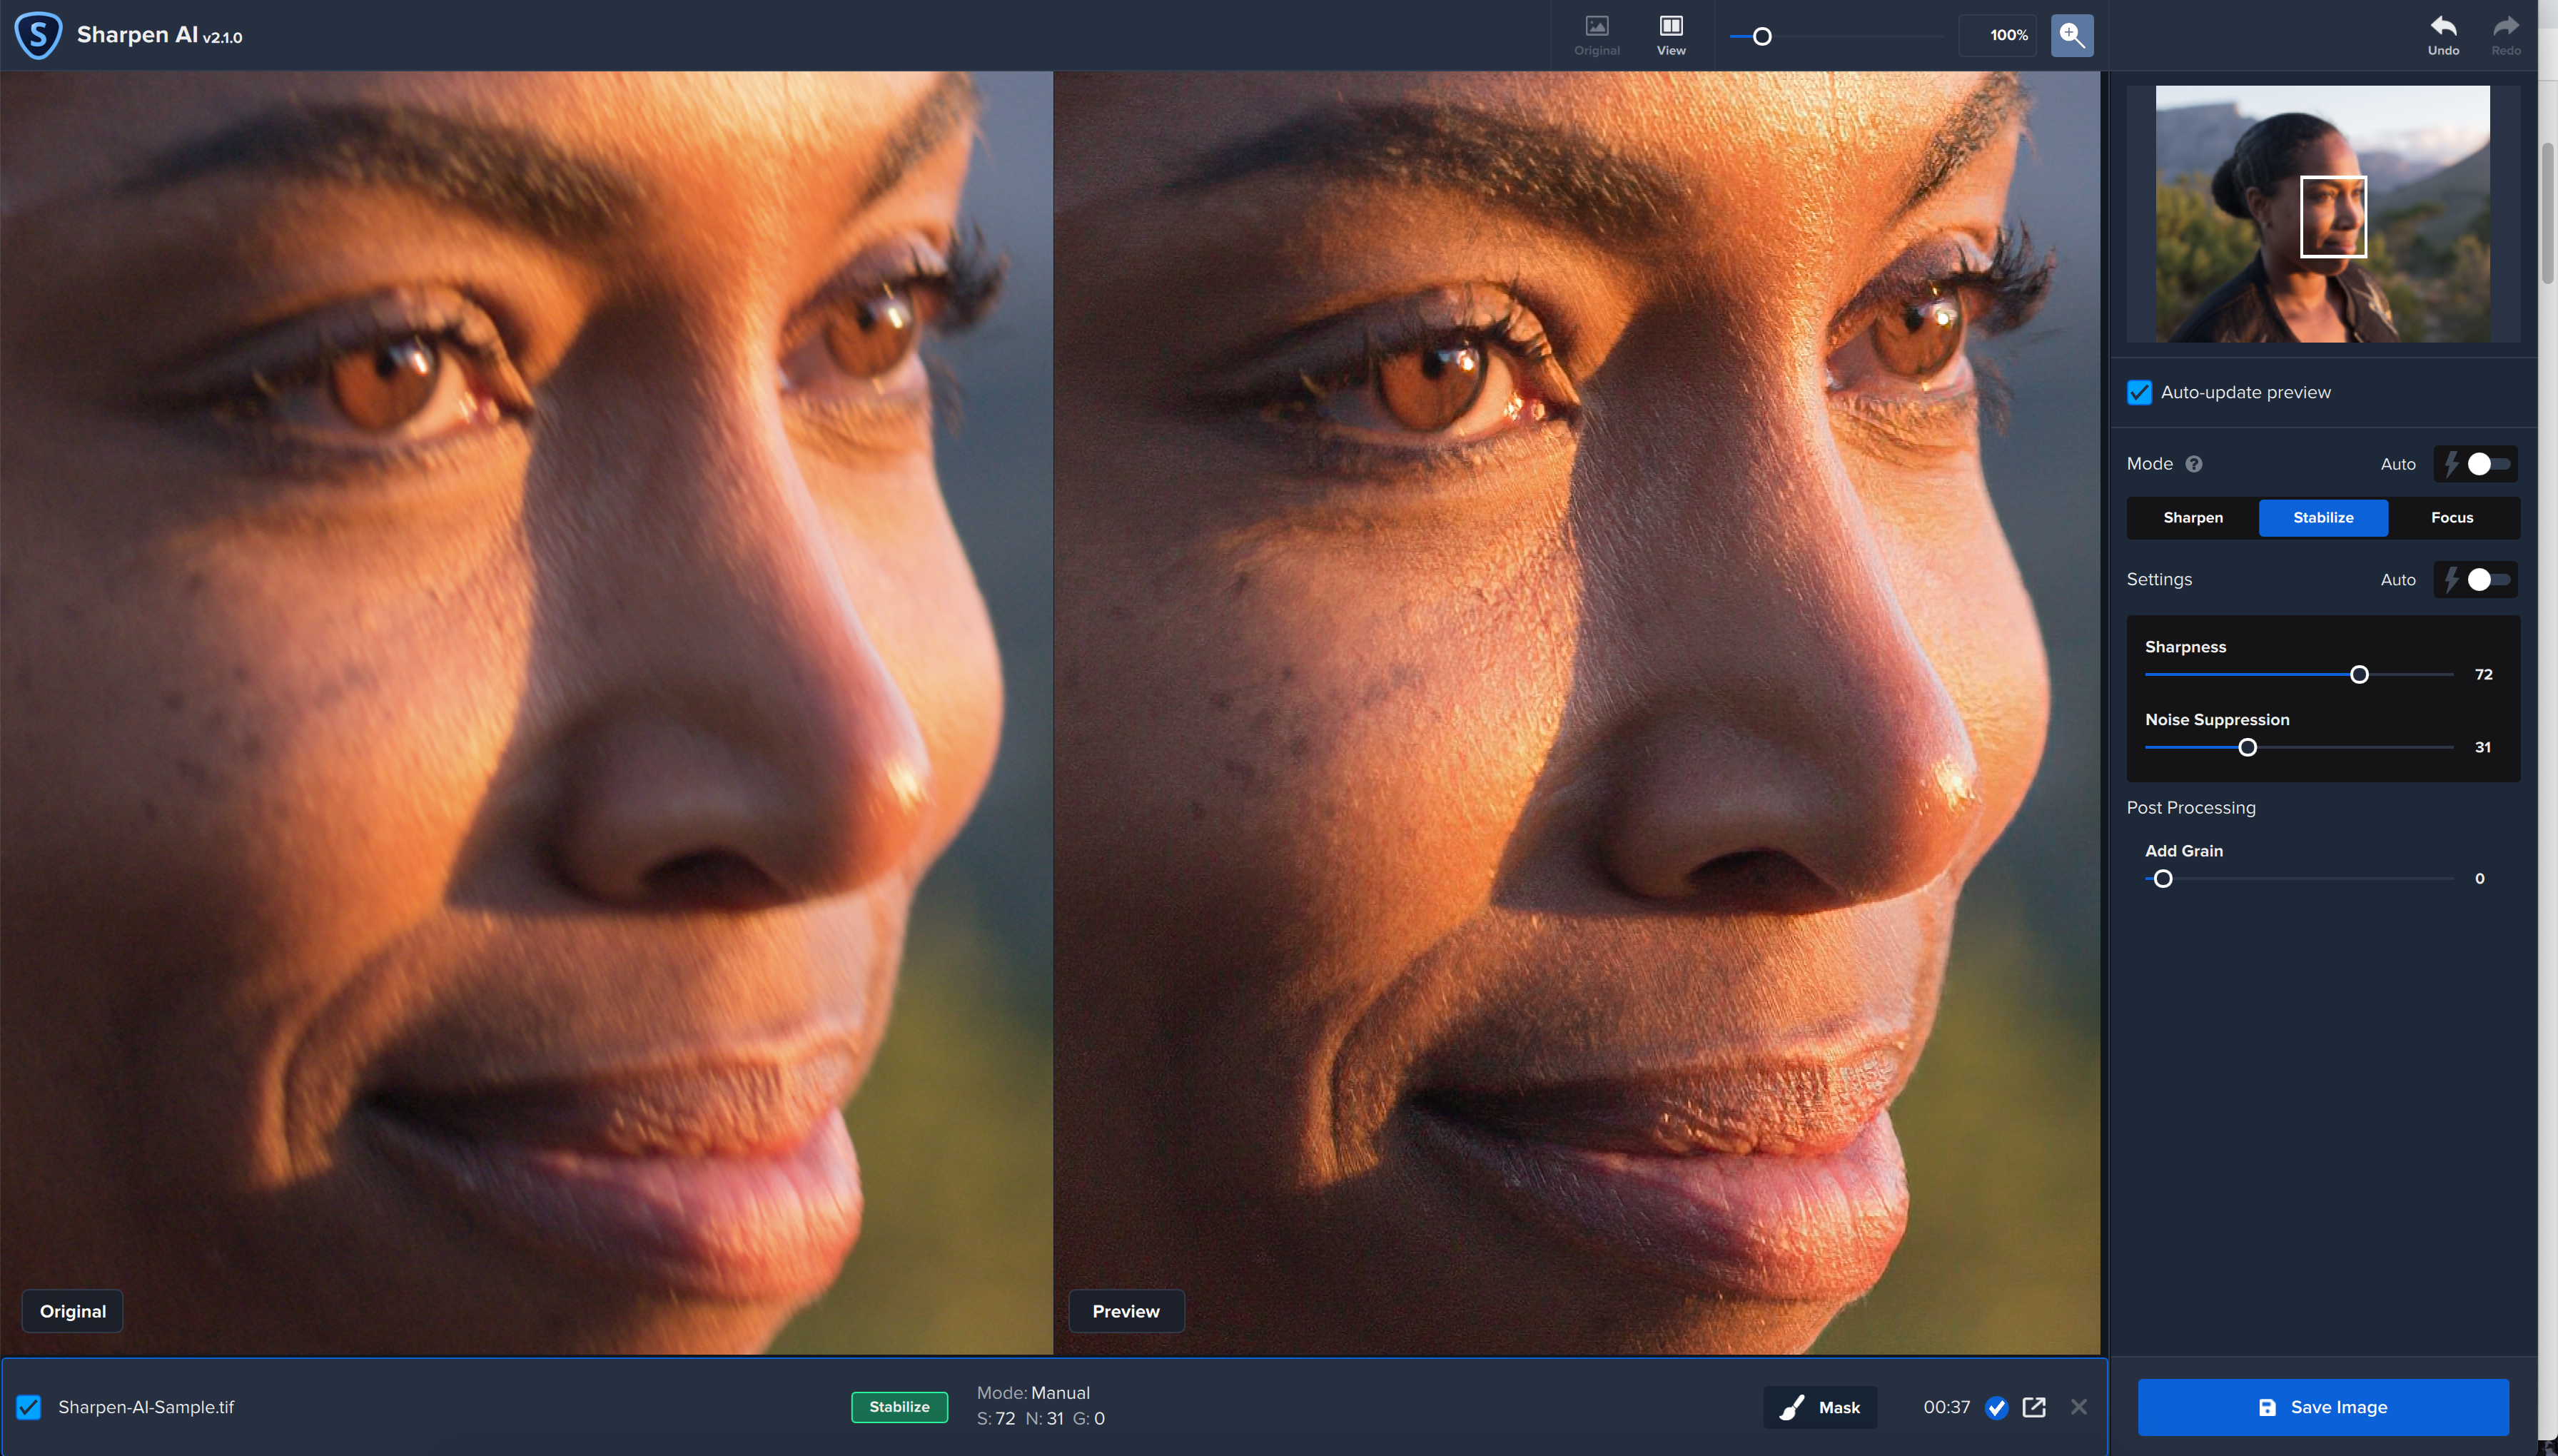
We recently released new versions of our Sharpen AI and DeNoise AI applications using a next-generation version of our AI Engine.  The AI Engine is the part of our software which takes in the AI model, and processes an image through it using a variety of hardware-optimized libraries.  This new version of the AI Engine has resulted in some incredible improvements in speed, but unfortunately the launch of the 3.0 versions of Sharpen AI and DeNoise AI was rougher than expected.

Problems

We ran into problems where after the initial release, certain combinations of operating systems, CPUs, GPUs, and drivers resulted in crashes or sub-optimal performance. Our customers posted several issues on our forums, and our support ticket volumes sky-rocketed.

Fortunately, our team rallied, and isolated a few of the major reproducible issues. And our engineers quickly diagnosed and patched numerous issues in rapid order. However, for many of our customers, the damage was already done: they had gone through an upgrade of our software, and gotten a new version that was worse than what they had had before.

The issues in our release products affected our customers across three dimensions:

The severity of the issue for a given user
The number of users affected
The length of time that a given user is affected

Each one of those dimensions has a multiplying effect on the negative impact of a given released bug, and unfortunately these releases suffered from larger than hoped-for effects across all three dimensions.

Solutions

Now that the dust is settling on those recent releases – the team met and we came up with some ways to improve the quality of our product releases in a way that also still enables us to innovate quickly on new enhancements to our products:

Better Testing

We recently had engaged a new Quality Assurance partner. But unfortunately we didn’t ask them to test across a diverse enough set of operating systems, CPUs, and GPUs. We also made large changes to our software, and the way that it is installed for our users, after the testing runs had already completed.

To address these issues, we’ve updated the testing plans to incorporate 5-times the number of tested types of machines, and instituted a stricter feature-freeze period between testing and release. This will ensure that we catch more issues earlier, and that we minimize the chances that new issues are introduced after testing.

Smaller Impact

We’ve also adjusted our release schedule, so that products with similar new functionality will go out at different times. This means that if issues with a new common piece of functionality, like this new AI Engine, are encountered, that they one affect one product at a time, and can be fixed for that one product.

Faster Fixes

One of the new features that we rolled out with the new product installers, is the ability to optimize software updates. This means that when you update a piece of Topaz software, that the installer only downloads the parts of the application which have changed since the last version.

We’ve also changed our release processes to enable more “hotfixes”, which represent a fix that the engineers feel is highly impactful for our customers, and has a low risk of introducing new problems. Close followers of past Topaz releases may have seen us do these before, we’re just further enabling the team to be able to get these fixes out faster to our customers.

Continuous Improvement through Transparency

At Topaz Labs, we feel that some of the best lessons are learned when things do not go well.  So we endeavour to foster open and honest communication internally towards learning those lessons as a team.  We also aim to keep our promise of high-quality software delivery to our customers, and be honest when we feel we have fallen short.

Hopefully others may find some of the lessons we’ve learned useful for their own projects.  We’ve certainly been encouraged that we can take steps towards even better releases in the future.

Posted on

Here’s Proof that Topaz Sharpen AI can Sharpen Out-of-Focus Images

You can now do the impossible with Sharpen AI by Topaz Labs: Fix your missed-focus images using the power of machine learning.

Every photographer has been there: you capture the perfect moment, in beautiful light, but somehow you didn’t quite get the shot. Maybe the light was a bit dim or your subject moved a little too quick, but your final, favorite shot ended up blurry. A fast-moving subject, camera shake, low light, and incorrect camera settings can all reduce the sharpness of your photo, leaving you with soft details, motion blur, and an imperfect photo. We’re here to fix it.

Sharpen AI application interface

We built a futuristic solution for blurry images

Using the power of machine learning technology, our cutting-edge software doesn’t simply “sharpen” your photo — it can actually help you recreate authentic details in your photo. With sophisticated artificial intelligence tech, Sharpen AI analyzes your image and compares it alongside a library of millions of photos to help you achieve the most stunningly accurate results. It’s your image, re-imagined the way it was supposed to be — with sharp lines and crisp detail.

Before and After Sharpen AI Stabilization - 200% Zoom

Download Sharpen AI for free and see for yourself

The only way to believe in our technology is to see for yourself. That’s why we offer a totally free, full-version, 30-day trial of all of our applications.

Download your free trial of Sharpen AI along with the original TIFF photo used in this article.

Comment below with your results or tag us on Instagram with #TopazLabs. We’d love to see how Sharpen AI helped rescue your blurry photos!

Posted on

Topaz Tutorial: Editing Landscapes with Miroslav Petrasko

Landscape photos are quite different from cityscape photos. If you are not shooting right into the sun, you usually have much less local contrast and extreme differences in brightness in the photos. You can’t just take one and be done with it, so some editing is always required–even if it’s only to fix lens problems.

Sharpness is really important in landscape photos. Together with a bigger depth of field, it makes landscape photos stand out more. Here is where Topaz Sharpen AI can come in handy.

A Stunning View

This is a view from the Five Fingers lookout platform in the Austrian Alps, high above the town of Hallstatt. It was taken during an overcast day, so while it’s properly exposed, it’s a bit dark, hazy and bland. I won’t go through every edit I did on these photos, but will point out some of the most important techniques to help you get more from your landscape photos.

Original Image (Click to view at 100%)

I took three exposures for this photo in 1EV increments. I could have gotten away with just using a single exposure, but I knew I would want to lighten and darken certain areas. So, having a proper exposure of every area makes for a cleaner photo than one that was over or underexposed in post-processing. Here are the two additional exposures.

(Click to view at 100%)

There is a photo post-processing technique called matching, which I’ll show you below. By doing so, you end up with a nice even blend that looks like one seamless photo. The idea behind it is to take the RAW files as smart objects into Photoshop and blend them together to get the desired exposure everywhere. 

(Click to view at 100%)

Once this is done, you go back into the RAW editor and tweak the RAW files, to create a similar look for each one. You do this by mostly tweaking the exposure, highlights, and shadows. You can also add enhancements like vibrance, dehaze and clarity to the RAWs, to make further editing even easier.

(Click to view at 100%)

I blended the photos into one by using layer masks and luminosity selections. Once done, I matched the exposures and added vibrance, clarity, and dehaze to them. Above is a screenshot of the blended, tweaked underexposed RAW and below is how it looked afterward. You can see that the blend has almost no contrast to it. That is normal because when you remove highlights and shadows, you also remove contrast. 

(Click to view at 100%)

From this point on, all of my edits are just tweaking brightness and contrast, maybe a bit of saturation here and there. Usually, you don’t need to edit saturation at all, as adding contrast makes the photo more saturated on its own. But as this was very overcast, I wanted the foreground color to stand more.

(Click to view at 100%)

You can see in this Photoshop screenshot all the layers I used and how I only painted them by hand to the areas I needed them in.

Best Practices for Sharpening

With this done, we’ll move on to sharpening. There are three things to consider here. Firstly, the whole photo should not be of the same sharpness. Our eyes are drawn towards sharper (and brighter) areas so you can use that to draw it towards your main subject. In this photo, that would mostly be the foreground and the middle area around the lake.

Secondly, not everything should be sharp. For instance, you would not expect the peaks in the further background to be as sharp as the closer ones. And you wouldn’t expect to have much darker clouds than the rest of the scenery.

Thirdly, it is good practice to resize the photo to your final desired resolution and only afterwards sharpen it. 

Topaz Sharpen AI

Let’s sharpen this photo now. We need to merge all the layers into a new one, and then use Topaz Sharpen AI from the plugin menu. There are multiple processing modes available in Sharpen AI to target specific problems–Sharpen, Stabilize, and Focus.

With a landscape photo, you can use all of them. For instance, if you got your focus a tiny bit off, you can try the focus mode to return some sharpness to the out of focus areas. Or perhaps you had a bit of wind come through and the foliage moved. In that case, you can try the stabilize mode.

Sharpening in Topaz Sharpen AI (Click to view at 100%)

For this photo, let’s go for the standard Sharpen mode. The standard settings look a bit strong for this photo, so let’s move the Remove Blur slider to 0.4. You can see a few areas in comparison below, all are at 100% zoom.

(Click to view at 100%)

We can remove the sharpness from the areas where it’s not needed, and tone it down in others. You can choose to go back to Photoshop and remove the sharpness from the clouds, if you want them to be a bit blurry and soft. I also removed the sharpness from the peaks in the distance and toned it down on the peaks that are close. Like this, there is a nice progression, with the sharpest things close to you, losing the sharpness the further away you look.

The Final Result

Final Result (Click to view at 100%)

About Miroslav Petrasko

While I started as a game designer, I switched to photography around 10 years ago. Since then I have been working with different luxury travel brands and almost daily, stubbornly updating my blog at hdrshooter.com with new photos, articles, and guides. It really is not an easy task.

Below are a few other landscape photos from my travels. The first three are from Austria: the view from Dürnstein Castle, Grossglockner High Alpine Road and the reflection at Altaussee. The last two are from Switzerland: the peaks over Zermatt and Matterhorn.

Previous slide
Next slide

Get the Topaz Application Featured

Topaz Sharpen AI

Sharpen AI is the first sharpening and shake reduction software that can tell difference between real detail and noise. Create tack-sharp images even when you’re shooting handheld, at night, or with a shallow depth of field.
TRY IT NOW