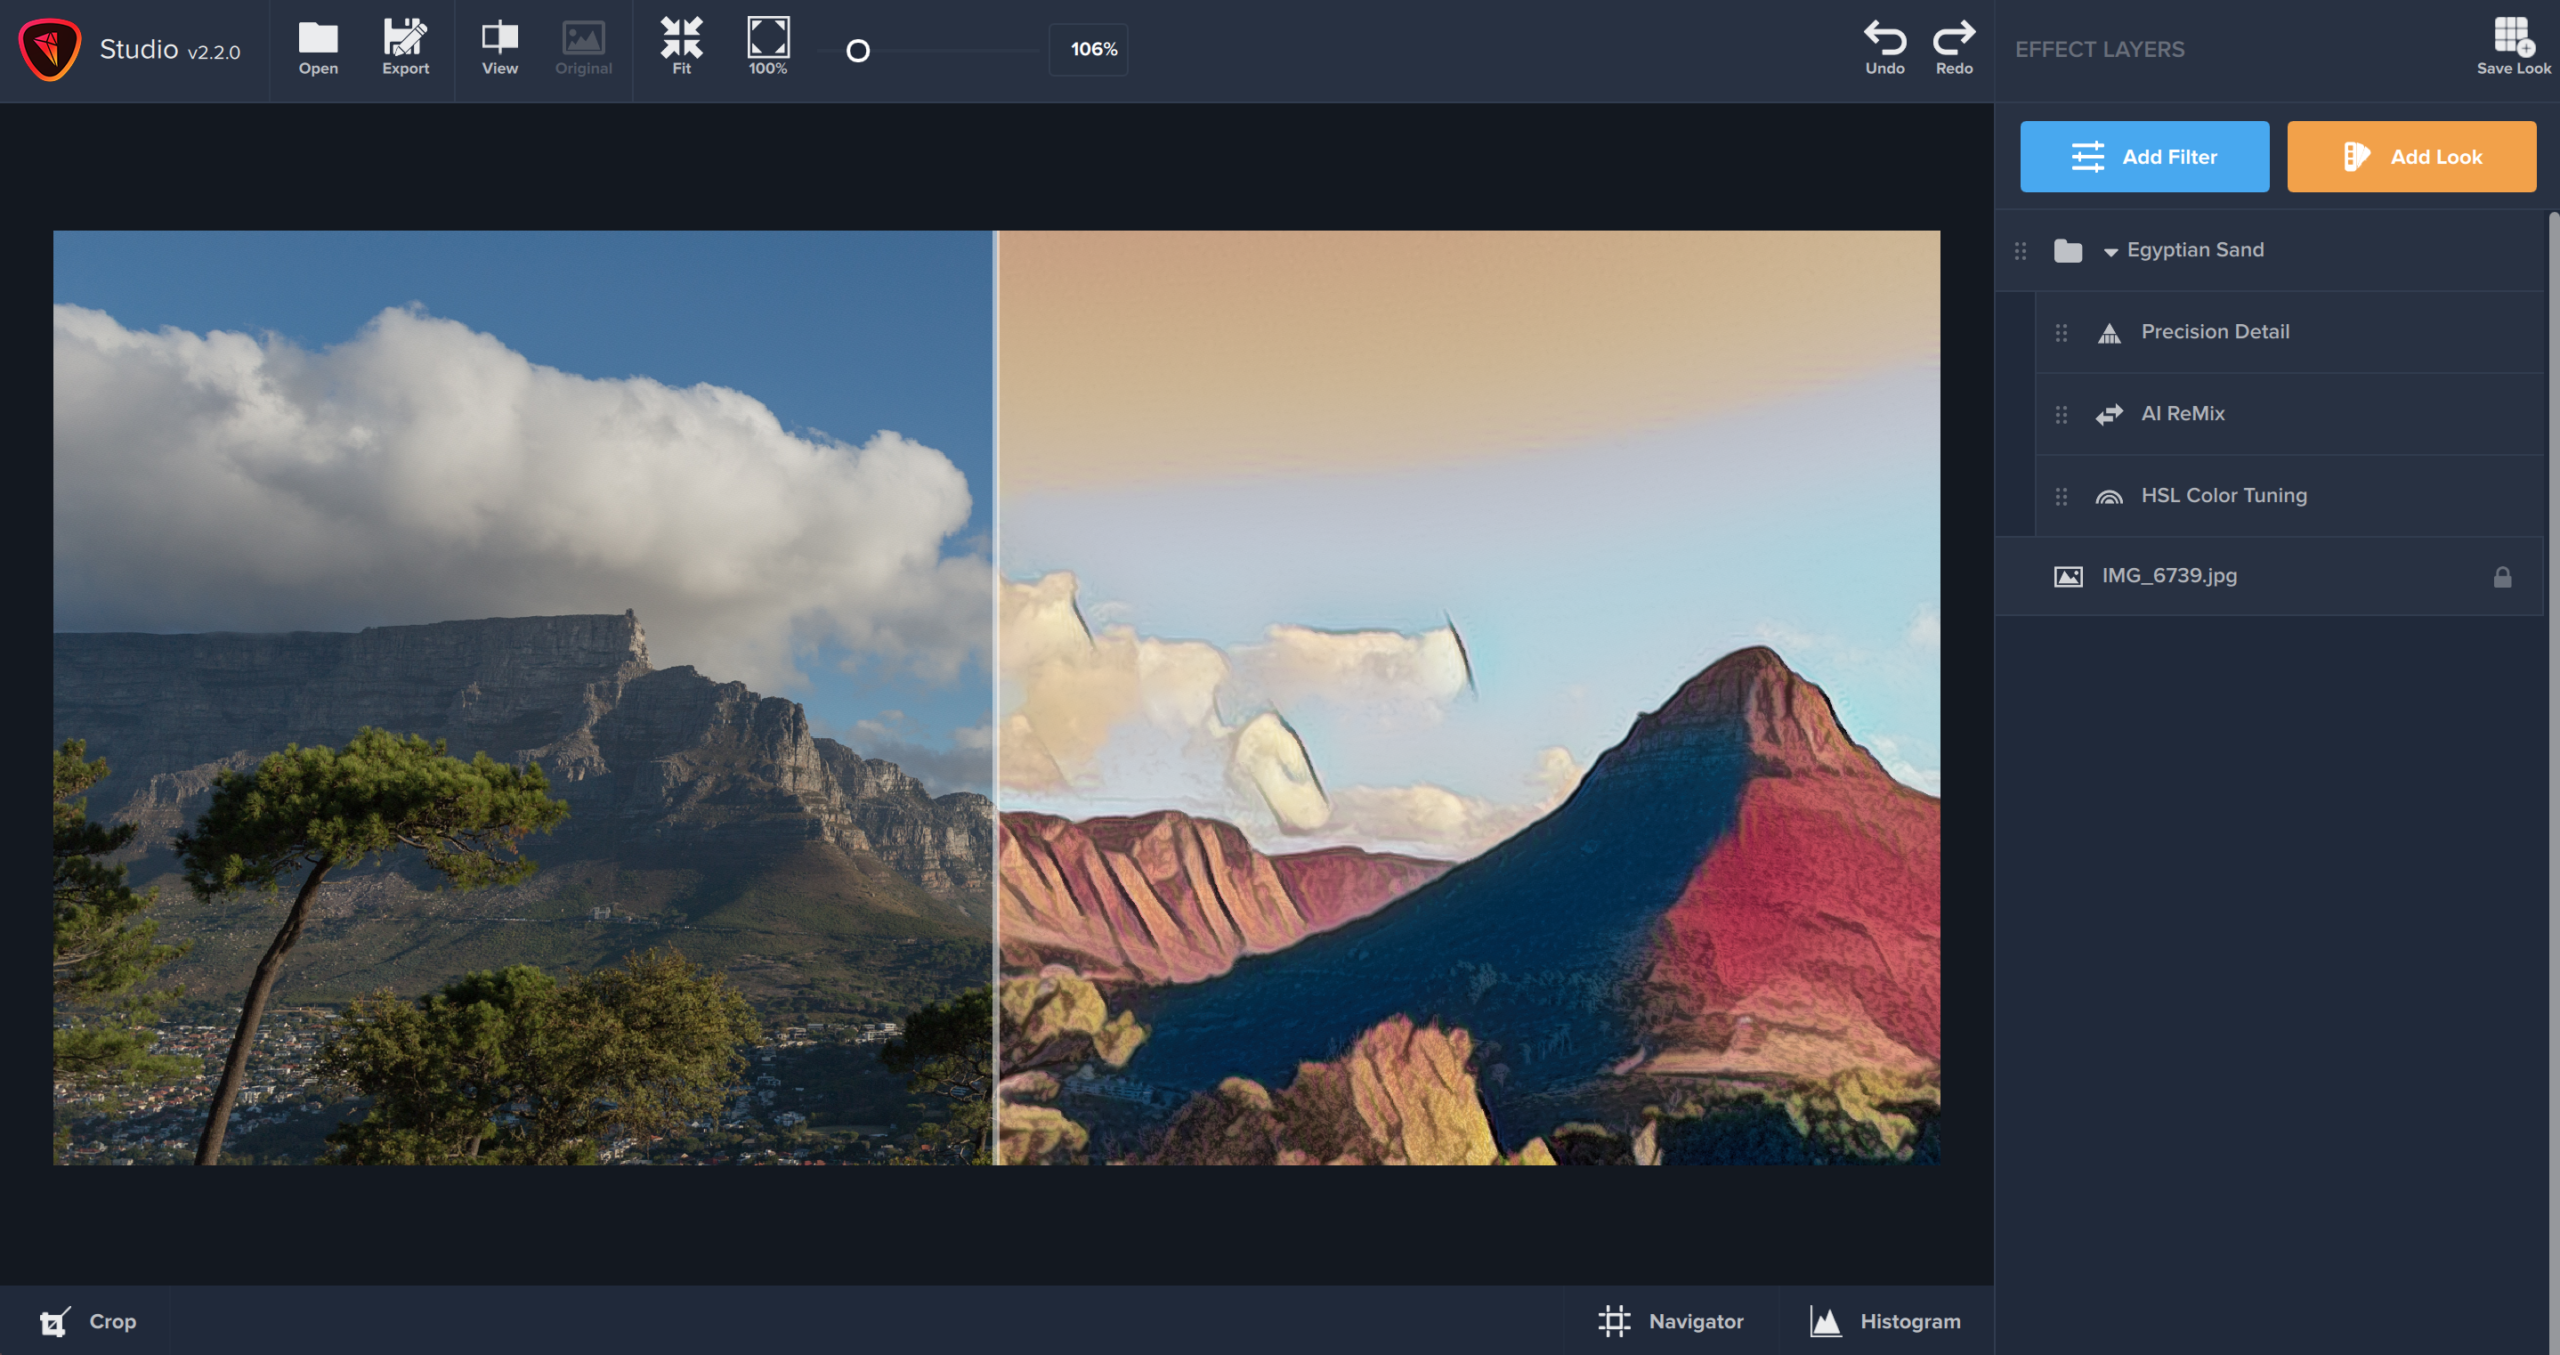
Posted on

Studio 2 Navigation

Users Guide

Studio 2 Navigation

The Navigation Menus on the bottom and top of the preview screen in Studio 2 are designed to help our users easily edit their images.

The Top Navigation Bar in Topaz Studio 2 allow you the functionality to view your image the way you want to, as well as Undo and Redo. 

Open Icon: Click this icon to open a new image in Topaz Studio 2.

Export Icon: Click this icon to export your image to your computer.

View Button: The view button gives you five options for viewing your image: Single View (the entire edited image), Split Horizontal and Vertical (See half of our image edited and half unedited) and Side-by-Side Horizontal and Side-by-Side Vertical (see the same image on both halves of the screen – one edited, one original). 

Original Icon: Click on the Original Icon to see what your image looked like before you edited it. Click this icon again to view your edits once more.

Fit Icon: If you have zoomed in or out of your image, click this icon to return your preview image to full screen.

100% Option: Click the 100% option to see your image at it’s original size. 

Zoom Slider: Use this slider to zoom in and out on your image. Click and drag your image to choose which part of the image you are seeing.

Undo and Redo: Click the undo and redo buttons to undo or redo changes you make to your image.

The bottom navigation bar gives you three important tools to help you edit your image.

Crop Tool: Select the crop tool to crop or straighten your image. Your cropping options will appear on the right side of our screen: Aspect Ratio, Straighten, and the ability to adjust your image by width and height. Use the check mark button to apply the changes.

Navigator: If you are zoomed in to your image, use the Navigator to see where on your image your preview screen is currently located. 

Histogram: Use the histogram to see a frequency distribution by means of rectangles whose widths represent class intervals and whose areas are proportional to the corresponding frequencies: the height of each is the average frequency density for the interval.

Topaz Labs Blog

Find written and video tutorials to guide you through creative processes in Topaz software. Start creating a masterpiece today!

Topaz Help Center

Got a question? We’ve got answers. Find troubleshooting, tips, and more, or contact our Support Team.

Posted on

Topaz Studio 2 User Guide

Topaz Studio 2 User Guide

With roughly 300 Looks and counting, Topaz Studio 2 is loaded with creative and artistic styles you can apply in just one click to turn your photo into a head-turning, unique work of art. But even with all the included Looks, Topaz Studio 2 was created to let you take the reins and develop your very own style. Here are a few quick steps on how to create a custom Look in the new Topaz Studio 2.

Topaz Studio’s filters work well individually, but the true magic happens when they’re combined together. Topaz Studio 2 includes over 200 “Looks” (pre-built groups of filters) that help you explore different beautiful effects for your images with a single click.

Previewing and Applying a Look

Click the “Add Look” button on the right hand side of your screen. Here, you’re able to choose from a Look Category as well as “Sort By” a particular filter you would like to use – or you are able to browse through all of the Looks on the “All Looks” category. To preview a Look, simply click on the Look and it will show you what the Look will do to your image. Once you have selected a Look you like, simply click “Apply” to apply it to your image. 

Favoriting a Look

If you find a Look that you would like to be able to find again easily, click the heart in the upper right hand corner of the Look. This will add the Look to your “My Favorites” category, which you can find under the dropdown Category menu. 

Applying Multiple Looks

You are also able to apply multiple looks to your image. After you “Apply” your first look, click the orange “Add Look” button again and simply apply a second Look on top of your exising Look. 

After inputting your image, click “Add Filter” to open up the Effects Layers panel. Loaded with the best of Topaz technology, you’ll find a wide range of effects to start creating your digital artwork! You can use over 25 effect settings to play with color, texture, lines, and light in your image – and that’s just the beginning. Apply as many filters as you’d like and adjust them until you have the perfect look for your image.

Once you’ve got your unique look nailed down, navigate to the “Save Look” icon in the right-hand corner of the Effects Layer panel. See the illustration below! 

Topaz Studio allows you to move beyond the boundaries of traditional photography into the world of digital creation.

You created presets in Classic Studio and you loved them. You want to keep them but you also want all the cool features in Studio 2. No problem! We’ve made a handy little tool for you!

  1. Open Studio 2
  2. Go to the Help drop down menu and choose “Migrate Custom TS1 Presets”
  3. Choose whether you want to migrate the custom presets you created, presets you did not create but have marked as a Favorite, or both
  4. Done! You will be able to find these presets now under your “My Looks”

Missing Presets?

Please submit a support ticket with your database attached. Below are instructions to find it.

MAC:

  1. Open a File Explorer window
  2. Enter the following in your navigation bar:
    C:\Users\*YOURUSERNAMEHERE*\AppData\Local\Topaz Labs\Topaz Studio\QML\OfflineStorage\Databases
  3. Select the SQLITE File

WINDOWS:

Find your database:

  1. Open a finder window and choose Macintosh HD
  2. Users -> (Your User Account) ->Library -> Application Support -> Topaz Labs -> Topaz Studio -> tgrc

Topaz Labs Blog

Find written and video tutorials to guide you through creative processes in Topaz software. Start creating a masterpiece today!

Topaz Help Center

Got a question? We’ve got answers. Find troubleshooting, tips, and more, or contact our Support Team.

Posted on

Studio 2 Filters

Studio 2 Filters

Topaz Studio 2 Filters allow you to transform your image in infinite ways. In Studio, we’ve thought about what common adjustments would look like if they were designed today, and updated them to their most modern and useful forms. Sorted into three distinct categories, Essential, Creative, and Stylistic, you’ll find that these aren’t your everyday image editing filters as soon as you give them a try. LEARN MORE

AI Clear, Basic Adjustment, Brightness Contrast, Black and White, Curves, Dehaze, HSL Color Tuning, Precision Contrast, Precision Detail, Reduce Noise, Sharpen

Bloom, Blur, Channel Mixer, Color Overlay, Color Theme, Dual Tone, Edge Exposure, Film Grain, Focal Blur, Motion Blurs, Quad Tone, Text, Vignette

Abstraction, AI Remix, Digital Frame, Edges, Glow, Impression, Radiance, Saturation, Smudge, Texture

Topaz Labs Blog

Find written and video tutorials to guide you through creative processes in Topaz software. Start creating a masterpiece today!

Topaz Help Center

Got a question? We’ve got answers. Find troubleshooting, tips, and more, or contact our Support Team.