Posted on

Studio 2 Projects

Users Guide

Studio 2 Projects

Learn how to save a .TS2 project file to access your project at a later date using the helpful guides below.

Saving your project as a .TS2 helps you access your entire project rather than just your image at a later date. This will save all of your filter and layer settings as well so you can tweak your project over time if you want to make changes to your image later on. To save a .TS2 project file the first time, go to File -> Save Project As… and select a location for your project to be saved. Name your project, then continue editing. Don’t forget to save again if you make any edits to the project.

To save over an existing file, simply go to File -> Save Project. This will save over your existing project if you make any changes to your project after you’ve completed it.

You can find your .TS2 projects by default in the same location you opened your original image. For instance, if you opened an image from your Pictures folder, the project will automatically save to your Pictures folder. You can override this by selecting a location to save manually by clicking File -> “Save Project As”.

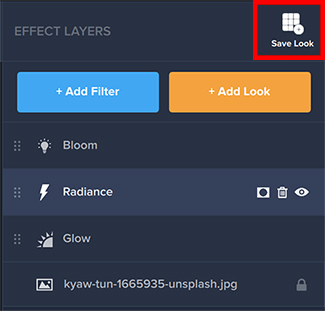
To open an existing .TS2 project file, locate the project in it’s save location on your computer. For example, if you saved your project file to your “Documents” folder, locate the file there. Double click on the .TS2 to launch the project file in Topaz Studio 2. Once opened, all of your layers and applied looks and filters will open along with your image.

Topaz Labs Blog

Find written and video tutorials to guide you through creative processes in Topaz software. Start creating a masterpiece today!

Topaz Help Center

Got a question? We’ve got answers. Find troubleshooting, tips, and more, or contact our Support Team.

Posted on

Topaz Studio 2

Topaz Studio 2

Topaz Studio 2 features intuitive and easy-to-use masking tools! Choose from five types of masking or combine masking options for perfectly masked adjustments. Here is a quick run-through of the masking tools in Topaz Studio 2.

Masking allows you to selectively make adjustments on your image. Let’s say you want to bring out the details in your granddaughter’s hair, but don’t necessarily want to bring out all the details of her skin, like her pores. Masking is great for that. Masking allows you to enhance part of the image, without being forced to make that same edit to the overall image. You also have the choice of varying mask densities. A black (0.00) density mask will completely remove the effect, while a white (1.00) density mask will allow an effect to completely remain. You can tune the range in between those values to achieve your desired effect.

The Topaz Studio Integrated Masking is unlike anything you have seen before. We have included 5 masking types: Brush, Spot, Gradient, Color, and Luminosity, as well as a Mask Adjustments panel and an option to invert or completely reset your mask. Our brush masking includes intuitive, content-aware technology that was developed in house. Not only are the new masking features awe-inspiring, but you can combine masking types. After making adjustments with one type of mask, click apply or switch to another mask type and build upon that mask. It’s never been so easy!

In Topaz Studio, we wanted to give you full control, so we have included both Look Masking and Filter Level Masking. Each has the exact same functions, but Look Masking will effect the entire set of filters, or “Look” that have been applied to your image. Filter Level Masking will only effect that Filter that you use the mask on.

To edit your Look Mask, apply a look and then simply click mask icon next to the name of your look. To edit your filter mask, select the masking icon next to the Filter you wish to edit.

Brush Masking works great to apply effects exactly where you need them to be placed. You can paint in or paint out just one adjustment or entire effects with the global masking. In the Brush Mask Panel, you will find many easy to use controls. The Mask Density slider controls the opacity of your brush from 0.00 to 1.00. The Radius Slider controls the overall size, while the Softness Slider controls edge softness. The Edge Aware toggle allows you turn on or off our unique Edge Aware technology. 

Our unique edge aware technology allows you to effortlessly perfect masks. Simply keep the edge that you wish to be detected between the red inner circle and the green outer circle. Our technology will automatically detect the edge. It’s that easy.

The Spot Mask tool allows you to add eclipse shaped masks to your image. Easily adjust the size and shape of your Spot Mask with the on screen manipulation tools. The Spot Mask Adjustment Panel allows you to adjust the Mask Density, Transition, and Color Aware with easy-to-use sliders. If you wish to add more than one Spot Mask to your image, simply click done and then click the spot mask again to add a second mask.

The Gradient Mask allows you to create natural transitions. To add a Gradient Mask, simply click the gradient icon. When the gradient mask is added you will see three lines – a red, white, and green. Anything above the red line will be completely removed and anything below the green line will completely remain. You can manipulate the gradient on screen by grabbing the handles. The white handle will move the entire gradient, while moving the green or red handle can create longer and shorter transitions. You also have the power to manipulate it to have it going any direction you wish, such as mirrored or vertical. You can increase the Content Aware Slider or add more than one Gradient Mask to create interesting effects.

The Color Mask allows you to create masks based upon colors found in your image. You can select a color by moving the Hue Slider. Whatever hue you select, will be masked out. The Range Slider allows you to capture a larger range or smaller range of colors. If you wish to have a more natural selection, use a larger range, but if you wish for a more precise selection, use a smaller range. If you wish for the hue you selected to remain, simply invert the mask once you are satisfied with your edits.

Luminosity Masking allows you to make masking selections based upon the brightness of you image. You can select the brightness you would wish to be masked using the Luminosity Slider. The range slider allows you to adjust if you would like smoother or more precise selection.

The Adjustment Panel is where you can modify the mask you just created. You can change the feathering to be a smoother transition, as well as the contrast and density to create more drastic or less drastic masking transitions. These are all dependent on the look you wish to achieve. When you are satisfied with your adjustments to your mask, all you have to do is click Apply to burn your mask in.

Invert, Clear, and Delete. You have the ability to completely invert, clear, and delete your mask all from the Masking Panel. These options are easily accessed by clicking the three dots in the lower right-hand corner of your mask preview screen. Inverting a mask can be great for creating unique effects or in the various ways stated earlier in section 2 & 4. If you’re not happy with your mask, you can always clear it and start fresh. If you’d like to get rid of it entirely, simply delete the mask from your filter or look.

Topaz Labs Blog

Find written and video tutorials to guide you through creative processes in Topaz software. Start creating a masterpiece today!

Topaz Help Center

Got a question? We’ve got answers. Find troubleshooting, tips, and more, or contact our Support Team.

Posted on

Topaz Studio 2 User Guide

Topaz Studio 2 User Guide

With roughly 300 Looks and counting, Topaz Studio 2 is loaded with creative and artistic styles you can apply in just one click to turn your photo into a head-turning, unique work of art. But even with all the included Looks, Topaz Studio 2 was created to let you take the reins and develop your very own style. Here are a few quick steps on how to create a custom Look in the new Topaz Studio 2.

Topaz Studio’s filters work well individually, but the true magic happens when they’re combined together. Topaz Studio 2 includes over 200 “Looks” (pre-built groups of filters) that help you explore different beautiful effects for your images with a single click.

Previewing and Applying a Look

Click the “Add Look” button on the right hand side of your screen. Here, you’re able to choose from a Look Category as well as “Sort By” a particular filter you would like to use – or you are able to browse through all of the Looks on the “All Looks” category. To preview a Look, simply click on the Look and it will show you what the Look will do to your image. Once you have selected a Look you like, simply click “Apply” to apply it to your image. 

Favoriting a Look

If you find a Look that you would like to be able to find again easily, click the heart in the upper right hand corner of the Look. This will add the Look to your “My Favorites” category, which you can find under the dropdown Category menu. 

Applying Multiple Looks

You are also able to apply multiple looks to your image. After you “Apply” your first look, click the orange “Add Look” button again and simply apply a second Look on top of your exising Look. 

After inputting your image, click “Add Filter” to open up the Effects Layers panel. Loaded with the best of Topaz technology, you’ll find a wide range of effects to start creating your digital artwork! You can use over 25 effect settings to play with color, texture, lines, and light in your image – and that’s just the beginning. Apply as many filters as you’d like and adjust them until you have the perfect look for your image.

Once you’ve got your unique look nailed down, navigate to the “Save Look” icon in the right-hand corner of the Effects Layer panel. See the illustration below! 

Topaz Studio allows you to move beyond the boundaries of traditional photography into the world of digital creation.

You created presets in Classic Studio and you loved them. You want to keep them but you also want all the cool features in Studio 2. No problem! We’ve made a handy little tool for you!

  1. Open Studio 2
  2. Go to the Help drop down menu and choose “Migrate Custom TS1 Presets”
  3. Choose whether you want to migrate the custom presets you created, presets you did not create but have marked as a Favorite, or both
  4. Done! You will be able to find these presets now under your “My Looks”

Missing Presets?

Please submit a support ticket with your database attached. Below are instructions to find it.

MAC:

  1. Open a File Explorer window
  2. Enter the following in your navigation bar:
    C:\Users\*YOURUSERNAMEHERE*\AppData\Local\Topaz Labs\Topaz Studio\QML\OfflineStorage\Databases
  3. Select the SQLITE File

WINDOWS:

Find your database:

  1. Open a finder window and choose Macintosh HD
  2. Users -> (Your User Account) ->Library -> Application Support -> Topaz Labs -> Topaz Studio -> tgrc

Topaz Labs Blog

Find written and video tutorials to guide you through creative processes in Topaz software. Start creating a masterpiece today!

Topaz Help Center

Got a question? We’ve got answers. Find troubleshooting, tips, and more, or contact our Support Team.